
Related Manuals for Unfinished Furniture of Wilmington SARA S-800SW


Summary of Contents for Unfinished Furniture of Wilmington SARA S-800SW
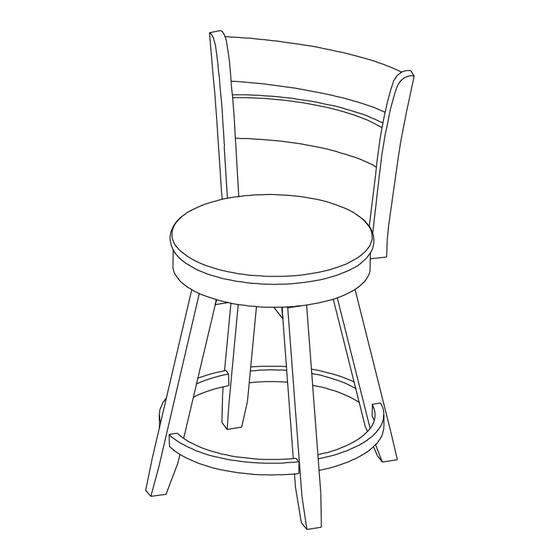
- Page 1 ASSEMBLY INSTRUCTIONS : SARA SWIVEL COUNTER STOOL Description : S-800SW Item No. ITEM NO.: S-800SW Printed in Vietnam ISSUED MAY 15, 2023 - 1 -...
-
Page 2: Before Assembly
BEFORE ASSEMBLY Thank you for purchasing this quality product. This product has been designed for easy assembly and constructed for durability. All parts were checked prior to packaging to insure quality. Prior to beginning assembly, however, make sure all parts and hardware are included and free of obvious defect. -
Page 3: Part List
PART LIST When unpacking, please be careful not to discard any parts with the packaging. Before continuing, please make sure you have the following parts: Description Sketch Description Sketch Chair Back Seat Frame Stretcher Chair Seat ITEM NO.: S-800SW Printed in Vietnam ISSUED MAY 15, 2023 - 3 -... -
Page 4: Hardware List
HARDWARE LIST When unpacking, please be careful not to discard any parts with the packaging. Before continuing, please make sure you have all of the following hardware: Description Sketch Description Sketch Long Bolt Medium Bolt (M6 x 80mm) (M6 x 40mm) Short Bolt Large Flat Washer (M6 x 30mm) - Page 5 STEP 1 Attach seat frame (B) to the back (A) with bolts (1), and washers (5) and (6) as shown below. Tighten with Allen key (11). Then use nuts (7), and washers (4) and (6) as shown below. Tighten with wrench (12). Note: DO NOT tighten any of the bolts, until the stool is assembled, then put on a flat level surface to make sure the stool is level and then tighten the bolts.
- Page 6 STEP 3 Attach the swivel plate underneath the seat frame (B) to legs (C) and (D) with bolts (3), and washers (4) and (6) as shown below. Tighten with Allen key (11). STEP 4 Attach the seat (F) to top of the seat frame (B) with screws (9) and brackets (10) as shown below. Tighten with a screwdriver.
Need help?
Do you have a question about the SARA S-800SW and is the answer not in the manual?
Questions and answers