Table of Contents
Advertisement
Advertisement
Table of Contents

Related Manuals for Creative EMU10K1 - Sound Blaster Live! Value


Summary of Contents for Creative EMU10K1 - Sound Blaster Live! Value
- Page 1 Sound Blaster Live! Value User Guide On-line Version...
- Page 2 Getting Started Creative Sound Blaster Live! Value Creative Audio Software...
- Page 3 Creative Technology Ltd. The software described in this document is furnished under a license agreement and may be used or copied only in accordance with the terms of the license agreement. It is against the law to copy the software on any other medium except as specifically allowed in the license agreement.
- Page 4 You may use the Software only on a stand-alone basis, such that the Software and the functions it provides are accessible only to persons who are physically present at the location of the computer on which the Software is loaded.
- Page 5 Except to the extent expressly permitted by this Agreement or by the laws of the jurisdiction where you acquired the Software, you may not use, copy or modify the Software. Nor may you sub-license any of your rights under this...
-
Page 6: Safety Information
FCC Part 15: This equipment has been tested and found to comply with the limits for a Class B digital device, pursuant to Part 15 of the FCC Rules. These limits are designed to provide reasonable protection against harmful interference... - Page 7 This apparatus complies with the Class “B” limits for radio interference as specified in the Canadian Department of Communications Radio Interference Regulations. Cet appareil est conforme aux normes de CLASSE “B” d’interference radio tel que spe’cifie’ par le Ministère Canadien des Communications dans les règlements d’interfe’rence radio.
- Page 8 Creative Labs Model Number: CT4670 has been tested according to the FCC / CISPR22/85 requirement for Class B devices and found compliant with the following standards: EMI/EMC: ANSI C63.4 1992, FCC Part 15 Subpart B This device complies with part 15 of the FCC Rules.
-
Page 9: Table Of Contents
Creative PC-DVD and FourPointSurround..................6 Two Speakers or Headphones......................7 Installing the Creative Software........................9 Windows 95 .............................9 Windows 98 ...........................13 Windows NT..........................13 Testing the Installation..........................14 Using Sound Blaster Live! Value ............15 SB Live! Tour.............................15 Creative Launcher............................16 Options ............................16 Groups............................16 AudioHQ ..............................17 SoundFonts ............................18 Configure a MIDI Bank....................18... - Page 10 SoundFont Caching......................20 SoundFont Device......................20 Device Controls ..........................20 Playback Sessions ......................20 Wave Blaster Emulation ....................21 Sound Device ........................21 Creative Keyboard.........................22 MIDI Input.........................22 Test an Instrument......................22 Sound Graph..........................23 Creative Mixer..........................24 Mixer Menu........................24 Customizing the Mixer .....................24 Playback..........................25 Balance Sliders........................25 Volume Control .........................25 Recording...........................25...
- Page 11 Troubleshooting ..................41 Installing Software .............................41 Sound................................41 SoundFonts..............................43 Joystick ...............................43 I/O Conflicts...............................44 Windows NT 4.0............................44 Creative PlayCenter ...........................45 Contents...
-
Page 12: Introduction
Congratulations! You are now the proud owner of Sound Blaster™ Live!™ Value—the ultimate platform for the Environmental Audio experience. At the heart of Sound Blaster Live! Value is EMU10K1™, a new processor from E-mu Systems based on E-mu’s highly acclaimed Emulator IV sound module and Darwin hard disk recorder. -
Page 13: System Requirements
❐ Powered speakers or external amplifier (recommended: Cambridge SoundWorks speakers) Sound Blaster Live! Value gives you an estimate of the hard disk space required when you select it on the installation screen. Some applications may require a system configuration greater than that listed above. -
Page 14: Installing Sound Blaster Live! Value
Installing Sound Blaster Live! Value Most of the items you need for installation are included. The following illustration shows the basic What You Need components necessary for a complete installation. CD Digital Cable Installing your audio card requires you to perform the following steps: •... -
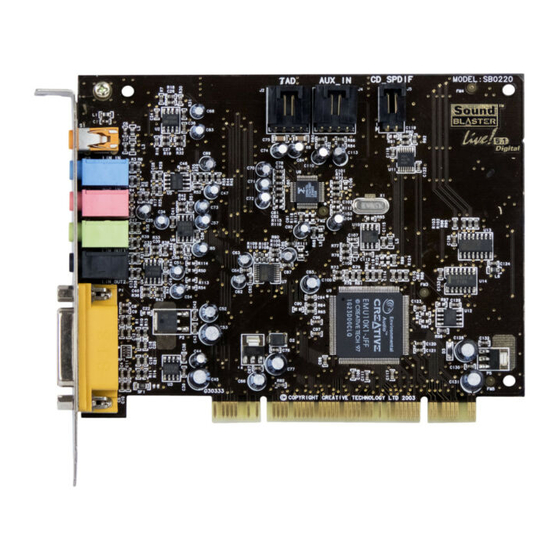
Page 15: Installing The Audio Card
Before you remove the computer cover, touch a grounded metal surface to discharge static electricity. 4. Locate a PCI slot for the audio card. Remove or disable any existing Remove the slot cover from the audio card and its driver from your slot—save the screw to secure the... - Page 16 PCI slot, and firmly press the card into place until it fits snugly. 6. Use the screw from the slot cover to secure the audio card to the frame of the computer—securing the card with the screw assures proper grounding.
- Page 17 8. Connect your speakers, headphones, microphone, joystick, MIDI devices, or other devices to the back panel of the audio card. Stereo, CD player, tape deck, etc. Microphone Joystick If you are connecting a single pair of powered speakers (or Powered speakers (front),...
-
Page 18: Configuring The Speakers
The best speaker configuration for Sound Blaster Live! Value depends on the type and number of Configuring the speakers you have connected to the audio card. For the best audio, Creative’s Cambridge SoundWorks Speakers PCWorks FourPointSurround speaker system is an excellent complement to Sound Blaster Live! Value After installing the Creative Software, open the Speaker utility from the AudioHQ to select the speaker configuration. -
Page 19: Creative Pc-Dvd And Fourpointsurround
Creative PC-DVD and To achieve the best possible sound when playing DVD titles, connect your PC-DVD drive to Sound Blaster Live! Value with an MPC-to-MPC (4-pin) audio cable; connect Sound Blaster Live! Value to the FourPointSurround Encore Dxr2 decoder card with an MPC-to-JST audio cable. -
Page 20: Two Speakers Or Headphones
With the AUDIO_OUT connector on the Encord Dxr2 decoder card connected to the AUX_IN connector on Sound Blaster Live! Value, you must enable the AUX input on the Mixer as shown below. AUX input icon—click the speaker icon (below) to enable... - Page 21 To add two more speakers, connect the additional speakers to the Rear Out jack on Sound Blaster Live! Value. Existing Two Speakers Additional Speakers Result PCWorks PCWorks Environmental audio SoundWorks SoundWorks Environmental audio with improved bass MicroWorks MicroWorks Excellent Environmental Audio and bass...
-
Page 22: Installing The Creative Software
Windows 95 When you turn on your computer, Windows 95 automatically detects the new hardware, and prompts you for the software installation disk. The installation may vary from the instructions below based upon previously installed software and hardware. To install in Windows 95: 1. - Page 23 Browse button to locate, or type, the following: D:\DIRECTX\DIRECTX\DRIVERS\USA. Double-click the My Computer Click OK to install the gameport/joystick drivers. (If you are not prompted and want to install the icon on your desktop, right-click gameport/joystick drivers, click Start on the Taskbar, select Settings and Control Panel. Double- your CD-ROM drive icon, and click the Install New Hardware icon.
- Page 24 7. Next, the Software License Agreement appears. Read the text and click on the Yes button if you accept the terms of the agreement. The README file follows. Please read the file for any last minute information not included in this manual.
- Page 25 10. The Select Program Folder dialog allows you to select the folder to which the audio software is to be installed, or you may confirm the default selection. Click the Next button when the Program Folder is correct. 11. The Installation Information dialog lists the installation selections you have made.
- Page 26 12. The Creative Sound Blaster Live! Value installation screen, similar to that shown to the right, appears to inform you of the progress of the installation. 13. You may be prompted to restart your computer—restart your computer for the drivers to take effect.
-
Page 27: Windows 98
2. Select the Search For The Best Driver For Your Device (Recommended) option and click the Next button. 3. Clear all check boxes and cleck only the Specify a Location check box. Type or click the Browse button and point to the driver path: D:\AUDIO\ENGLISH\WIN95DRV (D: represents your CD-ROM drive). -
Page 28: Testing The Installation
To test the installation: Testing the Installation 1. Click in the task bar; select Programs, Creative, and PlayCenter from the menus. The Creative PlayCenter appears. Alternatively, open the PlayCenter by selecting its icon on the Creative Launcher. 2. On the PlayCenter, click the Media icon and select Open Media File. -
Page 29: Using Sound Blaster Live! Value
Using Sound Blaster Live! Value Sound Blaster Live! Value is supported by a full-range of applications to help you get the absolute most from the audio card: ❐ SB Live! Tour ❐ Creative Launcher ❐ AudioHQ • SoundFonts • Device Controls •... -
Page 30: Creative Launcher
The Creative Launcher is installed at the top of your screen. If it does not appear, move your mouse pointer to the top of the screen. As the pointer reaches the top of the screen, it changes to a pointing hand and the Creative Launcher displays as a bar window. -
Page 31: Audiohq
The AudioHQ interface has the standard look and feel of the Windows Control Panel. It contains several control utilities that allow you to view, audition, or set up the audio properties of one or more audio devices on your computer. -
Page 32: Soundfonts
A variation bank can only be cleared by clearing its main bank . 6. Repeat Steps 3, 4 or 5 as required. By stacking a SoundFont file instead of replacing one with the other, you may return to the original sounds or use the new selection. -
Page 33: Configure An Instrument
5. To clear an instrument from the stack, select the instrument and then click the Clear button. 6. For faster processing of SoundFont files, the files are loaded into memory. You need to set the maximum amount of cache memory your SoundFont files can occupy, so that your system performance does not suffer from insufficient memory. -
Page 34: Soundfont Caching
To change the SoundFont device SoundFont Device 1. On the Options tab page of the SoundFont dialog, select the new device from the SoundFont Device list. Device Controls Device Controls allows you to configure your audio devices for audio playback. The EMU8008 chip or higher on your audio device allows multiple simultaneous Wave playback sessions;... -
Page 35: Wave Blaster Emulation
“AWE.” Wave Blaster Emulation is disabled if your system already has a true Creative SB16-compatible audio card installed and correctly configured under Windows 95. -
Page 36: Creative Keyboard
1. In Creative Keyboard, click the bank and the instrument you want. 2. Click the keys on the keyboard to test the sound. If you have an external MIDI input device , you will probably find it easier to use: •... -
Page 37: Sound Graph
The frequency bands are 250 Hz, 375 Hz, 750 Hz, 1 kHz, 2 kHz, 3 kHz, 4 kHz, 6 kHz, 8 kHz, 10 kHz, 12 kHz, 14 kHz, 16 kHz, and 18 kHz. Fine grain spectrum displays the normal frequency spectrum of the reocrding signal linearly. Its range is 160 Hz to 12 kHz, with a frequency interval of about 86 Hz, and is very detailed. -
Page 38: Creative Mixer
You can use your mouse pointer to change the size and shape of the Mixer. Place the mouse pointer on Customizing the Mixer the side or corner of the Mixer and, holding down the left mouse buttom, drag the side or corner to re- shape the Mixer. -
Page 39: Playback
1. Set the mute box for the device to not muted: Muted Not muted Balance sliders are displayed on the bottom of the Mixer. Move the slider left of right to adjust the Balance Sliders balance of sound from left or right. Re-center the balance by double-clicking on the slider. - Page 40 • To adjust the recording volume, use the “What U Hear” volume slider. 3. If you do not have the icon, select the sources you want to mix in the Recording Control view. • To adjust the recording volume, use the volume sliders of the respective sources in the Recording Control view of Mixer.
-
Page 41: Speaker
The Speaker (Play or Volume Control) controls affect the sound heard over the desktop speaker that is produced by the audio sources. Speaker The Speaker utility allows you to configure your speakers or headphones through the intuitive graphical interface to achieve the balance of effects you want. - Page 42 To select the audio device: 1. In the dialog, click the Options tab. 2. In the Audio Device box, click the device you want to use. Using Sound Blaster Live! Value...
-
Page 43: Environmental Audio
On the Master tab page, you can define an audio environment by specifying the effects and their master settings—add to or remove effects from an environment, specify the type and the degree of the effect. - Page 44 If you do not want to save the environment, click the Delete button. On the Source tab page, you can set the amount of the effects to apply on an audio source. If the Always Save Settings Automatically check box on the Options tab page is selected, your revised settings are saved when you quit the Environmental Audio control utility.
- Page 45 Environment box, and then click the Save button. To configure an effect: 1. To change the value of a parameter, select the parameter and move the slider at the bottom of the dialog. You can audition changes without closing the dialog.
-
Page 46: Soundo'le
1. On the File menu, click Open. The Open a Sound File dialog appears. 2. Select the wave file you want to open. Information about the file such as the wave format, and data size are displayed in the dialog. You can preview a file by clicking the Play button. -
Page 47: Embedding A Wave File
2. Create a new wave file or open an existing file that you want to link. 3. Save the wave file if you created a new one. The wave file must be saved before you can link it to an OLE client. -
Page 48: Wave Studio
1. From the File menu, click Open. The Open Sound File dialog appears. 2. In the File Name list, click a file you want to open. Once a file has been selected: • Play button allows you to listen to the playback of the selected wave file. -
Page 49: Playback
Mixing When you mix the data of two wave files, the data of one file is added to another to create a new file. After mixing, you can play back the new file to hear the new sound generated. -
Page 50: Recording
❐ For CCITT, A-Law, and µ-Law the ratio is 1:2 (compressed : uncompressed). ❐ For ADPCM formats, the ratio is 1:4. For example, if you are working on a 1MB ADPCM file, you must have at least 4MB of free disk space to store the decompressed file. -
Page 51: Special Effects
This effect applies only to stereo files. Most effects can be applied to: ❐ Entire file by placing the cursor at the beginning of the file or not placing the cursor on the wave data. ❐ Selected portion of the file by using the cursor to select the section. -
Page 52: Using Volume Meter
You can choose which one to monitor by clicking on it. Clicking Auto Reset Indicator turns on an automatic timer that resets the peak and valley indicators every five seconds or so. If you want to monitor the peak/valley at a much longer period, deselect Auto Reset Indicator. -
Page 53: Creative Playcenter
PlayCenter is usually launched automatically when you insert a disc into your CD-ROM/PC-DVD drive. It will recognize the media and start playback of the disc, depending on the preferences you have set. If it does not, follow the steps described below to play your multimedia files and discs. -
Page 54: Configuring
5. On the PlayCenter interface, click the Play button. To adjust the volume: 1. On the PlayCenter LED display, click and drag the Volume Slider to the desired volume level or double-click the desired level on the Volume Slider. Configuring You can set your preferences as to how PlayCenter is to handle the playback of your discs and multimedia files. - Page 55 2. On the System menu, click Disc Detector. The Creative Disc Detector dialog appears. 3. Click the Players tab page. 4. Select the disc type in the list box and click the Select Player button. The Player Properties dialog appears.
-
Page 56: Troubleshooting
To select an appropriate environment: 1. Open Environmental Audio control. Display Creative Launcher at the top of your screen (bring your mouse pointer to the top edge of the screen to display Launcher). Then, click the Environments tab. 2. In the Environment list, select “No effects” or an appropriate environment. - Page 57 ❑ No hardware conflict between the card and a peripheral device. ❑ The output selection on the Speaker dialog corresponds to your speaker or headphone configuration. ❑ The Original Sound sliders in either or both the Master and Source tab pages of the Speaker dialog are set to 100 percent.
-
Page 58: Soundfonts
Increase your system's 8-bit I/O recovery time of the BIOS setting, usually under the Chipset Feature Settings Do not attempt to make changes to section. Or, if available, you may adjust the AT Bus speed to a slower clock. If the problem persists, try a the BIOS unless you have different joystick. -
Page 59: I/O Conflicts
Windows 95/98. If you still are unable to determine which card is causing the conflict, remove all cards except the audio card and other essential cards (for example, disk controller and graphics cards). Add each card back until Device Manager indicates that a conflict has occurred. -
Page 60: Creative Playcenter
PlayCenter 1. In Creative Launcher, click Settings, and click the Disc Detector icon,. 2. On the General tab page of the Creative Disc Detector dialog, select Enable Disc Detector. 3. Click the Players tab. 4. Select the DVD Disc entry and then click the Select Player button.
Need help?
Do you have a question about the EMU10K1 - Sound Blaster Live! Value and is the answer not in the manual?
Questions and answers