Table of Contents
Advertisement
Quick Links
Advertisement
Table of Contents

Subscribe to Our Youtube Channel
Related Manuals for Stairville ShineBar 240


Summary of Contents for Stairville ShineBar 240
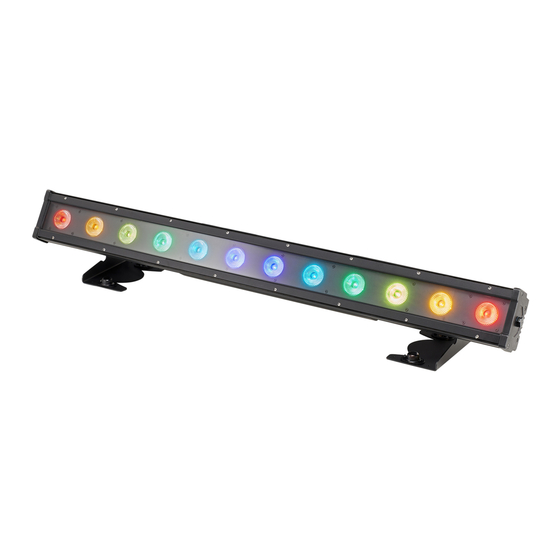
- Page 1 ShineBar 240 LED bar...
- Page 2 Thomann GmbH Hans-Thomann-Straße 1 96138 Burgebrach Germany Telephone: +49 (0) 9546 9223-0 Internet: www.thomann.de 25.05.2023, ID: 522476...
-
Page 3: Table Of Contents
7.3 System settings..........................32 7.4 System information......................... 34 7.5 Reset to factory defaults........................ 35 7.6 Menu overview..........................36 7.7 Functions in 2-channel DMX mode................... 37 7.8 Functions in 6-channel DMX mode................... 38 7.9 Functions in 8-channel DMX mode................... 39 ShineBar 240 LED bar... - Page 4 7.10 Functions in 10-channel DMX mode..................40 7.11 Functions in 72-channel DMX mode..................43 7.12 Functions in 74-channel DMX mode..................44 Technical specifications........................46 Plug and connection assignments....................48 Troubleshooting............................49 Cleaning............................... 51 Protecting the environment......................52 ShineBar 240 LED bar...
- Page 5 ShineBar 240 LED bar...
-
Page 6: General Information
Our products and user manuals are subject to a process of continuous development. We there‐ fore reserve the right to make changes without notice. Please refer to the latest version of the user manual which is ready for download under www.thomann.de. ShineBar 240 LED bar... -
Page 7: Further Information
Personal consultation For personal consultation please contact our technical hotline. If you have any problems with the device the customer service will Service gladly assist you. 1.2 Notational conventions This manual uses the following notational conventions: ShineBar 240 LED bar... -
Page 8: Symbols And Signal Words
ð Automatic operation is started. Switch off the device. 1.3 Symbols and signal words In this section you will find an overview of the meaning of symbols and signal words that are used in this manual. ShineBar 240 LED bar... - Page 9 This combination of symbol and signal word indicates a pos‐ sible dangerous situation that can result in material and environmental damage if it is not avoided. Warning signs Type of danger Warning – high-voltage. Warning – hot surface. Warning – dangerous optical radiation. ShineBar 240 LED bar...
- Page 10 General information Warning signs Type of danger Warning – suspended load. Warning – danger zone. ShineBar 240 LED bar...
-
Page 11: Safety Instructions
Ensure that plastic bags, packaging, etc. are disposed of properly and are not within reach of babies and young children. Choking hazard! Ensure that children do not detach any small parts (e.g. knobs or the like) from the unit. They could swallow the pieces and choke! Never let children unattended use electrical devices. ShineBar 240 LED bar... - Page 12 15 minutes. NOTICE! Risk of fire Do not block areas of ventilation. Do not install the device near any direct heat source. Keep the device away from naked flames. ShineBar 240 LED bar...
- Page 13 The plasticiser contained in the rubber feet of this product may possibly react with the coating of your surface and after some time cause permanent dark stains. In case of doubt, do not put the rubber feet directly on the surface and use a suitable underlay if neces‐ sary, i.e. felt pads or similar. ShineBar 240 LED bar...
-
Page 14: Features
Sturdy bracket for secure attachment to trusses or firm footing on the ground splash-proof connectors Degree of protection IP65, suitable for temporary outdoor use Noiseless operation due to passive cooling Suitable connection cable for the output socket (Power Twist TR1 IP65) optionally available (e.g. item no. 292462) ShineBar 240 LED bar... - Page 15 For technological reasons, the light output of LEDs decreases over their lifetime. This effect increases with higher operating temperature. You can extend the service life of the illuminants by providing adequate ventilation and operating the LEDs with the lowest possible brightness. ShineBar 240 LED bar...
-
Page 16: Installation
NOTICE! Risk of overheating Always ensure sufficient ventilation. The ambient temperature must not exceed the limits stated in the chapter Tech‐ nical Specifications of the User Manual. ShineBar 240 LED bar... - Page 17 Never connect the DMX input or output to audio devices such as mixers or ampli‐ fiers. NOTICE! Possible damage due to moisture Moisture entering into open connectors (plugs and couplers) of DMX or power cords can cause short circuits. Close unused connectors with end caps intended for this purpose (www.thomann.de). ShineBar 240 LED bar...
- Page 18 Always work from a stable platform whenever installing, moving or servicing the unit. In doing so, the area underneath the unit must be cordoned off. The safety cable must be threaded through the openings in the bracket. ShineBar 240 LED bar...
-
Page 19: Starting Up
Such a chain may consist of up to 30 DMX devices. Make sure that the output of the last device in the chain is terminated by a resistor (110 Ω, ¼W). ShineBar 240 LED bar... - Page 20 DMX output of the master unit to the DMX input of the first slave unit. Then connect the DMX output of the first slave unit to the DMX input of the second slave unit and so on. Please note that this device must not be connected to a dimmer. ShineBar 240 LED bar...
-
Page 21: Connections And Controls
Connections and controls Connections and controls Overview ShineBar 240 MENU DOWN ENTER ö ö 1 Mounting brackets with locking screws for locking in desired orientation 2 Input and output connections 3 Control panel with function keys and display [MENU] | activates the main menu and toggles between menu items. Closes an opened sub menu. - Page 22 & Output connections 6 [POWER OUT] | lockable output socket (Power Twist TR1 IP65) for powering further POWER OUT DMX OUT devices Max. 6A 7 [DMX OUT] | DMX output, designed as XLR panel socket, 3-pin ShineBar 240 LED bar...
-
Page 23: Operating
Connect the device to the power supply to start operation. After a few seconds, the display indicates that a reset is in progress. The device is then ready for use. The display shows the operating mode that was selected when the unit was last powered off. ShineBar 240 LED bar... -
Page 24: Main Menu
If you do not press any key for about 30 seconds, the display turns off. It will be reactivated to display the previously shown menu by pressing any button. All previously made settings are retained even when you disconnect the device from the power grid. ShineBar 240 LED bar... - Page 25 DMX address for the various DMX modes. Mode Highest possible DMX address 2-channel mode 6-channel mode 8-channel mode 10-channel mode 72-channel mode 74-channel mode When the display shows the desired value, confirm with [ENTER]. ShineBar 240 LED bar...
- Page 26 Press [UP] or [DOWN] to select the desired DMX mode. Menu level 2 Function ‘2CH’ 2-channel mode ‘6CH’ 6-channel mode ‘8CH’ 8-channel mode ‘10CH’ 10-channel mode ‘72CH’ 72-channel mode ‘74CH’ 74-channel mode When the display shows the desired value, confirm with [ENTER]. ShineBar 240 LED bar...
- Page 27 Menu level 4 Function ‘Auto’ ‘Dimmer’ ‘000’ … ‘255’ Total brightness of the LEDs ‘Speed’ ‘000’ … ‘255’ Running speed show ‘Prog’ ‘00’ … ‘20’ Selecting a show When the display shows the desired value, confirm with [ENTER]. ShineBar 240 LED bar...
- Page 28 ‘000’ … ‘255’ Total brightness of the colour macros ‘Strobe’ ‘000’ … ‘255’ Flash frequency of the strobe effect ‘Macro’ ‘00’ … ‘22’ Selecting the colour macros When the display shows the desired value, confirm with [ENTER]. ShineBar 240 LED bar...
- Page 29 ‘000’ … ‘255’ Flash frequency of the strobe effect ‘Static.r’ ‘000’ … ‘255’ ‘Static.g’ ‘000’ … ‘255’ Green ‘Static.b’ ‘000’ … ‘255’ Blue ‘Static.l’ ‘000’ … ‘255’ Lime ‘Static.a’ ‘000’ … ‘255’ Amber ‘Static.c’ ‘000’ … ‘255’ Cyan ShineBar 240 LED bar...
- Page 30 ‘000’ … ‘255’ ‘User.g’ ‘000’ … ‘255’ Green ‘User.b’ ‘000’ … ‘255’ Blue ‘User.l’ ‘000’ … ‘255’ Lime ‘User.a’ ‘000’ … ‘255’ Amber ‘User.c’ ‘000’ … ‘255’ Cyan When the display shows the desired value, confirm with [ENTER]. ShineBar 240 LED bar...
- Page 31 ‘Tunable White’ ‘Dimmer’ ‘000’ … ‘255’ Total brightness of the LEDs ‘Strobe’ ‘000’ … ‘255’ Flash frequency of the strobe effect ‘CTC’ ‘2700K’ … ‘7500K’ Colour temperature When the display shows the desired value, confirm with [ENTER]. ShineBar 240 LED bar...
-
Page 32: System Settings
The display reversal is deactivated. The display of the device is in the standard orientation. ‘ Lock’ Key lock ‘On’ The key lock is activated. ‘Off’ Key lock deactivated ‘Dmx.Err’ Device behaviour on DMX signal failure ShineBar 240 LED bar... - Page 33 ‘F’ The device shows the temperature in Fahrenheit. ‘Dimmer Curve’ Dimmer curve ‘Linear’ Linear course ‘Exponential’ Exponential course ‘Logarithmic’ Logarithmic course ‘S Curve’ S-curve shaped course When the display shows the desired value, confirm with [ENTER]. ShineBar 240 LED bar...
-
Page 34: System Information
Menu level 2 Function ‘Firmware’ Displays the current firmware version. ‘Temperature’ Displays the current temperature of the device. ‘Run Time’ Displays the total running time of the device. When the display shows the desired value, confirm with [ENTER]. ShineBar 240 LED bar... -
Page 35: Reset To Factory Defaults
ð The display shows ‘Factory Reset’ . Use [UP] or [DOWN] to select between ‘YES’ (reset device to factory defaults) and ‘NO’ (cancel reset) and confirm with [ENTER]. To return to the previous menu level without changes, press [MENU]. ShineBar 240 LED bar... -
Page 36: Menu Overview
Invert 72CH 74CH Prog Static.r User.g Lock Macro Static.g User.b Dimmer Static.b User.l Dmx.Err Strobe Blackout Static.l User.a Hold Macro Emergency Static.a User.c Temp Static.c Tunable White Dimmer Dimmer.Curve Linear Strobe Exponential Logarithmic S-Curve 2700K 7500K ShineBar 240 LED bar... -
Page 37: Functions In 2-Channel Dmx Mode
0…4 LEDs off 5…19 2700 K 20…39 2900 K 40…59 3100 K 60…79 3400 K 80…99 3700 K 100…119 4000 K 120…139 4400 K 140…159 4800 K 160…179 5400 K 180…199 5800 K 200…219 6400 K ShineBar 240 LED bar... -
Page 38: Functions In 6-Channel Dmx Mode
Intensity Green (0 % to 100 %) 0…255 Intensity Blue (0 % to 100 %) 0…255 Intensity Lime (0 % to 100 %) 0…255 Intensity Amber (0 % to 100 %) 0…255 Intensity Cyan (0 % to 100 %) ShineBar 240 LED bar... -
Page 39: Functions In 8-Channel Dmx Mode
Intensity Green (0 % to 100 %) 0…255 Intensity Blue (0 % to 100 %) 0…255 Intensity Lime (0 % to 100 %) 0…255 Intensity Amber (0 % to 100 %) 0…255 Intensity Cyan (0 % to 100 %) ShineBar 240 LED bar... -
Page 40: Functions In 10-Channel Dmx Mode
Preprogrammed automatic show 21 246…255 Colour macro Running speed of automatic show (when channel 3 = 0… 245) 0…255 Running speed increasing Running speed (when channel 3 = 246…255) 0…21 LEDs off 22…32 Colour macro 1 ShineBar 240 LED bar... - Page 41 11…120 Colour macro 9 121…131 Colour macro 10 132…142 Colour macro 11 143…153 Colour macro 12 154…164 Colour macro 13 165…175 Colour macro 14 176…186 Colour macro 15 187…197 Colour macro 16 198…208 Colour macro 17 ShineBar 240 LED bar...
- Page 42 Intensity Green (0 % to 100 %) 0…255 Intensity Blue (0 % to 100 %) 0…255 Intensity Lime (0 % to 100 %) 0…255 Intensity Amber (0 % to 100 %) 0…255 Intensity Cyan (0 % to 100 %) ShineBar 240 LED bar...
-
Page 43: Functions In 72-Channel Dmx Mode
Intensity Blue (0 % to 100 %), LED 12 0…255 Intensity White (0 % to 100 %), LED 12 0…255 Intensity Amber (0 % to 100 %), LED 12 0…255 Intensity Cyan (0 % to 100 %), LED 12 ShineBar 240 LED bar... -
Page 44: Functions In 74-Channel Dmx Mode
Intensity Red (0 % to 100 %), LED 12 0…255 Intensity Green (0 % to 100 %), LED 12 0…255 Intensity Blue (0 % to 100 %), LED 12 0…255 Intensity Lemon (0 % to 100 %), LED 12 ShineBar 240 LED bar... - Page 45 Operating Channel Value Function 0…255 Intensity Amber (0 % to 100 %), LED 12 0…255 Intensity Cyan (0 % to 100 %), LED 12 ShineBar 240 LED bar...
-
Page 46: Technical Specifications
Supply voltage 100 - 240 V 50/60 Hz Degree of protection IP65 Mounting options In hanging position, in standing position, wall mounting Dimensions (W × H × D) 1004 mm × 163 mm × 147 mm ShineBar 240 LED bar... - Page 47 Technical specifications Weight 9.5 kg Ambient conditions Temperature range –0 °C…40 °C Relative humidity 20 %…80 % (non-condensing) Further information Suitable for outdoor use fanless Remote control Not possible Wireless DMX Housing colour black Separately controllable LEDs ShineBar 240 LED bar...
-
Page 48: Plug And Connection Assignments
The unit offers a 3-pin XLR socket for DMX output and a 3-pin XLR plug for DMX input. Please refer to the drawing and table below for the pin assignment of a suitable XLR plug. Configuration Ground, shielding Signal inverted (DMX–, ‘cold signal’) Signal (DMX+, ‘hot signal’) ShineBar 240 LED bar... -
Page 49: Troubleshooting
Never connect the DMX input or output to audio devices such as mixers or ampli‐ fiers. In the following we list a few common problems that may occur during operation. We give you some suggestions for easy troubleshooting: ShineBar 240 LED bar... - Page 50 4. Check whether the DMX cables run near or parallel to high-voltage cables that may cause damage or interfer‐ ence to a DMX interface circuit. If the procedures recommended above do not succeed, please contact our Service Center. You can find the contact information at www.thomann.de. ShineBar 240 LED bar...
-
Page 51: Cleaning
The fan grids of the device must be cleaned of any contamination, such as dust, etc. on a reg‐ ular basis. Before cleaning, switch off the device and disconnect mains-operated devices from the mains. Only use pH-neutral, solvent-free and non-abrasive cleaning agents. Clean the unit with a slightly damp lint-free cloth. ShineBar 240 LED bar... -
Page 52: Protecting The Environment
Dispose of this device through an approved waste disposal firm or through your local waste facility. When discarding the device, comply with the rules and regulations that apply in your country. If in doubt, consult your local waste disposal facility. ShineBar 240 LED bar... - Page 53 Notes ShineBar 240 LED bar...
- Page 54 Notes ShineBar 240 LED bar...
- Page 56 Musikhaus Thomann · Hans-Thomann-Straße 1 · 96138 Burgebrach · Germany · www.thomann.de...
Need help?
Do you have a question about the ShineBar 240 and is the answer not in the manual?
Questions and answers