Chapters
Table of Contents

Related Manuals for Häfele ORION 533.09.872


Summary of Contents for Häfele ORION 533.09.872
- Page 1 ORION 533.09.872 ORION 533.09.867 ORION 533.09.873 ORION 533.09.865 ORION 533.09.871 ORION 533.09.866 Einbau - Bedienungsanleitung Built-in Gas Hob - User Manual Ankastre Gazlı Ocak - Kullanım Kılavuzu...
- Page 2 GEBRAUCHSANWEISUNG FÜR GASHERD 62-75 CM...
- Page 3 Bitte lesen Sie erst die Gebrauchsanweisung durch! Sehr geehrte Kunden, Wir möchten, dass Sie Ihr Produkt, das in modernen Anlagen mit hoher Qualität hergestellt wurde, möglichst effizient nutzen können. Aus diesem Grund sollen Sie vor Gebrauch des Produktes diese Gebrauchsanweisung sorgfältig lesen und als Referenzquelle aufbewahren. Falls Sie das Produkt an eine andere Person weitergeben sollten, sollten Sie die Gebrauchsanweisung mitgeben.
-
Page 4: Table Of Contents
INHALT WICHTIGE SICHERHEITSANWEISUNGEN ................3 1.1. Allgemeine Sicherheit ....................... 3 1.2. Sicherheit von Kindern ...................... 5 1.3. Sicherheit bei Betrieb und Strom ..................5 1.4. Anwendungszweck ......................5 MONTAGE ......................... 6 2.1. Vor Gebrauch des Produktes ..................... 6 2.2. Montage und Verbindungen ..................... 7 2.3. -
Page 5: Wichtige Sicherheitsanweisungen
1. WICHTIGE SICHERHEITSANWEISUNGEN Dieser Teil enthält Sicherheitsanweisungen, die behilflich sein können, Gefahren wie körperliche Verletzungen bzw. Materialschaden zu vermeiden. Bei Nichtbeachtung dieser Hinweise, werden alle Arten von Garantie hinfällig. 1.1. Allgemeine Sicherheit • Solange keine Person, die für die Sicherheit verantwortlich ist bzw. die notwendigen Anweisungen für den Gebrauch gibt, anwesend ist, ist dieses Produkt nicht für den Gebrauch durch Personen mit Behinderungen an körperlichen, sensorischen oder geistigen... - Page 6 • Seien Sie vorsichtig beim Kochen mit Alkohol. Alkohol verdunstet bei hohen Temperaturen und beim Kontakt mit heißen Oberflächen kann es sich entzünden und einen Brand verursachen. • Wärmen Sie geschlossenen Konservendosen und Einmachgläser nicht auf. Der entstehende Druck kann das Glas explodieren lassen. •...
-
Page 7: Sicherheit Von Kindern
1.2. Sicherheit von Kindern Während des Gebrauchs des Produktes und bis es abkühlt, sind die offen zugänglichen Teile des Produkten heiß; Kinder sollten fern gehalten werden. • VORSICHT: Bei der Benutzung des Grills können die zugänglichen Teile heiß werden. Kleine Kinder sollten vom Produkt fern gehalten werden. •... -
Page 8: Montage
2. MONTAGE 2.1. Vor Gebrauch des Produktes Vergewissern Sie sich, dass die Strom- und Gasleitung geeignet sind. Wenn nicht, ziehen Sie einen autorisierten Elektriker und Installateur hinzu und lassen Sie die notwendigen Vorkehrungen treffen. Die Vorbereitung der Stelle, an der das Produkt angebraucht werden soll und der Strom- und/oder Gasleitungen werden durch den Kunden durchgeführt. -
Page 9: Montage Und Verbindungen
Das Lüftungsgitter sollte in der Nähe des Küchenbodens und nach Außen offen sein und mindestens 75 cm groß sein. 2.2. Montage und Verbindungen 2.2.1. Vorbereitung des Einbaukochfeldes vor der Montage Bild3 Bild 1 Bild 2 Legen Sie den Herd umgedreht Verlegen Sie das Silikon bei Inox- Verlegen Sie das in der auf das in der Packung... - Page 10 Bild 6 Glas 5. Oberes Tragbrett Silikondichtung 6.Silikondichtung Tragbrett 7. Arbeitsfläche Verbindungsapparat 8. Verbindungsklammern 9. Schraube Bild7 Der Herd hat eine Dichtung, die verhindert, dass Flüssigkeiten durch die Hohlräume in den Schrank fließen. Kleben Sie die Dichtung wie oben in den Bildern angezeigt an, um die Dichtung anzubringen.
-
Page 11: Stromanschluss
Nachdem Sie die Schutzfolie von der Inox-Oberfläche entfernt haben, können Sie Ihren Herd benutzen. 2.3. Stromanschluss Das Produkt muss auf jeden Fall an eine geerdete Leitung angeschlossen werde! Die Herstellerfirma übernimmt keine Verantwortung bei Benutzung ohne geerdete Leitung. Gefahr von Stromschlag, Kurzschluss bzw. Brand bei Installation durch unprofessionelle Personen! Der Anschluss an das Stromnetz darf nur durch autorisierte Personen durchgeführt werden und die Produktgarantie beginnt nur nach richtiger Installation des Produktes. -
Page 12: Gasanschluss
2.4. Gasanschluss Jegliche Arbeiten an der Gasausrüstung und -systemen sollte durch autorisierte Personen durchgeführt werden. Prüfen Sie vor der Installation, ob die örtlichen Verteilungsbedingungen (Art des Gases und Gasdruck) mit den Produkteinstellungen kompatibel sind. 2.4.1. LPG-Anschluss Achten Sie darauf, dass der Gasschlauch und Gasregler, den Sie an Ihrem Herd benutzen werden, sicher sind. -
Page 13: Dichtheitsprüfung
Falls Ihr Gerät Erdgaskompatibel ist, lassen Sie Ihr Gerät durch die betreffende Installationsfirma der Erdgasvertriebsfirma verbinden. Die Erdgasverbindung Ihres Gerätes ist ½“. Falls Sie Ihr Gerät von LPG zu Erdgas bzw. von Erdgas zu LPG umrüsten möchten, wenden Sie sich bitte an den nächsten Kundendienst und lassen Sie die notwendigen Einstellungen durchführen. -
Page 14: Entsorgung Des Produktes
2.7. Entsorgung des Produktes 2.7.1. Entsorgung der Verpackung Verpackungsmaterial ist für Kinder gefährlich. Verwahren Sie das Verpackungsmaterial außerhalb der Reichweite der Kinder. Das Verpackungsmaterial des Produktes wurde von Recycle-Material hergestellt. Es sollte entsprechend den Entsorgungsanweisungen getrennt und entsorgt werden. Nicht im häuslichem Müll entsorgen. 2.7.2. -
Page 15: Über Das Produkt
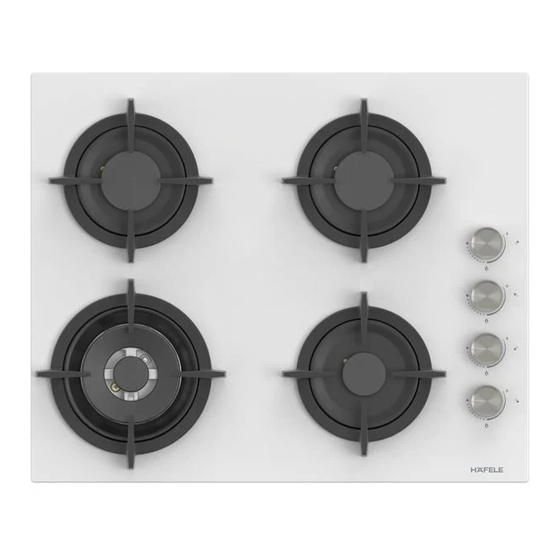
3. ÜBER DAS PRODUKT: 3.1. Gesamtansicht Kleiner Brenner Mittlerer Brenner Großer Brenner Wok / Mini-Wok Brenner Knopf für kleinen Brenner Knopf für mittleren Brenner Knopf für großen Brenner Knopf für Wok /Mini-Wok Brenner Grill Herdplatte... -
Page 16: Verbrauchswerte
3.2. Verbrauchswerte Tabelle 1.1_ Verbrauchswerte (SabafBrenner) LPG G30 30 m ar N G20 20 m ar LPG G30 50 m ar NG G2 5.3 25 mb ar Verbra Verbra Injektor( Strom Verbrau Injektor Strom Verbrauc Injektor( Strom Injektor(m Strom (kW) ch (g/h) (mm) (kW) -
Page 17: Gebrauch Des Herdes
GEBRAUCH DES HERDES 4.1. Erster Gebrauch Nach Entfernen des Schutzfilms auf der Inox-Fläche können Sie Ihr Produkt benutzen. 4.2. Erste Reinigung Manche Wasch- bzw. Reinigungsmittel können die Oberfläche beschädigen. 1. Entfernen Sie alle Verpackungsmaterialien. 2. Die Oberfläche des Produktes mit einem feuchten Tuch oder Schwamm wischen und einem trockenen Lappen trockenwischen. -
Page 18: Gassperrvorrichtung
4.4. Gassperrvorrichtung Der Thermoapparat aktiviert den Sicherheitsmechanismus und schaltet das Gas bei Flüssigkeitsüberlauf, wenn die oberen Brenner erlöschen, sofort. 1: Drücken Sie den Gasherdknopf, drehen Sie ihn gegen den Uhrzeigersinn und bringen Sie ihn auf die hohe Flammenposition. 2: Zünden Sie Ihren Herd entsprechen der Eigenschaften des Herdes an. 3: Halten Sie den Knopf 3-5 Sekunden nach den Anzünden gedrückt und warten Sie, bis die Sicherheitsvorrichtung aktiv wird. -
Page 19: Reinigung Des Bedienungsfeldes
• Achten Sie darauf, dass nach der Reinigung alle Flüssigkeitsüberreste entfernt sind und dass während des Kochens die Essensspritzer sofort aufgewischt werden. • Benutzen Sie für die Reinigung von rostfreiem bzw. Inox-Flächen und der Griffe keine ätzenden bzw. chlorhaltigen Mittel. Reinigen Sie mit einem weichen, in Seife gewaschenen Tuch und flüssigem (nicht kratzendem) Reinigungsmittel;... -
Page 20: Vorschläge Für Die Problemlösung
VORSCHLÄGE FÜR DIE PROBLEMLÖSUNG Das Produkt funktioniert nicht ✓ Der Stecker (geerdet) ist eventuell nicht in einer geerdeten Steckdose. Kontrollieren Sie, ob der Stecker in der Steckdose steckt. ✓ Die Sicherung ist eventuell defekt oder gesprungen. Kontrollieren Sie die Sicherungen in der Sicherungsbox. Falls die Sicherung gesprungen ist, sollte sie wieder eingeschaltet werden. - Page 21 GAS HOB USER’S MANUAL 62-75 CM...
- Page 22 Please first read this manual! Dear Customer, We desire you get the most out of this product which is produced in the modern facilities on basis of high-quality. For this reason, please read this manual carefully and thoroughly prior to using the product and keep it for future reference.
- Page 23 TABLE OF CONTENTS IMPORTANT SAFETY INSTRUCTIONS................. 3 1.1. General Safety ......................... 3 1.2. Safety for children ......................5 1.3. Safety of the electric-related works ................. 5 1.4. Intended use ........................5 INSTALLATION ........................6 2.1. Prior to use of the product ....................6 2.2.
-
Page 24: Important Safety Instructions
1. IMPORTANT SAFETY INSTRUCTIONS This section contains safety instructions to help prevention of physical injury or material damage. Failure to comply with these instructions makes any warranty invalid. 1.1. General Safety • This product is not designed for use by persons (including children) who are lack of knowledge or experience and have deficient physical, sensual or cognitive skills unless they are attended by a person to take care of their safety or give necessary instructions for use of the... - Page 25 • Be careful when using alcohol in the food. The alcohol evaporates at high temperature and when it contacts with hot surfaces, it may inflame and cause fire. • Do not heat the sealed cans and glass jars. The resulting pressure may cause burst of the jar.
-
Page 26: Safety For Children
1.2. Safety for children The exposed parts of the product will get heated during use and after use until it cools down; keep children away. • CAUTION: During use of the grill, the accessible parts may be hot. You should keep the children away from the product. •... -
Page 27: Installation
2. INSTALLATION 2.1. Prior to use of the product Make sure the power and/or gas installation is suitable. If not, make the necessary arrangements by means of qualified technical and installer. The customer shall be responsible for preparation of the place where the product shall be placed as well as the power and/or gas installation. -
Page 28: Installation And Connections
Air vent should be near the kitchen floor and minimum75cm², opening to the outer atmosphere 2.2. Installation and connections 2.2.1. Preparation of the built-it range prior to installation Figure 3 Figure 2 Figure 1 Turn upside down Apply the silicon In case of inox products, apply range in the supplied in the... - Page 29 Figure 6 1. Glass 5. Upper Tray 2. Silicon Seal 6.Silicon Seal 3. Tray 7.Counter Surface 4. Connection Element 8.Connection Clips 9.Screw 2.2.2. Installation of the range The range is equipped with a seal to prevent the liquids through the cavities into the cabinet.
-
Page 30: Wiring
2.3. Wiring You should definitely use an earthed line for the product! The manufacturing firm shall not be responsible for any damages that may occur if the product is used without the earth. Electric shock, short-circuit or fire risk arising from the installation performed by any unprofessional persons! The product should be connected to the mains only by an authorized and qualified person and the warranty of the product starts only after correct installation. - Page 31 2.4.1. LPG connection Make sure the gas hose and gas pressure-reducing valve you use on the range are safe. Connect the gas delivery hose with the hose behind the range and tighten it by using a clamp and screwdriver (figure 10). Make sure it is firmly tightened.
-
Page 32: Sealing Inspection
2.5. Sealing inspection Open the pressure-reducing valve or natural gas valve and control by application of much foamy water on the connection to find out any gas leakage. Never control by flame. 2.6. Final inspection Plug the power cable into the socket and activate the fuse of the equipment. -
Page 33: Disposal Of The Product
2.7. Disposal of the product 2.7.1. Destruction of the package Packaging materials are dangerous for the children. Keep the packaging materials at a place not accessible by the children. The packaging of the product is made of the recycled materials. And throw them in the garbage by shorting out as per the instructions on waste. -
Page 34: About Product
3. ABOUT PRODUCT: 3.1. General view Small burner Mid burner Big burner Wok / Mini wok Burner Small Burner Button Mid Burner Button Big Burner Button Wok /Mini wok Burner Button Grill Top Table... -
Page 35: Consumption Values
3.2. Consumption values Table 1.1_ Consumption values (for Sabaf burners) LPG G30 30 m ar NG G20 20 m ar 30 50 m ar NG G2 5.3 25 mb ar Consum Consump Consu Consu Injector Power Injector Power Injector Powe Injector Power ption... -
Page 36: Use Of The Range
USE OF THE RANGE 4.1. First use Start to use the equipment after removal of the protective film on Inox surface. 4.2. First cleaning Some detergents or cleaning agents may give harm to the surface. 1. Remove all packaging materials. 2. -
Page 37: Gas Cut-Off Safety Apparatus
4.4. Gas cut-off safety apparatus Thermal element activetas the safety mechanism activates and cuts off the gas immediately against extinguishment of the top burners due to liquid overflown. 1: Push and turn anticlockwise the gas range button for setting high flame. 2: Turn on the lighter depending on the characteristics of your range. -
Page 38: Cleaning The Control Panel
• No special cleaning agent is required for cleaning the product. Clean the product by use of dishwashing liquid, lukewarm water and a soft cloth or sponge and wipe clean with a dry cloth. • Make sure you completely wipe off any liquid left after the cleaning and clean immediately any food around splashed during the cooking. -
Page 39: Suggested Solutions For Problems
SUGGESTED SOLUTIONS FOR PROBLEMS Product does not operate. ✓ The product is not plugged (earthed) to the socket. Make sure the equipment is plugged. ✓ The fuse is burn or broken. Check the fuse in the fuse box. If the fuse is burnt, activate it again. - Page 40 GAZLI OCAK KULLANMA KILAVUZU 62-75 CM...
- Page 41 Lütfen önce bu kılavuzu okuyun! Değerli Müşterimiz, Modern tesislerde, yüksek kalite anlayışı ile üretilen ürününüzden sizin en iyi verimi almanızı istiyoruz. Bu nedenle, ürünü kullanmadan önce bu kılavuzun tamamını dikkatle okuyun ve bir başvuru kaynağı olarak saklayın. Ürünü bir başkasına verirseniz, kullanma kılavuzu ile birlikte verin.
- Page 42 İÇİNDEKİLER ÖNEMLİ GÜVENİLK TALİMATLARI ..................3 1.1. Genel Güvenlik ......................... 3 1.2. Çocukların güvenliği ......................5 1.3. Elektrikle ilgili çalışmalarda güvenlik ................5 1.4. Kullanım amacı ......................... 5 MONTAJ ........................... 6 2.1. Ürünün kullanılmasından önce ..................6 2.2. Montaj ve bağlantılar ....................... 7 2.3.
-
Page 43: Önemli̇ Güveni̇lk Tali̇matlari
1. ÖNEMLİ GÜVENLİK TALİMATLARI Bu bölüm, kişisel yaralanma ya da maddi hasar tehlikelerini önlemeye yardımcı olacak güvenlik talimatları yer almaktadır. Bu talimatlara uyulmaması halinde her türlü garanti geçersiz hale gelir. 1.1. Genel Güvenlik • Bu ürün, yanlarında güvenliklerinden sorumlu olacak veya ürünün kullanımıyla ilgili gerekli talimatları... - Page 44 • Tüm havalandırma kanallarının etrafını açık tutun. • Ürün, kullanım sırasında sıcak olabilir. Sıcak bölmelere ısıtma elemanlarına vb. dokunmayın. • Her kullanımdan sonra ürünün kapalı olduğundan emin olun. • Ürün ve ürünün elle erişilebilen parçaları kullanım esnasında sıcaktır. • Ürüne çalışır vaziyetteyken dokunmayınız. •...
-
Page 45: Çocukların Güvenliği
1.2. Çocukların güvenliği Ürün kullanımdayken ve kullanım sonrasında soğuyana kadar ürünün açıktaki kısımları ısınacaktır; çocuklar uzak tutulmalıdır. • DİKKAT: Izgaranın kullanımı sırasında, erişilebilen parçalar sıcak olabilir. Küçük çocuklar üründen uzak tutulmalıdır. • 8 yaşın altındaki çocukların, yanlarında yetişkin birisi olmadan ürüne dokunmaları... -
Page 46: Montaj
2. MONTAJ 2.1. Ürünün kullanılmasından önce Elektrik ve/veya gaz tesisatının uygun olduğundan emin olun. Değilse ehliyetli bir elektrikçi ve tesisatçı çağırarak gerekli düzenlemeleri yaptırın. Ürünün yerleştirileceği yerin ve ayrıca elektrik ve/veya gaz tesisatının hazırlanması müşteriye aittir. Ürünün kurulumda, elektrik ve/veya gazla ilgili yerel standartlarda belirtilen kurallara uyulmalıdır. -
Page 47: Montaj Ve Bağlantılar
Havalandırma menfezi mutfak tabanına yakın dış atmosfere açılacak şekilde minimum 75cm²olmalıdır. 2.2. Montaj ve bağlantılar 2.2.1. Montaj öncesinde ankastre ocağın hazırlanması Şekil 3 Şekil 1 Şekil 2 Ocağınızın paketten çıkan strafor Paket içerisinden çıkan Silikonu inox ürünlerde inox içerisine ters koyarak silikonu gösterilen yüzeye, cam ocak ürünlerde cam silikonunuzu çekiniz. - Page 48 Şekil 6 1. Cam 5. Üst Tabla 2. Silikon Conta 6. Silikon Conta 3. Tabla 7. Tezgah Yüzeyi 4. Bağlantı Aparatı 8. Bağlantı Mandalları 9. Vida Şekil 7 Ocağın, sıvıların boşluklardan dolaba akmasına engelleyen bir conta bulunur. Bu contayı yerleştirmek için yukarıda resimlerle tarif edilen şekilde contayı...
-
Page 49: Elektrik Bağlantısı
2.3. Elektrik bağlantısı Ürünün mutlaka topraklı bir hat ile kullanılması gerekir! Topraklama hattı yapılmadan kullanılması halinde oluşacak hasarlardan, üretici firma sorumlu olmayacaktır. Profesyonel olmayan kişilerin yaptığı kurulumlardan kaynaklanan elektrik çarpması, kısa devre veya yangın tehlikesi! Ürünün şebeke elektriğine bağlantısı yalnızca yetkili ve ehliyetli bir kişi tarafından yapılabilir ve ürünün garantisi yalnızca doğru kurulumdan sonra başlar. - Page 50 2.4.1. LPG bağlantısı Ocağınızda kullanacağınız gaz hortumunun ve gaz dedantörünün güvenilir olmasına dikkat ediniz. Gaz getiren hortumu ocağınızın arkasındaki hortum başına geçirip bir sac kelepçe ve tornavida kullanarak sıkınız. ( şekil 10) Sıkıldığından emin olunuz. Cihaza gaz hortumunun boyu 1500 mm’den uzun olmamalıdır. LPG için kullanılacak dedantörün basıncı...
-
Page 51: Sızdırmazlık Kontrolü
2.5. Sızdırmazlık kontrolü Dedantörü veya doğalgaz vanasını açınız ve bol köpüklü sabunlu suyu, yaptığınız bağlantının üzerine sürerek gaz kaçağı olup olmadığını kontrol ediniz. Kesinlikle alev ile kontrol etmeyiniz. 2.6. Son kontrol Elektrik kablosunu fişe takın ve cihazın sigortasını etkinleştirin. Fonksiyonlarını kontrol edin. 2.6.1. -
Page 52: Ürünün Atılması
2.7. Ürünün atılması 2.7.1. Ambalajın imhası Ambalaj malzemeleri çocuklar için tehlikelidir. Ambalaj malzemelerini çocukların ulaşamayacağı bir yerde saklayın. Ürünün ambalajı, geri dönüşümlü malzemelerden üretilmiştir. Atık talimatlarına uygun bir şekilde tasnif ederek çöpe atın. Normal ev çöpüyle birlikte atmayın. 2.7.2. Sonragerçekleştirilecek nakliye •... -
Page 53: Ürün Hakkinda
3. ÜRÜN HAKKINDA: 3.1. Genel görünüm Küçük Bek Orta Bek Büyük Bek Wok / Mini wok Bek Küçük Bek Düğmesi Orta Bek Düğmesi Büyük Bek Düğmesi Wok /Mini wok Bek Düğmesi Izgara Ocak Üst Tabla... -
Page 54: Sarfiyat Değerleri
3.2. Sarfiyat Değerleri Firma, ürünün kalitesini geliştirmek için önceden bildirimde bulunmadan teknik özelliklerde değişiklik yapabilir. Kılavuzda yer alan resimler şematiktir ve ürününüzle tıpatıp aynı olmayabilir. Ürün üzerindeki işaretlerde veya ürünle birlikte verilen diğer basılı belgelerde belirtilen değerler, yürürlükteki standartlar uyarınca laboratuvar koşulları... -
Page 55: Ocağin Kullanimi
OCAĞIN KULLANIMI 4.1. İlk kullanım İnox yüzeyde bulunan koruyucu filmi kaldırdıktan sonra kullanmaya başlayınız 4.2. İlk temizleme Bazı deterjanlar veya temizlik maddeleri yüzeye zarar verebilirler. 1. Bütün ambalaj malzemelerini çıkarın. 2. Ürün yüzeyini nemli bir bezle veya süngerle silin ve bir kuru bezle silerek kurulayın. -
Page 56: Gaz Kesme Güvenlik Aparatı
4.4. Gaz kesme güvenlik aparatı Termal aparat güvenlik mekanizmasını etkinleştirir ve sıvı taşması durumunda üst brülörlerin sönmesi durumunda gazı derhal keser. 1: Gazlı ocak düğmesinin üzerine bastırarak saat dönüş yönünün tersine çeviriniz ve yüksek alev konumuna alınız. 2: Ocağınızın özelliğine göre çakmağınızı ateşleyin. 3: Yanma gerçekleştikten sonra düğmeyi 3-5 saniye daha basılı... -
Page 57: Kontrol Panelinin Temizlenmesi
• Temizlik işleminden sonra kalan sıvıları tamamen sildiğinizden ve pişirme sırasında etrafa sıçrayan yemekleri hemen temizlediğinizden emin olun. • Paslanmaz veya inox yüzeylerin ve tutamağın temizliğinde asit veya klor içeren temizleme maddeleri kullanmayın. Sabunlu yumuşak bir bez ve sıvı (çizici olmayan) deterjan yardımıyla tek yönde silmeye dikkat ederek temizleyin. -
Page 58: Problem İçi̇n Çözüm Öneri̇leri̇
PROBLEM İÇİN ÇÖZÜM ÖNERİLERİ Ürün çalışmıyor. ✓ Ürünün fişi ( topraklı ) prize takılmamış olabilir. Fişin prize takılı olduğunu kontrol ediniz. ✓ Sigorta bozuk veya atmış olabilir. Sigorta kutusundaki sigortaları kontrol edin. Sigorta atmış ise tekrar devreye alın. Ürün ateşliyor yanmıyor. ✓...
Need help?
Do you have a question about the ORION 533.09.872 and is the answer not in the manual?
Questions and answers