Page 1
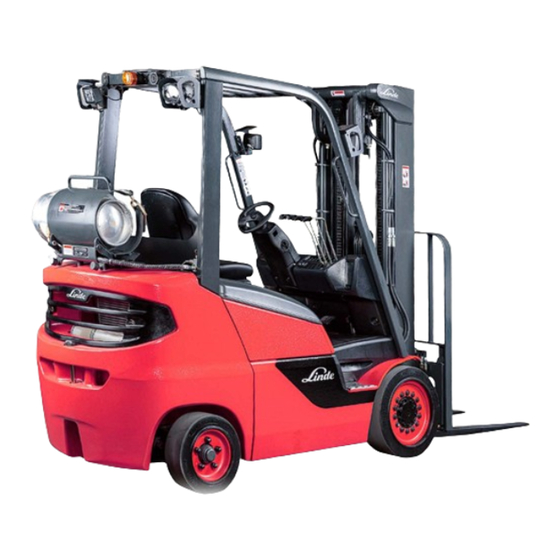
1202 series LP Gas Forklift Truck Operating Instructions H20T/600, H25T, H25T/ 600, H30T, H35T North America 1202 series LP 12028011590 US - 11/2022 - 04...
Page 2
Linde − Your Partner With over 100,000 fork lift trucks and ware- Your local Linde partner can offer you a com- house machines sold annually, Linde is one of plete package from a single source; ranging the world's leading manufacturers of material from expert advice on all aspects of sales and handling equipment.
Page 3
Preface Parts and service See your Linde dealer for genuine Linde parts (the only factory-authorized replacements), factory-trained service personnel and manuals for your equipment. Proposition 65 WARNING This warning is provided pursuant to California Health & Safety Code Sections 25249.5 et. seq.
Operators must under- lowed. stand the meaning of these symbols and mes- Operating Instructions - 1202 series LP 12028011590 US - 11/2022 - 04...
Page 14
The information contained herein must be ob- served, otherwise environmental damage may occur. DANGER Indicates an imminently hazardous situation which if not avoided will result in death or serious injury. Operating Instructions - 1202 series LP 12028011590 US - 11/2022 - 04...
Place a “Do Not Operate” tag on the truck, remove the key and alert your supervisor. The truck may not be placed back into service until necessary repairs are made. F285 07-2017 Operating Instructions - 1202 series LP 12028011590 US - 11/2022 - 04...
Watch for pedestrians around the truck. DANGER Risk of injury! Watch for people in your work area because they may not watch for you, even if you have lights or alarms. Operating Instructions - 1202 series LP 12028011590 US - 11/2022 - 04...
Avoid running over loose objects Travel with the forks near the floor, tilted on the roadway surface. back to cradle any load whenever possible. Never begin travel before the mast is fully Operating Instructions - 1202 series LP 12028011590 US - 11/2022 - 04...
Be sure to main- To avoid hazards associated with a dock, you tain a safe distance from each edge. Before should personally check that the trailer brakes driving the truck over a ramp or bridge plate, Operating Instructions - 1202 series LP 12028011590 US - 11/2022 - 04...
Never travel up or down an incline at an ● ly, brace feet, and lean away from the direction of angle to the incline direction. Always travel impact. straight up or straight down any ramp or incline. Operating Instructions - 1202 series LP 12028011590 US - 11/2022 - 04...
Exhaust gases can cause serious injury or death if not ventilated. Do not continuously operate the truck or allow it to idle in any confined space or any place that is not well ventilated. Operating Instructions - 1202 series LP 12028011590 US - 11/2022 - 04...
Close the hand wheel valve on the tank when other reason. All defective or damaged components LP gas-powered lift trucks are parked over- must be repaired or replaced before using the truck. night or stored for long periods indoors with Operating Instructions - 1202 series LP 12028011590 US - 11/2022 - 04...
If problems with filling occur, call the LP gas ● supplier. Store both full and empty tanks according to ● local fire codes. Always observe the law or regulations in ● your country, state, or province when filling LP gas tanks. Operating Instructions - 1202 series LP 12028011590 US - 11/2022 - 04...
Spilled oil should be removed with oil-bind- ● ing agents at once and disposed of accord- ing to local regulations. If recycling is not possible, dispose of used ● oil according to local regulations. Operating Instructions - 1202 series LP 12028011590 US - 11/2022 - 04...
Page 25
Spilled hydraulic oil should be removed with ● oil-binding agents at once and disposed of according to local regulations. If recycling is not possible, dispose of used ● hydraulic oil according to local regulations. Operating Instructions - 1202 series LP 12028011590 US - 11/2022 - 04...
Never attempt to jump start a vehicle with ● a frozen battery. This can result in an explo- If a battery is charged while installed in the ● sion. truck, the hood or battery access door must Operating Instructions - 1202 series LP 12028011590 US - 11/2022 - 04...
WARNING The engine fan may start and operate at any time, even when the engine is off. Always disconnect the battery before touching or reaching into the fan. Operating Instructions - 1202 series LP 12028011590 US - 11/2022 - 04...
Refer to OSHA 1910.177. Do not mix different sizes or tire types, this ● could affect stability. If the procedures listed above are not fol- ● lowed the result could be death or serious injury. Operating Instructions - 1202 series LP 12028011590 US - 11/2022 - 04...
Parking brake warning decal This decal reminds operators to engage the parking brake lever whenever it is necessary to set the parking brake as it is not automati- cally applied. Operating Instructions - 1202 series LP 12028011590 US - 11/2022 - 04...
TRAINED AND AUTHORIZED OPERATORS ONLY. MISUSE OF THIS TRUCK COULD CAUSE INJURY TO YOURSELF OR OTHERS WORKING WITH YOU. READ INSTRUCTIONS IN OPERATOR’S MANUAL. 0009384608 Operating Instructions - 1202 series LP 12028011590 US - 11/2022 - 04...
This decal is placed in areas where parts move close together during normal truck op- KEEP HANDS CLEAR, SERIOUS INJURY COULD RESULT. eration. The decal warns personnel to keep 0009384603 hands clear of these areas at all times. Operating Instructions - 1202 series LP 12028011590 US - 11/2022 - 04...
If the truck starts to tip over, DO NOT JUMP! Stay in the seat, hold onto the steering wheel tight- ly, brace feet, and lean away from the direction of impact. DON'T JUMP! HOLD ON TIGHT BRACE FEET LEAN AWAY Operating Instructions - 1202 series LP 12028011590 US - 11/2022 - 04...
Hood latch warning decal This decal warns operators to ensure that the hood latch is fully engaged before operating the truck. ENSURE HOOD LATCH IS SECURELY FASTENED BEFORE OPERATING TRUCK. 0009385609 Operating Instructions - 1202 series LP 12028011590 US - 11/2022 - 04...
Safety Operator Warning Decals Flammable LP warning decal This decal lists important safety rules concern- ing removable LP fuel tanks. Operators must follow these rules during operation and while changing or filling tanks. Operating Instructions - 1202 series LP 12028011590 US - 11/2022 - 04...
Mechani- displacement pump. These motors power the cal braking is not normally used during opera- drive wheels. tion. It’s primary use is to function as a parking Operating Instructions - 1202 series LP 12028011590 US - 11/2022 - 04...
Page 37
The dual mast maintains the inner and out- er uprights of the simple mast. The carriage Operating Instructions - 1202 series LP 12028011590 US - 11/2022 - 04...
12 Rotary-push button for operating the pre- trucks only) mium display unit 13 "Back" button for operating the premium display unit 14 "Favorite" button for operating the premi- um display unit Operating Instructions - 1202 series LP 12028011590 US - 11/2022 - 04...
Push button (F3) for optional equipment Push button for work lights, positions 1/2 Push button (F4) for optional equipment Push button for work lights, positions 7/8 Switch for optional equipment Push button for rear LED light stripes Operating Instructions - 1202 series LP 12028011590 US - 11/2022 - 04...
Overview Standard Display Unit Standard Display Unit 10:30 03.03.2015 12345,6 Display_1000b Operating Instructions - 1202 series LP 12028011590 US - 11/2022 - 04...
Page 43
Display not operational Malfunctions and information menu Forwards drive direction (single-pedal oper- Settings menu ation) (green) Favorites display menu Reverse drive direction (single-pedal opera- Status display menu tion) (green) Fuel level display (green/red) Brightness sensor Operating Instructions - 1202 series LP 12028011590 US - 11/2022 - 04...
Overview Menu Structure, Standard Display Unit Menu Structure, Standard Display Unit 10:30 10:30 03.03.2015 03.03.2015 10:30 03.03.2015 12345,6 12345,6 Display_1002c Operating Instructions - 1202 series LP 12028011590 US - 11/2022 - 04...
Page 45
If there are no malfunctions or items of infor- mation, the respective "Error code", "Messag- es" and "Status icons" (displayed only if more than six status icons are active) menu items are hidden. Operating Instructions - 1202 series LP 12028011590 US - 11/2022 - 04...
Overview Premium Display Unit (optional equipment) Premium Display Unit (optional equipment) 1045 0,0 ° km/h 10:30 Display_2000a Operating Instructions - 1202 series LP 12028011590 US - 11/2022 - 04...
Page 47
Warning light for the gas system (LP trucks "Lift mast [tilt angle/load weight (special only) (red) equipment)]" display Display not operational Small time display Display not operational Display not operational Forwards drive direction (single-pedal oper- ation) (green) Operating Instructions - 1202 series LP 12028011590 US - 11/2022 - 04...
Selects the truck settings. System settings menu Selects the system settings. Malfunctions and infor- Selects malfunctions and information. mation menu Time/date Standard display unit: time and date display. Time/date Premium display unit: time and date display. Operating Instructions - 1202 series LP 12028011590 US - 11/2022 - 04...
Page 52
Can be reset in the "Settings" menu or using the diag- nostic program. Daily trip odometer Displays the distance travelled per day. Total mileage odometer Displays the total distance travelled. Displays the engine coolant temperature and hydraulic Temperatures oil temperature. Operating Instructions - 1202 series LP 12028011590 US - 11/2022 - 04...
Page 53
Lift height Displays the lift height (optional equipment). Lift limits Selects the lift limits (optional equipment). Lowering limit Selects the lowering limit (optional equipment). Push button assign- Displays/selects the push button assignment. ment Operating Instructions - 1202 series LP 12028011590 US - 11/2022 - 04...
Page 54
Front view camera Displays the front view camera. FRONT Fork arms camera Displays the fork arms camera. FORK2 Unlock Selects Unlock Lock Selects Lock Replace Selects Replace. Remove Selects Remove. Fullscreen Selects Fullscreen. Operating Instructions - 1202 series LP 12028011590 US - 11/2022 - 04...
Page 55
Date / time hour format. ● Clock display: am = morning/pm = afternoon. Brightness Adjusts the brightness of the display. Reset trip odometer Reset the daily trip odometer. Reset consumption Resets the average consumption. average Operating Instructions - 1202 series LP 12028011590 US - 11/2022 - 04...
Page 56
Configures the freely programmable push buttons on Edit button assignment the armrest console and the overhead console. A★ Linde push button Configures the functions that can be assigned via the configuration push button. Operating Instructions - 1202 series LP 12028011590 US - 11/2022 - 04...
Page 57
Display additional sta- Standard display unit: tus icons Displayed only if more than six status icons are active. Contact address au- Displays the contact address of the authorized dealer. thorized dealer Operating Instructions - 1202 series LP 12028011590 US - 11/2022 - 04...
0009384611 WARNING The expansion tank is under pressure! Risk of scalding due to hot coolant. Unscrew the filler cap slowly and only if the expansion tank is not hot. 0009385648 1202 05222020-01 rv02 Operating Instructions - 1202 series LP 12028011590 US - 11/2022 - 04...
(MAX and MIN) for the battery umns A, B, and D. in pounds and kilograms. BACK TILT – shows the maximum an- gle that the mast can be tilted back. Operating Instructions - 1202 series LP 12028011590 US - 11/2022 - 04...
Overview Definition of directions Definition of directions Forwards Right Backwards Left Directions as seen from the driving position; the load is at the front. 6210_001-031 Operating Instructions - 1202 series LP 12028011590 US - 11/2022 - 04...
The truck can then be operated at full speed immediately upon being placed in service. However, during the first 50 operating hours, avoid subjecting the engine or hydraulic sys- tem to high continuous loads. Operating Instructions - 1202 series LP 12028011590 US - 11/2022 - 04...
In this case, performing a reset will allow initialization to oc- cur. See Troubleshooting the LP Level Display System in section 5. Operating Instructions - 1202 series LP 12028011590 US - 11/2022 - 04...
To ensure the fuel line is emptied, always return to the seat and remain there until the engines stops. This will ensure the engine stops from fuel starvation instead of normal time-out. Operating Instructions - 1202 series LP 12028011590 US - 11/2022 - 04...
Page 67
Position the new LP gas tank so that the centering pin (7) fits into the slot (6) in the tank rim. This ensures that gas is always drawn from the liquid phase portion in the tank, thereby avoiding malfunction. Operating Instructions - 1202 series LP 12028011590 US - 11/2022 - 04...
Page 68
If obvious leaking is heard or otherwise detected, close the valve im- mediately and do not open it again until the problem is corrected. Check for leaks with leak spray and a gas detector. Operating Instructions - 1202 series LP 12028011590 US - 11/2022 - 04...
LP tank must be changed in the next 5–25 minutes. If the illuminated field (6) lights up completely red, the LP tank is empty. The symbol (4) will 10:30 flash at this point. 1202 05242022-01 Operating Instructions - 1202 series LP 12028011590 US - 11/2022 - 04...
(4). Adjust the setting for the driver's weight as necessary. Pull out the lever (3). d12020011a Move the lever to set the driver's weight for the suspension. Operating Instructions - 1202 series LP 12028011590 US - 11/2022 - 04...
Page 71
Seat Heating (optional equipment) Push the switch (6) upwards to activate the seat heater. Push the switch (6) downwards to deacti- vate the seat heater. NOTE The maximum temperature is predefined. d12020012a Operating Instructions - 1202 series LP 12028011590 US - 11/2022 - 04...
Release the lever (2). Seat Suspension Adjustment Seat suspension is automatically adjusted to the driver's weight whenever the electrical system is switched on and the seat is occu- pied. Operating Instructions - 1202 series LP 12028011590 US - 11/2022 - 04...
Page 73
(See below.) Push the switch (8) upwards to activate the seat heater. Push the switch (8) downwards to deacti- vate the seat heater. NOTE The maximum temperature is predefined. Operating Instructions - 1202 series LP 12028011590 US - 11/2022 - 04...
Page 74
Push the switch (10) downwards to activate the seat cooling. Push the switch (10) to the center position to deactivate the seat cooling. d12020015a NOTE The maximum temperature is predefined. Operating Instructions - 1202 series LP 12028011590 US - 11/2022 - 04...
Move the armrest console (2) up- wards/downwards and forwards/backwards until the arm rest pad (3) is comfortably positioned and the hydraulic control levers can be easily reached. Tighten the clamping screw (1). 1202 08102020-01 Operating Instructions - 1202 series LP 12028011590 US - 11/2022 - 04...
(driver seated) and the electrical system switched on before the seat belt is fastened. Otherwise the truck will be restricted to the programmed speed. Operating Instructions - 1202 series LP 12028011590 US - 11/2022 - 04...
Page 77
To free the belt, pull it strenuously until slight movement is detected, then release it slowly. This should unlock the belt and allow it to be withdrawn normally from the retractor housing. Operating Instructions - 1202 series LP 12028011590 US - 11/2022 - 04...
The swivel mechanism is unlocked and allows the seat to be rotated to the right. Allow the locking bolt to snap audibly into place. Repeat the above procedure to return the seat to the straight-ahead position. Operating Instructions - 1202 series LP 12028011590 US - 11/2022 - 04...
If the truck is equipped with the option- al height adjustment, pull upward or push downward axially on the steering wheel until the desired height is reached. Tighten the locking knob by turning it clock- wise. Operating Instructions - 1202 series LP 12028011590 US - 11/2022 - 04...
03.03.2015 the following procedure. 1045,0 NOTE The display saves the last displayed view and displays this again after the electrical system has been switched back on. Display_1004b Operating Instructions - 1202 series LP 12028011590 US - 11/2022 - 04...
Page 81
30 seconds. The relevant text message can be displayed via the "Notifications" menu item in the Mal- functions and information menu (11). Operating Instructions - 1202 series LP 12028011590 US - 11/2022 - 04...
● display (marked in red) 1045,0 Confirm entry ● Confirm the message ● NOTE Button tones are deactivated as default in the factory settings. They can be activated using the diagnostic program. Display_1007a Operating Instructions - 1202 series LP 12028011590 US - 11/2022 - 04...
Deviations may occur due to uneven ground, use of the truck on slopes, deflection in the mast and fork arms caused by heavy loads, tire wear or tire deflection. Operating Instructions - 1202 series LP 12028011590 US - 11/2022 - 04...
tween different options (if an update is available) or "Back" (cancel the process). Push the button to confirm your selec- tion. Push the back button Display_1138 Operating Instructions - 1202 series LP 12028011590 US - 11/2022 - 04...
The "Language" symbol appears at the bottom left of the display. Display_1139 Use the or buttons to select the de- sired language. Press the button to confirm. Push the back button Display_1140 Operating Instructions - 1202 series LP 12028011590 US - 11/2022 - 04...
sired units. Press the button to confirm. Push the back button NOTE A custom combination of units can be speci- fied via the diagnostic program. Display_1142 Operating Instructions - 1202 series LP 12028011590 US - 11/2022 - 04...
The "Date format" symbol appears at the bot- tom left of the display. Display_1143 Use the buttons to select the de- sired date and hour format. Press the button to confirm. Push the back button Display_1144 Operating Instructions - 1202 series LP 12028011590 US - 11/2022 - 04...
Press the button to confirm. 12.02.2015 Push the back button NOTE To toggle between the year, month and day, press the button. Display_1146 Operating Instructions - 1202 series LP 12028011590 US - 11/2022 - 04...
Use the buttons to select the de- sired minutes. Press the button to confirm. 02:30 Push the back button NOTE To toggle between minutes and hours, press button. Display_1148 Operating Instructions - 1202 series LP 12028011590 US - 11/2022 - 04...
This means that the display remains at a level of brightness comfortable for the human eye even under pronounced changes in lighting (e.g. when driving into the hall). Display_1150 Operating Instructions - 1202 series LP 12028011590 US - 11/2022 - 04...
Display_1151 Use the buttons to choose between "Reset" or "Back" (cancel the process). Press the button to confirm your selec- tion. Push the back button Display_1152 Operating Instructions - 1202 series LP 12028011590 US - 11/2022 - 04...
Push the back button Display_1025 Variant 2 Use the buttons to choose between "Reset" or "Back" (cancel the process). Press the button to confirm your selec- tion. Push the back button Display_1154 Operating Instructions - 1202 series LP 12028011590 US - 11/2022 - 04...
Push the back button NOTE The "factory settings" are: Display_1156 Units: kg | km/h | km ● Date format: dd/mm/yyyy/24h ● Language: German ● Brightness: 4 ● Operating Instructions - 1202 series LP 12028011590 US - 11/2022 - 04...
(HW) of the display unit (3) Serial number of the display unit (4) ● Serial number (5) ● Licencing (6) ● To finish, push the button. Push the back button Display_1158 Operating Instructions - 1202 series LP 12028011590 US - 11/2022 - 04...
tween different options or "Back" (cancel the process). Push the button to confirm your selec- tion. Push the back button NOTE To deactivate wireless access, confirm the corresponding selection. Display_1160 Operating Instructions - 1202 series LP 12028011590 US - 11/2022 - 04...
Push the back button For more information about this process, refer to the section entitled "Cleaning the radiator and checking the radiator for leak tightness". Display_1162 Operating Instructions - 1202 series LP 12028011590 US - 11/2022 - 04...
"Driving dynamics". Press the button to confirm your selec- tion. Push the back button Display_1165 NOTE Adjusting the driving dynamics can be deacti- vated or activated via the diagnostic program. Operating Instructions - 1202 series LP 12028011590 US - 11/2022 - 04...
"Off" or "On". Push the button to confirm your selec- tion. Push the back button For more information about this process, refer to the section entitled "Load push operation and shovel operation". Display_1168 Operating Instructions - 1202 series LP 12028011590 US - 11/2022 - 04...
(2) and reverse travel (3) is displayed here. NOTE The "Speed limit" is set using the diagnostic program. To finish, press the button. Push the back button Display_1171 Operating Instructions - 1202 series LP 12028011590 US - 11/2022 - 04...
Display_1173 Use the and buttons to select the de- sired function. Press the button to confirm your selec- tion. Push the back button Display_1174 Operating Instructions - 1202 series LP 12028011590 US - 11/2022 - 04...
Not all of the configuration options can be se- lected, depending on the function. Display_1177 Press the button to confirm the required configuration. Use the buttons to select the sec- ond required configuration. Operating Instructions - 1202 series LP 12028011590 US - 11/2022 - 04...
Page 103
Operation Display Unit Press the button to confirm the second required configuration. Press the back button For more information, refer to the section enti- tled "A★ button". Operating Instructions - 1202 series LP 12028011590 US - 11/2022 - 04...
Display_1179 Start the engine. Move the lift mast to a vertical position. Select the corresponding option to start the calibration procedure. NOTE The value for calibration is limited to ± 2°. Operating Instructions - 1202 series LP 12028011590 US - 11/2022 - 04...
Page 105
Operation Display Unit After calibration has been completed, the message "Calibration successful" (4) appears. NOTE If calibration was not successful, repeat. Push the back button Display_1180 Operating Instructions - 1202 series LP 12028011590 US - 11/2022 - 04...
Use the buttons to choose be- tween "Set" or "Back" (cancel the process). 0,15 Push the button to confirm your selec- tion. -1,0 ° Push the back button 0.00 Display_1183 Operating Instructions - 1202 series LP 12028011590 US - 11/2022 - 04...
"Red" means: critical malfunction or infor- ● mation "+" on the symbol (7) means: multiple mal- ● functions or items of information NOTE Invalid values or error values are displayed as "--". Display_1058a Operating Instructions - 1202 series LP 12028011590 US - 11/2022 - 04...
NOTE 10:30 The display saves the last displayed view and displays this again after the electrical system has been switched back on. Display_2004 Operating Instructions - 1202 series LP 12028011590 US - 11/2022 - 04...
Page 109
30 seconds. The relevant text message can be displayed via the "Notifications" menu item in the Mal- functions and information menu. Operating Instructions - 1202 series LP 12028011590 US - 11/2022 - 04...
Press and hold down the "Back" button to per- form the following action: Variant 1: Jump to the first position in the ● main menu Variant 2: Jump to the displays ● Operating Instructions - 1202 series LP 12028011590 US - 11/2022 - 04...
Page 111
Add the selected display, function or cam- ● era (special equipment) as a favorite in the display NOTE Button tones are deactivated by default in the factory settings. They can be activated using the diagnostic program. 1202 02172022-02 Operating Instructions - 1202 series LP 12028011590 US - 11/2022 - 04...
Select display (1) by turning the rotary-push button 10:30 Press the button. The context menu (2) for the favorites is opened. Press the rotary-push button to confirm Display_2006 the "Lock" selection (3). Operating Instructions - 1202 series LP 12028011590 US - 11/2022 - 04...
Page 113
Press the button 10:30 The context menu (2) for the favorites is opened. Turn the rotary-push button to the rel- evant position and press it to confirm the Display_2008 "Replace" selection (5). Operating Instructions - 1202 series LP 12028011590 US - 11/2022 - 04...
Page 114
"Temperatures" (8). The display (1) is replaced according to the 80 ºC selection. A confirmation message appears on 60 ºC the display unit. Display_2010 Operating Instructions - 1202 series LP 12028011590 US - 11/2022 - 04...
Page 115
Two of the same fa- vorites cannot be displayed. Only one favorite can be saved to the "Camera Image" menu area if no other favorite (e.g. "Rear view cam- era") has been saved. Operating Instructions - 1202 series LP 12028011590 US - 11/2022 - 04...
Page 116
"Save" selection (11). According to your selection, the display is saved as a favorite. A confirmation message appears on the display unit. To return to the displays, press the but- ton twice. Display_2012 Operating Instructions - 1202 series LP 12028011590 US - 11/2022 - 04...
Page 117
Display_2013a The first menu level "System settings" (12) is opened. Turn the rotary-push button to the rel- 1045 evant position and press it to confirm the "Edit Favorites" selection (13). Display_2014b Operating Instructions - 1202 series LP 12028011590 US - 11/2022 - 04...
Page 118
Turn the rotary-push button according to the desired sequence. Press the rotary-push button to confirm 1045 the desired sequence. To return to the displays, press the but- ton three times. Display_2016 Operating Instructions - 1202 series LP 12028011590 US - 11/2022 - 04...
Page 119
"Rear view camera" (15). 1045 Briefly press the button. 0,0 ° The context menu (16) for the favorites is opened. REAR Press the rotary-push button to confirm the "Fullscreen" selection (17). 10:30 Display_2018 Operating Instructions - 1202 series LP 12028011590 US - 11/2022 - 04...
Page 120
Activating the camera fullscreen. Turn the rotary-push button according to the desired display, e.g. from "Rear view camera" to "Auto mode 1". The "Auto mode 1" fullscreen appears on the display. Operating Instructions - 1202 series LP 12028011590 US - 11/2022 - 04...
The first menu level "Display" (2) is opened. Turn the rotary-push button according to the desired display, e.g. "Temperatures" 1045 (3). Press the rotary-push button to confirm the "Temperatures" (3) selection. 80 ºC 60 ºC Display_2021 Operating Instructions - 1202 series LP 12028011590 US - 11/2022 - 04...
Page 122
Deviations may occur due to uneven ground, use of the truck on slopes, bends in the lift mast and fork arms caused by heavy loads, tire wear or tire deflection. Operating Instructions - 1202 series LP 12028011590 US - 11/2022 - 04...
The first menu level "Functions" (2) is opened. Turn the rotary-push button according to the desired display, e.g. "Push button as- 1045 signment" (3). Press the rotary-push button to confirm the "Push button assignment" selection (3). Display_2024 Operating Instructions - 1202 series LP 12028011590 US - 11/2022 - 04...
Page 124
● Lift height preselector − multiple ● Lift limits − multiple ● Lowering limit − variable ● Push button assignment (Editing the as- ● signment is done in the Truck Settings menu.) Display_2025 Operating Instructions - 1202 series LP 12028011590 US - 11/2022 - 04...
The main menu (1) is opened. Turn the rotary-push button to the rel- evant position and press it to confirm the 1045 "Camera image" selection (2). AUTO1 AUTO2 REAR FORK1 Display_2026 Operating Instructions - 1202 series LP 12028011590 US - 11/2022 - 04...
Page 126
In "Auto mode 1", the cameras are switched ● on depending on the direction of travel. In "Auto mode 2", the cameras are switched ● on depending on the direction of travel and the lift height. Operating Instructions - 1202 series LP 12028011590 US - 11/2022 - 04...
Turn the rotary-push button to the rel- evant position and press it to confirm the "Truck settings" selection (2). Display_2144 The first menu level "Truck settings" (2) is opened. 1045 Display_2145 Operating Instructions - 1202 series LP 12028011590 US - 11/2022 - 04...
20,0 km/h evant position and press it to confirm the "ON" or "OFF" selection. For more information about this process, refer 20,0 km/h to the section entitled "Reducing the driving speed". Display_2147 Operating Instructions - 1202 series LP 12028011590 US - 11/2022 - 04...
The second menu level "Speed limit forward" (1) is opened. 1045 Turn the rotary-push button to the rele- vant position and press it to confirm the de- sired driving speed. 15,0 km/h km/h Display_2149 Operating Instructions - 1202 series LP 12028011590 US - 11/2022 - 04...
The second menu level "Speed limit back- ward" (1) is opened. 1045 Turn the rotary-push button to the rele- vant position and press it to confirm the de- sired driving speed. 15,0 km/h km/h Display_2151 Operating Instructions - 1202 series LP 12028011590 US - 11/2022 - 04...
Turn the rotary-push button to the rele- vant position and press it to confirm the de- sired driving dynamics. NOTE Display_2153 Adjusting the driving dynamics can be disa- bled or enabled via the diagnostic program. Operating Instructions - 1202 series LP 12028011590 US - 11/2022 - 04...
"Back" selection (cancel the process) or "Activate" selection. For more information about this process, refer to the section entitled "Load push/shovel oper- ation". Display_2155 Operating Instructions - 1202 series LP 12028011590 US - 11/2022 - 04...
Select the corresponding option to start the calibration procedure. NOTE The value for calibration is limited to ± 2°. After calibration has been completed, the "Calibration successful" message appears. NOTE If calibration was not successful, repeat the procedure. Operating Instructions - 1202 series LP 12028011590 US - 11/2022 - 04...
(1) is opened. 1045 Turn the rotary-push button to the rel- evant position and press it to confirm the 0,15 m "Back" selection (cancel the process) or the -1,0 ° "Set" selection. Display_2161 Operating Instructions - 1202 series LP 12028011590 US - 11/2022 - 04...
"Back" selection (cancel the process) or "Activate" selection. For more information about this process, refer to the section entitled "Cleaning the radiator and checking the radiator for leak tightness". Display_2164 Operating Instructions - 1202 series LP 12028011590 US - 11/2022 - 04...
opened. 1045 Turn the rotary-push button to the rel- evant position and press it to confirm the 0,10 m "Back" selection (cancel the process) or the -1,0 ° "Set" selection. Display_2172 Operating Instructions - 1202 series LP 12028011590 US - 11/2022 - 04...
Display_2177 The third menu level (2) is opened. 1045 Turn the rotary-push button to the rele- vant position and press it to confirm the de- sired selection. Display_2178 Operating Instructions - 1202 series LP 12028011590 US - 11/2022 - 04...
Function deactivated (4) ● Automatic mode (5) ● Display_2183 NOTE Not all of the configuration options can be se- lected, depending on the function. Press the button to confirm the selection and configuration. Operating Instructions - 1202 series LP 12028011590 US - 11/2022 - 04...
AUTO AUTO For more information, refer to the section enti- tled "A★ button". Display_2184 Exiting the Truck Settings Menu To return to the displays, press the but- ton twice. Operating Instructions - 1202 series LP 12028011590 US - 11/2022 - 04...
Turn the rotary-push button to the rel- evant position and press it to confirm the "System settings" selection (2). Display_2185 The first menu level "System settings" (2) is opened. 1045 Display_2186 Operating Instructions - 1202 series LP 12028011590 US - 11/2022 - 04...
Turn the rotary-push button to the rel- evant position and press it to confirm the "Back" selection (cancel the process) or to choose between different options (if an up- date is available). Display_2188 Operating Instructions - 1202 series LP 12028011590 US - 11/2022 - 04...
evant position and press it to confirm the 1045 "Edit Favorites" selection (1). See the section entitled "Displaying favorites" and the subsection entitled "Editing favorites" for details of how to proceed. Display_2189 Operating Instructions - 1202 series LP 12028011590 US - 11/2022 - 04...
"Language" selection (1). Display_2190 The second menu level "Language" (1) is opened. 1045 Turn the rotary-push button to the rele- vant position and press it to confirm the de- sired language. Display_2191 Operating Instructions - 1202 series LP 12028011590 US - 11/2022 - 04...
"Units" selection (1). Display_2192 The second menu level "Units" (1) is opened. 1045 Turn the rotary-push button to the rele- vant position and press it to confirm the de- sired units. Display_2193 Operating Instructions - 1202 series LP 12028011590 US - 11/2022 - 04...
10:30 Sonntag :00 PM NOTE To jump between seconds, minutes, hours, 12/24 hour format, day and month/year, press button or the rotary-push button Display_2195 Operating Instructions - 1202 series LP 12028011590 US - 11/2022 - 04...
"Brightness" selection (1). Display_2196 The second menu level "Brightness" (1) is opened. 1045 Turn the rotary-push button to the rele- vant position and press it to confirm the de- sired brightness. Display_2197 Operating Instructions - 1202 series LP 12028011590 US - 11/2022 - 04...
(1) is opened. 1045 Turn the rotary-push button to the rel- evant position and press it to confirm the "Back" selection (cancel the process) or the 12,6 "Reset consumption" selection. Display_2199 Operating Instructions - 1202 series LP 12028011590 US - 11/2022 - 04...
average" (1) is opened. 1045 Turn the rotary-push button to the rel- evant position and press it to confirm the "Back" selection (cancel the process) or the "Reset consumption" selection. Display_2201 Operating Instructions - 1202 series LP 12028011590 US - 11/2022 - 04...
"Back" selection (cancel the process) or the "Reset consumption" selection. NOTE The "factory settings" are: Units: kg | km/h | km ● Date format: dd/mm/yyyy/24h ● Display_2203 Language: German ● Brightness: 4 ● Operating Instructions - 1202 series LP 12028011590 US - 11/2022 - 04...
The "System information" menu item displays the following information: Part number of the display unit ● Serial number ● Hardware version (HW)/user interface ver- ● sion (HMI)/software version (SW) of the dis- play unit Display_2205 Operating Instructions - 1202 series LP 12028011590 US - 11/2022 - 04...
Turn the rotary-push button to the rel- evant position and press it to confirm the "Back" selection (cancel the process) or to choose between different options. NOTE To deactivate wireless access, confirm the corresponding selection. Display_2207 Operating Instructions - 1202 series LP 12028011590 US - 11/2022 - 04...
Operation Premium Display Unit (optional equipment) Exiting the System Settings Menu To return to the displays, press the but- ton twice. Operating Instructions - 1202 series LP 12028011590 US - 11/2022 - 04...
NOTE If several messages are present, you can scroll through them by turning the rotary-push button To return to the displays, push the but- ton two or three times. Operating Instructions - 1202 series LP 12028011590 US - 11/2022 - 04...
Press the rotary-push button Display_2113 Select the required function by turning the rotary-push button Example: Reducing the driving speed (2). 1045 Press the rotary-push button 0,0 ° 10:30 Display_2114 Operating Instructions - 1202 series LP 12028011590 US - 11/2022 - 04...
Page 155
The LED (3) goes out and the symbol (4) is no longer displayed. In the example: The "Reduc- ing the driving speed" function is switched off. To return to the displays, press the but- ton. Operating Instructions - 1202 series LP 12028011590 US - 11/2022 - 04...
Insert the ignition key (1) into the ignition switch and turn it clockwise. For trucks equipped with access control systems, a knob will be present in position (1). In this case, turn the knob clockwise and swipe the Operating Instructions - 1202 series LP 12028011590 US - 11/2022 - 04...
Page 157
The engine will quickly reach its operating temperature. If the engine fails to start Release the Start/Stop button and wait for at least one minute. Then press the button again. Operating Instructions - 1202 series LP 12028011590 US - 11/2022 - 04...
Page 158
Release the drive pedal. On single pedal trucks only, place the direc- tional lever (A) in the neutral position. Apply the parking brake. Press the Start/Stop button (2). Operating Instructions - 1202 series LP 12028011590 US - 11/2022 - 04...
Page 159
In this case, the driver should close the manual shut-off valve on the LP tank immediately and wait until the engine stops. The source of the fault must be determined and corrected before operating the truck. Operating Instructions - 1202 series LP 12028011590 US - 11/2022 - 04...
The system will change from stand-by mode to log-in mode The two LED’s (2) and (3) will flash green alternately to confirm this. Pass the card or fob over the face of the unit. 1202 08092020-03 Operating Instructions - 1202 series LP 12028011590 US - 11/2022 - 04...
Page 161
Both LED’s will stop flashing and remain green continuously. The engine may now be started. Continue the engine starting process ac- cording to the procedure in the Engine Starting and Shut-down section. Operating Instructions - 1202 series LP 12028011590 US - 11/2022 - 04...
Page 162
(1) is returned to the off position and a time delay expires. Log-out will occur automat- ically after the time delay. This also applies to restarting after intentional shutdown. Operating Instructions - 1202 series LP 12028011590 US - 11/2022 - 04...
If this is done, the drive system will brake the truck to a standstill at the same rate as above, and then acceler- ate in the new direction. Operating Instructions - 1202 series LP 12028011590 US - 11/2022 - 04...
Page 164
Shut down the engine and apply the parking brake if making a longer stop. Operating Instructions - 1202 series LP 12028011590 US - 11/2022 - 04...
Page 165
Release the parking brake. Slowly release the brake pedal half way. Use the other foot to actuate the appropri- ate drive pedal (1) or (3). Release the brake pedal completely. Operating Instructions - 1202 series LP 12028011590 US - 11/2022 - 04...
NOTE Quick flooring of the accelerator pedal will have no effect as the maximum acceleration rate is controlled automatically. If the pedal is released, the hydrostatic drive system will automatically slow the truck. Operating Instructions - 1202 series LP 12028011590 US - 11/2022 - 04...
Page 167
Easing off the drive pedal will give responsive, controlled braking. Com- plete release of the drive pedal will pro- vide maximum hydrostatic braking. If quick- er stopping is required (as in emergencies), depress the brake pedal (2). Operating Instructions - 1202 series LP 12028011590 US - 11/2022 - 04...
Page 168
(2) all the way down. Release the parking brake. Slowly release the brake pedal half way. Use the left foot to actuate the drive pedal (3). Release the brake pedal completely. Operating Instructions - 1202 series LP 12028011590 US - 11/2022 - 04...
The reduction in the driving speed is disa- bled if the lift height falls below the preset lift Display_1076 height. The symbol (1) is no longer displayed. The reduction in the driving speed is switched off. Operating Instructions - 1202 series LP 12028011590 US - 11/2022 - 04...
Page 170
(3). Switching on Briefly push the push button (3). The LED (4) illuminates in green. The reduc- tion in the driving speed is switched on. Operating Instructions - 1202 series LP 12028011590 US - 11/2022 - 04...
Page 171
Reflections on walls may also lead to a reduc- tion in the driving speed. If the distance between an object and the ra- dar sensor is less than 1 m, the function of the Operating Instructions - 1202 series LP 12028011590 US - 11/2022 - 04...
Page 172
SIGNAL POWER the signal strength of the radar beam. If no object is detected by the radar sensor, the yellow "Output" LEDs (6) and (9) light up. OUTPUT 2 OUTPUT 1 SIGNAL POWER d12020092 Operating Instructions - 1202 series LP 12028011590 US - 11/2022 - 04...
Page 173
Either "On" (11) or "Off" (12) can be select- Select "On" (11). 1045 The speed limit is switched on. 20,0 km/h 20,0 km/h Display_2089 The symbol (1) is displayed in the status bar on the display unit. Display_1076 Operating Instructions - 1202 series LP 12028011590 US - 11/2022 - 04...
Page 174
1045 Either "On" (11) or "Off" (12) can be select- 20,0 km/h Select "Off" (12). The symbol (1) is no longer displayed. The 20,0 km/h speed limit is switched off. Display_2090 Operating Instructions - 1202 series LP 12028011590 US - 11/2022 - 04...
Turn the steering wheel clockwise to turn the truck to the right. Turn the steering wheel counter-clockwise to turn the truck to the left. d12020035 Operating Instructions - 1202 series LP 12028011590 US - 11/2022 - 04...
Such hard brak- ing should only be necessary in an emergen- cy. When the brake pedal is pressed all the way down, a mechanical linkage actuates the brake valve so that all hydraulic holding Operating Instructions - 1202 series LP 12028011590 US - 11/2022 - 04...
Page 177
(1) to unload the release button (2). Press the release button and allow the han- dle to return to the released (vertical) posi- tion. Verify that the "P" symbol (3) in the display unit disappears. d12020037 Display_1060 Operating Instructions - 1202 series LP 12028011590 US - 11/2022 - 04...
Page 178
Shut down the engine and apply the parking brake if making a longer stop. Operating Instructions - 1202 series LP 12028011590 US - 11/2022 - 04...
Single-pedal trucks may have an optional foot- operated horn button (4) on the floor plate. Press any of these horn buttons to sound 1202 08072020-01 the horn. 1202 08142020-01 rv02 Operating Instructions - 1202 series LP 12028011590 US - 11/2022 - 04...
(e.g. sideshifter, clamps etc.). In this case additional actuating levers (3, 4, 5) are provided. Many different attachment types are possi- ble. Note the symbols on the lever decals. Operating Instructions - 1202 series LP 12028011590 US - 11/2022 - 04...
Page 181
Moving the lever forward will then open the at- tachment. If the lever is not moved to open the attachment within this time, it will lock again. 1202 08062020-14 Operating Instructions - 1202 series LP 12028011590 US - 11/2022 - 04...
To prevent the truck from tipping over, the overload protection intervenes in the lifting movement if the load is too great. The lifting movement is reduced or stopped regardless of the lift height and tilt angle. Operating Instructions - 1202 series LP 12028011590 US - 11/2022 - 04...
Page 183
(between 1.80 m and 2.20 m). For duplex or triplex lift masts, the lifting and tilting limitation function is active above the first stage of the lift mast. Operating Instructions - 1202 series LP 12028011590 US - 11/2022 - 04...
Page 184
Display_1068 Leave the critical area by slowly tilting back- wards and lowering the load. The warning light for the assistance system (1) goes out. Move the joystick to the neutral position. Operating Instructions - 1202 series LP 12028011590 US - 11/2022 - 04...
Page 185
NOTE If the function fails, the driving speed is per- manently limited to the lowest value. Contact your service partner. Malfunctions Possible malfunctions are described in the "Malfunction displays" section. Operating Instructions - 1202 series LP 12028011590 US - 11/2022 - 04...
WARNING Forks must be retained at the outer edges of the fork carriage. On trucks without a load backrest, separate retainers (3) must be installed on both sides. Operating Instructions - 1202 series LP 12028011590 US - 11/2022 - 04...
It is also possible to configure the truck so that this feature is engaged, activated, and switch- ed off via successive pressing of a dedicated button switch in the overhead switch panel. Operating Instructions - 1202 series LP 12028011590 US - 11/2022 - 04...
Press and hold the A4 button. The LED will turn yellow. Hold the button until an audi- ble tone is heard and the message "Value saved" appears in the display. The angle of tilt is now stored in the system memory. Operating Instructions - 1202 series LP 12028011590 US - 11/2022 - 04...
Page 189
A4 button. Once the reference angle is reached, the system will deactivate. The A4 button must be pressed again for any subse- quent use. Operating Instructions - 1202 series LP 12028011590 US - 11/2022 - 04...
Page 190
If tilting past the stored reference angle be- comes necessary, press the A4 button to turn the system off. The mast will now tilt through its entire mechanical range. Permanent Use Operating Instructions - 1202 series LP 12028011590 US - 11/2022 - 04...
Page 191
Operation Operation With this mode, the tilt memory system is ac- tive whenever the truck is on. The mast will always stop at the pre-set reference angle during tilting. Operating Instructions - 1202 series LP 12028011590 US - 11/2022 - 04...
Before the measurement, the load must be ● lowered by 4 inches (10 cm). The raised load must be stationary ● NOTE Reliable display of the load weight cannot be guaranteed for light loads of less than 220 lbs (100 kg). Operating Instructions - 1202 series LP 12028011590 US - 11/2022 - 04...
Page 193
The zero value is saved. In addition, the buz- zer sounds. The load weight indicator shows a value of Display_1059a 0 kg NOTE The zero value remains saved even when the truck is switched off and switched back on. Operating Instructions - 1202 series LP 12028011590 US - 11/2022 - 04...
Page 194
The load weight indicator shows a value of 0 kg NOTE 1202 12162021-01 The zero value remains saved even when the truck is switched off and switched back on. 1045 0,0 ° km/h km/h 10:30 Display_2095 Operating Instructions - 1202 series LP 12028011590 US - 11/2022 - 04...
Page 195
The A2 button can also be activated virtually in the display using the rotary knob. Further information regarding the sequence is descri- bed in the section entitled Push buttons in the premium display unit. Operating Instructions - 1202 series LP 12028011590 US - 11/2022 - 04...
The fork wear protection system is a convenience feature only. It does not relieve the operator of the responsibility to ensure fork position is correct for any given task. Always ensure fork position is correct for any given task. Operating Instructions - 1202 series LP 12028011590 US - 11/2022 - 04...
Page 197
The system will then remain off until turned on again with the F2 button. Permanently Active If the truck is programmed with this mode, the carriage cannot be lowered below the level determined by the mast switch. Operating Instructions - 1202 series LP 12028011590 US - 11/2022 - 04...
Repeat the movement several times. To restore hydraulic function, turn the key off and then start the engine normally. Operating Instructions - 1202 series LP 12028011590 US - 11/2022 - 04...
Reconnection Thoroughly clean the couplings and remove the protective caps (4). Pull back the collar (2) and push the fitting onto the plug (3). Secure the protective caps. Operating Instructions - 1202 series LP 12028011590 US - 11/2022 - 04...
The specific lighting affected and the delay period (from 5 to 60 seconds) are chos- en and set through the programming interface. Operating Instructions - 1202 series LP 12028011590 US - 11/2022 - 04...
Page 201
Auto - LED appears yellow; work lights ● Pos 1/2 switch on depending on drive direction 1202 08062020-01 Off - LED off; work lights off ● Pos 3/4 Pos 5/6 Pos 7/8 Pos 1/2 1202 08062020-02 Operating Instructions - 1202 series LP 12028011590 US - 11/2022 - 04...
Page 202
On - LED appears green; light strips are ● switched on 1202 08062020-03 Auto - LED appears yellow; light strips ● switch on depending on drive direction Off - LED off; light strips off ● 1202 08062020-04 Operating Instructions - 1202 series LP 12028011590 US - 11/2022 - 04...
Page 203
On - LED appears green; floor spot light is ● switched on Auto - LED appears yellow; floor spot light ● switches on depending on drive direction Off - LED off; floor spot light is off ● 1202 08062020-06 1202 08062020-07 Operating Instructions - 1202 series LP 12028011590 US - 11/2022 - 04...
Page 204
In this last case, the light will come on when the door is opened and dim when the door is closed. 1202 08062020-08 1202 08062020-09 Operating Instructions - 1202 series LP 12028011590 US - 11/2022 - 04...
Page 205
Switch positions (6) and (7) will engage the left or right turn signal respectively. The turn signal indicator will flash in the display. 1202 08062020-10 Operating Instructions - 1202 series LP 12028011590 US - 11/2022 - 04...
Later version:Pull the lever (3a) backwards. Open the cab door outwards. Closing the right-hand cab door From the outside, close the cab door all the way to the point that the lock engages. 1202 10102022-01 Operating Instructions - 1202 series LP 12028011590 US - 11/2022 - 04...
Page 209
WARNING Risk of injury from glass. Shield eyes when using the emergency hammer. Proceed carefully afterwards to avoid laceration from glass remnants. d12020065a Operating Instructions - 1202 series LP 12028011590 US - 11/2022 - 04...
(5). The LED (6) will appear yellow. The default speed level will au- tomatically be active whenever the system is turned on. Operating Instructions - 1202 series LP 12028011590 US - 11/2022 - 04...
Page 211
(1). The roof glass washer is activated by pressing and holding the button (3). For either system, the washer pump will operate as long as the button is held up to a maximum of 20 seconds. Operating Instructions - 1202 series LP 12028011590 US - 11/2022 - 04...
(not shown) and direct their fins towards the windows. NOTE To prevent a musty odor from developing, run the blower for ten minutes after switching off the air conditioning to dry any water remaining on the evaporator. Operating Instructions - 1202 series LP 12028011590 US - 11/2022 - 04...
A cooling fan (1) for the operator is available as an option. The standard location for the fan is the front right-hand leg of the overhead guard. Use toggle switch (2) to turn the fan on or off. d12020137 Operating Instructions - 1202 series LP 12028011590 US - 11/2022 - 04...
If equipped, the USB socket (2) will be instal- led in the compartment of the armrest console. The following power outputs are protected: Nominal voltage: 5 V ● Current strength: maximum 1.5 A ● d12020111a Operating Instructions - 1202 series LP 12028011590 US - 11/2022 - 04...
Push down on the handle and turn to lock it into position. Reverse the above procedure to uncouple loads from the truck. Operating Instructions - 1202 series LP 12028011590 US - 11/2022 - 04...
(7). NOTE The hood can be opened further if necessary. Before opening the hood further, the armrest console must first be moved all the way down. d12020079a Operating Instructions - 1202 series LP 12028011590 US - 11/2022 - 04...
Page 217
the locking lever (7). Lift the hood to the next engagement posi- tion of the locking lever. NOTE The locking lever (7) will hold the hood open in either position. d12020081a Operating Instructions - 1202 series LP 12028011590 US - 11/2022 - 04...
Page 218
Release the lever. Ensure all personnel are clear of the hood. Press down firmly on the hood until the latch (10) engages the hook (9). d12020082a Operating Instructions - 1202 series LP 12028011590 US - 11/2022 - 04...
Grasp the cutouts (6) and lift the rear edge of the floor plate up. Place the support strap (7) around the knob on the steering wheel. The floor plate may be lifted out completely if necessary. 1202 08142020-02 Operating Instructions - 1202 series LP 12028011590 US - 11/2022 - 04...
After the carriage has lowered to the de- sired position, screw the threaded stud (2) back in clockwise and tighten to 11.1 ft-lb (15 Nm). This must be done or the lift func- tion will not operate. Operating Instructions - 1202 series LP 12028011590 US - 11/2022 - 04...
Move the tilt lever in the desired direction. The tilt function will operate for one second. Repeat this motion as many times as nec- essary until the mast is at the desired angle. Operating Instructions - 1202 series LP 12028011590 US - 11/2022 - 04...
If necessary, remove the forks. Attach towing vehicle (ensure sufficient tractive power and braking force) to the tow- ing pin of the truck using a towing bar. Operating Instructions - 1202 series LP 12028011590 US - 11/2022 - 04...
Page 223
(4). NOTE The brake will remain released for approxi- mately 25 minutes due to leakage in the brake valve. If necessary, the brake must then be released again using the lever (4). Operating Instructions - 1202 series LP 12028011590 US - 11/2022 - 04...
Page 224
Tighten the stud to 15 ft-lbs (20 Nm). After the stud is tightened, run the lock nut down to hold the stud position. Tighten the lock nut to 37 ft-lbs (50 Nm). Operating Instructions - 1202 series LP 12028011590 US - 11/2022 - 04...
Page 225
Always confirm correct operation of the mechanical brake after restoring braking at the brake valve. The truck must not be driven until proper braking ability is confirmed. Operating Instructions - 1202 series LP 12028011590 US - 11/2022 - 04...
For LP trucks, remove the LP tank from the truck. The truck has four slots in the underside of the chassis for use with lashing straps that have hooks at their ends. These slots are used with Operating Instructions - 1202 series LP 12028011590 US - 11/2022 - 04...
Page 227
For trucks with the optional raised driver's compartment, also insert the lashing straps (9) and (10) into the holding fixtures at a right angle to the truck. Operating Instructions - 1202 series LP 12028011590 US - 11/2022 - 04...
Page 228
28 inches and 32 inches (700 mm to 800 mm). Ensure that all lashing straps or tie-downs are tight and securely attached to the trans- port vehicle. Chock the wheels. d12020107a Operating Instructions - 1202 series LP 12028011590 US - 11/2022 - 04...
Page 229
Ensure that the towing pin is fully inserted through both of its bores in the counterweight. Ensure that all lashing straps or tie-downs are tight and securely attached to the trans- port vehicle. Chock the wheels. Operating Instructions - 1202 series LP 12028011590 US - 11/2022 - 04...
Bent or damaged lifting eyes must be re- ● paired or replaced only by an authorised technician. Do not allow the lifting eyes to come into ● contact with aggressive chemicals, acids or their vapours. Operating Instructions - 1202 series LP 12028011590 US - 11/2022 - 04...
Page 231
Do not hoist the truck if problems with a lifting eye are found. Have the lifting eyes repaired or replaced before hoisting the truck. Adjust the lifting gear to the distances be- tween the lifting eyes on the truck. Operating Instructions - 1202 series LP 12028011590 US - 11/2022 - 04...
Page 232
Slowly lift the truck and set it down again. d12020129 Servicing work on the lifting eyes Servicing work every 1000 operating hours but at least every 12 months: Check the lifting eyes on the lift mast for wear. Operating Instructions - 1202 series LP 12028011590 US - 11/2022 - 04...
Page 233
Operation Loading/transportation Check that the lifting eyes on the counter- weight are secure and check for wear. Operating Instructions - 1202 series LP 12028011590 US - 11/2022 - 04...
Page 234
Operation Loading/transportation Operating Instructions - 1202 series LP 12028011590 US - 11/2022 - 04...
This does not the effectiveness of the protective equipment require training as described above. according to established principles for testing forklift trucks. Any evaluation of safety must Operating Instructions - 1202 series LP 12028011590 US - 11/2022 - 04...
Place a collection vessel under the mast. Lift chains on trucks used in the food industry must be lubricated with an oil approved for the Clean lift chains with a paraffin derivative food industry. such as petroleum ether. Operating Instructions - 1202 series LP 12028011590 US - 11/2022 - 04...
The truck must not be operated the maintenance process except for individual main- tenance activities that specifically require otherwise. until such repairs are complete. This list does not cover attachments or other truck modifi- Operating Instructions - 1202 series LP 12028011590 US - 11/2022 - 04...
Place a “Do Not Operate” tag on the truck, remove the key and alert your supervisor. The truck may not be placed back into service until necessary repairs are made. F285 07-2017 Operating Instructions - 1202 series LP 12028011590 US - 11/2022 - 04...
Check the steering axle Check for any debris entangled or wrapped around the steer wheels and remove it. Check the steering cylinder for leakage at its seals and fittings. Operating Instructions - 1202 series LP 12028011590 US - 11/2022 - 04...
Overfilling the engine with oil can cause engine dam- age. Do not overfill the engine with oil. Drain excess en- gine oil if necessary. After adding oil, replace the filler cap and turn to tighten it. Operating Instructions - 1202 series LP 12028011590 US - 11/2022 - 04...
Continue mon- itoring/filling until the level stabilizes at or just below the upper mark with the engine running. Close the hood. Operating Instructions - 1202 series LP 12028011590 US - 11/2022 - 04...
Check especially for long pieces of debris wrapped around the fan shaft and remove if found. Debris around the fan shaft, such as fibers or plastic, can damage the shaft seal and destroy the fan. Operating Instructions - 1202 series LP 12028011590 US - 11/2022 - 04...
Hydraulic oil is flammable. Do not allow hydraulic oil to contact hot engine com- ponents. Use care when adding oil to avoid spilling. Reinstall the dipstick when finished and tighten the breather cap. Operating Instructions - 1202 series LP 12028011590 US - 11/2022 - 04...
Decal locations are given in the Overview section of this manual. Refer to the decal descriptions in the Safety section of this manual if necessary. Any dam- aged or unreadable decals must be replaced. Operating Instructions - 1202 series LP 12028011590 US - 11/2022 - 04...
Check wheel mounting hardware for loose- ness. This is especially important if a wheel has recently been removed and reinstalled for repairs, replacement, or any other reason. Have any loose wheel mounting hardware Operating Instructions - 1202 series LP 12028011590 US - 11/2022 - 04...
The seat belt must be replaced after an accident. For seat belts integrated into the driver's seat, the seat and its fastening must also be checked by trained technicians after an accident. Operating Instructions - 1202 series LP 12028011590 US - 11/2022 - 04...
(operate through complete range of motion) Fuel level ● CAUTION Excessive noise during hydraulic function operation indicates low hydraulic fluid. This condition must be checked and corrected imme- diately to avoid damage to the hydraulic pump. Operating Instructions - 1202 series LP 12028011590 US - 11/2022 - 04...
Intervals given here- in for specific items however must not be ex- ceeded in any case. Your Linde dealer will be able to provide application-specific interval recommendations if required. Inspect V-Ribbed Belt ...
Spray the radiator fins from outside (behind the truck) with a direct water jet until the radiator is clean. Operating Instructions - 1202 series LP 12028011590 US - 11/2022 - 04...
Page 251
"Start" (4). Select "Start" (4). The "Radiator cleaning active" message ap- pears on the display unit. The fan is activated and runs for three minutes at maximum speed. Display_1080a Operating Instructions - 1202 series LP 12028011590 US - 11/2022 - 04...
Page 252
The fan is activated and runs for three minutes at maximum speed. Display_2099 During this time, the symbol (5) is displayed in the status bar on the display unit. Cleaning Procedure Start the fan using the above procedure. Display_1081a Operating Instructions - 1202 series LP 12028011590 US - 11/2022 - 04...
Page 253
Select "Stop" (cancel the process) (10). The "Radiator cleaning cancelled" message appears on the display unit. The symbol (5) is no longer displayed in the status bar. Display_1082a Operating Instructions - 1202 series LP 12028011590 US - 11/2022 - 04...
Page 254
Display_2100 tightness. Replace any damaged hoses and re-tighten the hose clips. Install the rear panelling. Install the side panels. Close the hood. Operating Instructions - 1202 series LP 12028011590 US - 11/2022 - 04...
Squeeze the valve (1) and remove the dust residue. If the valve is damaged, replace it. t12020030a Operating Instructions - 1202 series LP 12028011590 US - 11/2022 - 04...
This will allow more effective penetration of the grease. Lubricate Operator Compart- ment Components Check and lubricate as necessary the follow- ing points in the operator compartment: Operating Instructions - 1202 series LP 12028011590 US - 11/2022 - 04...
Page 257
Maintenance Routine Lubrication and Inspection Driver’s seat guide rails ● Hood hinge bolts ● Windshield wiper bearings (if equipped) ● Cabin door latches and hinges (if equipped) ● Hood latch ● Operating Instructions - 1202 series LP 12028011590 US - 11/2022 - 04...
Remove the filter (2) and clean or replace. Reinstall the filter. t12020036 Maintaining the Air Conditioning The following maintenance work must be car- ried out at the beginning, middle and end of a season: Operating Instructions - 1202 series LP 12028011590 US - 11/2022 - 04...
Page 259
Oth- erwise, the fins will be damaged and impair the air flow. Check the belt tension on the compressor and check the condition of the belt. t12020037 Operating Instructions - 1202 series LP 12028011590 US - 11/2022 - 04...
Measure protrusion of carriage roller (1) rel- ative to inner upright (2). On triple masts, also measure protrusion of inner upright roller (3) relative to intermedi- ate upright (4). Operating Instructions - 1202 series LP 12028011590 US - 11/2022 - 04...
Lift chains on trucks used in the food industry must be lubricated with an oil approved for the food industry. Apply Linde chain spray to each chain and guide surfaces. This should be done every 500 hours or as necessary to maintain a light film of lubricant on the chains at all times.
Top up with washer fluid until the washer fluid is visible in the filling opening. Close the filler cap. t12020031a Close the hood. Operating Instructions - 1202 series LP 12028011590 US - 11/2022 - 04...
(based on years in service) listed at documentation for maintenance requirements. the top of each chart. All lubrication and service intervals must be reduced for dusty conditions, large tempera- ture fluctuations or intensive use. Operating Instructions - 1202 series LP 12028011590 US - 11/2022 - 04...
Check the condition of the electrical connections and check that they are securely attached Check the condition of the starter battery Check the axle load sensor Check the load pressure sensor Check the lift height sensor Hydraulics Check the oil level in the hydraulic system Operating Instructions - 1202 series LP 12028011590 US - 11/2022 - 04...
Page 265
Calibrate the axle load sensor Calibrate the load pressure sensor Hydraulics Replace all filters in the hydraulic system Lifting system Check the sideshift for wear (if equipped) Check the fork positioner for wear (if equipped) Operating Instructions - 1202 series LP 12028011590 US - 11/2022 - 04...
Page 266
Additional maintenance every 10,000 hours, but at least every 5 years (Exceptions in parentheses) Internal combustion engine Replace the engine coolant Final tasks Carry out a functional test, including a test drive Attach the service sticker Operating Instructions - 1202 series LP 12028011590 US - 11/2022 - 04...
Deutz engine: year round. These oils should be used only in DQC III-LA (LA ≙ low-ash engine oil) ● extreme climate zones. DQC IV-10-LA (LA ≙ low-ash engine oil) ● Operating Instructions - 1202 series LP 12028011590 US - 11/2022 - 04...
Page 268
Original equipment specification above. Mixing with or using other hydraulic The following grade of hydraulic oil is supplied fluids may result in costly damage. from the factory as original equipment: Operating Instructions - 1202 series LP 12028011590 US - 11/2022 - 04...
Page 269
Use only a coolant additive that complies with Deutz DQC CB-14, VW standard TL 774-F (G12+) or a coolant additive in the same product groups in accordance with the latest edition of Deutz TR 0199-99-1228. Operating Instructions - 1202 series LP 12028011590 US - 11/2022 - 04...
Control unit for the armrest / start/stop push sensor (terminal 30) (F6), 15 A button (terminal 30) (F8), 5 A Control unit for the on-board power supply Control unit for the truck movements, termi- (terminal 30) (F7), 15 A nal 30g (F26), 10 A Operating Instructions - 1202 series LP 12028011590 US - 11/2022 - 04...
Page 271
Control unit for work lighting 2 (5F3)*, 25 A 25.2 Not assigned 11.1 Linde diagnostics (F14), 5 A 25.3 Not assigned 11.2 Standard display unit or comfort display unit 25.4 Not assigned (6F1), 5 A * Optional equipment Operating Instructions - 1202 series LP 12028011590 US - 11/2022 - 04...
Page 272
Fuse (5) for the sensor system and shut-off ● valve on the evaporator (0F11), 10 A t12020014 Fuse (6) for the ignition system (0F2), 20 A ● Main fuse (7) for the engine (F3), 30 A ● Operating Instructions - 1202 series LP 12028011590 US - 11/2022 - 04...
Jump Starting When the truck battery is discharged, a jump- start battery can be used with a jumper cable to start the truck. The following must be taken into consideration when doing this: Operating Instructions - 1202 series LP 12028011590 US - 11/2022 - 04...
Page 274
(2) as possible. NOTE If the source battery is housed in another vehi- cle, start that vehicle's engine and allow it to idle. Operating Instructions - 1202 series LP 12028011590 US - 11/2022 - 04...
Page 275
(4) from the engine block (3) first. Then disconnect it from the source battery (5). Disconnect the positive cable (1) from the source battery (5) first, then from the dis- charged battery (2). Operating Instructions - 1202 series LP 12028011590 US - 11/2022 - 04...
- Lights up when there is an electrical fault. - The error code is stored in the "Malfunctions and information" menu (8). Contact authorized service personnel. - The truck moves at creep speed or is at a standstill. Operating Instructions - 1202 series LP 12028011590 US - 11/2022 - 04...
Page 277
The engine must be switched off immediately and the malfunction must be rectified. To switch off the buzzer or the message, 10:30 press the rotary-push button Display_2103 Operating Instructions - 1202 series LP 12028011590 US - 11/2022 - 04...
Page 278
Resolve the malfunction. If the problem per- engine or in the engine control unit. sists, contact authorized service personnel. NOTE The "Engine protection" function can be switched off using the diagnostic program. Contact authorized service personnel. Operating Instructions - 1202 series LP 12028011590 US - 11/2022 - 04...
Page 279
The icons are displayed in the following colors depending on the status of the truck: "No color" means: minor malfunction or in- ● formation "Yellow" means: malfunction or information ● "Red" means: critical malfunction or infor- ● mation Operating Instructions - 1202 series LP 12028011590 US - 11/2022 - 04...
Have ignition transformer inspected and re- Defective ignition transformer. paired by authorized service personnel. Have fuel system inspected and repaired by Defective evaporator or mixer. authorized service personnel. Operating Instructions - 1202 series LP 12028011590 US - 11/2022 - 04...
Page 281
(insulation breakdown). ized service personnel. Check intake manifold mounting and connec- Vacuum leak at Intake manifold. tions for tightness. Have fuel system inspected and repaired by Gas supply insufficient or obstructed. authorized service personnel. Operating Instructions - 1202 series LP 12028011590 US - 11/2022 - 04...
Page 282
Add engine oil of proper specification until the Insufficient oil. correct level is achieved. Have truck inspected for leakage. Have oil pump inspected and repaired by au- Oil pump failure. thorized service personnel. Operating Instructions - 1202 series LP 12028011590 US - 11/2022 - 04...
See "Hydraulic oil too hot; temperature warning Hydraulic oil temperature too high. is displayed". Have the brake valve inspected and repaired Defective brake valve. by authorized service personnel. Operating Instructions - 1202 series LP 12028011590 US - 11/2022 - 04...
Page 284
Binding at lift cylinders. Cylinders show friction Have the cylinders inspected and repaired by marks. authorized service personnel. Have the mast inspected and repaired by au- Binding or damage in mast components. thorized service personnel. Operating Instructions - 1202 series LP 12028011590 US - 11/2022 - 04...
Contact an authorized deal- The system may require up to 10 minutes to The tank change-out procedure must be generate an accurate reading after reset. ● performed with the truck parked on a lev- Operating Instructions - 1202 series LP 12028011590 US - 11/2022 - 04...
Page 286
Maintenance Troubleshooting Operating Instructions - 1202 series LP 12028011590 US - 11/2022 - 04...
Page 288
Specifications Specifications Specifications 1202 11222022-01 Operating Instructions - 1202 series LP 12028011590 US - 11/2022 - 04...
Page 289
H20/600, 225/75-10 (23x9-10) Front tire size H25/600, 250/75-12 (27x10-12) H30, H35 H20/600, 6.50-10 Rear tire size H25/600, 225/75-10 (23x9-10) H30, H35 Number of front/rear wheels (x = driven) All models 2x / 2 Operating Instructions - 1202 series LP 12028011590 US - 11/2022 - 04...
Page 290
(1180/1482 mm) Overall width (b H25/600, 49.5 in / 62.6 in H30, H35 (1256/1590 mm) H20/600, 1.75 x 4.0 x 48 in H25, Fork arm dimensions (s/e/l) (45 x 101 x 1219 mm) H25/600 Operating Instructions - 1202 series LP 12028011590 US - 11/2022 - 04...
Page 292
Type of traction controller All models ly variable H20/600 2900 psi (200 bar) 3335 psi (230 bar) Working pressure for attachments H25/600 2900 psi (200 bar) 3,262.5 psi (225 bar) 3,552.5 psi (245 bar) Operating Instructions - 1202 series LP 12028011590 US - 11/2022 - 04...
Page 293
Noise level at the driver's ear All models 79 dB(A) Tow coupling, type/model All models DIN 15170-H Note 1. Track width changes with tire/wheel variants. Note 2. Other fork lengths are available as options. Operating Instructions - 1202 series LP 12028011590 US - 11/2022 - 04...
Page 294
91.0 in 184.9 in 5 deg / 135.0 in (3430 mm) (2312 mm) (4695 mm) 8 deg 102.8 in 208.5 in 5 deg / 158.7 in (4030 mm) (2612 mm) (5295 mm) 8 deg Operating Instructions - 1202 series LP 12028011590 US - 11/2022 - 04...
Page 295
(h2) back ered (h1) and 1.75 See Note 2. inch fork See Note 1. heel) 86.6 in 175.6 in 5 deg / 125.8 in (3195 mm) (2199 mm) (4460 mm) 8 deg Operating Instructions - 1202 series LP 12028011590 US - 11/2022 - 04...
Page 296
209.8 in (5330 mm) (1644 mm) (2415 mm) (6545 mm) 5 deg 66.7 in 97.0 in 265.5 in 5 deg / 215.7 in (5480 mm) (1694 mm) (2465 mm) (6745 mm) 5 deg Operating Instructions - 1202 series LP 12028011590 US - 11/2022 - 04...
Page 297
Note 1. Since forks must be raised slightly to travel and there is no free-lift on a simple mast, this value will increase slightly for travel. Note 2. Other tilt angles are available as options. Operating Instructions - 1202 series LP 12028011590 US - 11/2022 - 04...
Page 298
Specifications Mast Heights Operating Instructions - 1202 series LP 12028011590 US - 11/2022 - 04...
Page 299
..... . . 32 California Health & Safety Code..Door operation, cabin (option)..198 Operating Instructions - 1202 series LP 12028011590 US - 11/2022 - 04...
Page 301
Overhead switches, summary..31 Setting the language....133 Setting the lift height zero point..Operating Instructions - 1202 series LP 12028011590 US - 11/2022 - 04...
Page 302
....standard seat....Operating Instructions - 1202 series LP 12028011590 US - 11/2022 - 04...
Page 303
Engine......fault codes, explained... . . 266 Operating Instructions - 1202 series LP 12028011590 US - 11/2022 - 04...
Page 304
KION North America Corporation 1202 series LP 12028011590 US - 11/2022 - 04...
Need help?
Do you have a question about the 1202 Series and is the answer not in the manual?
Questions and answers