Sign In
Upload
Download
Table of Contents
Contents
Add to my manuals
Delete from my manuals
Share
URL of this page:
HTML Link:
Bookmark this page
Add
Manual will be automatically added to "My Manuals"
Print this page
×
Bookmark added
×
Added to my manuals
Manuals
Brands
Linde Manuals
Forklifts
1346 Series
Operating instructions manual
Linde 1346 Series Operating Instructions Manual
Electric forklift truck
Hide thumbs
1
2
3
4
Table Of Contents
5
6
7
8
9
10
11
12
13
14
15
16
17
18
19
20
21
22
23
24
25
26
27
28
29
30
31
32
33
34
35
36
37
38
39
40
41
42
43
44
45
46
47
48
49
50
51
52
53
54
55
56
57
58
59
60
61
62
63
64
65
66
67
68
69
70
71
72
73
74
75
76
77
78
79
80
81
82
83
84
85
86
87
88
89
90
91
92
93
94
95
96
97
98
99
100
101
102
103
104
105
106
107
108
page
of
108
Go
/
108
Contents
Table of Contents
Troubleshooting
Bookmarks
Table of Contents
Table of Contents
Introduction
Scope
Obligations of the Equipment Owner
Operator Responsibilities
Proper Use
Hazard Messages
Safety
Before Operation
Operator Daily Checklist
Operating Position
Pedestrians
Travel
Lifting and Lowering
Inclines, Ramps, Docks, Elevators
Avoiding Falls and Tip-Overs
Suspended Loads
Parking
Battery Safety
Safety During Maintenance
Personnel Qualifications
Hazardous Substances
Operator Warning Decals
Data Plate
Voltage Decal
Operator Warning Decal
Trained Operator Warning Decal
Test or Service Warning Decal
Never Stand or Walk under Forks Warning Decal
Do Not Lift Personnel Warning Decal
Crushed Fingers Warning Decal
No Step Warning Decal
Back up Alarm Warning Decal
Overview
Technical Description
Truck Components
Display Unit
Controls
Decal and Data Plate Location
Data Plate
Definition of Directions
Chassis Options
Operation
Unloading and Preparing a New Truck for Operation
Steering Wheel Height Adjustment
Armrest Adjustment
Operating the Display Unit
Turning the Truck on and off
Driving
Braking
Steering System
Horn
Emergency Stop Switch
Fork Position Adjustment
Hydraulic Controls
Lights and Back-Up Alarm
Fan (Optional Equipment)
Tilt Memory (Optional Equipment)
Changing the Battery
Connecting the Battery to an External Charger
Manual Lowering of Fork Carriage
Towing the Truck
Securing the Truck for Transport
Hoisting the Truck
Long Term Storage
Maintenance
Personnel Qualifications
Cleaning
Cleaning the Truck
Cleaning the Lift Chains
Operator Inspection and Maintenance
Daily Inspection Overview
Daily Inspection Checklist
Check for Fluid Leakage
Check Overhead Guard
Check Hydraulic Cylinders
Check Lift Chains
Check Fork Carriage
Check Battery Retention
Check Battery Connector
Check Hydraulic Oil Level
Check Wheels and Tires
Check the Steering Axle
Check Decal Condition
Check Multifunction Handle Bellows
Anti-Static Strap (Optional Equipment)
Operational Checks
Routine Lubrication and Inspection
Routine Lubrication and Inspection Intervals
Checking Gear Oil Level
Checking Pedals
Hydraulic Tank Pressure Valve Test
Steer Axle Lubrication
Lubricating Mast Bearing Blocks
Testing and Cleaning the Fans
Adjusting and Lubricating Lift Chains
Checking Reeving Hose Preload (Optional Equipment)
Lubricating the Sideshifter (Optional Equipment)
Scheduled Maintenance
General Maintenance Information
Scheduled Maintenance Chart
Sideshifter Maintenance Intervals
Sideshifter Maintenance (Optional Equipment)
Fluids and Lubricants
Capacities
Fluid and Lubricant Specifications
Troubleshooting
Fuses
Specifications
Dimensions
Specifications E18S and E20S
Mast Heights
Advertisement
Quick Links
1
Troubleshooting
Download this manual
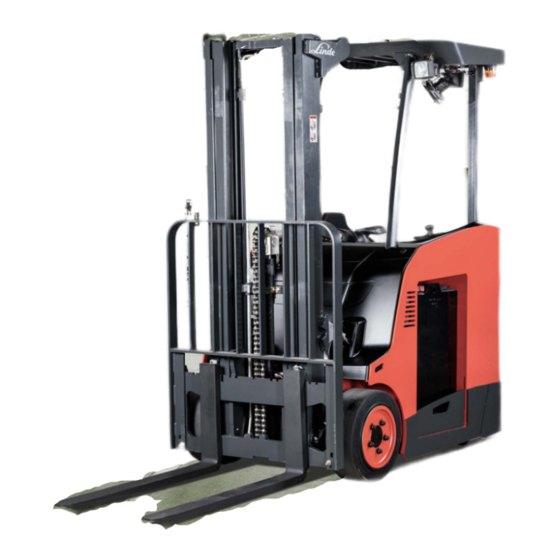
1346 series Electric Forklift
Truck
Operating Instructions
Models E18S, E20S
1346 series – 13468011540 rev03 US
– 8/2018
Table of
Contents
Previous
Page
Next
Page
1
2
3
4
5
Advertisement
Table of Contents
Need help?
Do you have a question about the 1346 Series and is the answer not in the manual?
Ask a question
Questions and answers
Related Manuals for Linde 1346 Series
Forklifts Linde 1347 Series Operating Instructions Manual
Electric forklift truck (132 pages)
Forklifts Linde 1202 Series Operating Instructions Manual
Lp gas forklift truck (304 pages)
Forklifts Linde 1355 Series Operating Instructions Manual
Vertical order picker (100 pages)
Forklifts Linde 1252 Series Operating Instructions Manual
Electric forklift truck (274 pages)
Forklifts Linde L 14 Operating Instructions Manual
Linde pallet stackers (87 pages)
Forklifts Linde K10 Manual
(116 pages)
Forklifts Linde H 50 D Service Training
Ic-engined fork truck, type 353 (282 pages)
Forklifts Linde H40D Original Instructions Manual
Diesel truck (310 pages)
Forklifts Linde 388-01 Series Original Instructions Manual
Electric forklift trucks (318 pages)
Forklifts Linde E12 Operating Instructions Manual
Electric truck (222 pages)
Forklifts Linde T20 SP Service Training
Stand-on pallet stacker (134 pages)
Forklifts Linde EVO 391-01 Series Original Instructions Manual
Lpg truck, cng truck (249 pages)
Forklifts Linde E25 Service Training
Electric fork truck (168 pages)
Forklifts Linde E 20-02 Operating Instructions Manual
Fork lift truck (96 pages)
Forklifts Linde 335-03 Series Original Instructions Manual
(140 pages)
Forklifts Linde H120-1200 Original Instructions Manual
Forklift truck (200 pages)
This manual is also suitable for:
E18s
E20s
Table of Contents
Print
Rename the bookmark
Delete bookmark?
Delete from my manuals?
Login
Sign In
OR
Sign in with Facebook
Sign in with Google
Upload manual
Upload from disk
Upload from URL


Need help?
Do you have a question about the 1346 Series and is the answer not in the manual?
Questions and answers