
Related Manuals for Harbor Breeze 43001


Summary of Contents for Harbor Breeze 43001
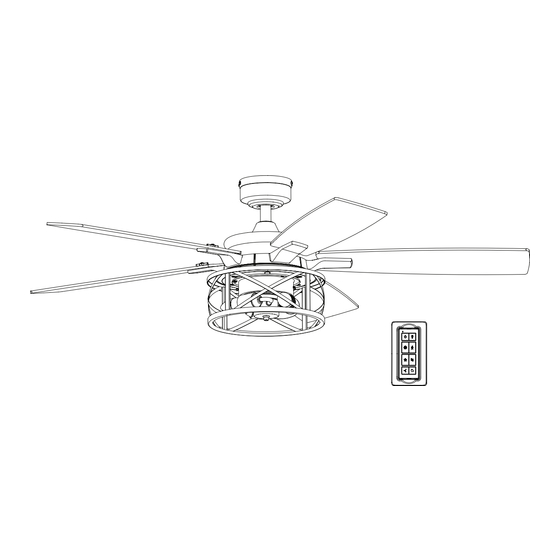
- Page 1 52” CEILING FAN Owner’s Manual Model #43001 To obtain service, please contact the Service Department: 1-877-706-3267, 8 a.m. - 5 p.m. Central, Monday - Friday. 9941 • 110223...
-
Page 2: Package Contents
PACKAGE CONTENTS Unpack your fan and check the contents. You should have the following items: PACKAGE CONTENTS 1. Canopy 13. Fitter Plate Screw (x3) 2. Canopy Cover 14. Light Pan 15. Light Pan Screw (x3) 3. Mounting Bracket Screw (x4) 16. -
Page 3: Mounting Options
DIMENSION REFERENCE A. 14.39 in. B. 8.63 in. C. 8.24 in. D. 5.13 in. MOUNTING OPTIONS Two Mounting Options Downrod Mount Angled Ceiling Mount (Up to 10 degrees) Choose one of the following mounting options: Downrod Mount is best suited for ceilings 8 ft. or higher. For taller ceilings you may want to use a longer downrod (not included). -
Page 4: Safety Instructions
SAFETY INSTRUCTIONS READ ALL SAFETY INFORMATION AND INSTALLATION INSTRUCTIONS BEFORE YOU BEGIN INSTALLING THE FAN AND SAVE INSTRUCTIONS. CAUTION: This fan is not suitable for damp or outdoor locations. All set screws of the fan must be checked and retightened where necessary before installation. To reduce the risk of personal injury, do not bend the blade brackets when installing the brackets, balancing the blades or cleaning fan. -
Page 5: Care And Maintenance
SAFETY INSTRUCTIONS WARNING: To avoid risk of electric shock, be sure to shut off power at the main fuse or circuit breaker box before installing or servicing this fixture. Turning off the electrical power by using the light switch is not sufficient to prevent electrical shock. - Page 6 ASSEMBLY INSTRUCTIONS 1. Turn OFF the electrical power at the main fuse or circuit breaker. DANGER: Failure to disconnect the power supply prior to installation may result in serious injury or death. Mounting Bracket Screw 2. Loosen all four mounting bracket screws located on the mounting bracket and completely remove the two screws from the round holes in the canopy.
- Page 7 ASSEMBLY INSTRUCTIONS 5. Slide the downrod into the yoke of the motor assembly, align the holes, then re-install the downrod Set Screw pin and downrod clip. Secure with the two set screws Yoke Cover and slide the yoke cover down until it rests on top of the Downrod motor assembly.
- Page 8 ASSEMBLY INSTRUCTIONS ASSEMBLY INSTRUCTIONS SECONDARY HANGING SYSTEM Braided Cable For installation in the United States: Building codes in the U.S.A. do not require installation of a Secondary Brace Hanging System. If desired, the braided cable can be cut and removed using wire cutters (sold separately). Skip to Step 11.
- Page 9 ASSEMBLY INSTRUCTIONS 11. Use wire connectors and push-in connectors to Black (hot) connect the receiver and fan wires to the supply wires Bare/Green (ground) from outlet box according to the wiring diagram and the White (neutral) Wire following instructions: Connector Push-in •...
- Page 10 ASSEMBLY INSTRUCTIONS 15. Remove one of the three fitter plate screws preassembled to the fitter plate and loosen the other two but do not remove. Feed the 9-pin connector 9-pin Fitter Plate through the center hole in the light pan. Align the Connector keyhole slots in the light pan with the loosened screws in the fitter plate.
- Page 11 ASSEMBLY INSTRUCTIONS 19. If desired, the wall bracket in remote pack can be installed to a wall using the provided mounting screws. The remote can be stored in the Wall wall bracket for easy access. Bracket Mounting Screw 20. Turn ON the electrical power at the main fuse or circuit breaker and the wall switch.
- Page 12 OPERATING INSTRUCTIONS LED Indicator 1. To operate the fan using the remote, press and release Fan Off the following buttons: Light On/Off Fan Off - Turns the power to fan off. Light Control - Tap the light control button to turn the High Speed light off and on.
- Page 13 OPERATING INSTRUCTIONS 3. Using a ceiling fan will allow you to raise your thermostat setting in summer and lower your thermostat setting in winter without feeling a difference in your comfort. In warmer weather, push the reverse switch to the left, which will result in downward airflow creating a wind chill effect.
-
Page 14: Troubleshooting
TROUBLESHOOTING If you have difficulty operating your new ceiling fan, it may be the result of incorrect assembly, installation or wiring. In some cases, these installation errors may be mistaken for defects. If you experience any faults, please check the Troubleshooting section below. If a problem cannot be remedied or you are experiencing difficulty in installation, please contact the Service Department: 1-877-706-3267, 8 a.m. -
Page 15: Limited Lifetime Warranty
1-877-706-3267, 8 a.m. - 5 p.m. Central, Monday - Friday. Model Name: 52” Ceiling Fan Model No: 43001 Set forth below, the manufacturer, Hong Kong China Electric appliance Company (HKC) warrants the fan motor for this ceiling fan to be free from defects in workmanship and material for the life of the product.
Need help?
Do you have a question about the 43001 and is the answer not in the manual?
Questions and answers