
Related Manuals for Ride1up REVV 1 DRT


Summary of Contents for Ride1up REVV 1 DRT
- Page 1 E-bike Owner’s Manual REVV 1 DRT Revv 1 DRT Owner’s Manual For the most up to date documents, bike models, additional information, instructional videos, and more, visit us at Ride1UP.com...
- Page 2 Phone: 1-877-RIDE1UP (743-3187) Contact Us: https://ride1up.com/contact/ For the most effective assembly resources on your Revv 1 DRT, please scan the QR Code below for the video assembly tutorial: For the most up to date documents, bike models, additional information, instructional videos, And more visit us at Ride1UP.com...
-
Page 3: Table Of Contents
Model: Revv 1 DRT Table of Contents 1. Safety Notes ..........................4 1.2 E-bike Safety: ........................5 1.3 Electrical Safety: ........................5 1.4 Brake Safety: ......................... 6 1.5 Maintenance: ......................... 6 1.6 Additional Warnings: ......................6 1.7 Notable Bike Parts: ........................ 9 2. -
Page 4: Safety Notes
Have maintenance/repairs done by a qualified bicycle mechanic. Never use/ride any Ride1Up bike product in ways precluded by the manufacturer and the laws of your state and local municipality. It is your responsibility to comply the laws in which you are operating the e-bike. Laws vary depending on location in which you operate the bike. -
Page 5: E-Bike Safety
1.3 Electrical Safety: Only use the charger supplied by Ride1Up and never tamper or modify the charger in any way. Do not leave the e-bike or battery plugged into a wall outlet unattended. Unplug the battery before leaving the bike alone. -
Page 6: Brake Safety
Failure to do so could cause death, serious personal injury, and/or property damage. For the most up to date documents, bike models, additional information, instructional videos, And more visit us at Ride1UP.com... - Page 7 Failure to follow this rule may result in serious injury and/or death. For the most up to date documents, bike models, additional information, instructional videos, And more visit us at Ride1UP.com...
- Page 8 Never operate a bike while under the influence of alcohol, drugs, or any substance or condition that could impair motor functions, judgement, or the ability to safely operate a bike. For the most up to date documents, bike models, additional information, instructional videos, And more visit us at Ride1UP.com...
-
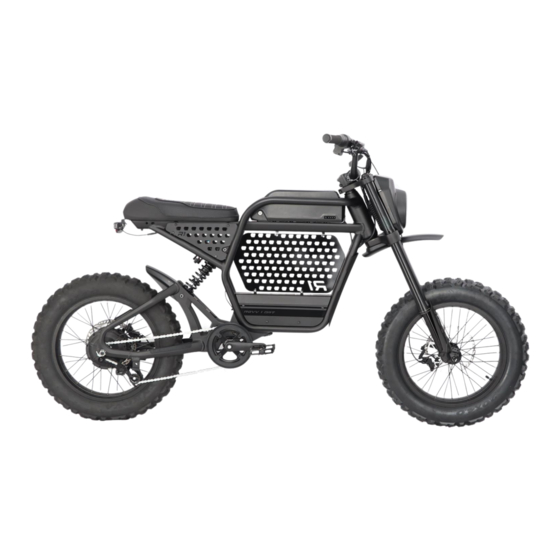
Page 9: Notable Bike Parts
1.7 Notable Bike Parts: For the most up to date documents, bike models, additional information, instructional videos, And more visit us at Ride1UP.com... -
Page 10: What's In The Box
2. What’s in the Box? The Revv 1 DRT will arrive fully wrapped with foam and cardboard and include the following in our Accessory Box: Accessory Box: • User Manual • Ride1Up Gift • Battery Charger • (2) Keys •... -
Page 11: Headset Assembly
Plug the cables running from the handlebars to those running through the headset together by matching colors (i.e. green to green, black to black) and aligning the arrows to connect in the correct orientation. For the most up to date documents, bike models, additional information, instructional videos, And more visit us at Ride1UP.com... -
Page 12: Front Wheel Assembly
Place the front wheel onto the fork assuring that the disc rotor is aligned and fits between the brake pads. • Insert the thru-axle through the fork and the front wheel axle hole and tighten. For the most up to date documents, bike models, additional information, instructional videos, And more visit us at Ride1UP.com... - Page 13 WARNING ◆ IT IS VITAL THAT THE AXLE BOLTS HAVE BEEN TIGHTENED. IF THEY ARE NOT PROPERLY ALIGNED, THE WHEEL MAY COME OFF, CAUSING SERIOUS INJURY AND/OR DEATH. ◆ For the most up to date documents, bike models, additional information, instructional videos, And more visit us at Ride1UP.com...
-
Page 14: Pedal Assembly
The right pedal (marked “R”) must be installed in the right crank arm. It is standard thread, rotate clockwise to install and tighten. • Use a 15mm wrench on pedals to finish tightening the pedals in place. For the most up to date documents, bike models, additional information, instructional videos, And more visit us at Ride1UP.com... -
Page 15: Detailed Torque Settings
Charging port is on the left side of the battery. NOTE: ◆ ALWAYS KEEP THE CHARGER PORT COVERED TO PROTECT AGAINST MOISTURE, WHICH CAN DESTROY THE BATTERY. For the most up to date documents, bike models, additional information, instructional videos, And more visit us at Ride1UP.com... -
Page 16: E-Bike Basics & Care
5. E-bike Basics & Care 5.1 E-bike Basics: Your Revv 1 DRT e-bike will arrive with a center LCD display, light controls next to the right grip, and functional controls near the left grip. For the most up to date documents, bike models, additional information, instructional videos, And more visit us at Ride1UP.com... -
Page 17: Battery Basics & Care
Charging for 1-2 hours will keep it near 80% depending on last usage. You can check the charge percentage on the display. For the most up to date documents, bike models, additional information, instructional videos, And more visit us at Ride1UP.com... - Page 18 It is best to determine what is causing the noise and resolve the issue. If you are unsure of the cause, please review our support page at www.Ride1UP.com. You can also share a clear video without wind noise to Support@Ride1UP.com.
-
Page 19: Troubleshooting Problems
(6.1.a) Display Settings: Perhaps a setting was accidentally changed. Try resetting the display by conducting a factory reset. Review the display manual or display support page on www.Ride1UP.com to reset the display. (6.1.b) Cables: Look for kinked, loose, disconnected or damaged cables. Check the quick disconnect connections, especially the one on the chain stay or display. -
Page 20: Charging The Battery
Inspect the charging port of the battery and the tip of the charger for moisture or debris every time you connect the charger. If you ever see a spark while charging your battery, please contact Support@Ride1UP.com and share pictures. Follow the steps when charging battery: Step 1. -
Page 21: Battery Basics & Care
40-80%. Recommended storage temperatures are 50°-77°F and will provide the best performance out of the battery. Storage should be done in a dry area. For the most up to date documents, bike models, additional information, instructional videos, And more visit us at Ride1UP.com... -
Page 22: Lcd Display Instructions
To change the assist level, press the MINUS (-) or PLUS (+) buttons until desired level is displayed in the top right corner. For the most up to date documents, bike models, additional information, instructional videos, And more visit us at Ride1UP.com... -
Page 23: Speed & Mileage Mode Switch
8.6 Off Road Mode The Revv 1 DRT is shipped with a default Class 2 (pedelec) setting which limits top speeds to 20mph using throttle and pedal assist. For speeds more than 28mph, rider must contact Ride1Up Customer Support to acknowledge private road use only and compliance with local laws and regulations. - Page 24 NOTE: ◆ THE DISPLAY MAY VARY BASED ON GENERATION. PLEASE REFER TO OUR ONLINE USER MANUAL BASE FOR UPDATED OR PREVIOUS MODELS. For the most up to date documents, bike models, additional information, instructional videos, And more visit us at Ride1UP.com...
-
Page 25: Error Code Troubleshooting
The motor temperature is high enough to reach the protection point 0x12 The current sensor is broken 0x13 The battery temperature is broken For the most up to date documents, bike models, additional information, instructional videos, And more visit us at Ride1UP.com... -
Page 26: Warranty Information
NOTE: (Full warranty terms can be found at https://ride1up.com/terms-and-conditions/) All Ride1UP electric bikes come with a One-Year Limited Warranty from date of purchase. Defective items or parts will be replaced and shipped to the holder of the warranty only. Warranties are not transferable to parties other than the original purchaser. - Page 27 After the first 30-days, Ride1UP will ship replacement parts of defective items within one year at no charge. The owner will be responsible for labor. Warranty parts will be shipped within the U.S. only at our cost. It will be necessary to send an email with a photo and/or video as requested to support@ride1up.com...
Need help?
Do you have a question about the REVV 1 DRT and is the answer not in the manual?
Questions and answers