
Subscribe to Our Youtube Channel
Related Manuals for Ride1up Cafe Cruiser


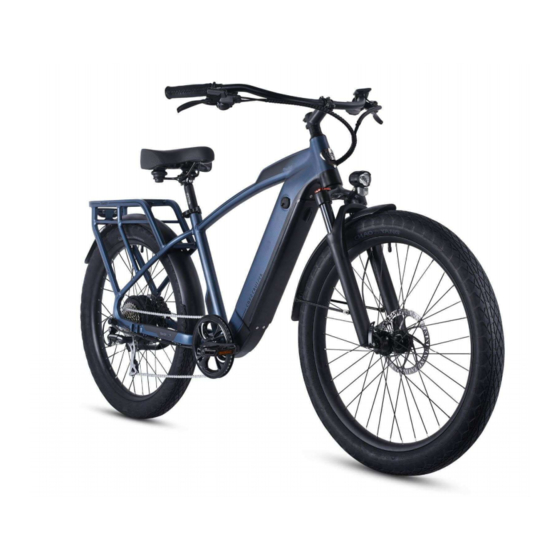
Summary of Contents for Ride1up Cafe Cruiser
- Page 1 E-bike Owner’s Manual Model: Cafe Cruiser For the most up to date documents, bike models, additional information, instructional videos, and more, visit us at Ride1UP.com...
- Page 2 NOTE: ◆ THIS IS FOR YOUR RECORDS ONLY. YOUR SERIAL NUMBER IS THE NUMBER STAMPED ON THE FRONT OF YOUR HEAD TUBE. Thank you for purchasing a Ride1UP Cafe Cruiser e-bike! This manual contains important safety, performance & maintenance information. Please take a moment to read the manual and review our instructions before start riding &...
-
Page 3: Table Of Contents
Model: Cafe Cruiser Table of Contents 1. Safety Notes ............................5 1.1 Personal Safety: ........................5 1.2 E-bike Safety: ........................... 5 1.3 Electrical Safety: ........................5 1.4 Brake Safety: ........................... 6 1.5 Maintenance: ........................... 6 1.6 Additional Warnings: ........................ 6 1.6 Additional Warnings (Continued): ..................... - Page 4 WARNING: Basic safety precautions should always be observed when using an electrical appliance to reduce the risk of fire, electrical shock, or serious injury. For the most up to date documents, bike models, additional information, instructional videos, And more visit us at Ride1UP.com...
-
Page 5: Safety Notes
1.3 Electrical Safety: Only use the charger supplied by Ride1UP. Do not store the bike or battery plugged into a wall outlet. Unplug the battery before leaving the bike alone. Never modify the charger in any way. The charger has been designed for a specific voltage, always check that the outlet’s voltage is the same as that stated on the... -
Page 6: Brake Safety
Do not exceed local speed restrictions. Maintain your brakes such that you can at least execute a one-braked-wheel skid on dry, level, clean pavement. For the most up to date documents, bike models, additional information, instructional videos, And more visit us at Ride1UP.com... -
Page 7: Additional Warnings (Continued)
Be sure to follow all requirements of airlines and air couriers regarding lithium batteries if you take your e-bike with you during air travel, or if you ship your e-bike by air courier. 1.7 Notable Bike Parts: For the most up to date documents, bike models, additional information, instructional videos, And more visit us at Ride1UP.com... -
Page 8: What's In The Box
Figure 1: Bike frame, bike box, saddle, additional box of parts (Figure 2), front wheel, axle skewer, stem and handlebars, all zip tied together and padded. Figure 2: Saddle and separate box with: saddle, fender, pedals, charger, and toolkit. For the most up to date documents, bike models, additional information, instructional videos, And more visit us at Ride1UP.com... -
Page 9: Installation Steps: Assembling Your Bike
WARNING ◆ IT IS VITAL THAT THE QUICK RELEASE HAVE BEEN TIGHTENED. IF THEY ARE NOT PROPERLY ALIGNED, THE WHEEL MAY COME OFF, CAUSING SERIOUS INJURY AND/OR DEATH. For the most up to date documents, bike models, additional information, instructional videos, And more visit us at Ride1UP.com... -
Page 10: Saddle/Seat Post Assembly
The seat post angle is adjustable. Ensure each bolt is correctly torqued. If left loose or over-tightened, a seat post bolt could snap. For the most up to date documents, bike models, additional information, instructional videos, And more visit us at Ride1UP.com... -
Page 11: Pedal Assembly
Or lastly, if the chain is shifting past the largest or smallest cog. For the most up to date documents, bike models, additional information, instructional videos, And more visit us at Ride1UP.com... -
Page 12: Test And Adjust Front And Rear Brakes
Adjusting your derailleur properly will be done best by a mechanic, however it can be accomplished by following a helpful video. Please check our support pages at www.Ride1UP.com for the latest tips and video on how to do this properly. -
Page 13: Battery Connection & Removal
Charging port is on the right side of the battery at the top of the down tube. NOTE: ◆ ALWAYS KEEP THE CHARGER PORT COVERED TO PROTECT AGAINST MOISTURE, WHICH CAN DESTROY THE BATTERY. For the most up to date documents, bike models, additional information, instructional videos, And more visit us at Ride1UP.com... -
Page 14: E-Bike Basics & Care
5. E-bike Basics & Care 5.1 E-bike Basics: Your Cafe Cruiser e-bike will arrive with an LCD 3-button display installed. The middle button turns on and off the bike. Simply hold the button down. It is best practice, for safety, to only turn on your electric bike once you have lifted your leg over the bike and are straddling the frame. -
Page 15: Battery Basics & Care
(under adjustments) to remove any additional clicking or grinding noises. If you cannot fix the derailleur hanger, new ones can be found online. Ride1UP will cover the cost to straighten your derailleur hanger or replace if necessary if it arrived bent. -
Page 16: Troubleshooting Problems
(6.1.a) Display Settings: Perhaps a setting was accidentally changed. Try resetting the display by conducting a factory reset. Review the display manual or display support page on www.Ride1UP.com to reset the display. Steps to complete this procedure are listed on the last page of this owner’s manual. -
Page 17: Derailleur/Gears
If you ever see a spark while charging your battery. Please inspect the charging port of the battery and the tip of the charger. Please contact Support@Ride1UP.com and share pictures. Follow the steps when charging battery: Step 1. Turn the bike off. The LCD will be off. -
Page 18: Battery Basics & Care
40-80%. Recommended storage temperatures are 50°-77°F and will provide the best performance out of the battery. Storage should be done in a dry area. For the most up to date documents, bike models, additional information, instructional videos, And more visit us at Ride1UP.com... -
Page 19: Display Instructions
8. Display Instructions: 8.1 General Operation: (for more information, download the entire LCD manual at ride1up.com/bike/support) Switching the e-bike System On/Off: to switch on/off the e-bike system, hold the MODE button for 2 seconds. To turn the headlight on/off, hold the + button. -
Page 20: Symbols Explained
2s to recover default settings, the display shows DEF-00 at the same time, and then returns to a general display state. Recover Interface (Image) Default Settings For the most up to date documents, bike models, additional information, instructional videos, And more visit us at Ride1UP.com... -
Page 21: Error Code Troubleshooting
EBS (electronic issue. This can happen often after a crash or when the bike is brake shut-off) dropped. See video on Ride1UP YouTube channel, or under instructional videos on the support page to resolve. Communication A problem with the connection from the internal controller to the Error display. -
Page 22: Warranty Information
After the first 30-days, Ride1UP will ship replacement parts of defective items within one year at no charge. The owner will be responsible for labor. Warranty parts will be shipped within the U.S. only at our cost. It will be necessary to send an email with a photo and/or video as requested to support@ride1up.com...
Need help?
Do you have a question about the Cafe Cruiser and is the answer not in the manual?
Questions and answers
how do I replace the battery knob ?