Subscribe to Our Youtube Channel
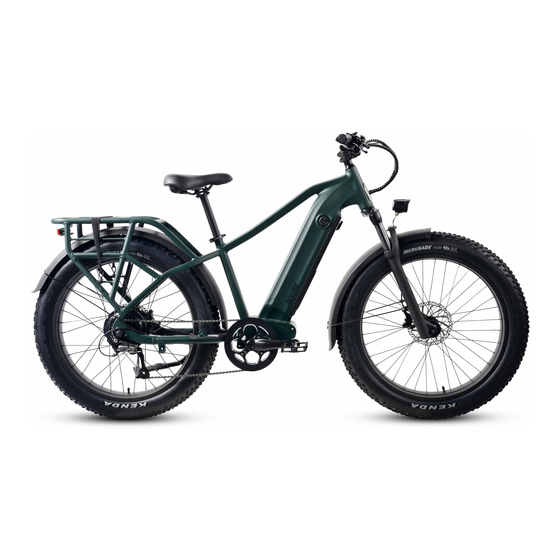
Summary of Contents for Ride1up RIFT
- Page 1 E-bike Owner’s Manual RIFT For the most up to date documents, bike models, additional information, instructional videos, and more, visit us at Ride1UP.com...
- Page 2 Ride1Up RIFT Owner’s Manual Thank you for purchasing a Ride1Up RIFT e-bike! Please fill out the information below. This is for your records only. Your serial number is the number stamped on the bottom of the downtube facing the front of the e-bike.
-
Page 3: Table Of Contents
Model: Rift Table of Contents 1. Safety Notes ..........................6 1.1 Personal Safety: ......................6 1.2 E-bike Safety: .......................... 7 1.3 Electrical Safety: ........................7 1.4 Brake Safety: ........................... 8 1.5 Maintenance: ........................... 8 1.6 Additional Warnings: ....................... 8 1.6 Additional Warnings (Continued): ..................9 1.7 Notable Bike Parts: ....................... - Page 4 KD218 LCD Display Instructions ..................17 Error Code Troubleshooting: .................... 18 Warranty Information ....................... 20 NOTE: (full warranty terms listed on website) ................20 For the most up to date documents, bike models, additional information, instructional videos, And more visit us at Ride1UP.com...
- Page 5 For the most up to date documents, bike models, additional information, instructional videos, And more visit us at Ride1UP.com...
-
Page 6: Safety Notes
Have maintenance/repairs done by a qualified bicycle mechanic. Never use/ride any Ride1Up bike product in ways precluded by the manufacturer and the laws of your state and local municipality. It is your responsibility to comply the laws in which you are operating the e-bike. Laws vary depending on location in which you operate the bike. -
Page 7: E-Bike Safety
Library for troubleshooting steps. The rear rack on the RIFT has a maximum weight capacity of 150 lbs. Do not exceed the max weight capacity as this may compromise the integrity of the bike and could cause death, serious personal injury and/or property damage. -
Page 8: Brake Safety
Failure to do so could cause death, serious personal injury, and/or property damage. For the most up to date documents, bike models, additional information, instructional videos, And more visit us at Ride1UP.com... -
Page 9: Additional Warnings (Continued)
Failure to follow this rule may result in serious injury and/or death. For the most up to date documents, bike models, additional information, instructional videos, And more visit us at Ride1UP.com... -
Page 10: Notable Bike Parts
Never operate a bike while under the influence of alcohol, drugs, or any substance or condition that could impair motor functions, judgement, or the ability to safely operate a bike. 1.7 Notable Bike Parts: For the most up to date documents, bike models, additional information, instructional videos, And more visit us at Ride1UP.com... -
Page 11: Installation Steps: Assembling Your Bike
2. What’s in the Box? The RIFT will arrive fully wrapped with foam and cardboard and include the following in our Accessory Box: Accessory Box: User Manual • Ride1Up Gift • Battery Charger • (2) Keys • • Ride1Up Allen Wrench Set •... -
Page 12: Front Wheel Assembly
Align the disc rotor so it fits between the brake pads. Do not force it. (Figure 2) • Place the front wheel axle onto the fork dropouts. (Figure 3) For the most up to date documents, bike models, additional information, instructional videos, And more visit us at Ride1UP.com... -
Page 13: Seat Post Assembly
Slide saddle into seat post clamp. • Using an 6mm hex wrench. Tighten the bolt to 12 nm of torque (unless noted otherwise on • seatpost). For the most up to date documents, bike models, additional information, instructional videos, And more visit us at Ride1UP.com... -
Page 14: Pedal Assembly
Handlebar Clamp: 5-9nm (unless otherwise marked), tighten evenly in a cross pattern - If installed properly the gap at each bolt should be similar. Failure to do so may result in serious injury and/or death. For the most up to date documents, bike models, additional information, instructional videos, And more visit us at Ride1UP.com... -
Page 15: Adjust Derailleur And Shifter
Adjusting your derailleur properly will be done best by a mechanic, however it can be accomplished by following a helpful video. Please check our support pages at www.Ride1UP.com for the latest tips and video on how to do this properly. -
Page 16: Charging The Battery
Do not cover the battery while it is charging. If you ever see a spark while charging your battery. Please inspect the charging port of the battery and the tip of the charger. Please contact Support@Ride1UP.com and share pictures. Follow the steps below when charging the battery: Step 1. -
Page 17: Kd218 Lcd Display Instructions
Press and hold POWER button for 2 seconds to power on and off. The Display automatically shuts down when the bike is not used for 10 minutes. For the most up to date documents, bike models, additional information, instructional videos, And more visit us at Ride1UP.com... -
Page 18: Error Code Troubleshooting
The error code may only appear briefly when the problem occurs. If an error occurs and you can do so safely, For the most up to date documents, bike models, additional information, instructional videos, And more visit us at Ride1UP.com... - Page 19 Disconnect electronic brake shut offs. Likely a magnet sensor Brake Abnormality issue. This can happen often after a crash or when the bike is dropped. See video on Ride1UP YouTube channel, or under instructional videos on the support page to resolve. Communication...
-
Page 20: Warranty Information
After the first 30-days Ride1UP will ship replacement parts of defective items within one year at no charge. The owner will be responsible for labor. Warranty parts will be shipped within the U.S. only at our cost. It will be necessary to send an email with a photo/and or as appropriate to support@ride1up.com...


Need help?
Do you have a question about the RIFT and is the answer not in the manual?
Questions and answers