Table of Contents
Advertisement
Quick Links
Advertisement
Table of Contents

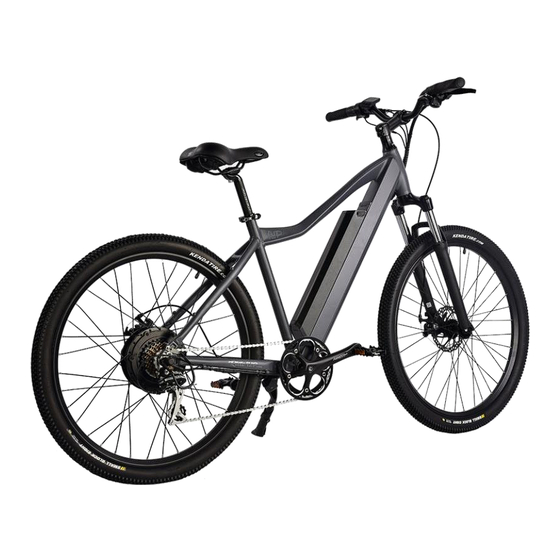
Summary of Contents for Ride1up 500 Series
- Page 1 500 Series Owners Manual...
-
Page 2: Table Of Contents
Manual Safety notes ................2 1.1 Personal Safety: ............... 2 1.2 Ebike Safety: ..............2 1.3 Electrical Safety: .............. 2 1.4 Brake Safety: ..............3 1.5 Maintenance: ..............3 1.6 Additonal warnings: ............4 Assembling your ebike ............6 2.1 What’s in the box ............6 2.2 Installation steps: ............ -
Page 3: Safety Notes
• At night your Ebike MUST have white front and red rear lights lit. It MUST also • Only use the charger supplied by Ride1UP. be fitted with a red rear reflector and • Never modify the charger in any way. -
Page 4: Brake Safety
• Be careful while getting used to the immediately. brakes. Practice emergency stops in a • Ensure the battery is removed from the bike before For additional information, instructional videos, and more visit Ride1up.com... -
Page 5: Additonal Warnings
Routine maintenance checks are required on your e Bike. Check all important connections, brake functionality, and ensure axel nuts are secured before riding. Failure to do so may result in serious injury and/or death. For additional information, instructional videos, and more visit Ride1up.com... - Page 6 Be sure to follow all requirements of airlines and air couriers regarding lithium batteries if you take your e bike with you during air travel, or if you ship your e bike by air courier. ELECTRIC BIKE PARTS For additional information, instructional videos, and more visit Ride1up.com...
-
Page 7: Assembling Your Ebike
2.1 What’s in the box Figure 1: Bike; fork, front wheel, skewer, handlebars, zip tied together and padded. Figure 2: Seat and seat post, and separate box with pedals and charger. For additional information, instructional videos, and more visit Ride1up.com... -
Page 8: Installation Steps
2.2 Installation steps: 2.2.1. Fork Assembly For additional information, instructional videos, and more visit Ride1up.com... -
Page 9: Front Wheel Assembly
◆ IT’S VITAL TO TIGHTEN THE SCREWS TO AVOID THE MOVEMENT OF THE HANDLEBAR, AS WELL AS ENSURING FORK IS EN THIS SHOULD BE COMPLETED BY A BIKE MECHANIC. 2.2.2. Front Wheel Assembly For additional information, instructional videos, and more visit Ride1up.com... -
Page 10: Saddle Assembly
PROPRRLY ALIGNED, THE WHEEL MAY COME OFF, CAUSING DAMAGE TO THE BIKE OR YOURSELF. 2.2.3. Saddle assembly 1. Open the seat clip and insert the seat post. (Fig.10&11) 2. Adjust the suitable height and rotate the clip to tighten and then shut it. (Fig.12) For additional information, instructional videos, and more visit Ride1up.com... -
Page 11: Pedal Assembly
◆ THERE ARE TWO PEDALS INCLUDED IN THE BOX WITH YOUR BIKE. THE PEDALS SCREW INTO THE ENDS OF THE CRANKS WITHOUT EXTRA NUTS, SCREWS OR PINS. 3 Battery connection and charging For additional information, instructional videos, and more visit Ride1up.com... - Page 12 3. Pull out the battery. (Fig.19) 4. Replace battery with key in the same position, then turn key to lock. (Fig.20) 5. Charging port on the bottom of the battery. (Fig.21) For additional information, instructional videos, and more visit Ride1up.com...
- Page 13 For additional information, instructional videos, and more visit Ride1up.com...
-
Page 14: Warranty Information
The warranty is only upheld if the user has followed all the rules in the owner’s manual. Ride1up reserves the right to make judgement determinations of proper use based on the evidence provided and may require photos and/or videos of the items in questions. -
Page 15: Display Instructions
“2”. To convert unit, press the UP/DOWN button until the desired setting is displayed. To store a changed setting, hold the MODE button for 2s and then exit general settings. For additional information, instructional videos, and more visit Ride1up.com... - Page 16 For additional information, instructional videos, and more visit Ride1up.com...


Need help?
Do you have a question about the 500 Series and is the answer not in the manual?
Questions and answers