
Subscribe to Our Youtube Channel
Related Manuals for Formax FD 87HDS-R


Summary of Contents for Formax FD 87HDS-R
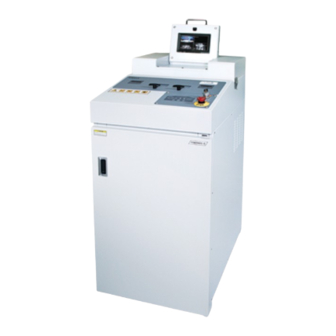
- Page 1 FD 87HDS-R Hard Drive Shredder With Video Recording System Serial Number: 2210B12062 and higher OPERATOR MANUAL SECOND EDITION 4/2024...
-
Page 3: Table Of Contents
TABLE OF CONTENTS TOPIC PAGE Safety Precautions Checking Safety Devices Overview & Specifications Installation Operation, Control Panel Overloading Emptying Waste Bin Exterior Cleaning Recording System 8-12... -
Page 4: Safety Precautions
Notes on work safety The FD 87HDS-R Hard Drive Shredder has been inspected for safety. However, improper operation and misuse risk the following: • the health or life of the operator •... - Page 5 The FD 87HDS-R Hard Drive Shredder is intended only for shredding discarded hard drives from desktop and laptop computers. The hardened, solid-steel cutting blades are designed to handle these materials. Any other use beyond the scope described here is regarded as not being in accordance with the instructions.
-
Page 6: Checking Safety Devices
Checking the Safety Devices Check the safety devices: • at the start of each work shift (when operation is sporadic) • at least once a week in continuous operation • after each maintenance or repair Check the safety devices for: •... -
Page 7: Overview & Specifications
Installation 1. Appropriate power outlet must be available at installation site. 2. The FD 87HDS-R is delivered completely assembled. During transport, be aware of the shredder’s high center of gravity. 3. The shredder can be moved on its casters. If a fork-lift is used, be sure to use the designated pick-up points. - Page 8 Operation Main Switch 1. On the left side of the machine, open the door leading to the electrical control panel. Push on the lever and the handle will pop out. Pull to open (Fig. 1). 2. Flip the main power switch to the UP position (Fig. 2). Close electrical control panel door. 3.
-
Page 9: Operation, Control Panel
Operation 1. Set main switch to ON. Turn the OFF/ON key switch on the control panel to the ON position. Fig. 3 2. Touch the START pad on the control panel to engage the machine. 3. Open the appropriate shredding chamber door (based on the size of the hard drive), (Fig. -
Page 10: Overloading
Overloading the Motor If the shred capacity of the machine is exceeded, the shredder will stop automatically. To resume shredding: 1. Push and hold the reverse button until the hard drive backs completely out of the shredder. 2. Press STOP on the control panel, then reinsert the hard drive. 3. -
Page 11: Recording System
Recording System Front Camera Records operator shredding. Simultaneous display of four recording channels. If you close down the monitor, both the Monitor recording system and shredder will turn off. Memory Card Lock Security lock that protects SD memory. SD Memory Card You can download the video files by compression and connecting them to a computer. - Page 12 Recording Function Power ON/OFF Moving Direction (Left, Up), Increase number Moving Direction (Right, Down), Decrease number CAM1-CAM4 Individual or 4 division channel Exit from play back menu (previous screen) Enter the Menu or exit to the previous screen Stop recording, confirm, select or change setting...
- Page 13 Menu - System 1. Memory Format - Select Format in System by using the Up and Down buttons and press the SEL button. * When using a new memory card, it must be formatted on the device, and when purchasing and using it directly, it is highly recommended to purchase it in an MLC type that can save multiple times repeatedly.
- Page 14 Menu - Playback 2. Play recorded files -You can play videos immediately on the device Move to the folders using Up and Down buttons. Select and play folders (files) using SEL button. Move to previous screen.
- Page 15 Menu - Setting the Date & Time 3. Time setting - Set the date and time using Up and Down buttons. Move using SEL button. Move to Menu...
Need help?
Do you have a question about the FD 87HDS-R and is the answer not in the manual?
Questions and answers