Advertisement
Quick Links
ASSEMBLY INSTRUCTIONS / PLANO DE ARMADO
Before assembling the furniture,
carefully read the assembly instructions!
Antes de armar el mueble, lea con
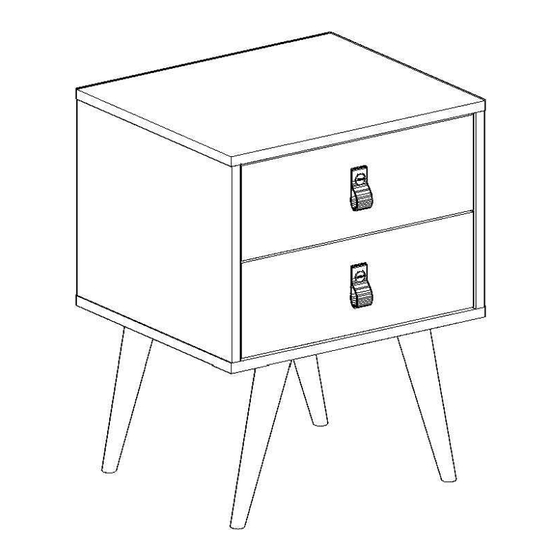
3001 - AMBER NIGHSTAND
Congratulations! You have purchased a
product of excellent quality, made from
MDP or MDF wood veneer, extracted
from renewable forests. It has high
strength and current design.
producto de excelente calidad,
fabricado con placa de madera de MDP
o MDF, proveniente de florestas
renovables. Tiene alta resistencia y
1) Check all parts before starting
assembly.
Verifique todas las partes
antes de empezar el armado.
ATENTION
2) When starting the assembly,
don't support the parts on the
wall.
A l empezar el armado, no
apoyes las partes en la pared.
3) When placing parts and hardware aside,
be careful not to lose them.
Al poner las piezas y herrages a parte,
4) The furniture must be mounted on the
floor, to do this, use the box itself to protect
and not damage the floor.
El mueble suele ser armando al piso, para
eso, use la propria caja para protegerlo y no
5) Begin assembly by following the
step-by-step instructions.
Comience el armado siguiendo la
instrucciones paso a paso.
6) It's the assembler's responsibility to
follow the instructions in this manual, which
are fundamental to the structure of the
furniture.
Es de responsabilidad del armador seguir
las instrucciones de este manual, que son
fundamentales para la estructura del mueble.
1) Care and cleaning should be
done with a cloth slightly
moistened with water.
CARE
debe ser hecha con un trapo
CUIDADOS
levemente humedecido en agua.
2) Don't use abrasive products, such as
soap, detergents and steel sponge.
No use productos abrasivos, como
3) Don't use wax or oil to shine the furniture.
No use cera o aceites para darle brillo al
mueble.
4) Don't expose the furniture to weather or
excessive heat.
No exponer el mueble a interperies ni al
calor excesivo.
5) When the assembly is finished, clean the
room and the furniture.
Al terminar el armado, limpie al ambiente y
al mueble.
ASSEMBLY INSTRUCTION
PLANO DE ARMADO
Advertisement

Subscribe to Our Youtube Channel
Related Manuals for Manhattan Comfort AMBER 3001


Summary of Contents for Manhattan Comfort AMBER 3001
- Page 1 ASSEMBLY INSTRUCTIONS / PLANO DE ARMADO Before assembling the furniture, 1) Care and cleaning should be 1) Check all parts before starting carefully read the assembly instructions! done with a cloth slightly assembly. Antes de armar el mueble, lea con moistened with water.
- Page 2 PARTS / PIEZAS LGTH WDTH DPTH DESCRIPTION LARG ANCH GROS CANT (mm) (mm) (mm) RIGHT SIDE PANEL LATERAL DERECHA LEFT SIDE PANEL LATERAL IZQUIERDA BOTTOM BASE TABLERO DRAWER FRONT DRAWER SIDE DRAWER BACK DRAWER BOTTOM PANEL BACK PANEL TRASERO...
- Page 3 USE THE RULER TO IDENTIFY THE SCREWS HARDWARE / HERRAJES UTILICE LA REGLA PARA IDENTIFICAR LOS TORNILLOS DESCRIPTION CODE CANT (mm) WOODEN DOWEL TARUGO TOOLS / HERRAMIENTAS MINIFIX SCREW TORNILLO MINIFIX PATA HAMMER RUBBER HAMMER PHILLIPS SCREWDRIVER MEASURING TAPE MARTILLO MARTILLO GOMA LLAVE PHILLIPS SCREW 5X50mm...
- Page 4 Fit the Wooden Dowels. Insert the Encajar los Tarugos. Minifix Screws. Insertar los Tornillos Minifix. Warning: Before fit the wooden dowels, make sure you are using the correct hole. For this process, consider the second hole Warning: before the edge of the plate. To be sure, the measurement Before assembling the mini fix screw make sure you between the center of the holes must be 10,07 inch are using the correct hole.
- Page 5 Fit the Sides Panels to the Bottom. Afterwards, fit the Minifix Drums on the Sides Panels and turn clockwise. Encaja las Laterales en la Base. Luego, coloque los Tambores Minifix en las sentido de las agujas del reloj. Fit the Top to the Sides Panels.
- Page 6 Insert the Minifix Screws. Fit the Wooden Dowels. Insertar los Tornillos Minifix. Encajar los Tarugos. Warning: Warning: Make sure that the hole to be used for the Make sure that the hole to be used for the wooden dowels is the first from the side of mini fix screw is the second from the side the rip.
-
Page 7: Handle Assembly
Glue the Hole Covers. Attach the Slides. Pegar los Tapa-Agujeros. Fije las Correderas. HANDLE ASSEMBLY - Fit the Plastic Screw in the Fix the Handle. central hole of the Handle; - Fold the Handle and fit the Asegure el Tirador. hole at the farthest end into the Screw;... - Page 8 Put the Drawers.
Need help?
Do you have a question about the AMBER 3001 and is the answer not in the manual?
Questions and answers