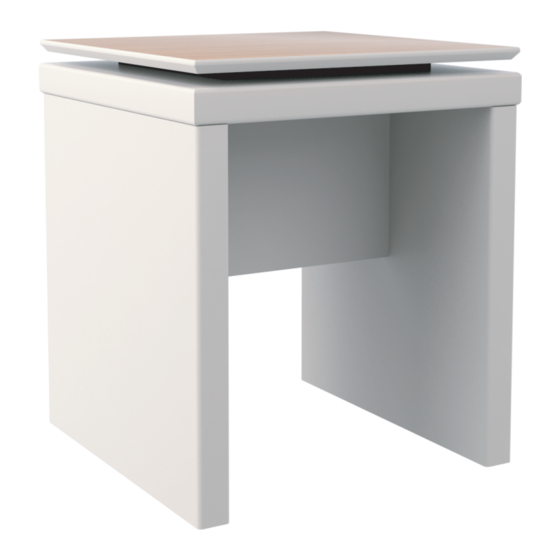
Summary of Contents for Manhattan Comfort 86200
- Page 1 MANUAL DE MONTAGEM ASSEMBLY INSTRUCTIONS INSTRUCCIONES DE MONTAJE COD BR: 86200 COD US: 89500 V : 00...
- Page 2 V : 00...
- Page 3 Sumário Summary Resumen Introdução Introduction Introducción Antes de começar Before starting Antes de comenzar Evite acidentes Avoid accidents Evitar accidentes Identificação das peças Identifying parts Identificación de las piezas Dimensões e ferramentas Dimensions and tools Dimensiones y herramientas Montagem do móvel Furniture assembly Montaje de la mueble Introdução...
- Page 4 Antes de começar Before starting Antes de comenzar Antes de começar a montagem prepare o ambiente, deixando-o completamente limpo e com bom espaço para iniciar o trabalho. Prepare the room before starting the assembly, leaving it completely clean and the area in good condition to start the work.
- Page 5 Para identificar o número da peça, verifique o verso da mesma, lá você encontra informações do lote de fabricação, código de identificação do produto e o número da peça. To identify the part number, check its back. There, you can find information from the production batch, product reference code and part number.
- Page 6 COD BR: 86200 COD US: 89500 PEÇA DESCRIÇÃO QUANT. CAIXA PART DESCRIPTION PIEZA DESCRIPCIÓN CANTIDAD CAJA TABLETOP CUBIERTA TAMPO LATERAL SIDE LATERAL BACK SUPPORT REFUERZO BANDEIRA TAMPO SUPERIOR UPPER BORAD CUBIERTA SUPERIOR SARRAFO MAIOR BATTEN SOPORTE ACESSÓRIOS INCLUÍDOS NA CAIXA 01 - HARDWARE INCLUDED IN BOX 01 - ACCESORIOS INCLUÍDOS EN LA CAJA 01...
-
Page 7: Passo
=10KG - 22LB LATERAL 2x / SIDE 2x / LATERAL 2x PASSO 1 Posicionar sapata 2x0136 na lateral 02, parafusar 4x1533 e minifix 1x0599. STEP 1 Place sapata 2x0136 in side 02, screw 4x1533 and screw minifix 1x0599. 0599 PASO 1 Poner sapata 2x0136 en 0136 lateral 02, atornillar 4x1533... - Page 8 BANDEIRA / BACK SUPPORT / REFUERZO PASSO 2 Encaixar cavilhas 2x1668 na Bandeira 03. STEP 2 Insert dowels 2x1668 on Back Support 03. PASO 2 Clavijas de ajuste 2x1668 1668 en el Refuerzo 03. TAMPO SUPERIOR / UPPER BOARD / CUBIERTA SUPERIOR PASSO 3 Parafusar 4x3525 fixando os sarrafos 06 no Tampo Superior 04,...
- Page 9 UNINDO OS TAMPOS / UNITED THE TOP BOARDS / UNIENDO LAS CUBIERTAS PASSO 5 Encaixar Tampo 01 no Tampo Sup. 04. STEP 5 Attach Top Board 01 to Upper Board. PASO 5 Montar el Cubierta 01 en el Cubierta superior 04. PASSO 5.1 Após encaixar Tampo 01 no Tampo Sup.
- Page 10 PASSO 7 Parafusar castanhas 2x0494 e colar 2 adesivos. STEP 7 Screwing nuts 2x0494 and place 2 stickers. PASO 7 Atornillar las tuercas 2x0494 y pegar 2 adhesivos. 0494 ADESIVO STICKER ADHESIVO PASSO 8 Encaixar cavilhas 4x1668 nas Laterais. STEP 8 Insert dowels 4x1668 on Sides.
- Page 11 PASSO 9.1 Parafusar castanhas 4x0494 e colar 4 adesivos. STEP 9.1 Screwing nuts 4x0494 And paste 4 stickers. 0494 PASO 9.1 Atornillar las tuercas 4x0494 y pegar 4 adhesivos. ADESIVO ADHESIVO STICKER V : 00...
-
Page 12: Step
V : 00...


Need help?
Do you have a question about the 86200 and is the answer not in the manual?
Questions and answers