
Related Manuals for Rollei Lion Rock Pro


Summary of Contents for Rollei Lion Rock Pro
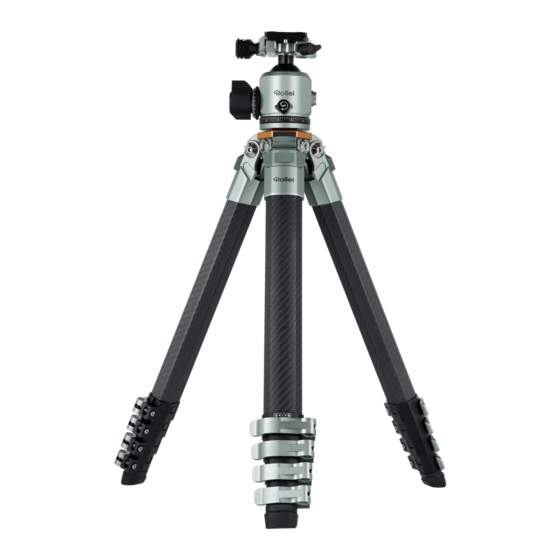
- Page 1 Lion Rock Pro inkl. Stativkopf / incl. Tripod Head ANLEITUNG AUF DEUTSCH MANUAL IN ENGLISH www.rollei.de...
-
Page 2: Table Of Contents
Inhalt Produktübersicht . . . . . . . . . . . . . . . . . . . . . . . . . . . . . . . . . . 4 Produktübersicht Panoramakopf . - Page 3 Content Product Overview . . . . . . . . . . . . . . . . . . . . . . . . . . . . . . . . . 14 Product Overview Ball Head .
-
Page 4: Produktübersicht
Produktübersicht Danke, dass Sie sich für unsere Produkte entschieden haben! Vor der Verwen- dung bitte sorgfältig durchlesen . Produktübersicht Kugelkopf Basisplatte Basis Sicherungsmechanismus 1/4-Zoll-Schraube Schnellwechselplatte Wasserwaage Arretierschraube der Basisplatte Schnellwechselplatte 12 12 Anti-Rutsch-Rille Panorama-Basis- Kugel-Gelenk Verriegelungs-Knopf Dämpfungs-Knopf 1/4-Zoll-Gewinde Hauptverriegelungsschraube Basis-Verriegelungs-Knopf DEUTSCH... -
Page 5: Schnellwechselplatte Nutzen
Schnellwechselplatte nutzen 1 . Lösen Sie die Arretierschraube der Basisplatte [3] . Drücken Sie dazu zusätz- lich den Sicherungsmechanismus der Schnellwechselplatte [2] herunter, um die Basisplatte [1] komplett öffnen zu können . 2 . Richten Sie die Schnellwechselplatte [11] wie im Bild dargestellt aus . 3 . -
Page 6: Einstellung Der Dämpfung
Einstellung der Dämpfung 1 . Installieren Sie Ihre Kamera auf dem Kugelkopf . 2 . Lösen Sie die Hauptverriegelungsschraube A [7] (Abb . 1) und schwenken Sie die Kameraplattform vorsichtig, bis Sie die gewünschte Bewegungsempfind- lichkeit gefunden haben . 3 . Ziehen Sie dann den Dämpfungs-Knopf B [6] heraus (Abb . 1) und drehen Sie ihn im Uhrzeigersinn, bis die beiden Stopper sich treffen (Abb . - Page 7 Einstellung der Dämpfung Dämpfung lösen Hinweis: Halten Sie das Gerät mit einer Hand fest und führen Sie diesen Vorgang mit der anderen Hand durch, um eine Beschädigung des Geräts zu vermeiden . 1 . Ziehen Sie den Dämpfungs-Knopf [6] heraus (Abb . 1) und lassen Sie ihn los, wenn er gegen den Uhrzeigersinn in die entsprechende Position gedreht ist .
-
Page 8: Produktübersicht Stativ
Produktübersicht Stativ Festziehen Zubehör-Verriegelungsknopf Lösen Winkelverriegelung Gummifüße / Spikes Zubehör-Sicherheitsknopf Nutzen Sie den mitgelieferten Inbusschlüssel wie in der Abbildung, um die Füße festzuziehen oder zu lösen . DEUTSCH... -
Page 9: Winkeleinstellung
Winkeleinstellung Halbautomatische Winkeleinstellung: Ziehen Sie die Winkelverriegelung [2] heraus bis sie sich fixiert . Stellen Sie das Bein auf den maximalen Winkel ein, die Winkelverriegelung [2] springt automatisch zurück in die Einrastung . Bewegen Sie das Bein dann in den gewünschten, kleineren Winkel, bis es automatisch einrastet . -
Page 10: Verwendung Des Zubehörs
Drehen Sie die Konter-Schraube mit dem Inbusschlüssel, bei montiertem Kopf nach oben, um das Drehen des Kopfes zu verhindern . Optional erhältlich Nivellieradapter für Lion Rock Pro Nivellier-Feststellschraube Lösen Sie die Nivellier-Feststellschraube, um den Winkel frei einzustellen . Drehen Sie den Haken nach links, um ihn zu lösen . - Page 11 Optional erhältlich Mittelsäule für Lion Rock Pro Mittelsäulen-Feststellschraube . Lösen Sie die Mittelsäulen-Feststellschraube, um die Mittelsäule in der Höhe zu verstellen . Drehen Sie den Haken nach links, um ihn zu lösen . Drehen Sie die Konter-Schraube mit dem Inbusschlüssel, bei montiertem Kopf nach oben, um das Drehen des Kopfes zu verhindern .
-
Page 12: Montage Und Demontage Von Zubehör
Lösen Sie die Zubehör-Feststellschraube . Drücken und halten Sie den Zubehör- Sicherungsknopf . Lösen Entnehmen Sie das Zubehör . Festziehen Technische Daten Lion Rock Pro Stativ mit / ohne Stativkopf Material Carbon Sektionen Stativbeindurchmesser Max . Ø 32 mm Packmaß... - Page 13 Kugel-Durchmesser 4,4 cm Basis-Breite 5,7 cm Basis-Höhe 9,1 cm Gewicht 0,46 kg Maximale Traglast 20 kg Lion Rock Pro + Nivellierung Sektionen Stativbeindurchmesser Max . Ø 32 mm Packmaß 55 cm Minimale Höhe 13,5 cm Maximale Höhe 143 cm Gewicht...
-
Page 14: Product Overview
Product Overview Thank you for choosing our products! Please read carefully before use . Product Overview Ball Head Base plate Base Safety mechanism quick-release 1/4 inch screw plate Spirit level Locking screw of the base plate Quick-release plate 12 12 Anti-slip groove Panorama base locking button Ball joint... -
Page 15: Using The Quick-Release Plate
Using the Quick-Release Plate 1 . Loosen the locking screw of the base plate [3] . Also press down the Safety mechanism quick-release plate [2] to be able to open the base plate [1] completely . 2 . Align the quick-release plate [11] as shown in the picture . 3 . -
Page 16: Setting The Damping
Setting the Damping 1 . Install your camera on the ball head . 2 . Loosen the main locking screw A [7] (Fig . 1) and carefully swivel the camera platform until you have found the desired movement sensitivity . 3 . - Page 17 Setting the Damping Release the damping Note: Hold the appliance firmly with one hand and carry out this procedure with the other hand to avoid damaging the appliance . 1 . Pull out the damping knob [6] (Fig . 1) and release it when it is turned anti- clockwise to the corresponding position .
-
Page 18: Product Overview Tripod
Product Overview Tripod Tighten Accessory locking button Loosen Angle locking Rubber feet / spikes Accessory safety button Use the supplied Allen key as shown in the illustration to tighten or loosen the feet . ENGLISH... -
Page 19: Angle Adjustment
Angle Adjustment Semi-automatic angle adjustment: Pull out the angle locking [2] until it locks into place . Set the leg to the maximum angle, the angle locking [2] automatically springs back into the lock . Then move the leg to the desired, smaller angle until it engages auto- matically . -
Page 20: Using The Accessories
With the head fitted, turn the counter screw upwards using the Allen key to prevent the head from turning . Optionally Available Levelling adapter for Lion Rock Pro Levelling locking screw . Loosen the levelling locking screw to freely adjust the angle . - Page 21 Optionally Available Centre column for Lion Rock Pro Centre column locking screw . Loosen the centre column locking screw to adjust the height of the centre column . Turn the hook to the left to release it . With the head fitted, turn the counter screw upwards using the Allen key to prevent the head from turning .
-
Page 22: Assembly And Disassembly Of Accessories
Loosen the accessory locking screw . Press and hold the accessory locking button . Loosen Remove the accessory . Tighten Technical Data Lion Rock Pro tripod with / without tripod head Tripod material Carbon Sections Tripod leg diameter Max . Ø 32 mm Pack size 61 .0 cm / 51 .9 cm... - Page 23 13 .5 cm Maximum height 143 cm Weight 1 .62 kg Maximum load capacity 20 kg Lion Rock Pro + centre column Sections Tripod leg diameter Max . Ø 32 mm Pack size 54 .5 cm Minimum height 38 cm...
- Page 24 In de Tarpen 42 D-22848 Norderstedt Service Hotline: +49 40 270750277 /rollei.foto.de @rollei_de Lion Rock Pro incl. Stativkopf / Lion Rock Pro incl. tripod head Art.-Nr. / Item No.: 23071 Optionales Zubehör / Optional accessories: Mittelsäule / Centre column Art.-Nr. / Item No.: 23073...
Need help?
Do you have a question about the Lion Rock Pro and is the answer not in the manual?
Questions and answers