
Related Manuals for Emerson Branson 2000Xt


Summary of Contents for Emerson Branson 2000Xt
- Page 1 Original Instructions 100-412-177 - REV. 17 2000Xt Power Supply O p e r a t i n g M a n u a l Branson Ultrasonics Corp. 120 Park Ridge Road Brookfield, CT 06804 (203) 796-0400 http://www.bransonultrasonics.com...
- Page 2 100-412-177 REV. 17...
- Page 3 Manual Change Information At Branson, we strive to maintain our position as the leader in ultrasonics plastics joining, cleaning and related technologies by continually improving our circuits and components in our equipment. These improvements are incorporated as soon as they are developed and thoroughly tested.
- Page 4 Foreword Congratulations on your choice of a Branson Ultrasonics Corporation system! The Branson 2000X Series system is process equipment for the joining of plastic parts using ultrasonic energy. It is the newest generation of product using this sophisticated technology for a variety of customer applications. This Instruction Manual is part of the documentation set for this system, and should be kept with the equipment.
-
Page 5: Table Of Contents
Table of Contents Chapter 1: Safety and Support Safety Requirements and Warnings ........2 General Precautions . - Page 6 Chapter 7: Maintenance 2000X Series Preventive Maintenance ........144 Parts Lists .
- Page 7 List of Figures Chapter 1: Safety and Support Chapter 2: The 2000Xt Power Supply Figure 2.1 2000X Time Power Supply Front Panel Display after Power-Up ....21 Chapter 3: Delivery and Handling Chapter 4: Installation and Setup Figure 4.1...
- Page 8 Figure 6.4 Test Screen ..........103 Figure 6.5 System Configuration Screens .
- Page 9 List of Tables Chapter 1: Safety and Support Table 1.1 Branson Contacts ..........9 Chapter 2: The 2000Xt Power Supply Table 2.1 Power Supply Compatibility with Branson Converters .
- Page 10 Table 7.2 2000X-Series System Cables (External)....... 146 Table 7.3 Suggested Spares ..........147 Table 7.4 Cycle Modified Alarms and Messages, with Probable Cause and Corrective Action .
- Page 11 Chapter 1: Safety and Support Safety Requirements and Warnings ......2 General Precautions .
-
Page 12: Safety Requirements And Warnings
Safety Requirements and Warnings 1.1.1 Symbols found in this Manual Three symbols used throughout the manual warrant special attention: NOTICE A Note contains important information. It does not alert the user to potential injury, but only to a situation that might eventually require additional work or modification if you ignore it initially. -
Page 13: General Precautions
General Precautions Take the following precautions before servicing the power supply: • Be sure the power switch is in the Off position before making any electrical connections. • To prevent the possibility of an electrical shock, always plug the power supply into a grounded power source. - Page 14 1.2.1 Intended Use of the System The 2000Xt Power Supply and Actuator are components of an ultrasonic welding system. These are designed for a wide variety of welding or processing applications. 1.2.2 Emissions When being processed, certain plastic materials can emit toxic fumes and/or gases hazardous to user health.
- Page 15 1.2.5 Compliance with Safety Standards COMPLIANCE WITH SAFETY STANDARDS PRODUCTS: 2000X Series Stand and Power Supply A standard 2000X Series Actuator or Stand connected to a 2000X t/ea/ or d Power Supply when used with dual start switches and an emergency stop switch (mounted in the Base) is in compliance with the following OSHA requirements: 29 CF R Chapter XV II - Occupational Safety and Health Administration - Subpart O - Machinery and Machine Guarding - Section 1910.212 General requirements for all...
-
Page 16: Warranty
Warranty For warranty information please reference the warranty section of Terms and Conditions found at: www.emerson.com/branson-terms-conditions. 100-412-177 REV. 17... -
Page 17: How To Contact Branson
How to Contact Branson Branson is here to help you. We appreciate your business and are interested in helping you successfully use our products. To contact Branson for help, use the following telephone numbers, or contact the field office nearest you. Brookfield: •... -
Page 18: Returning Equipment For Repair
Returning Equipment for Repair Before sending equipment for repair, provide as much information with the equipment to help determine the problem with the system. Fill in any details below or on a separate sheet. Describe the problem; provide as much detail as possible. For example, is this a new problem? Is the problem intermittent? How often does it occur? How long before it occurs if you are just powering up? _______________________________________________________________________... -
Page 19: Table 1.1 Branson Contacts
1.5.2 Record information about the Problem Before sending equipment for repair, record the following information and send a copy of it with the equipment. This will greatly increase Branson’s ability to address the problem. Describe the problem; provide as much detail as possible. For example, is the problem intermittent? How often does it occur? How long before it occurs after powering up? _______________________________________________________________________... - Page 20 Table 1.1 Branson Contacts What you need help with or Whom to Call At this Phone information about Technical questions about the Welding Product 203-796-0400 welding system Support Ext 355 Technical questions about Horns and 203-796-0400 ATG Lab Tooling Ext 495 Ordering new parts Parts Store 877-330-0406...
-
Page 21: Obtaining Replacement Parts
Obtaining Replacement Parts You can reach Branson Parts Store at the following telephone numbers: Branson Part Store direct telephone number: 877-330-0406 fax number: 877-330-0404 Many parts can be shipped the same day if ordered before 2:30 p.m., Eastern time. A parts list is found in Chapter 7 of this manual, listing descriptions and EDP part numbers. -
Page 22: Disposing Obsolete Machines And Accessories
Disposing Obsolete Machines and Accessories Branson Ultrasonics is not responsible for the disposal of used machines and accessories. Branson Ultrasonics is willing to take back used machines or accessories and to dispose them properly. It is required that the corresponding parts meet the following conditions: •... -
Page 23: Chapter 2: The 2000Xt Power Supply
Chapter 2: The 2000Xt Power Supply Models Covered..........14 Overview of these Models. -
Page 24: Models Covered
This manual covers the 2000Xt Power Supply with both the digital UPS configuration. 2.1.1 Power Supply Manual and Guides The following documentation is available for the Branson 2000Xt Power Supply: • 2000Xt (EDP 100-412-177) • 2000-Series System Installation Guide (EDP 100-214-226) •... -
Page 25: Overview Of These Models
Overview of these Models The 2000X generates ultrasonic electrical energy through an ultrasonic converter for welding plastics. Several models are available, depending on the desired frequency (for example, 20 kHz) or the desired power range (for example, 2.2 kW). The Power Supply also contains a microprocessor-based controller module that provides for control and monitoring of welding operations. -
Page 26: Compatibility With Branson Products
Compatibility with Branson Products The 2000Xt Power Supply is designed to be used with: • 2000X ae Actuator (Actuator alone, or Actuator Stand on a Base or on a Hub) Table 2.1 Power Supply Compatibility with Branson Converters 2000X Model Converter 15 kHz/3300 W CJ15... -
Page 27: Features
Features 2.4.1 The Welding System The welding system consists of a Power Supply and a converter-booster-horn stack. The system can perform ultrasonic welding, inserting, staking, spot welding, swaging, and degating. It is designed for automated, semi-automated and/or manual production operations. Listed below are the control features of the Branson 2000X Time ultrasonic welding system. - Page 28 critical points in the weld. Use these graphs to optimize your weld process or diagnose application problems. • Graphs, User Selectable: In any mode you can select the scale of the time axis on any graph so that you can zoom in on the start of the weld cycle. •...
- Page 29 • Weld Modes: Time, Energy, Peak Power, Absolute, Collapse, and Ground Detect are the available Weld Modes in the 2000X product line so you can choose the mode of control that best meets your specific application need. Time, and Ground Detect are available in the 2000X Time Power Supply.
- Page 30 Depending on their profile, horns are referred to as stepped, conical, exponential, bar, or catenoidal. The shape of the horn determines the amplitude at the face of the horn. Depending on the application, horns can be made from titanium alloys, aluminum, or steel.
-
Page 31: Front Panel Controls
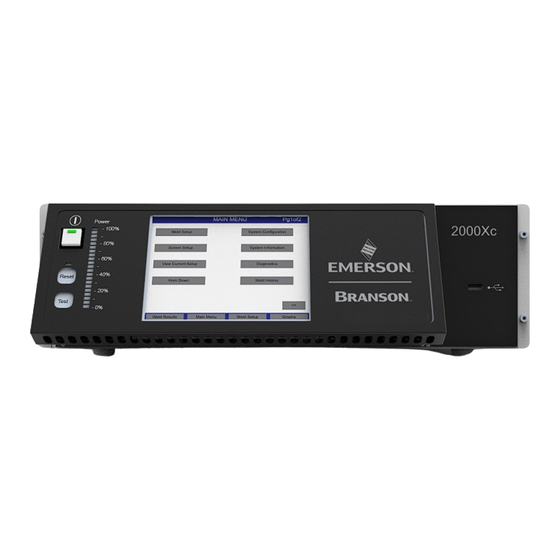
Front Panel Controls Figure 2.1 2000X Time Power Supply Front Panel Display after Power-Up Print Weld Results 02:Tm=.200s RUN:TIME = 1.000 Cycle# Time Pk Pwr Energy Freq Chg [Hz] 0.200 68.9 145.5 0.200 69.2 145.7 0.200 68.8 145.2 0.200 68.5 143.2 0.200 68.4... -
Page 32: Welding Systems
Welding Systems 2.6.1 Principle of Operation Thermoplastic parts are welded ultrasonically by applying high frequency vibrations to the parts being assembled. The vibrations, through surface and intermolecular friction, produce a sharp rise in temperature at the welding interface. When the temperature is high enough to melt the plastic, there is a flow of material between the parts. -
Page 33: Glossary
Glossary The following terminology may be encountered when using or operating a 2000X Time ultrasonic welding system: AB Amplitude: The amplitude at the horn face during the Afterburst step. AB Delay: Time delay between the end of the hold and the start of Afterburst. AB Time: The time duration of the Afterburst. - Page 34 Cycle Aborts: Settings that end the cycle immediately. Digital Filter: A smoothing technique used to provide more meaningful graph data. Downspeed: The rate of descent of the horn from the home position to the part. Energy Braking: Allows the power supply time to reduce the amplitude before the sonics are shut off.
- Page 35 Hold Time: The duration of the hold step. Horn Down: A mode in which ultrasonics are locked out and the user can advance the Actuator for setup and alignment. Host Commands: The host interface uses the 9-pin external RS-232 connector to connect system controller to the host PC.
- Page 36 Reset Required: Statement used to refer to alarms that will require the user to do a reset before a cycle can be run.The reset is accomplished by pressing the reset key on the front of the Power Supply, or by giving an external reset signal at the User I/O. Save Preset: Stores a programmed set of weld parameters as a preset.
-
Page 37: Chapter 3: Delivery And Handling
Chapter 3: Delivery and Handling Shipping and Handling ........28 Receiving . -
Page 38: Shipping And Handling
Shipping and Handling CAUTION The Power Supply internal components are sensitive to static discharge. Many components can be harmed if the unit is dropped, shipped under improper conditions or otherwise mishandled. 3.1.1 Environmental Specifications The Power Supply is an electronic unit that converts line voltage to ultrasonic energy and controls user input for regulating the weld process. -
Page 39: Receiving
Receiving The Power Supply is a sensitive electronic device. Many of its components can be harmed if the unit is dropped or otherwise mishandled. CAUTION The Actuator and the Power Supply are heavy. Handling, unpacking, and installation might require assistance or the use of a lifting device. Scope of Delivery Branson Power Supply units are carefully checked and packed before dispatch. -
Page 40: Unpacking
Unpacking The Power Supply is fully assembled. It is shipped in a sturdy cardboard box. Some additional items are shipped in the box with the Power Supply. When unpacking the Power Supply, take the following steps: Table 3.3 Unpacking Procedure Step Action Unpack the Power Supply as soon as it arrives. -
Page 41: Returning Equipment
Returning Equipment If you are returning equipment to Branson Ultrasonic Corporation, please call your Customer Service Representative to receive approval to return goods to Branson. If you are returning equipment for repair refer to Chapter 1: Safety and Support, Section 1.5 Returning Equipment for Repair, of this manual, for appropriate procedure. - Page 42 100-412-177 REV. 17...
-
Page 43: Chapter 4: Installation And Setup
Chapter 4: Installation and Setup About Installation......... . . 34 Handling and Unpacking . -
Page 44: About Installation
About Installation This chapter is intended to help the installer with the basic installation and setup of your new 2000X-series welder. This chapter will bring the reader to the point at which the system is functionally “ready to weld”. CAUTION The Actuator and related components are heavy. -
Page 45: Handling And Unpacking
Handling and Unpacking If there are any visible signs of damage to the shipping containers or the product, or you later discover hidden damage, NOTIFY YOUR CARRIER IMMEDIATELY. Save the packing material. Unpack the 2000X-series components as soon as they arrive. Refer to the following procedures. Verify you have all of the equipment ordered. -
Page 46: Figure 4.1 Unpacking The Stand (Actuator On A Base); Right-Side View Of Stand
Figure 4.1 Unpacking the Stand (Actuator on a Base); right-side view of Stand Move the shipping container close to the intended installation location, leave it on the floor. Open the top of the box. Remove the insert from the top of the protective box. Remove the staples at the bottom of the protective box. -
Page 47: Figure 4.2 Unpacking The Stand (Actuator On A Hub); Hub Shown Separately
4.2.4 Unpack the Stand (Actuator on a Hub) Figure 4.2 Unpacking the Stand (Actuator on a Hub); Hub shown separately CAUTION Heed the “This End Up” arrows and the “Open Top First” instructions. The packaging is designed to be removed from the assemblies from an upright orientation only. -
Page 48: Figure 4.3 Ultrasonic Converter (J-Type For Stand Use) And Booster
CAUTION The column and column support are under spring tension from the counterbalance spring. Do NOT attempt to disassemble the column from the stand, but always keep the column support clamped together. When making height adjustments, carefully and slowly release the clamps to control the motion, and hold the stand to prevent sudden movements or injury. -
Page 49: Take Inventory Of Small Parts
Take Inventory of Small Parts Table 4.1 Small Parts Included (=x) with Power Supply and/or Actuator Assemblies 2000X Power Supply Actuator Part or Kit Stand Stand 15 kHz 20 kHz 30 kHz 40 kHz (alone) (Base) (Hub) T-Handle Wrench Mylar Washer Kit Silicone Grease Actuator Mtg. -
Page 50: Table 4.2 List Of Cables
Table 4.2 List of Cables Part Number Description 101-241-208 Alarm I/O, 15’ (J957S) 101-241-209 Alarm I/O, 25’ (J957S) 101-241-258 Alarm I/O, 50’ (J957S) 101-240-020 Start Cable (J911) 8’ (req PLA) 101-240-015 Start Cable (J911) 15’ (req PLA) 101-240-010 Start Cable (J911) 25’ (req PLA) 101-240-168 Start Cable (J911) 50’... -
Page 51: Installation Requirements
Installation Requirements This section covers the location options, dimensions of the major assemblies, environmental requirements, electrical requirements and factory air requirements, to help you plan and execute your installation successfully. 4.4.1 Location The actuator or stand may be installed in a variety of positions. The stand (on a base) is often manually operated, using its base-mounted start switches, and so is installed at a safe and comfortable workbench height (approximately 30-36 inches) with the operator sitting or standing in front of the system. -
Page 52: Figure 4.4 Aed Actuator Dimensional Drawing
Figure 4.4 aed Actuator Dimensional Drawing 18.54 (471) AIR INLET CAUTION SPACE ALLOCATION FOR CONNECTOR AND CABLE BENDS AIR SUPPLY MUST BE FREE OF OIL AND WATER MAX. PRESSURE 100 PSI/690 kPa/6.89 bar 5.00 9.83 AIR INLET (127) (250) 1/4” DIA TUBING 13.73 (349) -
Page 53: Figure 4.5 Power Supply Dimensional Drawing
Figure 4.5 Power Supply Dimensional Drawing 5.0” (127mm) Desired Clearance Air Intake 20.5” 520.7mm 3.5” 88.9mm 0.45” 13.4” 11.4mm 340.1mm 17.6” 445.8mm 5.8” 5.8” 147.32mm 147.32mm Air Outlet is under front panel 100-412-177 REV. 17... -
Page 54: Table 4.3 Environmental Specifications
4.4.2 Environmental Specifications Table 4.3 Environmental Specifications Environmental Concern Acceptable Range Humidity 30% to 95%*, non-condensing Ambient Operating Temperature +5°C to +50°C (41°F to 122°F) -25°C to +55°C (-13°F to +131°F); Storage / Shipping Temperature Up to +70°C (+158°F) for 24 hours *Above 40°C the humidity drops to 90% 4.4.3 Electrical Input Power Ratings... - Page 55 Table 4.4 Input Power Requirements Model Power Current Rating NEMA Connector 400 W 200V - 3 Amp Max. @ 200V / 20 Amp NEMA L6-20P Plug 240V fuse 400 W 100V - 5 Amp Max. @ 100V / 20 Amp NEMA 5-15P Plug 120V fuse...
- Page 56 4.4.4.3 Pneumatic Connections to Actuator Air connection to the ae actuator is made to the AIR INLET connector on the top rear of the actuator, with plastic pneumatic tubing. For installations using actuator-alone assemblies, you must provide an air filter assembly which will support at least to 100 psig and remove particulate matter of 5 microns or larger.
-
Page 57: Installation Steps
Installation Steps WARNING This product is heavy and can cause a pinching or crushing injury during installation or adjustment. Keep clear of moving parts and do not loosen clamps unless directed to do so. CAUTION If a stand is not mounted in a vertical position, the air filters (on the column support) must be removed, reoriented, and replumbed. -
Page 58: Figure 4.6 Base Mounting Centers
Figure 4.6 Base Mounting Centers 28.0 in / 711 mm 7.37 in / 187 mm 14.75 in / 16.5 in / 375 mm 419 mm Mounting Holes accept 3/8 inch or metric M10 cap screws 21.31 in / 541 mm 4.5.2 Mounting the Stand (Actuator on Hub-mounted column) During unpacking, you removed the hub from the column/stand assembly. -
Page 59: Figure 4.7 Mounting Bolt Pattern For The Hub (For Stand On Hub)
Figure 4.7 Mounting Bolt Pattern for the Hub (for Stand on Hub) Front of Hub 3/8 inch or 10.50 in / 267 mm M10 bolts (4 places) 6.00 in / 152 mm 3.94 in / 100mm 5.25 in / 133 mm 0.59 in / 0.94 in / 24 mm 11 mm... -
Page 60: Figure 4.8 Actuator Rear View, Mounting Surface, Bolt And Guide Pin Locations
CAUTION The actuator support bolts for the 2000X-Series actuators are metric, M10 x 1.5 thread pitch, 25mm long. The support pin and mounting bolts must not extend more than 0.40 in (10 mm) into the actuator, otherwise, binding or damage to the carriage may occur. CAUTION DO NOT use 900-Series M10 x 1.25 mounting bolts. - Page 61 Lift the actuator assembly into position on your mount, and secure using the metric bolts provided. CAUTION In the event you must use bolts of a different length, ensure that the bolts extend more than 0.25 inch (6 mm) into the threads in the actuator housing, but less than 0.40 inch (10 mm).
-
Page 62: Figure 4.9 Connections On Rear Of Power Supply
4.5.7 Interconnect between Power Supply and Actuator There are two electrical connections between the Power Supply and the Actuator: the RF Cable and the Actuator Interface cable. A 37-pin cable is used for Power and Control Signalling between the 2000X Power Supply and a Branson Actuator. The cable connects to the rear of the Power Supply and the rear of the Actuator. -
Page 63: Figure 4.10 Electrical Connections From Power Supply To A 2000X-Series Actuator
Figure 4.10 Electrical Connections from Power Supply to a 2000X-series Actuator *ae/aed actuator air input shown **aed only AIR INLET CAUTION 100 PSI MAX. IMPORTANT AIR SUPPLY MUST BE FREE OF OIL AND WATER MAX. PRESSURE 100PSI/690 kPA/6.89 bar Air Inlet* MPS/GDS Actuator Interface Cable... -
Page 64: Start Switch Connection (Automation)
Start Switch Connection (Automation) NOTICE Appendix A: Automation for additional information about Automation. A Branson actuator requires 2 start switches and emergency stop connection. Stands on a base include this connection (factory installed and connected from the base) while the stand on a hub and actuator (alone) applications require the user make their own start switch/E-stop connections, as follows: NOTICE... - Page 65 NOTICE Start Switches PB1 and PB2 must be closed within 200 milliseconds of each other, and remain closed until the PB Release signal is active, to effect a start condition. BASE/START is the DB-9 female connection on the back of the actuator. Your cable requires a male DB-9 (D-shell) connector.
-
Page 66: Figure 4.12 User I/O Cable Identification And Wire Color Diagram
Figure 4.12 User I/O Cable Identification and Wire Color Diagram User I/O Cable Stripped and tinned one end, HD-44 male connector other end (cable length as ordered) Part number Wire Color Diagram Two Colors = Insulator/Stripe Three Colors = Insulator/Stripe/Dot Insulation Stripe Table 4.5... - Page 67 Table 4.5 User I/O Cable Pin Assignments, Alphabetical Order Signal Signal Signal Name Direction Definition Colors Type Range User definable outputs. Refer to J3_8_OUTPUT 24V True Output 0/24V, 100mA Table 4.6 to view Grn/Wht available selections. J3_22_OUTPUT 24V True Output 0/24V, 100mA Blk/Red/Grn J3_36_OUTPUT...
- Page 68 Table 4.5 User I/O Cable Pin Assignments, Alphabetical Order Signal Signal Signal Name Direction Definition Colors Type Range 24V_RTN Input 24V Return Orn/Red Ground 24V, 1.25A 24V_SRC Output 24V Source Blu/Red Source 24V_RTN Input 24V Return Blu/Wht/Orn Ground 24V, 1.25A 24V_SRC Output 24V Source...
-
Page 69: Figure 4.13 International Harmonized Line Cord Color Code
Table 4.6 User I/O Input and Output Function Selection Input Output J3_1_INPUT J3_8_OUTPUT Disabled Confirm Preset Disabled J3_17_INPUT J3_22_OUTPUT Ext Beeper Ext U/S Delay Cycle Okay J3_19_INPUT J3_36_OUTPUT Display Lock No Cycle Alarm Sonics Disable J3_31_INPUT Overload Alarm Memory Reset Modified Alarm External Start J3_32_INPUT... -
Page 70: Table 4.7 User I/O Dip Switch Functions
Table 4.7 User I/O DIP Switch Functions Switch Position Signal Description Output Signal REJECT_SIG REJECT SUSPECT_SIG SUSPECT PB_RELEASE_SIG PB_RELEASE G_ALARM_SIG G_ALARM READY_SIG READY WELD_ON_SIG WELD_ON ACTUATOR_CLEAR_SIG ACT_CLEAR J3_22_OUT_SIG J3_22_OUTPUT J3_36_OUT_SIG J3_36_OUTPUT J3_8_OUT_SIG J3_8_OUTPUT 100-412-177 REV. 17... -
Page 71: Guards And Safety Equipment
Guards and Safety Equipment 4.7.1 Emergency Stop Control If you use the Emergency Stop button on the Actuator to terminate a weld, twist the button to reset it. (The welder will not operate until this button is reset.) You must then press Reset at the power supply. -
Page 72: Rack Mount Installation
Rack Mount Installation If the system is Rack Mounted, you need to order the Rack Mount handle kit. The kit includes two rack mounting handles and two corner pieces, which support the handles and provide the rack mount interface. CAUTION The Rack Mount handle kit does NOT support the power supply in the rack. - Page 73 Table 4.8 Rack Mount Handle Kit Assembly Step Procedure From the front corners of the Power Supply, remove the corner trim pieces by removing the two Phillips screws. Save the screws. Noting that one side of each bracket is countersunk to accept the provided flathead screws, assemble the Rack Mount Handles as shown Figure 4.15 Detail of Rack Mount Handle Kit Assembly.
-
Page 74: Assemble The Acoustic Stack
Assemble the Acoustic Stack CAUTION The following procedure must be performed by a setup person. If necessary, secure the largest portion of a square or rectangular horn in a soft jawed vise. NEVER attempt to assemble or remove a horn by holding the converter housing or the booster clamp ring in a vise. -
Page 75: Table 4.11 Assembly For A 30 Khz System
Table 4.10 Assembly for a 15 kHz and 20 kHz System Step Action Install the threaded stud into the top of the horn. Torque to 450 in-lbs, 50.84 Nm. If the stud is dry, apply 1 or 2 drops of a light lubricating oil before installing. Install a single Mylar washer (matching the size of the washer to the stud) to each interface. -
Page 76: Table 4.12 Assembly For A 40 Khz System
4.9.3 For a 40 kHz System Table 4.12 Assembly for a 40 kHz System Step Action Clean the mating surfaces of the converter, booster, and horn. Remove any foreign material from the threaded holes. Apply a drop of Loctite 290 threadlocker (or equivalent) to the studs for the booster and horn. -
Page 77: Figure 4.16 Assembling The 20 Khz Acoustic Stack
4.9.4 Assembling the Acoustic Stack (shown with rectangular horn secured in the vise) Figure 4.16 Assembling the 20 kHz Acoustic Stack Converter Booster Spanner (provided) See stack Assembly Procedure Vise Jaw protectors (aluminum or soft material) Horn Vise Stack Assembly Torque Tables NOTICE The use of a Branson torque wrench or the equivalent is recommended. -
Page 78: Figure 4.17 Connecting Tip To Horn
4.9.5 Connecting Tip to Horn Clean the mating surfaces of the horn and tip. Remove foreign matter from the threaded stud and hole. Hand assemble the tip to the horn. Assemble dry. Do not use any silicone grease. Use the spanner wrench and an open-end wrench (Refer to Figure 4.17 Connecting Tip to Horn) and tighten to the following torque tip specifications:... -
Page 79: Installing The Ultrasonic Stack In The Actuator
4.10 Installing the Ultrasonic Stack in the Actuator This section lists the steps and indicates the assembly procedures for various ultrasonic stacks. 4.10.1 15 kHz, 20 kHz, and 30 kHz Converter Stacks The ultrasonic stack must first be assembled. To install the stack: Make sure that the system power is turned off by disconnecting the power plug. -
Page 80: Figure 4.19 Installing The 40 Khz Stack In A Branson Actuator
4.10.2 40 kHz Stacks Converter Stacks Make sure the system power is turned off by disconnecting the power plug. Place the converter/booster in the sleeve. Loosen four carriage door screws. Pull the door straight off and set it aside. Take the assembled sleeve and align the ring nut on the booster just above the support washer in the carriage. -
Page 81: Figure 4.20 Mounting Circles On Base
4.10.3 Mounting the Fixture on the Branson Base (hardware and mounting holes) The base provides mounting holes for your fixture. Mounting holes are also provided for the optional Branson leveling plate kit. The base is a tapped for metric M10-1.5 hardware. The mounting holes are arranged in three concentric bolt circles with the following dimensions. -
Page 82: Testing The Installation
4.11 Testing the Installation Turn on the air supply connections including the pneumatic dump valve and verify that the air pressure indicator light in the actuator is lit. Ensure there are no leaks in the air supply connections. Turn on the power supply. The power supply will begins its normal self-check. If the power supply displays an alarm message, find the alarm message definition, cause and correction in Chapter 7: Maintenance of this manual. -
Page 83: Still Need Help? Or Parts? Have Questions
4.12 Still Need Help? or Parts? Have Questions? Branson is pleased that you chose our product and we are here for you! If you need assistance with your 2000X-series system, call your local Branson representative or contact Branson customer service by calling the appropriate department as indicated on Table 1.1 Branson Contacts, in Section 1.5.3 Departments to... - Page 84 100-412-177 REV. 17...
- Page 85 Chapter 5: Technical Specifications Technical Specifications ........76 Physical Description .
-
Page 86: Technical Specifications
Technical Specifications 5.1.1 Environmental Requirements The 2000X Power Supply has the following environmental requirements. Table 5.1 Environmental Specifications Environmental Concern Acceptable Range Ambient Temperature +41°F to +122°F (+5°C to +50°C) Storage/Shipping Temperature –13°F to +158°F (–25°C to +70°C) Humidity 30% to 95%* non-condensing *Above 40°C the humidity drops to 90% 5.1.2 Electrical Requirements... - Page 87 Table 5.3 Input Current and Fuse Requirements Model Power Current Rating 750 W 100V - 120V 10 Amp Max. @ 100V / 20 Amp fuse For 30 kHz models 750 W 200V - 240V 5 Amp Max. @ 200V / 20 Amp fuse 1500 W 200V - 240V 10 Amp Max.
-
Page 88: Physical Description
Physical Description The 2000X Power Supply is part of an industrial system that can be used for ultrasonic welding, inserting, staking, spot welding, swaging, and degating thermoplastic parts, and for cutting and sealing thermoplastic fabric and film. Branson 2000X distance Power Supplies can operate with Actuators in manual, semi-automated, or automated systems. -
Page 89: Standard Modules And Components
Standard Modules and Components The following sections describe the 2000X internal circuits. 5.3.1 Circuit Descriptions The 2000X Power Supply contains the following modules: • Line Board • System Control Board • Ultrasonic Power Module • DC Power Module • User I/O The following sections contain descriptions for each module. - Page 90 • Allow control of the resonant frequency. • Control starting amplitude. • System Protection Monitor (SPM) and AutoTune with Memory (AT/M) circuit do the following: • Provide overload protection for the Ultrasonic Power Module. • Store operating frequency of last weld (frequency memory) and use the stored frequency as a starting point for the next weld.
-
Page 91: Figure 5.2 20 Khz Cr20 Converter Dimensions
Figure 5.2 20 kHz CR20 Converter Dimensions Grip Area 3.50 2.97 75.4 4.28 5.53 7.79 inches Figure 5.3 20 kHz Booster Dimensions 3.25* Grip Ring Diameter: 1/2 - 20 x 1-1/4 stud (Ti boosters) 1/2 - 20 x 1-1/2 stud (Al boosters) Variable Variable 2.38*... -
Page 92: Figure 5.4 20 Khz Converter/Booster/Horn, Typical Dimensions
Figure 5.4 20 kHz Converter/Booster/Horn, Typical Dimensions ONE-HALF CONVERTER BOOSTER WAVELENGTH* HORN INCHES 7.16 5.57 5 ± 0.5 127 ± 12.7 3.50 RECOMMENDED *OVERALL HORN LENGTH CLAMPING AREA CAN VARY BEYOND THESE BOOSTER FRONT END TYPICAL DIMENSIONS DIA. WILL VARY WITH DEPENDING ON THE APPLICATION AMPLITUDE **DIMENSIONS VARY WITH TUNING AND GAIN... -
Page 93: Figure 5.6 30 Khz Booster Dimensions
Figure 5.6 30 kHz Booster Dimensions M3x12 SOCKET HEAD SCREWS 2.66* Grip Ring diameter: 67.6 3/8 - 24 x 1-1/4 stud 3/8-24 UNF Ø.125 SPANNER 3.175 1.50* .63* WRENCH HOLES 3.55** to 3.79** 90.2 96.3 inches **varies with tuning and gain *these dimensions do not vary Figure 5.7 30 kHz, CA - 30 Converter with Booster... -
Page 94: Figure 5.8 30 Khz Converter/Booster/Horn, Typical Dimensions
Figure 5.8 30 kHz Converter/Booster/Horn, Typical Dimensions ONE-HALF CONVERTER BOOSTER WAVELENGTH* HORN INCHES 3.67** 3.3 ± 0.33 84 ± 8.4 *OVERALL HORN LENGTH RECOMMENDED CAN VARY BEYOND THESE TYPICAL DIMENSIONS CLAMPING DEPENDING ON THE APPLICATION LOCATION **DIMENSION VARIES WITH TUNING AND GAIN BOOSTER FRONT END DIA. -
Page 95: Figure 5.11 40 Khz, 4Tp Converter Dimensions
Figure 5.11 40 kHz, 4TP Converter Dimensions Figure 5.12 40 kHz Booster Dimensions Figure 5.13 40 kHz Converter/Booster/Horn, Typical Dimensions ONE-HALF CONVERTER BOOSTER WAVELENGTH* HORN INCHES 2.50** 2.5 ± 0.25 64 ± 6.4 *OVERALL HORN LENGTH RECOMMENDED CAN VARY BEYOND THESE TYPICAL DIMENSIONS CLAMPING DEPENDING ON THE APPLICATION... - Page 96 100-412-177 REV. 17...
-
Page 97: Chapter 6: Operation
Chapter 6: Operation 2000X External Communication Functions ......88 Front Panel Controls ......... 95 System Menus. -
Page 98: 2000X External Communication Functions
2000X External Communication Functions 6.1.1 Branson X-NetTM Setup Branson X-Net is a method of remotely communicating with a Branson 2000X touch screen welder. It is a bi-directional control technique that allows the user to remotely monitor and control the operation of the welder from a networked PC. Note: You can not use this to link to a PLC for the user I/O. - Page 99 window that has the welder’s Industrial PC IP address. In most networks this will be automatically assigned. NOTICE If the welder it turned off and a connection is not made for some time, some networks will reassign a new IP address, so this step may have to be repeated.
- Page 100 Be sure VNC Pocket Viewer is open: Double click on My Device. Double click on Disk. Double click on PocketVNC. This will turn on XNet. (The VNC Viewer will NOT open, it is running in the background.) Close this window by clicking the “X” button in the upper right corner. To return to the 2000X screen double click on the SBC icon.
- Page 101 PC Setting The PC will need to be configured for a static IP Address: From Windows select: Start > Settings > Network and Dial-Up Connections. Select: Local Area Connections > Properties > Internet Protocol > Properties. Set the following IP address: IP: 1.1.1.2 Subnet mask: 255.0.0.0 Gateway: 1.1.1.2...
- Page 102 Click on the keyboard icon in the lower right applications tray and select Hide Input Panel. Double click the SBC icon in the window screen to return to the 2000x main screen. To run the PocketVNC at power up: Using your mouse pull up the toolbar on the bottom of the screen. Click Start Settings Control Panel.
- Page 103 To view the stored data on a PC you may use Branson’s history utility program History.exe. (See the following section for further information.) 6.1.3 Branson History Utility The Branson History Utility program is used to display weld history results from the 2000X power supply on a PC.
- Page 104 Click OK, to close. NOTICE If the automatic pop up window does not appear user may access from the Start Menu>Program>Windows Explorer>Windows> Then double click on Epsonset. 6.1.4.3 Epson Stylus printers Attach your printer to the USB port and turn it on. Select "Epson Stylus"...
-
Page 105: Front Panel Controls
Front Panel Controls You use the color touch screen on the front panel of the 2000X Power Supply to navigate through all of the menus, set welding values, view alarms, and print reports or information about the most recently completed weld. You press the Reset Button when you encounter an alarm condition requiring that you reset the Power Supply before performing another operation. -
Page 106: Figure 6.1 Front Panel Of The 2000X Time Power Supply
• touching the Weld Setup Button will display the Weld Setup screen which accesses the Weld Mode, and all Weld Parameters including the Limits menu buttons. • touching the Graphs Button will display the Power, Amplitude, and Frequency menu buttons. •... - Page 107 NOTICE You can return to any of these menus at any time by pressing the respective touch screen button. 6.2.2.1 Button Types There are 3 types of “buttons”: • Navigation button: touching this button will “depress” it and display a new Screen. •...
- Page 108 6.2.4 Main Menu Screen Touching the Main Menu button displays the Main Menu screen. The following 13 choices are available on the Main Menu Screens: • System Information • System Configuration • Weld Setup • Diagnostics • View Quality Screen •...
-
Page 109: Table 6.1 Testing The Welding System
6.2.6 Graphs Menu Screen On this menu you can toggle Auto Refresh On or Off. By Touching the View Graphs button you will be taken to the View Graphs screen where graphs for Power, Amplitude, and Frequency can be displayed or printed from. A “No Graph Available” will appear on the screen if no valid data is available. - Page 110 Table 6.1 Testing the Welding System Step Action Position the part in the tooling. Verify that factory air supply has been connected to the actuator and turned on. (If using optional pneumatic dump valve, ensure it is turned on.) On the Power Supply front panel, press the power switch. The power light on the front of the Actuator becomes illuminated.
-
Page 111: System Menus
System Menus NOTICE Screen color presets can be modified from the Color Setup Screen. See: Section 6.4.1 System Configuration Menu. 6.3.1 Using the Weld Results screen Initially, Weld Results is the first screen to be displayed upon powering up the 2000X. The screen will show up to 4 preselected weld results of the last 7 weld cycles. -
Page 112: Figure 6.3 Column Setup Screens
6.3.1.1 Weld Results Touching the Weld Results button will take you to a listing of the weld results of the last 7 weld cycles. Up to 4 parameters from the 3 Column Setup menu screens can be selected to be viewed in the Weld Results screen. (Refer to Figure 6.2.) Column Setup is accessed by pressing the button in the lower right of the screen. -
Page 113: Figure 6.4 Test Screen
6.3.1.2 Weld Results Parameter Definitions • Set Amp (%): The set value for amplitude of the most recent weld when amplitude stepping is • Freq Min(Hz): the minimum frequency used during the most recent weld cycle • Freq Max(Hz): the maximum frequency used during the most recent weld cycle •... -
Page 114: Using The Main Menu
Using the Main Menu NOTICE Screen color presets can be modified from the Color Setup Screen. See: Section 6.4.1 System Configuration Menu. 6.4.1 System Configuration Menu You use the System Configuration Menu to set units in which the Power Supply will operate (that is, Metric or USCS), enter a password, reset counters or alarms, set the date or time, turn beeper on or off, and perform other system-related changes. - Page 115 System Configuration Navigation Menu, Pg 3 System Configuration Password Screen Sys Config Pg 1 / 2 ABC DEF JKL MNO Enter Password PQR STU VWX Weld Results Main Menu Weld Setup Graphs • A Password can be entered to limit access to the System Configuration Menu, weld setup, or recalling a preset.
- Page 116 System Configuration RS232 Screen System Configuration Reset Cycle Counter RS232 Terminal Host ASCII [tab] ASCII [comma] ACII [space] Disabled Save Exit Weld Results Main Menu Weld Setup Graphs An ASCII string of weld data is sent out through the RS232 port after each weld. The data is separated with the user-selected choice of a space, comma or tab.
- Page 117 Data String Sample Output The following examples illustrate the data string that is sent out through the serial port after each weld. The table following these data strings shows the relationship between control levels. IDID can be any number from 1 to 9999. Table headings 1 through 3 respectively reference data string examples 1 through 3.
-
Page 118: Table 6.2 Code Output
Table 6.2 Code Output Where Definition cccccccc@ is up to an 8-digit cycle count (Cycle Number) hh:mm:ss@ is time of cycle in hours, minutes and seconds (Time) MM/DD/YY@ is date in month, day and year (Date) Mode@ is weld mode (TIME, ENERGY, PKPWR, COL. ABS, G DET) tt.ttt@ length of ultrasonics in seconds (Act. - Page 119 NOTICE Select units (metric or USCS) before making selections. Rounding may cause an Invalid Preset alarm when using the minimum or maximum values, when changing units. System Configuration Amplitude Control System Configuration Extra Cooling Screen Screen When set to On, allows cooling air to start Allows you to set whether amplitude is when upper limit switch is triggered and internally (INT) or externally (EXT)
- Page 120 NOTICE Beepers: “Trigger Beeper” is replaced with “Release Beeper” for Hand Held operation only! Hand Held Hand Held is accessed and turned On or Off in the System Configuration menu. Hand Held will run in Time, and Ground Detect modes.Hand Held start function can be used with a hand held unit or a “Stack”...
-
Page 121: Table 6.3 Failures And Associated Alarms When Start Signal Is Lost
Table 6.3 Failures and associated alarms when start signal is lost Alarm Cause of Alarm Trigger Lost in Weld Start signal lost before ultrasonics ends Trigger Lost in Hold Start signal lost before Hold ends No alarm, cycle stops abruptly, terminates Start signal lost during Afterburst Afterburst No alarm, cycle stops abruptly, terminates... - Page 122 System Configuration Set Date Screen System Configuration P/S Settings Sys Config Pg 3 of 3 Date ABC DEF Current Date 10/02/03 JKL MNO New Date MM/DD/YY PQR STU VWX Weld Results Main Menu Weld Setup Graphs System Configuration Actuator Settings Screen System Config Actuator Cyl Diameter Pge 1 Set Cylinder Diameter 100-412-177 REV.
- Page 123 System Config Actuator Cyl Diameter Pge 2 System Configuration Actuator Cylinder Stroke Set Cylinder Diameter Set Cylinder Stroke System Configuration Actuator Custom System Configuration External Presets Button External selection of presets can be toggled On or Off. This feature can be used in both normal and Hand Held modes.
-
Page 124: Table 6.4 User I/O Inputs And Outputs
Table 6.4 User I/O Inputs and Outputs User I/O Inputs User I/O Outputs Disabled Disabled Select Preset * No Cycle Alarm Disabled Disabled No Cycle Alarm Select Preset * Cycle OK Ext U/S Delay Confirm Preset Display Lock Ext Beeper Ext Signal O/L Alarm Sonics Disable... - Page 125 System Configuration Digital Filter System Configuration Bargraph Scales Screen Allows you to turn the digital filter for graphing On or Off. NOTICE Branson recommends that you set the Digital Filter to On. System Configuration Frequency Offset Screen System Config Screen Setup Screen Screen Setup Allows you to set whether the frequency offset is internally (INT) or...
-
Page 126: Figure 6.6 System Information Screen
System Config Color Setup Screen System Config Color Setup Screen The Color Setup screen allows you to change colors for the Title Bar, Buttons, Background, and Text. Pressing the buttons will cycle through several colors you can select from. User can revert back to Default Colors by touch- ing Cold Start. -
Page 127: Figure 6.7 Diagnostics Screen
• Actuator: Displays aed/aod, aef/aof, and ae/HH, depending on configuration options for d actuators. • S/W Version: Displays power supply software version number. • Welder Addr: Turn on to assign a unique trackable number to a welder for data collection. •... - Page 128 Upper section: • When Digital Tune is set to On, Touching the Start Freq button moves you to a keyboard pop-up to set the Start Frequency. As with all pop-ups, the limits are displayed, and it is not possible to enter a value out of the operating range.
-
Page 129: Figure 6.8 Horn Signature Screen During Scan
6.4.3.1 Horn Signature Menu Figure 6.8 Horn Signature screen during scan Horn Signature = Off =19950 Hz Digital Tune Start Freq Print Scan Graph Start Scan Display Graph Horn Compare Scanning....Abort Scan Exit Weld Setup Weld Results Main Menu Graphs Figure 6.9 Horn Signature Screen... -
Page 130: Figure 6.10 Compare Data Screen
NOTICE Do not use this feature unless advised to do so by Branson. It is not required for most applications. Figure 6.10 Compare Data Screen Compare Data Print Scan A Scan B Scan C Horn ID Horn11808 Horn12098 Horn12043 Time 10:30:05 11:48:45 12:35:00... -
Page 131: Figure 6.11 Horn Down Screen
Figure 6.11 Horn Down Screen HORN DOWN Press Start switches until beep Weld Results Main Menu Weld Setup Graphs You can also disconnect air and manually bring the horn down to read distance and align your fixture • To use the Horn Down feature manually without Start switches, press the manual override on the solenoid valve which is accessible through the hole in the top of the Actuator, or disconnect air to the system and manually lower the horn. -
Page 132: Figure 6.12 Save/Recall Presets Screen
Figure 6.12 Save/Recall Presets Screen Save/Recall Presets Save Recall < 02 Tm=1:000s Clear Verify 04 Tm=1:000s USB Memory Date 07/21/04 Time 0917 Cycles Run 15 Preset Verified Weld Setup Weld Results Main Menu Graphs NOTICE USB Memory button will only show when a USB stick is inserted. To save a Preset: •... -
Page 133: Figure 6.14 Name Preset Keypad
• Touching the Automatically Name button shall close the window and place the preset name in the list. If the number already had a preset name, the overwrite pop-up will be displayed. The convention for naming presets is as follows: Table 6.5 Preset Naming Time: Tm = xxxxS... -
Page 134: Figure 6.15 Verify Preset Screen
To Clear Preset: • Highlight the desired Preset using the and arrow buttons. • Touching the Clear button will display the OK or Cancel popup. To Verify a Preset: When you press the Verify button, the following screen appears for 1 to 2 seconds to verify the Preset. - Page 135 6.4.6 Sequencing Presets The sequence is a list of preset numbers to be run in a defined order. The list contains between 2 and 30 presets. Any non-setup alarm will allow you to restart the sequence or to continue from where the alarm occurred. The power supply frequency memory may be cleared after every cycle.
-
Page 136: Figure 6.16 Print Menu
6.4.8 Print Menu You can print information about the current welder setup, the most recent weld that you performed, or the last 50 welds (weld history) that you performed, as well as graphs of the power, amplitude, or frequency of the most recent weld, plotted against the time of the weld cycle (in seconds). - Page 137 Print / Choose Printout Screen, 2 of 2 Print / Setup Screen • Touching any of the Navigation buttons on the SETUP Printout screen will bring you to this screen. • Print Now will present a message if no suitable Print Now printer is available for printing.
-
Page 138: Table 6.6 Selecting The Epson Printer Driver
6.4.8.1 Epson Printers Table 6.6 Selecting the Epson printer driver Step Action Connect the Epson printer to the USB port on 2000X P/S In Windows CE screen, open Internet Explorer Click "file", Select "page setup" > Printer model: Select "Epson Stylus" > Port: Select "LPT2", >... -
Page 139: Using The Weld Setup Menu
Using the Weld Setup Menu The Weld Setup Menu allows you to select and set all the parameters necessary to successfully operate in any available mode. Touchscreen color presets can be modified from the Color Setup Screen. See Section 6.4.1 System Configuration Menu. -
Page 140: Figure 6.17 Time Weld Mode Setup
6.5.1.1 Using Time Weld Mode You can use Time Mode to select the length of time that ultrasonic energy is applied to your parts. Within Time Mode, you can also select several other parameters. The following Table displays parameters available for use in Time Mode. The parameter input limits pop- up screen is accessed when the respective parameter Navigation button is touched. -
Page 141: Figure 6.18 Ground Detect Weld Mode Setup
Figure 6.18 Ground Detect Weld Mode Setup Available Parameters • Weld Mode> Gnd Detect The Pop-up menu shown below allows you to set Ground Detect Scrub Time Values. The Ground Detect parameter limits are • Scrub Time displayed in the lower left field as Min and Max Value. You cannot •... -
Page 142: Figure 6.19 Weld Setup
Figure 6.19 Weld Setup 6.5.2.2 Amplitude(%) You can set the amplitude of the ultrasonic energy that will be delivered in any welding mode. The Power Supply’s default is to use 100% of the available amplitude. By changing the amplitude to some lesser percentage of the total available you can “fine tune” your overall welding procedure without making changes to your tooling (converter, booster, horn, or fixture). -
Page 143: Table 6.9 Pretrigger Setup
6.5.2.3 Pretrigger You can select whether the ultrasonic energy will be started before the horn makes contact with the part. If you select ON, you can set the time at which the pretrigger ultrasonics will be started, and the amplitude that will be used. Auto (pretrigger) is the default. -
Page 144: Figure 6.22 Power Match Curve
6.5.2.4 Power Match Curve You can enter ± R Band limit values as a % of deviation from a desired or expected Power curve to be compared with an actual Power curve of an acceptable weld. This provides a means of comparing welds in progress to previously determined successful weld parameters. - Page 145 6.5.2.6 Digital UPS Use this screen to setup the DUPS and view available presets. This screen will only appear if the power supply has a DUPS module (Digital Universal Power Supply). The DUPS navigation screen is shown below. DIGITAL UPS Setup>...
- Page 146 The following keypad screens are accessed by touching the Ramp Time or Seek Time navigation button. DUPS Setup Ramp Time Screen DUPS Setup Seek Time SETUP SETUP Ramp Time[s] Seek Time[s] Current Value ABC DEF Current Value ABC DEF 0.080 0.500 JKL MNO JKL MNO...
-
Page 147: Figure 6.23 Cycle Abort
Table 6.10 Frequency Offset Frequency Offset Navigation Screen Frequency Offset Keypad FREQ OFFSET FREQ OFFSET Freq Offset[Hz] Current Value ABC DEF = +0 Freq Offset Change Sign[-,+] JKL MNO New Value PQR STU VWX Min Value Max Value +400 Exit Weld Setup Weld Results Main Menu... -
Page 148: Table 6.11 Afterburst
6.5.2.10 Timeout You can select the time the power supply will wait for a Ground Detection to occur during a weld when in Ground Detect mode. If a Ground Detect does not occur, the ultrasonic energy will be turned off and the Hold Time will start at the set timeout value. This feature is not available in Time mode. -
Page 149: Table 6.12 Write In Field
NOTICE Select values using the keypad, within the limits shown in the lower left field, and touch enter. 6.5.2.12 Write In Field Write In Field provides a means to assign a unique 10 digit alphanumeric to a specific weld setup and cycle. This is useful for tracking parameter performance relative to a specific welder, and its respective production run. -
Page 150: Figure 6.24 Quality Screen
6.5.3 Visual Quality Setup The Visual Quality Screen is accessed from the Weld Setup screen, it launches the Infinity QS Driver software allowing the user to view weld results. VQS software runs on the 2000X SBC and resides on a compact flash card. The Infinity QS screen displays the following graphically: average, maximum, minimum, and current weld results VQS and specification limits. -
Page 151: Figure 6.26 Infinity Qs Interface
Figure 6.26 Infinity QS Interface 10.0 Last Value Minimum Indicator Average Maximum Indicator Characteristic Bar Each characteristic bar shall provide basic information about the selected weld- characteristic being displayed. The Upper and Lower Limits shall be displayed above the Characteristic Bar. The most recent weld-characteristic value shall be displayed within the Characteristic Bar as a blue vertical line. -
Page 152: Figure 6.27 Visual Quality Limits
Figure 6.27 Visual Quality Limits 6.5.4 Graphs Access screen to view graphs of 3 available parameters, Power, Amplitude, and Frequency. Touching the View Graphs button will display the View Graphs screen. Table 6.13 Graphs Graphs Screen View Graphs View Graphs Print ** 1 ALARM** Power (%) -
Page 153: Chapter 7: Maintenance
Chapter 7: Maintenance 2000X Series Preventive Maintenance ......144 Parts Lists ..........145 Troubleshooting . -
Page 154: 2000X Series Preventive Maintenance
2000X Series Preventive Maintenance CAUTION Be certain to disconnect power before performing any maintenance on the power supply or actuator. The following preventive measures help assure long term operation of your Branson 2000X Series equipment. 7.1.1 Periodically Clean the Equipment Air is continuously drawn into the Branson power supply. -
Page 155: Parts Lists
Parts Lists This section provides lists of replacement parts, system cables, and suggested spares. 7.2.1 Replacement Parts Table 7.1 Replacement Parts List for 2000X distance Power Supply Component EDP Number DC Power Supply Module* 200-132-294R 100-242-1199R (100-242-1293R for 4 KW Line Board* units and 15 kHz 3.3 KW &... - Page 156 Table 7.1 Replacement Parts List for 2000X distance Power Supply Component EDP Number 100-246-1371 (100-246-1727 for 4 KW Line Cord units, 15 kHz, 30 kHz 1.5 KW 120VAC only) Miscellaneous Other parts such as wrenches, silicon grease, studs, etc., are found in Chapter 4: Installation and Setup.
-
Page 157: Table 7.2 2000X-Series System Cables (External)
Table 7.2 2000X-Series System Cables (External) Description Cable Model 101-240-178 Cable, RF CR & CJ20 25' CE J931CS 101-240-199 Cable, RF CR & CJ20 50' CE J931C 100-246-630 Cable, Ground Detect NOTICE Cables identified for ‘CJ-20 Converters’ are for those Converters when they are installed in Branson 2000X Actuators. - Page 158 Table 7.3 Suggested Spares 6-12 Description EDP# Units Units Units 400W 40 kHz power supply module, 159-244-064R digital 800W 40 kHz power supply module, 159-244-063R digital Front Panel Switch 200-099-252R 100-242-1199R (100-242-1293R for 4 KW units and 15 kHz 3.3 Line Filter KW &...
-
Page 159: Figure 7.1 Interconnect Diagram, Power Supply
7.2.4 Circuits Figure 7.1 Interconnect Diagram, Power Supply 100-412-177 REV. 17... -
Page 160: Troubleshooting
Troubleshooting When the 2000X Power Supply encounters a situation that is outside of the normal conditions, an alarm is generated. If there is any alarm condition, the Front Panel displays the number of alarms and generates an audible alarm. Pressing the Alarm button will display a message for corrective action. - Page 161 • A Failure of alarms, Equipment Failure, (Table 7.5) are those which might occur for hardware failure, or hardware disconnected. For example, if the door were open to replace a stack, a Door/ Trigger Switch alarm would occur. The specific equipment failure that has occurred is indicated by the message on your display or your printer.
-
Page 162: System Alarm Tables
System Alarm Tables The following tables detail alarms that you can encounter on the 2000X Power Supply, listed alphabetically by the Display Message that is presented on the front panel. The message on the display panel of the Power Supply is shown in the first column. A more detailed message that you can print is shown in the second column. - Page 163 Table 7.4 Cycle Modified Alarms and Messages, with Probable Cause and Corrective Action Display Printer Alarm Condition/ Corrective Action Message Message Cause Manually inspect the part. If the part is acceptable, turn Time Value for The amplitude time No Amplitude amplitude stepping Amplitude Step step trigger was not...
-
Page 164: Table 7.4 Cycle Modified Alarms And Messages, With Probable Cause And Corrective Action
Table 7.4 Cycle Modified Alarms and Messages, with Probable Cause and Corrective Action Display Printer Alarm Condition/ Corrective Action Message Message Cause Verify that there is The cycle was aborted Trigger Lost in Trigger Lost adequate pressure because trigger force Hold during Hold from your pneumatic... - Page 165 Table 7.5 Failure of Alarms and Messages, with Probable Cause and Corrective Action Display Printer Alarm Condition/ Corrective Action Message Message Cause Actuator Cylinder size is not Perform a Cold Start. Check NovRam Actuator 1.5, 2.0, 2.5, 3.0, setup/cable. Repair/replace NovRam failed 50mm, 63mm, Error Code =...
- Page 166 Table 7.5 Failure of Alarms and Messages, with Probable Cause and Corrective Action Display Printer Alarm Condition/ Corrective Action Message Message Cause The Horn did not retract to the home position after the Verify that air pressure is weld was completed correct.
- Page 167 Table 7.5 Failure of Alarms and Messages, with Probable Cause and Corrective Action Display Printer Alarm Condition/ Corrective Action Message Message Cause Recalibrate A change in horn Run an Actuator Calibration Actuator Recalibrate weight of 6-7 lbs procedure from the Alarm Actuator since the last power Information screen or from...
- Page 168 Table 7.5 Failure of Alarms and Messages, with Probable Cause and Corrective Action Display Printer Alarm Condition/ Corrective Action Message Message Cause You did not activate Start Switch Activate both start switches both start switches Start Sw Time Stagger Time at the same time to rerun within the required Missed...
-
Page 169: Table 7.6 No Cycle Alarms And Messages, With Probable Cause And Corrective Action
Table 7.5 Failure of Alarms and Messages, with Probable Cause and Corrective Action Display Printer Alarm Condition/ Corrective Action Message Message Cause Upper Limit Switch was not engaged at Verify the electrical the end of weld Upper Limit Upper Limit connections for the Upper cycle. - Page 170 Table 7.6 No Cycle Alarms and Messages, with Probable Cause and Corrective Action Display Alarm Condition/ Printer Message Corrective Action Message Cause Reset your The amplitude step amplitude step Amp Step Amp Step Before trigger has been parameter through Before Trg Trigger detected within 2 ms of the Alarm...
- Page 171 Table 7.6 No Cycle Alarms and Messages, with Probable Cause and Corrective Action Display Alarm Condition/ Printer Message Corrective Action Message Cause Verify that the part is in the fixture; verify that there is Trigger force was not adequate pressure Trigger Timeout Trigger Timeout achieved within the 10...
-
Page 172: Table 7.7 Suspect/Reject Alarms And Messages, With Probable Cause And Corrective Action
Table 7.7 Suspect/Reject Alarms and Messages, with Probable Cause and Corrective Action Display Printer Alarm Condition/ Corrective Action Message Message Cause Discard the part if you The actual distance encounter numerous +Reject value exceeded the or successive alarms +R Abs Dist Limit Absolute plus reject absolute with good parts. - Page 173 Table 7.7 Suspect/Reject Alarms and Messages, with Probable Cause and Corrective Action Display Printer Alarm Condition/ Corrective Action Message Message Cause Inspect your parts. For numerous or The actual absolute successive alarms, you +Suspect distance value did not might adjust +suspect +S Abs Dist Limit Absolute reach the plus suspect...
- Page 174 Table 7.7 Suspect/Reject Alarms and Messages, with Probable Cause and Corrective Action Display Printer Alarm Condition/ Corrective Action Message Message Cause Inspect your parts. For numerous or The actual trigger successive alarms, you +Suspect distance value might adjust the +S Trg Dist Limit Trigger Distance exceeded the plus Trigger Distance Limit...
- Page 175 Table 7.7 Suspect/Reject Alarms and Messages, with Probable Cause and Corrective Action Display Printer Alarm Condition/ Corrective Action Message Message Cause Manually inspect the part for a good weld. The absolute distance If you encounter - Suspect used in the most numerous or - S Abs Dist Limit Absolute...
- Page 176 Table 7.7 Suspect/Reject Alarms and Messages, with Probable Cause and Corrective Action Display Printer Alarm Condition/ Corrective Action Message Message Cause Discard the part. The peak power used If you encounter in the most recent numerous or + R Pk Power + Reject Peak weld was greater than successive alarms with...
- Page 177 Table 7.7 Suspect/Reject Alarms and Messages, with Probable Cause and Corrective Action Display Printer Alarm Condition/ Corrective Action Message Message Cause The system Bandwidth Limit (SBL) function Verify integrity of has determined the stack. - R Freq Limit - R Freq Limit frequency has dropped too much and is now Review application.
-
Page 178: Table 7.8 Setup Alarms And Messages, With Probable Cause And Corrective Action
Table 7.7 Suspect/Reject Alarms and Messages, with Probable Cause and Corrective Action Display Printer Alarm Condition/ Corrective Action Message Message Cause Inspect your parts. For numerous or The actual collapse successive alarms, you - Suspect distance value did not might adjust the - S Col Dist Limit Collapse Dist reach the minus... - Page 179 Table 7.8 Setup Alarms and Messages, with Probable Cause and Corrective Action Display Alarm Condition/Cause Corrective Action Message The time that you have set for Change the step time for the Amp Step the amplitude to step is greater amplitude and/or the time setting Conflict than the time that you have set for the weld cycle.
- Page 180 Table 7.8 Setup Alarms and Messages, with Probable Cause and Corrective Action Display Alarm Condition/Cause Corrective Action Message Change the +reject power limit or The plus reject power limit is peak power cutoff through the Cutoff Conflict equal to or greater than the Alarm Information screen or Setup peak power cutoff value.
- Page 181 Table 7.8 Setup Alarms and Messages, with Probable Cause and Corrective Action Display Alarm Condition/Cause Corrective Action Message The plus suspect energy limit is Change the +Suspect energy limit Energy Comp equal to or greater than the or maximum energy compensation Conflict energy compensation through the Alarm Information...
- Page 182 Table 7.8 Setup Alarms and Messages, with Probable Cause and Corrective Action Display Alarm Condition/Cause Corrective Action Message Weld force is equal to or greater than the plus suspect Force/Lmt Either raise the suspect limit or weld force limit. This alarm can Conflict lower the weld force.
- Page 183 Table 7.8 Setup Alarms and Messages, with Probable Cause and Corrective Action Display Alarm Condition/Cause Corrective Action Message The force step at energy is equal to or greater than the Force Step Either raise the suspect limit or plus suspect energy limit. This Conflict lower the step at energy setting.
- Page 184 Table 7.8 Setup Alarms and Messages, with Probable Cause and Corrective Action Display Alarm Condition/Cause Corrective Action Message The force step at energy is equal to or greater than the maximum energy Either raise max energy Force Step compensation setting. This compensation or lower the step at Conflict alarm will occur in time mode...
- Page 185 Table 7.8 Setup Alarms and Messages, with Probable Cause and Corrective Action Display Alarm Condition/Cause Corrective Action Message Manually inspect the part. If the part is acceptable, turn force stepping The collapse distance required No Force Step off. If the part is not acceptable, you for the force step not reached.
- Page 186 Table 7.8 Setup Alarms and Messages, with Probable Cause and Corrective Action Display Alarm Condition/Cause Corrective Action Message The rapid traverse distance is Either increase the suspect distance Rapid Trav. equal to or greater than the limit or decrease the rapid traverse Conflict plus suspect absolute limit.
- Page 187 Table 7.8 Setup Alarms and Messages, with Probable Cause and Corrective Action Display Alarm Condition/Cause Corrective Action Message The system pressure is out of tolerance (+/-3 PSI). The pressure is read only after five seconds of idle time while in ready. This alarm does not Go to horndown and adjust the Sys.
-
Page 188: Figure 6.21 Pretrigger
Table 7.8 Setup Alarms and Messages, with Probable Cause and Corrective Action Display Alarm Condition/Cause Corrective Action Message Change the +suspect time limit or The minus suspect time limit is Timeout maximum timeout value through the equal to or greater than the Conflict Alarm Information screen or Setup maximum timeout value. - Page 189 Table 7.8 Setup Alarms and Messages, with Probable Cause and Corrective Action Display Alarm Condition/Cause Corrective Action Message Invalid Preset Refer to text in first Invalid Change the settings in your preset. Preset entry. Specific to Error Error Code = A cold start may be needed.
- Page 190 Table 7.8 Setup Alarms and Messages, with Probable Cause and Corrective Action Display Alarm Condition/Cause Corrective Action Message The suspect limits for absolute Change the suspect absolute + - Abs Limit distance that you have entered distance limits through the Alarm Crossed are reversed.
- Page 191 Table 7.8 Setup Alarms and Messages, with Probable Cause and Corrective Action Display Alarm Condition/Cause Corrective Action Message The plus reject collapse Change the +reject collapse Col S/R Limit distance limit is equal to or less distance limit or - suspect collapse Cross than the minus suspect distance limit through the Alarm...
- Page 192 Table 7.8 Setup Alarms and Messages, with Probable Cause and Corrective Action Display Alarm Condition/Cause Corrective Action Message Change the +suspect force limit The plus suspect force limit is F S/R Limit and/or the - reject force limit equal to or less than the minus Cross through the Alarm Information reject force limit.
- Page 193 Table 7.8 Setup Alarms and Messages, with Probable Cause and Corrective Action Display Alarm Condition/Cause Corrective Action Message Change the missing part maximum The missing part maximum Missing Part distance limit or - suspect trigger distance is equal to or less than Conflict limit through the Alarm Information the minus suspect trigger limit.
- Page 194 Table 7.8 Setup Alarms and Messages, with Probable Cause and Corrective Action Display Alarm Condition/Cause Corrective Action Message The missing part minimum Change the missing part minimum distance is equal to or greater Missing Part distance limit or absolute distance than the absolute distance Conflict through the Alarm Information...
- Page 195 Table 7.8 Setup Alarms and Messages, with Probable Cause and Corrective Action Display Alarm Condition/Cause Corrective Action Message The pretrigger distance is equal Change the pretrigger distance or Pretrigger to or greater than the absolute absolute cutoff through the Alarm Conflict cutoff distance Information screen or Setup menu.
- Page 196 Table 7.8 Setup Alarms and Messages, with Probable Cause and Corrective Action Display Alarm Condition/Cause Corrective Action Message Change the +suspect trigger limit The plus suspect trigger limit is +S Trg > +S and/or the +suspect absolute limit equal to or greater than the through the Alarm Information plus suspect absolute limit.
- Page 197 Table 7.8 Setup Alarms and Messages, with Probable Cause and Corrective Action Display Alarm Condition/Cause Corrective Action Message The suspect lower limit you Change the suspect limits for trigger - S Trg > - S have set for trigger is less than distance and/or the limits you have the lower limit you have set for set for absolute distance.
-
Page 198: Table 7.9 Overload Alarms And Messages, With Probable Cause And Corrective Action
Table 7.9 Overload Alarms and Messages, with Probable Cause and Corrective Action Display Printer Alarm Condition/Cause Corrective Action Message Message UPS overload was detected in hold state. Alarm is called ‘Energy Braking’ because it Turn off Energy Energy Braking Energy Braking could be caused by power Braking, and call for Overload... -
Page 199: Table 7.10 Note Alarms And Messages, With Probable Cause And Corrective Action
7.4.8 Note Alarms Table 7.10 Note Alarms and Messages, with Probable Cause and Corrective Action Display Printer Alarm Condition/ Corrective Action Message Message Cause Manually inspect the The absolute cutoff part. If, with Absolute distance that you acceptable parts, you Absolute Cutoff Distance Cutoff requested has been... - Page 200 Table 7.10 Note Alarms and Messages, with Probable Cause and Corrective Action Display Printer Alarm Condition/ Corrective Action Message Message Cause A complete weld cycle Remove 24V from Ultrasonics has been run but the Sonics Disable input; Sonics Disabled Disabled by user ultrasonics were undefined Sonics input...
-
Page 201: Service Events
Service Events WARNING Service events should be performed only by qualified individuals. The potential for injury or death exists, as well as that for damage to the equipment (which can include loss of product warranty) or loss of valuable setup information for your application. When servicing the system, the service person(s) can have a need for certain conventional hand tools, and you might need to have the following information for testing or returning the system to service. - Page 202 7.5.3.1 Performing a Cold Start Select Diagnostics from the Main Menu. Touch the Cold Start button to initiate the Cold Start. The screen will return to Weld Setup when the Cold Start is complete. NOTICE Using the Cold Start procedures will erase the current preset and some of the Setup parameters in the System Configuration menu.
-
Page 203: Parts Replacement
Parts Replacement CAUTION The 2000X Power Supply contains components that can be degraded or damaged by electrostatic discharge. Always use a grounded wriststrap and use a grounded work area when handling or servicing the 2000X Power Supply. In the following paragraphs, you are provided instructions on removing and replacing components. -
Page 204: Figure 7.3 Component Location Of 2000X Modules
Figure 7.3 Component Location of 2000X Modules VGA Display with Membrane Keypad VGA PC Board ground ribbon attach point VGA Touch Screen, rear EDP 200-220-042 rear retaining screws (3) VGA Touch Screen Controller EDP 200-245-045 Ultrasonic Power Supply Module (see Table 7-1 for EDP numbers) VGA Inverter Board DC Power Supply Module EDP 200-242-1279... -
Page 205: Table 7.12 Removing The Touch Screen Display (Vga)
7.6.2 Circuit Boards and Modules Replaceable Modules are shown in Figure 7.3 Component Location of 2000X Modules. Ribbon cables and connectors are unique and keyed to prevent the misconnection of an appropriate connector in a location within the Power Supply case. Fans use identical wiring harnesses, with one tying back the ‘extra’... -
Page 206: Table 7.13 Removing The Power Supply Module
NOTICE Be sure the Touch Screen is installed in its original orientation. 7.6.5 Power Supply Module The ultrasonic Power Supply Module is affixed to the bottom of the power supply box with four screws through the bottom board. To remove the Power Supply Module, perform the following steps listed in Table 7.13. -
Page 207: Table 7.14 Removing The Dc Power Supply
7.6.6 DC Power Supply The DC Power Supply is mounted to the rear of the Power Supply case. It is mounted so it will swivel up to service the DC Power Supply, Line Board, and fuses. See Figure 7.3 Component Location of 2000X Modules. -
Page 208: Table 7.15 Removing The User I/O Board
7.6.7 User I/O Board The User I/O Board is the short interface board. It is mounted to the System Controller Board on standoffs, and is connected to the rear of the Power Supply case by its end panel. To remove the User I/O Board, take the following steps: Table 7.15 Removing the User I/O Board Step Action... -
Page 209: Table 7.17 Removing The System Controller Board
NOTICE When the battery is worn out, dispose it under the ordinance of each local government. 7.6.9 System Controller Board To remove the System Controller Board, take the following steps: Table 7.17 Removing the System Controller Board Step Action Print out or record all parameters from your weld setup. Turn the Power Supply off. -
Page 210: Figure 7.5 Location And Orientation Of U53, U54, U55, And U56
CAUTION Do not rely on the paper label for IC orientation. The triangle on the IC socket should be directly under the raised dot on the IC. The socket and IC also have a truncated corner to aid in alignment. The raised dot may also be located on the beveled surface of the IC. -
Page 211: Figure 7.6 Sbc Pc Board Connector Layout
7.6.10 Single Board Computer (SBC) Figure 7.6 SBC PC Board Connector Layout CN38: to Power CN26: to rear Ethernet port CN5: to J1 on inverter board CN4: to CN1 on Touch CN15: to CN2 on VG A Screen controller PCB CN27 (Bottom side): to External VGA Display input CN17: to front and rear USB... -
Page 212: Figure 7.7 Lineboard Edp 100-242-1199R
Figure 7.7 Lineboard EDP 100-242-1199R* E4 E4 E2 E2 E1 E1 LED1 LED1 E3 E3 U2 U2 C9 C9 Q1 Q1 D1 D1 R8 R8 F2 F2 F1 F1 R3 R3 L1 L1 K1 K1 C3 C3 R9 R9 C8 C8 C7 C7 D3 D3 F4 F4... -
Page 213: Table 7.20 Removing And Replacing The Line Fuses
CAUTION When reconnecting wires, observe the color coding that you previously noted and the connections noted in step 6 above. 7.6.12 Line Fuses To remove and replace the Line Fuses, take the following steps: Table 7.20 Removing and Replacing the Line Fuses Step Action Turn off the Power Supply. - Page 214 Table 7.21 Removing a Cooling Fan Step Action Disconnect the electrical connector(s). Remove the 4 fan mounting screws and nuts. Remove the fan and shield. To reinstall the a Cooling Fan, reverse the removal procedure while observing the direction of air flow. NOTICE Be sure that you reinstall the fan shields on the back of the Power Supply.
-
Page 215: Appendix A: Automation
Appendix A: Automation 2000X Series Automation ....... . .206 This appendix presents information on automation features, in the form of FAQs, on 2000X Series power supplies. -
Page 216: 2000X Series Automation
2000X Series Automation Q. What is the best tip for automating a Branson welder? A. Perhaps the best advice is to provide a “manual jog” function where the welder can be cycled by the system control panel without indexing the whole machine. The time saved debugging, optimizing, calibrating and servicing the welder over it’s lifetime will pay-back to the end-user and machine builder many times the cost of input hardware and code. - Page 217 Q. How LONG can I run the CABLES? A. Cable sets are available in 8, 15, 25, and on special order 50-foot lengths. Contact Branson Product Support or Customer Service if you have special needs. Q. Can I run the Branson welder cables in a WIRING TROUGH with other system cables? A.
- Page 218 Q. Does it wire up the same way? A. The USER I/O inputs wire the same way, and the start only needs a SINGLE START input from any available USER I/O input. Q. But you said you need DUAL START Inputs? A.
-
Page 219: Table A.1 Air Consumption
Q. How does RESET work? Can I hold it on? A. RESET is only acted upon after a GENERAL ALARM. Do not hold it in the RESET state as it will be ignored. Q. My system logic uses some value OTHER THAN 24 VOLTS. What do I do? A. - Page 220 Use the above table to calculate the air used by the air cylinder. Add 0.034 Cubic foot per Second of actual weld time to account for converter cooling air per weld cycle. (2 CFM) For example: 3.0 inch aed actuator running at full pressure (100psi) and stroke length (4 inches) at a cycle rate of 20 parts per minute = 0.0319 CFM per inch of stroke (from above table) X 8 inches (total stroke is 4 inches down and 4 inches back) equals 0.2552 CFM per stroke.
-
Page 221: Appendix B: Alarm Index
Appendix B: Alarm Index This alarm index is an alphabetical list of the alarms that appear on the system display and on printouts. In some instances, the alarm display and alarm printouts (more complete) are slightly different, and therefore are indexed separately as appropriate. All alarm page numbers are hyper-linked to the full description, which describes the cause of the alarm condition and the steps to resolve it. - Page 222 + - Pwr Limit Crossed + - Time Limit Crossed + - Trg Limit Crossed 162, 164 + R Abs Dist Limit + R Col Dist Limit 162, 165 + R Energy Limit 162, 166 + R Pk Power Limit + R Time Limit 185, 186 + R Trg >...
- Page 223 Col S/R Limit Cross Collapse Cutoff Collapse Distance for Amplitude Step not Reached 169, 170, 181 Cutoff Conflict Door/Trigger Switch (failure) 170, 171 Energy Comp Conflict Energy Comp Crossed Energy Compensation Maximum Energy Reached Energy Not Reached Energy Value for Amplitude Step not Reached Eng S/R Limit Cross External signal for Amplitude Step did not occur 181, 182...
- Page 224 Power level for Amplitude Step not Reached Power Supply NovRam Failed Preset Data/BBR Preset Not Available Pressure > Weld Force 184, 185 Pretrigger Conflict Pretrigger Overload Pretrigger Timeout Print Buffer Printer Buffer Full Printer Offline Pwr S/R Limit Cross 175, 176 Rapid Trav.
- Page 225 Ultrasonics P/S Ultrasonics Power Supply Not Present or Failed Upper Limit Switch Upper Limit Switch Failed Weld Force > pressure Weld O/L Weld Overload Weld Time was Extended for Energy Compensation Wrong Actuator Wrong Actuator AE/AED cannot be used with this level control 100-412-177 REV.
- Page 226 100-412-177 REV. 17...
-
Page 227: Appendix C: Manual Revisions
Appendix C: Manual Revisions Manual Revisions ........218 100-412-177 REV. -
Page 228: Manual Revisions
Manual Revisions Refer to the table below for the appropriate manual revision depending on your Power Supply’s manufacturing date. Table C.1 Manual Revisions Power Supply Manufacturing Date Manual Revision From July 2009 October 2010 November 2010 June 2012 3, 4, 5 July 2012 March 2013 6, 7...
Need help?
Do you have a question about the Branson 2000Xt and is the answer not in the manual?
Questions and answers