
Related Manuals for Gaggenau BSP2511 1 Series


Summary of Contents for Gaggenau BSP2511 1 Series
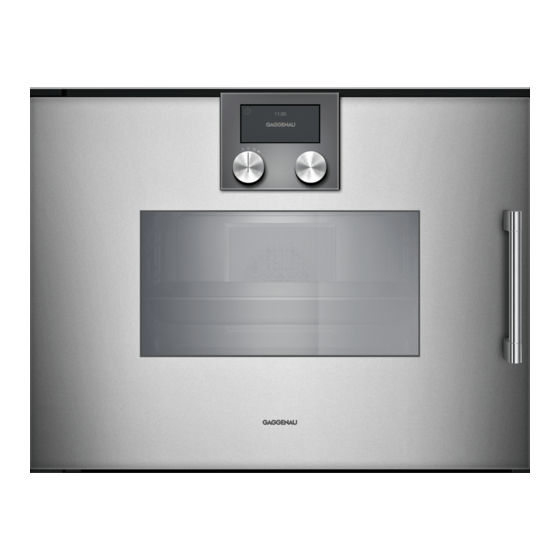
- Page 1 Gaggenau en User manual and installation instructions BSP2501.1 BSP2511.1 Combi steam oven...
-
Page 2: Table Of Contents
en Safety Table of contents 1.2 Intended use This appliance is designed only to be built INFORMATION FOR USE into kitchen units. Read the special installation instructions. Safety .............. 2 Only a licensed professional may connect ap- Preventing material damage ...... 5 pliances without plugs. Damage caused by in- correct connection is not covered under the Environmental protection and saving en- warranty. - Page 3 Safety en Opening the appliance door creates a WARNING ‒ Risk of injury! draught. Greaseproof paper may come into Scratched glass in the appliance door may contact with the heating element and catch develop into a crack. fire. ▶ Do not use any harsh or abrasive cleaners ▶...
-
Page 4: Safety
en Safety ▶ If the appliance or the power cord is dam- WARNING ‒ Risk of burns! aged, immediately unplug the power cord Hot steam may escape during operation. or switch off the fuse in the fuse box. ▶ Do not touch the ventilation openings. ▶... -
Page 5: Preventing Material Damage
Preventing material damage en Preventing material damage 2 Preventing material damage If the seal is very dirty, the appliance door will no 2.1 General longer close properly during operation. This may dam- ATTENTION! age the front of adjacent kitchen units. A build-up of heat may damage the appliance. Keep the seal clean at all times. -
Page 6: Environmental Protection And Saving En- Ergy
en Environmental protection and saving energy The descaling tablet may damage the cooking com- 2.4 Cleaning partment. ATTENTION! Use the descaling tablet for the descaling pro- ▶ Limescale may damage the appliance. gramme only. Descale the appliance regularly. Place the descaling tablet into the water tank. ▶... -
Page 7: Familiarising Yourself With Your Appliance
Familiarising yourself with your appliance en Familiarising yourself with your appliance 4 Familiarising yourself with your appliance for taller baking tins, use level 1. For very small baked 4.1 Appliance goods, you can also use two levels, e.g. level 1 and You can find an overview of the parts of your appliance level 3. - Page 8 en Familiarising yourself with your appliance All appliance types are operated in an identical man- Symbol Function ner. Call up automatic programmes or in- dividual recipes Record menu Edit settings Enter a name Delete letters Childproof lock Call up the timer menu Call up the long-term timer Demo mode Core temperature probe → Page 20...
- Page 9 Familiarising yourself with your appliance en Position of the function selector Use the function selector to select the functions or types of heating. Position Function/type of heating Temperature Application Zero setting Light Switch on the interior lighting Access to other functions, e.g. automatic programmes, indi- vidual recipes, remote start via Home Connect...
- Page 10 en Familiarising yourself with your appliance Position Function/type of heating Temperature Application 50-95 °C Cooking food in a vacuum at low Default temperature 60 °C temperatures between 50-95 °C Sous-vide cooking and with 100% steam: Suitable for meat, fish, vegetables and desserts A vacuum-sealing machine uses heat to hermetically seal the food in a special heat-resistant cook- ing bag.
-
Page 11: Accessories
Different displays can be shown in standby mode. The → "Home Connect ", Page 22 GAGGENAU logo and the time are preset. In standby mode, the brightness of the control panel is 4.4 Cooling fan reduced. The brightness of the display depends on the vertical viewing angle. - Page 12 You will find a comprehensive range of products for your appliance in our brochures and online: 5.2 Locking function www.gaggenau.com Accessories vary from one appliance to another. When The locking function prevents the accessories from tilt- purchasing accessories, always quote the exact ing when they are pulled out.
-
Page 13: Before Using For The First Time
The appliance must be installed and connected. After connecting the appliance to the power supply, the Requirement: The display shows the possible units °C GAGGENAU logo appears for approx. 30 seconds and and °F. The unit °C is preset. then the appliance displays the "Initial settings" menu. -
Page 14: Basic Operation
en Basic operation To eliminate the new-appliance smell, heat up the The ideal setting for heating is and 200 °C for empty appliance with the door closed. one hour. Basic operation 7 Basic operation Pull the fresh-water tank out of the appliance until 7.1 Activating the appliance the fill level indicator is visible, or completely re- To exit standby mode, open the door and turn the... -
Page 15: Timer Functions
Timer functions en ¡ If the water tank is empty, the display shows a mes- WARNING ‒ Risk of scalding! sage. Hot steam may escape when you open the appliance → "Fill the water tank", Page 14 door. Steam may not be visible, depending on the tem- perature. - Page 16 en Timer functions Press . 8.4 Short-term timer The short-term timer runs independently of the other 8.6 Cooking time appliance settings. You can enter a maximum of 90 minutes. When you set the cooking time for your food, the appli- ance automatically switches off after this time. You can Setting the short-term timer set a cooking time of between 1 minute and Press...
-
Page 17: Long-Term Timer
Long-term timer en Delaying the cooking time end a After the cooking time has elapsed, flashes and a signal tone sounds. Requirements Press , open the appliance door or set the func- ¡ The food is in the cooking compartment. tion selector to . ¡... -
Page 18: Automatic Programmes
en Automatic programmes Automatic programmes 11 Automatic programmes You can prepare a wide range of food using the auto- For some dishes, you must set the weight. matic programmes. The appliance selects the optimal a The display shows the possible settings. setting for you. -
Page 19: Individual Recipes
Individual recipes en to save or to cancel, and exit the menu. 12.1 Recording a recipe It is possible to set and record up to 5 phases consec- Entering the core temperature for a phase utively. Note: You cannot enter the cooking time for phases Turn the function selector to ... - Page 20 en Core temperature probe Use the rotary selector to select "Individual recipes" 12.6 Deleting a recipe and press to confirm. Turn the function selector to . Use the rotary selector to select the desired recipe. Press . to delete the recipe. Press to confirm.
-
Page 21: Core Temperature Probe
Core temperature probe en Inserting the core temperature probe into meat Food Core temperature guideline value in Insert the core temperature probe at the thickest °C point on the side as far as it will go into the meat. Saddle of veal, medium rare 58-60 Saddle of veal, well done 65-70... - Page 22 en Home Connect You may damage the cable of the core temperature Inserting the core temperature probe into fish probe with the appliance door. Insert the core temperature probe behind the head Do not trap the cable of the core temperature probe ▶...
-
Page 23: Home Connect
Home Connect en Open the Home Connect app and scan the follow- 14.1 Setting up the Home Connect app ing QR code. Install the Home Connect app on your mobile device. Start the Home Connect app and set up access for Home Connect. The Home Connect app guides you through the en- tire login process. - Page 24 en Home Connect Symbol Basic setting Possible settings Explanation Delete network set- You can delete all network settings from the appliance at tings any time. Appliance information The display shows: ¡ MAC address COM module ¡ Appliance serial number ¡ Software version Depending on the connection type, you can view more information, such as the SSID network name, by touch- ing the arrow button.
- Page 25 Standby screen Appearance of the standby screen ¡ Clock Off: No display. You can use this setting to reduce ¡ Clock + GAGGENAU logo the standby energy con- sumption of your appliance. ¡ Date On: Multiple screens can ¡ Date + GAGGENAU be adjusted.
- Page 26 en Basic settings Display Basic setting Selection Description Weight unit Set the weight unit Language German Set the language for the French text display [...] The system restarts when English you change the language. The restart takes a few seconds. After restarting, the appliance closes the basic settings menu.
- Page 27 Cleaning and servicing en Cleaning and servicing 16 Cleaning and servicing To keep your appliance working efficiently for a long ATTENTION! time, it is important to clean and maintain it carefully. Unsuitable cleaning agents damage the surfaces of the appliance. Do not use harsh or abrasive cleaning products. 16.1 Cleaning agents ▶...
- Page 28 en Cleaning and servicing Area Suitable cleaning agents Information Very dirty cooking ¡ Cleaning gel spray for Cleaning gel spray for ovens can be obtained from customer service compartment ovens or from the online shop. ¡ Do not spray into the steam outlets on the back of the cooking compartment.
-
Page 29: Cleaning And Servicing
Cleaning and servicing en Remove any food remnants from the drain filter. Before using the oven again, remove any detergent residue from the cooking compartment. Note: If the cleaning aid was cancelled due to a power cut, it must be restarted before using the oven again in order to remove any detergent residues from the appli- ance. - Page 30 en Cleaning and servicing Depending on the water hardness and the use of the Position the lid on the fresh-water tank and click it appliance, a message on the display reminds you to into place. run the descaling programme. Fill the fresh-water tank up to the "Max" mark with To prevent damage to the appliance, the appliance 1.7 l cold water.
-
Page 31: Troubleshooting
Troubleshooting en Lift the shelf supports slightly sideways away from 16.7 Removing the shelf supports the screw and pull them out towards the front . The wire racks can be removed for cleaning. Place a dishcloth in the cooking compartment to protect the stainless steel from scratches. - Page 32 en Troubleshooting Fault Cause and troubleshooting The appliance does Build-up of limescale in the appliance. not work. Display Start the descaling programme → Page 29. ▶ shows "Appliance locked. Descaling re- quired." Despite descaling, Build-up of limescale in the appliance, incorrect descaler used. "Please descale"...
- Page 33 Troubleshooting en Fault Cause and troubleshooting Powerful steam re- The door seal is dirty or loose. lease at the side of Clean the door seal. the door. Insert the door seal into the groove. Humming noise when The drain pump starts running. switching on.
-
Page 34: Disposal
en Disposal Remove the suction hose and clean it under run- Fully fit the suction hose . ning water. Ensure that the suction hose is not kinked. ‒ a b c Check whether the suction hose is free of residues. Fit the tank lid. - Page 35 How it works en ¡ If you are only baking on one level, use level 2. If 19.2 Vegetables you are baking on two levels at the same time, use Take note of the recommended settings for vegetables. levels 1 and 3. ¡...
- Page 36 en How it works Food Accessory/cookware Temperat- Type of Humidity Cooking Comments ure in °C heating in % time in min. Leeks, sliced Perforated steaming 20-30 tray Leeks, whole Perforated steaming 35-45 tray Peppers, stuffed Perforated steaming 180-200 20-25 Preheat. tray If stuffing with meat, sear the meat before- hand.
- Page 37 How it works en Fish – steaming fish Food Accessory/cookware Temperat- Type of Humidity Cooking Comments ure in °C heating in % time in min. Sea bream, whole, Perforated steaming 20-30 Can be cooked in the 500 g each tray swimming position if placed on half a potato.
- Page 38 en How it works Food Accessory/cookware Temperat- Type of Humidity Cooking Comments ure in °C heating in % time in min. Trout, whole, 250 g Perforated steaming 80-90 17-20 each tray Halibut, 300 g each Perforated steaming 80-90 17-20 tray Scallops, 15-30 g Unperforated steam 80-90 9-13 The more the scal-...
- Page 39 How it works en Food Accessory/cookware Temperat- Type of Humidity Cooking Comments ure in °C heating in % time in min. Meat pie Quiche dish 1. 210 1. 60 1. 30 2. 180 2. 60 2. 15 Knuckle of veal, 1 kg Unperforated steam 1.
- Page 40 en How it works sensory properties of the food, e.g. the tenderness ¡ When game and horse meat is cooked at low tem- and succulence, are retained with this cooking peratures, its flavour becomes stronger than when method. Heating it up gently gives the meat an prepared the conventional way.
- Page 41 How it works en ature more easily. Insert the core temperature probe ¡ To make the skin crispier, season poultry mainly in the chicken breast rather than in the middle or in with spices and herbs, and use little or no oil. a cavity.
- Page 42 en How it works ¡ Sous-vide cooking is a gentle, low-fat method of Use only fresh, top-quality food. This is the only way to cooking meat, fish, vegetables and desserts. A va- guarantee a consistent cooking result that delivers im- cuum-sealing machine uses heat to hermetically peccable flavour.
- Page 43 How it works en Sous-vide – meat Food Accessory/cookware Temperat- Heating Cooking Comments ure in °C func- time in tion min. Entrecôte, rare, Perforated steaming Once the meat is cooked, sear it 180 g each tray on a teppan yaki or grill it briefly at a high temperature on both sides.
- Page 44 en How it works Sous-vide – poultry Food Accessory/cookware Temperat- Heating Cooking Comments ure in °C func- time in tion min. Duck breast, 350 g Perforated steaming Once the breast is cooked, fry each tray the skin side in a hot frying pan until it is crispy.
- Page 45 How it works en Food Accessory/cookware Temperat- Heating Cooking Comments ure in °C func- time in tion min. Potatoes, peeled, in 2 Perforated steaming Recipe tip: Vacuum-seal along x 2 cm cubes, 800 g tray with some butter and salt. Can easily be used for making dishes such as salad.
- Page 46 en How it works ¡ With the full surface grill and air recirculation func- ures. Consequently, for browning and roasting, a tion, a pre-heating time of 5 minutes is sufficient. higher temperature than is actually needed on the You do not need to wait until the appliance reaches surface of the food is selected.
- Page 47 How it works en Take note of the recommended settings for side 19.10 Side dishes dishes. Also follow the instructions on the packaging. Side dishes Food Accessory/cookware Temperat- Type of Humidity Cooking Comments ure in °C heating in % time in min. Basmati rice, Unperforated steam 20-25 250 g + 500 ml water...
- Page 48 en How it works Food Accessory/cookware Temperat- Type of Humidity Cooking Comments ure in °C heating in % time in min. Steamed dumplings Unperforated steam 20-30 Allow steamed dump- or yeast dumplings, container lings to rise for 100 g each 30 minutes before steaming. → "Dough proving – leaving to rise", Page 51 Flan or crème cara-...
- Page 49 How it works en Food Accessory/cookware Temperat- Type of Humidity Cooking Comments ure in °C heating in % time in min. Hot towels Unperforated steam 10-15 Moisten the towels. container Potato gratin, 1 kg Ovenproof dish 45-65 potatoes Lasagne Unperforated steam 170-190 40-55 container Soufflé, cheese Soufflé...
- Page 50 en How it works Food Accessory/cook- Shelf pos- Temperat- Type of Humidity Cooking Comments ware ition ure in °C heating in % time in min. Bread rolls, 1. Unperforated 1. 150 1. 100 1. 10 Step 2. 170 °C 50-100 g each steam container 2.
- Page 51 How it works en Food Accessory/cook- Shelf pos- Temperat- Type of Humidity Cooking Comments ware ition ure in °C heating in % time in min. Tart Tart dish or tin 190-200 30-45 E.g. with apples, chocolate, apricots, or sa- voury with as- paragus, onions, cheese Wholemeal bread...
- Page 52 en How it works Food Accessory/cookware Temperat- Type of Humidity Cooking Comments ure in °C heating in % time in min. Baguette, bread rolls, Pan support from previous day Roasts, sliced, 150 g Unperforated steam 15-20 Finger-thick slices; do each container not pile them on top of one another;...
- Page 53 How it works en Food Accessory/cookware Temperat- Type of Humidity Cooking Comments ure in °C heating in % time in min. Chicken, 1 kg Perforated steaming 45-50 60-70 tray Chicken thighs, Perforated steaming 45-50 40-50 400 g each tray ¡ Carefully check and clean the preserving jars, rub- 19.17 Preserving food ber sealing rings, clips and springs.
-
Page 54: Customer Service
en Customer Service ¡ When using yoghurt ferment, follow the instructions ¡ Once you have finished making the yoghurt, place it on the packet. in the refrigerator. ¡ Pour the yoghurt into washed jars. ¡ To make thick yoghurt, add skimmed milk powder to the milk before heating it. -
Page 55: Declaration Of Conformity
2014/53/EU. A detailed Declaration of Conformity can be found on- A detailed RED Declaration of Conformity can be found line at www.gaggenau.com/gb among the additional online at www.gaggenau.com among the additional documents on the product page for your appliance. - Page 56 en Installation instructions ¡ This appliance is intended for front flush installation. WARNING ‒ Risk of injury! Even with a minor protrusion of the cabinet panel The appliance is heavy. above the appliance, there is a risk of damage to ▶ To move the appliance, two people are re- the cabinet by escaping steam.
- Page 57 Installation instructions en ¡ If the plug with earthing contact can no longer be When installing 2 appliances on top of each other, accessed after installation, an energy-isolating observe the clearances. device in the phases must be provided in the per- manent electrical installation in accordance with the installation regulations.
- Page 58 en Installation instructions Push the appliance all the way into the built-in unit. Aligning the appliance door Do not kink or trap the connection cable. ‒ Pull the appliance out slightly from its built-in recess. Centre the appliance. Undo the side screw. Use a spirit level to adjust the appliance so that it is perfectly level.
- Page 59 Installation instructions en Check the alignment. Tighten the side screw firmly. Slide the appliance into the built-in recess. 22.9 Combining the appliance with an oven Only combine suitable appliances of the same brand and series. Fit the combi-steam oven first, then the oven. If you want to install the appliance next to an oven, the door handles of both appliances must be in the centre.
- Page 60 BSH Hausgeräte GmbH Carl-Wery-Straße 34 81739 München, GERMANY www.gaggenau.com Valid within Great Britain: Imported to Great Britain by BSH Home Appliances Ltd. Grand Union House Old Wolverton Road Wolverton, Milton Keynes MK12 5PT United Kingdom...
Need help?
Do you have a question about the BSP2511 1 Series and is the answer not in the manual?
Questions and answers