Table of Contents
Advertisement
Quick Links
Advertisement
Table of Contents

Subscribe to Our Youtube Channel
Related Manuals for Gaggenau BSP 251


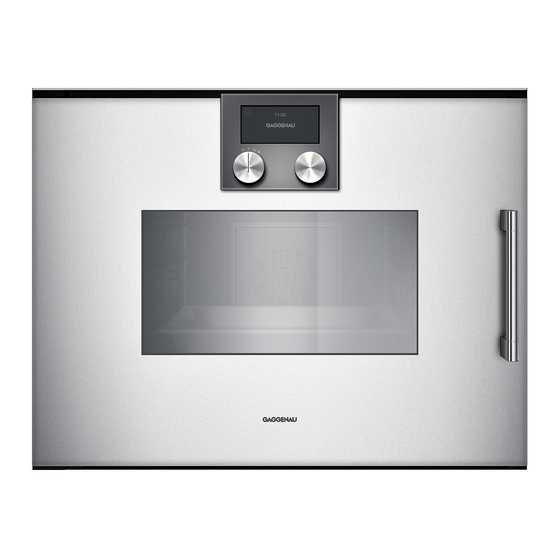
Summary of Contents for Gaggenau BSP 251
- Page 1 Instruction manual BSP 250/251 Combi-steam oven...
-
Page 2: Table Of Contents
Table of contents Instruction manual I ntended use T ime-setting options Calling up the timer menu Timer I mportant safety information Stopwatch Cooking time C auses of damage End of cooking time E nvironmental protection L ong-term timer Saving energy Setting the long-term timer Environmentally-friendly disposal C hildproof lock... - Page 3 Dough proving (leaving to rise) Regenerating (reheating) Defrosting Preserving Extracting juice (soft fruit) Preparing yoghourt Preparing bulky food Acrylamide in foodstuffs Additional information on products, accessories, replacement parts and services can be found at www.gaggenau.com and in the online shop www.gaggenau.com/zz/store...
-
Page 4: I Ntended Use
Intended use I ntended use R ead these instructions carefully. Only then Always slide accessories into the cooking I n t e n d e d u s e will you be able to operate your appliance compartment correctly. See description of safely and correctly. -
Page 5: I Mportant Safety Information
Important safety information I mportant safety information Warning – Risk of fire! Warning – Risk of scalding! I m p o r t a n t s a f e t y i n f o r m a t i o n Combustible items stored in the cooking ▯... - Page 6 Important safety information Warning – Risk of injury! Descaling tablets may cause chemical ▯ burns in the mouth, throat, eyes and on the skin. Follow the safety instructions on the packaging of the descaling tablets. Avoid the skin coming into contact with the descaling tablets.
-
Page 7: C Auses Of Damage
Causes of damage C auses of damage E nvironmental protection C aution! Y our new appliance is particularly energy-efficient. Here C a u s e s o f d a m a g e E n v i r o n m e n t a l p r o t e c t i o n you can find tips on how to save even more energy when –... -
Page 8: F Amiliarising Yourself With Your Appliance
Familiarising yourself with your appliance F amiliarising yourself with your appliance U se this section to familiarise yourself with your new F a m i l i a r i s i n g y o u r s e l f w i t h y o u r a p p l i a n c e appliance. -
Page 9: Grease Filter
Familiarising yourself with your appliance Grease filter Symbols Your appliance is equipped with a grease filter. The Symbol Function grease filter prevents the components of the appliance Start becoming soiled with grease. Leave the grease filter in Ø Stop the cooking compartment for all applications. Pause/End Cancel Display and operating controls... -
Page 10: Standby
– Different things can be displayed in standby mode. damage adjacent kitchen units. The cooling fan The default setting is the GAGGENAU logo and the continues running for a certain period after the time. appliance has stopped heating; afterwards, it switches –... -
Page 11: Function Selector Positions
Familiarising yourself with your appliance Function selector positions Position Function/heating function Temperature Application "Off" position ž Light Switch on the interior lighting. Access to other func- tions, e.g. automatic programmes, individual reci- pes, remote start (Home Connect). 30 - 230 °C Steaming at 70 - 100 °C: For vegetables, fish and side dishes. - Page 12 Familiarising yourself with your appliance Position Function/heating function Temperature Application 30 - 230 °C Grill mode with humidity: For stuffed vegetables. Full surface grill setting 2 + Default temperature 170 °C The grill output is increased. humidity 30 - 230 °C For au gratin dishes at the end of the cooking time at 230 °C.
-
Page 13: Accessories
Familiarising yourself with your appliance Accessories Special accessories Use only the accessories supplied with the product or You can order the following special accessories from available from the after-sales service. They are specially your specialist dealer: designed for your appliance. Ensure that you always BA 010 301 Triple telescopic pull-out rack insert the accessories into the cooking compartment... -
Page 14: B Efore Using For The First Time
Confirm with ™. Once the appliance has been connected to a power supply, the GAGGENAU logo will appear first for approximately 30 seconds. The "Initial settings" Setting the water hardness menu will then appear automatically. -
Page 15: Cleaning The Door Panel
Different displays can be shown in standby mode. appliance with the door closed. One hour with hot air The default setting is the GAGGENAU logo and the + 60% humidity at 200 °C is ideal for this. time. You can adjust the display using the "Standby screen"... -
Page 16: O Perating The Appliance
Operating the appliance Fill the fresh water tank with cold water up to the O perating the appliance "Max." mark (fig. B). F illing the water tank O p e r a t i n g t h e a p p l i a n c e To cook with steam, open the appliance door and fill the water tank on the right with water before starting the appliance. -
Page 17: Inserting Accessories
Operating the appliance Inserting accessories Switching off The wire rack and the perforated cooking container are Turn the function selector to 0. fitted with a locking function. The locking function Depending on the operating mode, you may hear an prevents the accessories from tilting when they are automatic rinse cycle running. -
Page 18: Safety Shut-Off
Time-setting options Safety shut-off T ime-setting options For your protection, the appliance is equipped with an automatic safety shut-off. Any heating process is switched off after 12 hours if the oven is not operated in Y ou use the timer menu to make the following settings: T i m e - s e t t i n g o p t i o n s this time. -
Page 19: Stopwatch
Time-setting options The timer menu closes and the time begins to count The timer menu is closed and the timing begins. The down. The Š symbol and the countdown appear in the symbol and the elapsed time are shown in the display. display. -
Page 20: End Of Cooking Time
Time-setting options End of cooking time Set the required cooking time using the rotary selector. You can delay the cooking time end to a later time. Example: it is 14:00. The dish requires a cooking time of 40 minutes. You want it to be ready at 15:30. Enter the cooking time and delay the cooking time end until 15:30. -
Page 21: L Ong-Term Timer
Long-term timer To cancel the entire procedure: Once the set time has elapsed, the appliance stops Set the function selector to 0. heating. Turn the function selector to 0. Switching off: To end the process, turn the function selector to 0. L ong-term timer W ith the appliance in "Hot air + 0% humidity"... -
Page 22: C Hildproof Lock
Childproof lock C hildproof lock A utomatic programmes T he appliance has a childproof lock to prevent children Y ou can prepare a wide range of food using the C h i l d p r o o f l o c k A u t o m a t i c p r o g r a m m e s operating it accidentally. -
Page 23: Selecting A Dish
Automatic programmes Selecting a dish Adding extra cooking time After the cooking time has ended, you can leave some The following categories are available. One or more dishes to continue cooking if you are not satisfied with dishes are listed beside each category. the cooking result. -
Page 24: I Ndividual Recipes
Individual recipes Programming a recipe I ndividual recipes Ž You can programme and save up to 5 preparation phases. I t is possible to save up to 50 individual recipes. You I n d i v i d u a l r e c i p e s Set the function selector to ž. -
Page 25: Entering Names
Individual recipes Entering names Notes – The cooking time does not start counting down until Enter the name of the recipe in "ABC". the appliance has reached the set temperature. – You can use the rotary selector to change the temperature while the recipe is in progress. -
Page 26: C Ore Temperature Probe
Core temperature probe Poultry: Insert the core temperature probe as far as it C ore temperature probe will go into the thickest point in the breast. Depending on its structure, insert the core temperature probe into the poultry crossways or lengthways. With poultry, make T he core temperature probe makes it possible to cook sure that the tip of the core temperature probe does not C o r e t e m p e r a t u r e p r o b e... -
Page 27: Setting The Core Temperature
Core temperature probe Setting the core temperature Notes – At the beginning of the cooking time, "<15 °C" is Caution! displayed for 3–4 minutes for the current core Damage to the core temperature probe: temperature. The core temperature probe may be damaged if the –... -
Page 28: Suggested Values For The Core Temperature
Core temperature probe Suggested values for the core Food Suggested value for the core temperature temperature Lamb Only use fresh food that has not been frozen. The Leg of lamb figures in the table are given as a guide. They will Medium rare 60–65 °C depend on the quality and composition of the food. -
Page 29: H Ome Connect
Home Connect Select the Home Connect app and install it on your H ome Connect mobile device. Launch the app and set up Home Connect access. The app will guide you through the registration T his appliance can be networked and controlled process. -
Page 30: Remote Start
Home Connect Remote Start If the display shows "Network connection successful", the connection process is complete. Follow the Remote start must be activated in order to start and instructions in the app. operate your appliance via the Home Connect app. If remote start is deactivated, the Home Connect app will Connecting the appliance to the app only show the operating modes of the appliance and let... -
Page 31: Remote Diagnostics
A detailed RED Declaration of Conformity can be found Note: For further information and details about the online at www.gaggenau.com on the product page for availability of Remote Diagnostics in your country, appliance in the additional documents. -
Page 32: B Asic Settings
- Date + GAGGENAU logo select the desired display. - Clock + date The selection is displayed. - Clock + date + GAGGENAU logo Display Reduced*/Standard If the 'Reduced' setting has been selected, only the most important information will be shown on the display after a short time. - Page 33 Basic settings Date Current date Sets the date. You can switch between year/month/day using the symbol C. Temperature unit °C* / °F Setting the temperature unit Weight unit kg*/oz. Set the weight unit Language German* / French [...] / English Select the language for the text display Note: The system will restart if the language is...
-
Page 34: C Leaning And Maintenance
Cleaning and maintenance Area Cleaning products C leaning and maintenance Cooking compart- Hot soapy water: ment Clean with a dish cloth and dry with a soft cloth. W ith thorough care and cleaning your appliance will C l e a n i n g a n d m a i n t e n a n c e Do not use oven spray or other aggres- retain its looks and remain in good order. -
Page 35: Cleaning Aid
Cleaning and maintenance Remove accessories and the grease filter from the Area Cleaning products cooking compartment. Remove the wire racks from Core temperature Wipe with a damp cloth. Do not clean in the cooking compartment (see ~ "Removing the probe the dishwasher. -
Page 36: Descaling Programme
Cleaning and maintenance The drying time of 20 minutes appears. Touch I to Notes start. The drying time elapses on the display. The – Remove all accessories from the cooking lamp in the cooking compartment stays off. compartment before starting the descaling programme (wire rack, cooking containers, core temperature probe). -
Page 37: Removing The Wire Racks
Cleaning and maintenance Place the descaling tablet in the compartment at Cleaning the tanks the back of the fresh water tank. Fill the fresh water Descaler residues are left in the fresh water tank and tank with water up to the "Max." mark (1.7 litres). used water tank after descaling. -
Page 38: T Rouble Shooting
Trouble shooting Warning – Risk of injury! T rouble shooting The light emitted by LED lights is very dazzling, and can damage the eyes (risk group 1). Do not look directly into the switched on LED lights for longer than 100 seconds. M alfunctions often have simple explanations. -
Page 39: Power Cut
Trouble shooting Humming noise when switching on The appliance has not been used for a Normal: Automatic rinsing during initial few days A whistling noise occurs during heating Noises may occur during steam genera- This is normal tion There is a "pop" noise during cooking Cold/warm effect with frozen food, This is normal caused by the steam... -
Page 40: A Fter-Sales Service
After-sales service A fter-sales service T ables and tips O ur after-sales service is there for you if your appliance N otes A f t e r - s a l e s s e r v i c e T a b l e s a n d t i p s needs to be repaired. -
Page 41: Vegetables
Tables and tips Vegetables ▯ ▯ Vegetables are prepared better in steam than in Blanching takes 8–10 minutes in the pre-heated boiling water: The taste, colour, and consistency appliance. If the vegetables or fruit will not be are retained better. Virtually none of the water- served immediately, chill in ice water to prevent soluble vitamins and nutrients are washed out. -
Page 42: Fish
Tables and tips Fish ▯ ▯ Steaming is a cooking method that does not use When using the perforated cooking container, you any fat and does not allow fish to dry out. can grease the container if the fish sticks too much. ▯... -
Page 43: Meat - Cooking At Higher Temperatures
Tables and tips Food Cooking Tempera- Humid- Cooking time Comments container ture in °C ity in % in mins Scallops Unperforated 80–90 9–13 The more the scallops weigh, the (15–30 g each) longer the chosen cooking time should be. Cod (250 g/piece) Perforated 80–90 15–17... -
Page 44: Meat/Poultry - Low-Temperature Cooking
Tables and tips Food Cooking Tempera- Humid- Cooking Comments container ture in °C ity in % time in mins Leg of lamb, seared, Unperforated 1) 200 medium rare (1.5 kg) 2) 140 60–70 Saddle of venison, seared, Unperforated 160–170 0/30 12–18 medium rare (500 g/piece) Joint of beef, well done... -
Page 45: Poultry
Tables and tips Food Cooking Tempera- Type of Cooking Comments container ture in °C heating time in mins Fillet of veal, well done Unperforated 80–90 › 150–200 (1 kg) Leg of lamb, boned, tied, Unperforated 70–80 › 180–240 Turn in garlic and herbs before cooking in oil medium rare (1.5 kg) Fillet of beef, medium rare Unperforated 70–80... -
Page 46: Sous-Vide Cooking
Tables and tips Sous-vide cooking Do not cook the food in the bag you bought it in (e.g. portions of fish). These bags are not suitable for sous- Sous-vide cooking is a method of cooking under a vide cooking. vacuum at low temperatures between 50 and 95 °C and Vacuum-sealing in 100% steam. - Page 47 Tables and tips Remove the vacuum-sealing bags with care after Vegetables: Flash fry in a frying pan or on a teppan yaki cooking as hot water accumulates on the bags. Place to give them the flavours you would expect from frying. the unperforated cooking container into the cooking When frying vegetables like this, it is easy to season compartment at the level below the perforated cooking...
- Page 48 Tables and tips Food Cooking Temperature Type of Cooking Comments container in °C heating time in mins Salmon fillet (140 g/piece) Perforated § If you wish, you can flash fry the salmon fillet in a hot frying pan once it is cooked.
-
Page 49: Grilling
Tables and tips Grilling ▯ ▯ A total of three grilling functions mean that you can Do not grill food with the oven door open. brown or grill (full surface grill and air recirculation) ▯ With the full surface grill and air recirculation your food to your requirements –... -
Page 50: Side Dishes
Tables and tips Food Cooking Temperature Type of Cooking Comments container, in °C heating time level in mins Toast in accordance with EN Wire rack 230 5–7 Preheat for 5 minutes. 60350-1 Topped, grilled courgettes, Unperforated 30–40 stuffed, halved lengthways Side dishes Food Cooking Tempera-... -
Page 51: Miscellaneous
Tables and tips Food Cooking Tempera- Humid- Cooking Comments container ture in °C ity in % time in mins Compote Unperforated 100 20–25 E.g. apples, pears, rhubarb Recipe tip: Add sugar, vanilla sugar, cinna- mon or lemon juice. Rice pudding Unperforated 100 55–60 Allow to cool down for 10 minutes and stir. - Page 52 Tables and tips Food Cooking Tempera- Humid- Cooking time Comments container ture in °C ity in % in mins Apple cake 20 cm spring- Preheat form cake tin, (in accordance with wire rack EN 60350-1) Bagels Unperforated 190–210 80–100 20–25 Baguette, pre-baked Wire rack 190–200...
-
Page 53: Dough Proving (Leaving To Rise)
Tables and tips Food Cooking Tempera- Humid- Cooking time Comments container ture in °C ity in % in mins Tart Tart dish or 190–200 0–30 30–45 E.g. with apples, chocolate, apricots, or tin, wire rack savoury with asparagus, onions, cheese Hot water sponge cake Unperforated 150 Preheat... -
Page 54: Defrosting
Tables and tips Defrosting ▯ After half of the defrosting time, turn fish or meat or separate pieces of frozen food, such as berries or ▯ pieces of meat. Fish does not need to be fully In the combi-steam oven, you defrost frozen food defrosted;... -
Page 55: Extracting Juice (Soft Fruit)
Tables and tips Extracting juice (soft fruit) ▯ ▯ The combi-steam oven lets you extract juice from Leave the berries in the appliance until all the juice berries effortlessly and cleanly. has been extracted. ▯ ▯ Place the berries into the perforated cooking insert You can then place the berries in a tea towel and and slide it into the 2nd level from the bottom. - Page 56 Valid within Great Britain: Imported to Great Britain by BSH Home Appliances Ltd. Grand Union House Old Wolverton Road Wolverton, Milton Keynes MK12 5PT United Kingdom...
Need help?
Do you have a question about the BSP 251 and is the answer not in the manual?
Questions and answers