
Subscribe to Our Youtube Channel
Related Manuals for ADDAC System ADDAC309


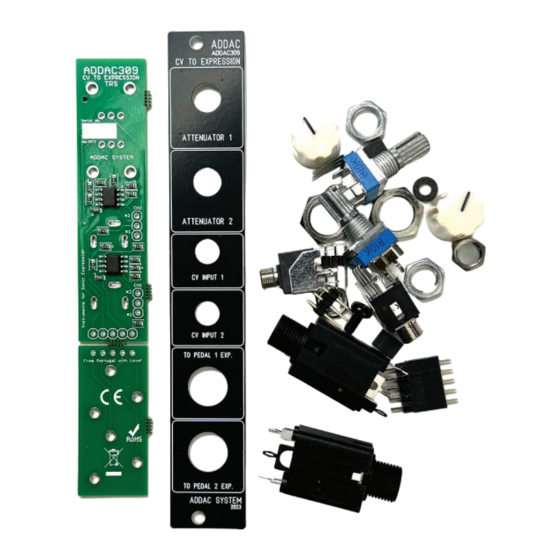
Summary of Contents for ADDAC System ADDAC309
- Page 2 ADDAC309 Assembly Guide May.2024 ADDAC SYSTEM page 2...
- Page 3 ADDAC309 Assembly Guide STEP 1: First let’s split the pcbs and trim their edges flush with some cutter. STEP 2: Locate and solder the pinheaders like shown below.. ADDAC SYSTEM page 3...
- Page 4 ADDAC309 Assembly Guide STEP 3: Locate the 3.5mm jacks and cut the thinest leg like shown below. STEP 4: Proceed by placing the jacks and potentiometers on the pcb followed by placing the panel and tighten the nuts. Notice the pcb is kept parallel to the panel, knobs are slightly raised to achieve this.
- Page 5 ADDAC309 Assembly Guide STEP 5: Place the 1/4’’ jacks into the small pcb STEP 6: Attach the small pcb to the panel and pinheader, tighten the 1/4’’ jack nuts and solder all remaining pads. ADDAC SYSTEM page 5...
- Page 6 ADDAC309 Assembly Guide STEP 7: Place the 2 jumpers on the bottom position for x1 output and finish it by placing the knobs. ADDAC SYSTEM page 6...
- Page 7 ADDAC309 Assembly Guide Congratulations you’re done! Happy Patching!! ADDAC SYSTEM page 7...
-
Page 8: Assembly Guide
For feedback, comments or problems please contact us at: addac@addacsystem.com ADDAC309 ASSEMBLY GUIDE Revision.01 May.2024...
Need help?
Do you have a question about the ADDAC309 and is the answer not in the manual?
Questions and answers