Table of Contents
Advertisement
Advertisement
Table of Contents

Related Manuals for Seca CT8000P-2


Summary of Contents for Seca CT8000P-2
- Page 1 CT8000P-2 User guide...
- Page 2 SCHILLER AG Altgasse 68 CH-6341 Baar, Switzerland The CT8000P-2 (Type CARDIOVIT AT-102 G2) bears the CE-0123 mark (Notified Body TÜV-SÜD 0123 Produkte Service GmbH, Ridlerstr. 65, 80339 Munich, Germany), indicating its compliance with the essential requirements of the Annex I of the Medical Device Directive 93/42/EE regarding safety, functionality and labelling.
-
Page 3: Table Of Contents
CT8000P-2 User guide Contents Table of contents Safety notes ..........5 Intended Use ................ 5 Indications for use..............5 Contra-indication ..............5 Responsibility of the User ........... 6 Organisational Measures ............. 6 Safety-conscious Operation ..........7 Safety facilities ..............7 Operation with other Devices .......... - Page 4 CT8000P-2 Contents Electrode placement .......29 Basics .................. 29 Electrode Identification and Colour Code ......30 Resting ECG with 10-lead patient cable ......31 4.3.1 Electrode placement for standard leads .......... 31 Standard (C4r)..............32 Balanced................33 Left posterior C7-C9 ............34 Nehb leads................
- Page 5 CT8000P-2 User guide Contents Memory ............ 61 Saving a Recording ............61 Editing the memory ............61 8.2.1 Opening the print preview from the memory and printing a recording 63 8.2.2 Transmitting and deleting stored recordings ........64 Worklist (Option) ........65 General information ............
- Page 6 CT8000P-2 Contents Transmission - Overview .......90 11.1 Transmission Options............90 11.1.1 Automatic transmission..............91 11.1.2 Manual transmission ................ 91 11.1.3 PDF export..................91 11.1.4 Schiller Link..................93 11.1.5 Retrieving data from the Schiller Server .......... 94 11.1.6 Failed data transmission ..............94 Maintenance ..........95...
-
Page 7: Safety Notes
USB stick, LAN or WLAN. Indications for use The CT8000P-2 is a 12-lead ECG device intended to acquire ECG signals from body surface electrodes and record, analyze, display and print ECGs for cardiological diagnosis in adult and paediatric patients. -
Page 8: Responsibility Of The User
Responsibility of the User CT8000P-2 Responsibility of the User The CT8000P-2 must only be used by qualified physicians or trained medical personnel. The numerical and graphical results and any interpretation given must be examined with respect to the overall clinical condition of the patient and the general recorded data quality. -
Page 9: Safety-Conscious Operation
© The device is CF classified. It is defibrillation protected only when the Seca original patient cable is used. However, as a safety precaution, remove the electrodes before defibrillation, if possible. -
Page 10: Operation With Other Devices
There is no danger when using this unit simultaneously with electrical stimulation equipment. If the device is part of a medical system, only the original seca patient cable must be used with, and connected to, the CT8000P-2. If the patient cable should become defective after defibrillation, a lead-off... -
Page 11: Maintenance
The owner is solely responsible for the data backup. -
Page 12: Symbols And Pictograms
Symbols used on the device Potential equalisation. CF symbol. The device is classified safe for internal and external use. However, it is only defibrillation protected when used with the original seca patient cable. Manufacturer symbol, manufacturing date. IP20 Keep dry. - Page 13 (Wi-Fi). The CT8000P-2 radiates high-frequency electromagnetic energy and can disturb other devices if the CT8000P-2 is not installed and operated in accordance with the user guide. However, there is no guarantee that no interference can occur in certain installations. If the CT8000P-2 causes interferences, these can be determined by switching the device off/on or by transmitting/not transmitting ECG data.
-
Page 14: Introduction
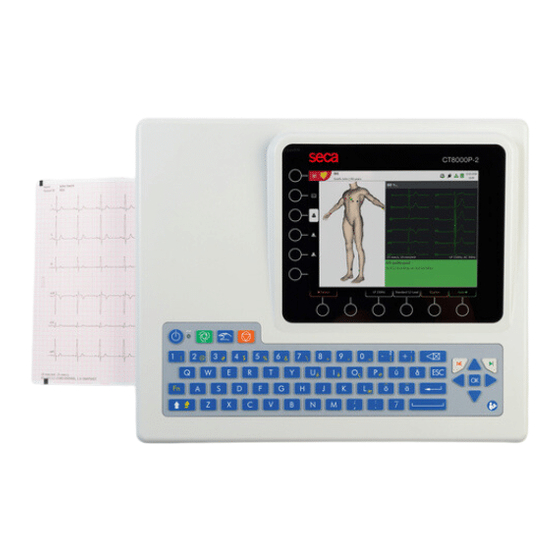
Introduction Main Components of the CT8000P-2 CT8000P-2 2 Introduction The seca CT8000P-2 is a 12-channel ECG unit designed to record, display and measure resting ECGs and exercise ECGs (optional). The CT8000P-2 has the following features: Main Components of the CT8000P-2... -
Page 15: Options
Introduction CT8000P-2 User guide Connections 2.1.1 Standard • Pacemaker detection • Manual rhythm printout in real time (leads, speed and amplitude can be changed) • Auto mode recording (10 seconds) with user-defined layout • Resting rhythm ECG • Measurements • Full disclosure of all 12 channels •... -
Page 16: Display
Introduction Display CT8000P-2 Display The display will vary according to the task being carried out. In all screens, however, the top and bottom areas always display the same category of information. Example for a typical patient data view: Access to the main menu:... -
Page 17: Display Details
Introduction CT8000P-2 User guide Display details Display details Displays and function keys during a resting ECG recording: Open/close the main Patient ID / Visit ID Hugh Brian I 53 years I Male menu Visit ID Patient ID Patient ID... - Page 18 Introduction Display details CT8000P-2 Patient ID I Visit ID Hugh Brian I 53 years I Male Normal Rhythm Averages Recorded ECG Results Measurements Accept Patient Print Discard by pressing Normal Normal Normal Interpretation Sinus rhythm Normal electrical axes Normal ECG...
-
Page 19: Keyboard
Introduction CT8000P-2 User guide Keyboard Keyboard (1) Power On/OFF Press the On/Off button to switch the device on or off. (2) Power Indicator The power supply LEDs indicate the power source (see Page 21). (3) Direct function key Auto Start... -
Page 20: Connections
Introduction Connections CT8000P-2 Connections All externally connected hardware must be approved by seca. Connection of any hardware not approved by seca is at the owner‘s risk. Moreover, the unit's warranty may become invalid. 2.6.1 Back panel (1) Power supply unit connection 100 -220 VAC, 50/60 Hz, 1.3 A. -
Page 21: Operation
• Do not allow the unit to come into contact with acidic vapours or liquids. • The CT8000P-2 should not be placed in the vicinity of X-ray or diathermy units, large transformers or electric motors. -
Page 22: Switching On / Off
Operation Switching on / off CT8000P-2 Switching on / off The unit is switched on and off with the On / Off key. • The switching off must be confirmed by pressing the key. • If access control is activated, the ON-OFF key must be pressed twice. -
Page 23: Power Supply
Operation CT8000P-2 User guide Power supply Power supply 3.3.1 Mains and battery indicators The unit can either be operated by the mains supply or by the built-in rechargeable battery. The LED indicates that the device is connected to the mains. -
Page 24: System And Ecg Settings
Operation System and ECG settings CT8000P-2 System and ECG settings • The system settings (time, date, device ID etc.) and other general settings are de- scribed on Page • Resting ECG settings (auto format, user defined leads, print options, interpretation, rhythm lead definition, etc.) are described on... -
Page 25: Changing The Printing Paper
• Certain glues can react with the paper. Therefore, do not use glue to attach the printout onto a mounting sheet. seca can only guarantee perfect printouts when original seca chart paper or chart paper of the same quality is used. -
Page 26: Patient / Recording Data
Operation Patient / recording data CT8000P-2 Patient / recording data In the patient data screen, new patients can be entered and previously stored patient data can be edited If a recording is performed without having entered a patient or visit ID, a UUID is generated instead of a patient ID, "Emergency ECG"... - Page 27 Operation CT8000P-2 User guide Patient / recording data Patient data - left entry fields Patient ID Enter the patient's identification number. Last name Enter patient's name (maximum 50 characters). First name Enter patient's first name (maximum 50 characters). Enter the patient‘s date of birth in the format dd.mm.yyyy, yyyy-mm-dd or mm/dd/ yyyy.
- Page 28 Operation Patient / recording data CT8000P-2 Acquiring technician Acquiring technician With the following settings, this "name" is read in automatically, but can be overwritten at any time: • Menu > Settings > General > Station > Parameter “Acquiring technician” • Menu > Settings > General > Access control > Access control mode > Local >...
-
Page 29: Patient Data Query (Pdq)
Operation CT8000P-2 User guide Patient / recording data 3.6.1 Patient data query (PDQ) When the unit is connected to SEMA or another hospital patient database (via network or WLAN), patient data can be filled in automatically when the Patient ID or Visit ID is entered. -
Page 30: Barcode Reader
Barcode reader A barcode reader can be attached to the USB port on the back panel to read the Patient ID / Visit ID. seca has tested the following barcode reader: Symbol Model LS 2208, from Symbol Tech N.Y. -
Page 31: Electrode Placement
A minimal resistance between skin and electrode is required to obtain the best ECG signal and ensure the highest quality ECG recording. Therefore, please note the following points: Only use electrodes that are recommended by seca (see accessories) Before using disposable electrodes, check that the expiration date has not yet passed. -
Page 32: Electrode Identification And Colour Code
Electrode placement Electrode Identification and Colour Code CT8000P-2 Electrode Identification and Colour Code The electrode colour codes in the following sections correspond to Code 1 (IEC) for the graphics and to Code 2 (AHA) in the tables IEC label Colour... -
Page 33: Resting Ecg With 10-Lead Patient Cable
Electrode placement CT8000P-2 User guide Resting ECG with 10-lead patient cable Resting ECG with 10-lead patient cable C1 red C2 yellow C3 green C4 brown C5 black C6 violet R red L yellow N black F green 4.3.1 Electrode placement for standard leads... -
Page 34: Standard (C4R)
Electrode placement Standard (C4r) CT8000P-2 Standard (C4r) ACC/AHA guidelines recommend examining patients suffering from a myocardial infarction with inferior ST elevation for possible RV ischaemia or RV infarction; this examination should be performed with a right precordial C4r lead. C1 red... -
Page 35: Balanced
Electrode placement CT8000P-2 User guide Balanced Balanced C7 (C4 Brown) C8 (C5 Black) C9 (C6 Violet) C4r (C3) Green C3r (C2 Yellow) C1 red L yellow R red F green N black Balanced 10-wire Cable IEC label AHA label Electrode placement... -
Page 36: Left Posterior C7-C9
Electrode placement Left posterior C7-C9 CT8000P-2 Left posterior C7-C9 If an acute coronary occlusion is strongly suspected, it is recommended to also register posterior chest wall leads (C7–C9) C4 brown C7 (C1 Red) C5 black C8 (C2 Yellow) C6 violet... -
Page 37: Nehb Leads
Electrode placement CT8000P-2 User guide Nehb leads Nehb leads The Nehb leads are bipolar chest leads. They are of special interest for the diagnosis of changes in the posterior ventricle wall. Three leads are arranged in the form of a triangle, also called the “small cardiac triangle”. -
Page 38: Pediatric
Electrode placement Pediatric CT8000P-2 Pediatric C2 yellow C7 Red C3r Green C5 black C6 violet C4r Brown R red L yellow N black F green IEC label AHA label Electrode placement C4r white / brown V4 brown / blue Fifth intercostal space on the mid-clavicular line. -
Page 39: Right Precordials (C3R-C6R)
Electrode placement CT8000P-2 User guide Right precordials (C3r-C6r) Right precordials (C3r-C6r) Since the treatment of an infarction might depend on the influence of the right ventricle, it is suggested to perform additional recordings with right precordial leads in the case of an acute infarction of the right ventricle's inferior wall (Circulation 2007). -
Page 40: Mason-Likar Modified (Exercise Ecg)
Electrode placement 4.10 Mason-Likar modified (exercise ECG) CT8000P-2 4.10 Mason-Likar modified (exercise ECG) AHA label IEC label Electrode Placement V1 red C1 red Fourth intercostal space at the right sternal border Fourth intercostal space at the left sternal border... -
Page 41: Skin/Electrode Resistance
Electrode placement CT8000P-2 User guide Skin/Electrode Resistance 4.11 4.11 Skin/Electrode Resistance 4.11.1 Electrode and patient cable check The electrode check is part of step 2 before the start of an ECG recording. The following is checked and displayed: • Excessive noise (signal noise too high) –... -
Page 42: Lead Sequence/Lead View
Electrode placement 4.12 Lead sequence/lead view CT8000P-2 4.12 Lead sequence/lead view 4.12.1 Setting Standard or Cabrera lead sequence The lead sequence is defined in the settings. (Menu > Settings > ECG > Leads & cable). In the Lead menu, select between Standard and Cabrera. -
Page 43: Resting Ecg
Do not operate the unit if the earth connection is suspect or if the mains lead is damaged or suspected of being damaged. If an external electronic device is connected to the CT8000P-2, use the potential equalisation stud for earth protection. -
Page 44: Resting Ecg - Procedural Flow Diagram
Resting ECG Resting ECG - Procedural Flow Diagram CT8000P-2 Resting ECG - Procedural Flow Diagram • Lead configuration, ECG Basic settings cable Entering patient data or Prepare the patient, connect the retrieving patient data Resting electrodes and switch on the device •... -
Page 45: Printing, Saving And Transferring Automatically
Resting ECG CT8000P-2 User guide Resting ECG - Procedural Flow Diagram 5.1.1 Printing, saving and transferring automatically Menu > Settings > General > Workflow Activate Print after acquisition, Transmit after acquisition and Delete after transmission to automatically print and transmit a saved recording or to delete recordings after transmission. -
Page 46: Automatic Resting Ecg Recording
Resting ECG Automatic resting ECG recording CT8000P-2 Automatic resting ECG recording To take an automatic ECG recording, press the Auto key. After approx. 10 seconds, the recording is analysed and the result displayed. The recording can be checked and saved and further printouts can be obtained in different formats. Depending on the setting, the recording is deleted automatically as soon as it has been transmitted, or it remains stored in the memory. -
Page 47: Etm Sport
Resting ECG CT8000P-2 User guide Automatic resting ECG recording 5.2.1 ETM Sport When ETM Sport interpretation is selected before the start of a recording, the additional criteria for an athlete's ECG are analysed and displayed. Abnormal ECG in athletes Intervals... -
Page 48: Automatic Printout
Resting ECG Automatic resting ECG recording CT8000P-2 5.2.2 Automatic printout The printout gives the following: • Heart rate • Patient name and ID • Date and time • Speed • Sensitivity • Filter • Device ID • Serial number • Software version And any combination of the following (for printout settings, see section 10.3 Menu... -
Page 49: Manual Rhythm Printout
Resting ECG CT8000P-2 User guide Manual Rhythm Printout Manual Rhythm Printout • Use this function to print a real-time ECG. The print parameters such as lead se- quence, print speed and sensitivity can be changed by the user during the printout. -
Page 50: Rhythm Recording
Resting ECG Rhythm recording CT8000P-2 Rhythm recording Press Rhythm to perform a rhythm recording. Select the recording duration in the dialogue that pops up. If a recording is cancelled after more than 10 seconds, it can still be stored. The recording can be checked and saved and further printouts can be obtained in different formats. -
Page 51: Changing The Ecg Display
Resting ECG CT8000P-2 User guide Changing the ECG display Changing the ECG display The ECG preview is optimised for one or two columns with 6 leads each, or for 3 columns with 4 leads each. The amplitude and speed can be set to 5, 10 or 20 mm/ mV, and to 12,5, 25 or 50 mm/s. -
Page 52: Myogram Filter
Resting ECG Changing the ECG display CT8000P-2 5.5.2 Myogram filter The myogram filter suppresses disturbances caused by strong muscle tremor. In Menu > Settings > ECG > Filters & formulas, the myogram filter is defined. LP 40Hz, AC 50Hz In the information field, Off, LP 25 Hz, LP 40 Hz or LP 150 Hz is displayed. -
Page 53: Culprit Coronary Artery Algorithm
Culprit Coronary Artery Algorithm CT8000P-2 User guide Introduction 6 Culprit Coronary Artery Algorithm Introduction The Culprit Coronary Artery Algorithm developed by Professor Hein Wellens is designed to determine the size of the cardiac area at risk by localising the occlusion... -
Page 54: Culprit Artery Algorithm Decision Overview
Culprit Coronary Artery Algorithm Introduction CT8000P-2 6.1.1 Culprit Artery Algorithm Decision Overview Prior Bypass/ PCI centre Stent? PCI = Percutaneous Coronary Intervention QRS width limit? PCI centre ST Score < lower Transport to nearest hospital limit? ST Score >= lower limit... -
Page 55: Starting The Ccaa Analysis
Culprit Coronary Artery Algorithm CT8000P-2 User guide Introduction 6.1.2 Starting the CCAA analysis When CCAA analysis is set, the following applies: • The lead setting is automatically set to Right Precordial (V4r). Ensure that the C4 electrode is placed in the C4r (precordial) position. -
Page 56: Ccaa Information On Print Preview/Printout
Culprit Coronary Artery Algorithm Introduction CT8000P-2 6.1.3 CCAA information on print preview/printout Information on LAD (left anterior descending) For men under the age of 40 showing early repolarisation in the anterior leads, false LAD diagnoses may occur. The following CCAA information is given on the print preview/printout: Manual entry before the start of the recording: –... -
Page 57: Exercise Ecg
Exercise ECG CT8000P-2 User guide Safety notes 7 Exercise ECG Safety notes The CARDIOVIT AT-102 G2 is CF classified. The patient connection is fully iso- lated. Always ensure however, that during the recording neither the patient nor the conducting parts of the patient connector nor the electrodes come into con- tact with other persons or conduction objects (even if these are earthed). -
Page 58: General
Exercise ECG General CT8000P-2 General The CARDIOVIT AT-102 G2 features one interface COM1 (RS-232) to control digital treadmills and bikes; moreover, it features the following functions: • Ten pre-programmed treadmill protocols • Seven pre-programmed bike protocols • Manually advancing to the next step at any time •... -
Page 59: Exercise Flow Diagram
Exercise ECG CT8000P-2 User guide Exercise Flow Diagram Exercise Flow Diagram • General settings Ergo Basic settings device, protocol Entering patient data or Prepare the patient, connect the retrieving patient data Exercise ECG electrodes and switch on the device •... -
Page 60: Recording Of An Exercise Ecg
Exercise ECG Recording of an exercise ECG CT8000P-2 Recording of an exercise ECG • Make sure the ergometer is connected to the CARDIOVIT AT-102 G2 (COM1) and ready for use (see ergometer user guide). • The ergometer/treadmill, the BP recorder, protocol settings as well as general set- tings for the exercise ECG are done in the Menu >... -
Page 61: During The Test
Exercise ECG CT8000P-2 User guide During the test During the test /min /min prev 120/80 mmHg x beats/min Watts Watts Exercise Step 2 25 mm/s 10 mm/mV Recovery PM off Hold Next (1) Heart rate Measured heart rate (2) Heart rate in % Current heart rate in % of max. -
Page 62: End Of Test Results
Exercise ECG During the test CT8000P-2 7.5.1 End of test results The following information is displayed after completion of the test: Trend view with graphic presentation of: • Load stages • Blood pressure Auto/Manual • Heart rate • METs Print... -
Page 63: Memory
Editing the memory Approx. 350 resting ECGs, 100 resting rhythms and 10 exercise ECGs can be stored on the CT8000P-2. When Menu > Memory is selected, stored recordings are displayed • The recordings are listed by date/time; however, different listing criteria can be se- lected and recordings can also be searched via the search function. - Page 64 Memory Editing the memory CT8000P-2 Search recordings Select recordings with: Sort by: Sort order: time: Start time up sort Select all Clear Deselect Clear Upload View selection Deleting the selected recordings Upload the selected recordings Select all recordings Deselect selected recordings...
-
Page 65: Opening The Print Preview From The Memory And Printing A Recording
Memory CT8000P-2 User guide Editing the memory 8.2.1 Opening the print preview from the memory and printing a recording Depending on the settings in Menu > Settings > General > Workflow, the recording is printed automatically as soon as it has been saved. -
Page 66: Transmitting And Deleting Stored Recordings
Memory Editing the memory CT8000P-2 8.2.2 Transmitting and deleting stored recordings Depending on the settings in Menu > Settings > General > Workflow (see Page 85), the recording is transmitted and deleted automatically as soon as the recording has been finished. If automatic transmission is not activated, recordings can be transmitted as follows. -
Page 67: Worklist (Option)
To receive a worklist from the Schiller Server, the unit identification of the CT8000P-2 (device ID in the system) must be the same as the one defined for the Schiller Server. This is usually set when the unit is first commissioned. The Device ID is shown in Menu >... -
Page 68: Receiving A Worklist
Worklist (Option) Receiving a worklist CT8000P-2 Receiving a worklist To open the worklist proceed as follows: 1. Press Menu > Worklist. Select a recording Search recordings Search for PID, Visit ID, first name or last name Workitem Details Worklist Sync. worklist... -
Page 69: Taking A Worklist Recording
Worklist (Option) CT8000P-2 User guide Receiving a worklist All patients given in the worklist are displayed with their last/first name, patient ID, order ID and room number. The following recording types are available: • Resting ECG • Resting rhythm •... -
Page 70: Performing A Recording From Work Order Details
Worklist (Option) Receiving a worklist CT8000P-2 9.2.2 Performing a recording from work order details • This procedure corresponds with the worklist mode “Record from work order details”, see setting section 10.7 General, page 85, workflow. • Patient data provided by the HIS cannot be edited (except for height and weight). -
Page 71: Sending Worklist Recordings To The His
Worklist (Option) CT8000P-2 User guide Receiving a worklist 9.2.3 Sending worklist recordings to the HIS • It is possible to automatically send performed worklist recordings. This is defined in system settings (Menu > > Settings > General > Workflow > Transmit after... -
Page 72: General And System Settings
General and System Settings 10.1 Navigation CT8000P-2 10 General and System Settings 10.1 Navigation When pressing the Menu key , the option Settings is displayed. Main menu Worklist Patient cable Lead & cable Lead sequence Standard Filter & Formulas Recorder Default lead config. -
Page 73: Overview "Menu > Settings
General and System Settings CT8000P-2 User guide Navigation 10.1 10.1.1 Overview "Menu > Settings This menu can be protected with a password via the menu Settings > General > Access control. Menu Settings Sub-menu • Lead & cable • Filter & Formulas •... -
Page 74: Saving And Restoring Settings
General and System Settings 10.1 Navigation CT8000P-2 10.1.2 Saving and restoring settings Changed settings are saved automatically. In Menu > Settings, settings from another device can be imported, or a backup of the settings can be restored (see Page 72). -
Page 75: Ecg Menu
General and System Settings CT8000P-2 User guide ECG Menu 10.2 10.2 ECG Menu 10.2.1 Lead & Cable Menu Parameter Description / selection Patient cable IEC or AHA Lead & Cable Lead sequence Standard or Cabrera • Standard 12-lead • Paediatric •... -
Page 76: Additional Leads
General and System Settings 10.2 ECG Menu CT8000P-2 10.2.4 Additional Leads Standard leads per lead configuration These settings apply to current resting rhythm recordings and recordings from the memory as well as the printout. Therefore, saved ECGs can be displayed or printed with different settings at any time. -
Page 77: Menu Reports
General and System Settings CT8000P-2 User guide Menu Reports 10.3 10.3 Menu Reports Saved ECGs can be displayed with different settings at any time. 10.3.1 General Parameter Description Sequential or Simultaneous. If Sequential is selected, consecutive time segments are used for the individual lead groups (this applies for printouts). If Simultaneous is... -
Page 78: Resting Ecg
General and System Settings 10.3 Menu Reports CT8000P-2 10.3.3 Resting ECG Saved ECGs can be displayed with different settings at any time. • Patient data is always printed. • The order listed below can vary. • Select (), activate/deactivate with OK or with function key , sort with keys Up/Down and Average/Rhythm amplitude 5/10/20 mm/mV. -
Page 79: Rhythm Ecg
General and System Settings CT8000P-2 User guide Menu Reports 10.3 10.3.4 Rhythm ECG Saved ECGs can be displayed with different settings at any time. • The order listed below can vary. • Select (), activate/deactivate with OK or with function key... -
Page 80: Menu Layouts
General and System Settings 10.4 Menu Layouts CT8000P-2 10.4 Menu Layouts In this menu, the views and layouts for Preview and the ECG review can be set. 10.4.1 Resting Preview Resting ECG Rhythm ECG Preview review review Menu Parameter Description View order Select whether Hookup or Recorder is shown at the top. - Page 81 General and System Settings CT8000P-2 User guide Menu Layouts 10.4 Rhythm ECG review Rhythm ECG Resting ECG Preview review review These settings apply to current resting rhythm ECG recordings and recordings from the memory. Therefore, saved ECGs can be displayed with different settings at any time.
-
Page 82: Exercise Ecg
General and System Settings 10.4 Menu Layouts CT8000P-2 10.4.2 Exercise ECG Preview Preview Review Menu Parameter Description Preview view order Select whether Hookup or Recorder is shown at the top. 12-lead layout 2x6 / 4x3/ 1x6 Preview Amplitude 5/10 /20 mm/mV Speed 12.5/25/50 mm/s... -
Page 83: Connectivity
General and System Settings CT8000P-2 User guide Connectivity 10.5 10.5 Connectivity 10.5.1 EMR integration Menu Parameter Description / selection None – No input field displayed EMR integration Schiller Link (EMR = electronic medical – Device ID is displayed record system) Schiller Server –... -
Page 84: Wlan
General and System Settings 10.5 Connectivity CT8000P-2 10.5.3 WLAN To select a WLAN network, press the function key “Browse networks”, select your network and confirm with the OK key. Once all parameters have been set, press the "Apply" function key... - Page 85 General and System Settings CT8000P-2 User guide Connectivity 10.5 General Advanced Network Menu Parameter Description / selection “Yes” = if you want the SSID to be hidden in the Wifi network. Hidden “No” = if you want the SSID to be visible in the Wifi network.
-
Page 86: Regional Settings
General and System Settings 10.6 Regional settings CT8000P-2 10.6 Regional settings Sub-menu Parameter Description / selection • Date format (dd.mm.yyyy / yy-mm-dd / mm/dd/yyyy) • Time format (HH:mm:ss/h:mm:ss) • Time zone • Date and time settings (manual setting is only possible when... -
Page 87: General
General and System Settings CT8000P-2 User guide General 10.7 10.7 General Menu Parameter Description / selection Various parameters Software and hardware versions are displayed. Info A diagnostic file (.nfo) is written to the connected USB Information Send info to USB USB memory stick. - Page 88 General and System Settings 10.7 General CT8000P-2 Menu Parameter Description / selection • None Open - no restriction • Basic Login when switching on the device and/or menu setting with pass- word Access Control Mode • Local Definition of users, passwords and privileges locally on the device •...
-
Page 89: Setting User Name & Password For Access Control
General and System Settings CT8000P-2 User guide General 10.7 Menu Parameter Description / selection Automatic log off Yes/No Automatic logout activated (Only displayed when access control is activat- Timeout logout [s] 10.7.1 Setting user name & password for access control Choose the Access control menu. -
Page 90: Exercise Ecg
General and System Settings 10.8 Exercise ECG CT8000P-2 10.8 Exercise ECG 10.8.1 General Parameter Description Select Calculation of the target HR based on AHA or WHO AHA or WHO Target HR guidelines J+10ms, J+20ms, J+30ms, Point at which the ST measurement is performed. -
Page 91: Bike Protocol
General and System Settings CT8000P-2 User guide Exercise ECG 10.8 10.8.3 Bike protocol Pre-defined bike protocols. 25/25-2/25 corresponds to a warm-up load of 25 Watt, a base load of 25 Watt, an increase of 25 Watt per step for 2 minutes as well as a recuperation load of 25 Watt. -
Page 92: 11 Transmission - Overview
Security of the network is the sole responsibility of the network operator. seca takes no responsibility for the configuration of Windows. In order to guarantee the security of the network, seca recommends the following: – isolating the CARDIOVIT AT-102 G2 network from other networks –... -
Page 93: Automatic Transmission
Transmission - Overview CT8000P-2 User guide Transmission Options 11.1 Wifi When Wifi is set, the symbols are as follows: • Symbol Green - Connected to Wifi network and SCHILLER Server. • Symbol Black - Connected to network but no connection with SCHILLER Server •... - Page 94 Transmission - Overview 11.1 Transmission Options CT8000P-2 Activate PDF export in the Menu > Settings > Workflow > PDF to USB after save. If PDF export is active, the recordings from the memory are transmitted as soon as a USB stick is connected. The symbol PDF export is displayed when data has successfully been transferred to the memory stick.
-
Page 95: Schiller Link
Transmission - Overview CT8000P-2 User guide Transmission Options 11.1 11.1.4 Schiller Link Schiller Link is a PC application/service which communicates between the EMR sys- tem and the CARDIOVIT AT-102 G2 . To activate this communication, set Schiller Link in the menu Connectivity >... -
Page 96: Retrieving Data From The Schiller Server
Transmission - Overview 11.1 Transmission Options CT8000P-2 11.1.5 Retrieving data from the Schiller Server Patient data can automatically be retrieved from the Schiller Server to the CT8000P- 2. This is called patient data query (PDQ). To do this, the Patient or Visit ID is entered... -
Page 97: 12 Maintenance
Maintenance work not described in this section may only be performed by a qualified technician authorised by seca. The following table indicates the intervals and responsibilities of the maintenance work required. Local regulations in your country may stipulate additional or different inspection intervals and tests. -
Page 98: Visual Inspection
No kinks, abrasion or wear in any cable assembly. Input/output connectors (undamaged). In addition to the visual inspection, switch on the CT8000P-2, scroll through the menu and test some sample functions. In this way, you can check that: •... -
Page 99: Cleaning The Casing And Cables
• Confirm that all connectors engage securely. The casing of the CT8000P-2 and the cable assemblies can be cleaned with a cloth slightly moistened (not wet) on the surface only. If necessary, a domestic non-caustic cleaner or a 50 % alcohol solution can be used to remove grease stains and finger prints. -
Page 100: Cleaning The Cable Assembly
Maintenance 12.3 Cleaning the casing and cables CT8000P-2 12.3.1 Cleaning the cable assembly 1. Before cleaning, inspect the cable for damage. Gently bend and flex all parts of the cable. Inspect for splits in the sheathing, damage or extreme wear, exposed wires or bent connectors. -
Page 101: Disinfection
Maintenance CT8000P-2 User guide Disinfection 12.4 12.4 Disinfection Disinfection removes certain bacteria and viruses. Please refer to the manufacturer's information. Use commercially available disinfectants intended for clinics, hospitals and medical practices. Disinfect the device in the same way as described for cleaning the device (previous page). -
Page 102: Battery
4. Charge the battery for at least 3.5 hours. 12.6.2 Battery disposal The battery must be disposed of in municipally approved areas or sent back to seca. Explosion hazard! The battery must not be burned or disposed of in domestic waste. -
Page 103: Inspection Report
Maintenance CT8000P-2 User guide Inspection Report 12.7 12.7 Inspection Report The user guide, especially chapter 12, must be read before the inspection. Recommended inspection interval: Every 6 months Serial no.: ________________ Test Results Date Visual inspection 12.2 • Casing not damaged ... -
Page 104: Lifed-Item Replacement Every 3 - 5 Years
Maintenance 12.7 Inspection Report CT8000P-2 12.7.1 Lifed-item replacement every 3 - 5 years Inspection Results Replacement Internal battery Replace internal battery if opera- • Unit sent to SCHILLER service tion falls substantially under six (6) centre for accumulator replace- hours. -
Page 105: 13 Trouble Shooting
• Old paper inserted Ensure that new SCHILLER paper is inserted. Note that the CT8000P-2 thermal paper is heat- and light-sensitive. If it is not stored in its original seal, stored in high temperatures or Printout fades, is not is simply old, print quality can deteriorate. - Page 106 Trouble Shooting 13.1 Possible problems CT8000P-2 Error Possible causes and indicators Error localisation and troubleshooting printout • Incorrect settings interpretation Check that the interpretation and measurement options are ena- statement, bled for the printout and that the lead sequence is set to Normal...
-
Page 107: Preventing Electromagnetic Interferences
Portable HF telecommunication devices must not be used within a radius of 0.3 m from the CT8000P-2 and its cables. Do not place the CT8000P-2 on top of other electric/electronic devices - i.e. maintain a sufficient distance to other devices (this includes the patient cables). -
Page 108: Accessories And Disposables
SCHILLER. Failure to do so may endanger life and/or invalidate the warranty. Your local representative stocks all the disposables and accessories available for the CT8000P-2. A comprehensive list of all SCHILLER representatives can be found on the SCHILLER website (www.schiller.ch). In case of difficulty, contact our head office. -
Page 109: 14 Technical Data
Technical Data CT8000P-2 User guide Device 14.1 14 Technical Data 14.1 Device Dimensions 384 x 319 x 90 mm, approx. 4.5 kg including thermal paper Ambient conditions Operating temperature • 10 to 40 °C Relative humidity during operation • 15 to 95% (non-condensing) Pressure during operation •... -
Page 110: Ecg
Technical Data 14.2 ECG CT8000P-2 Interfaces • ECG cable interface • Potential equalisation • Network connection (1Gbit) • 2 USB • 2 RS-232 Memory Memory for at least 350 ECG recordings, 100 resting rhythm recordings and 10 exercise ECGs. 14.2 Patient input •... -
Page 111: Safety Standards
Technical Data CT8000P-2 User guide Safety Standards 14.3 14.3 Safety Standards Safety standard IEC/EN 60601-1 IEC/EN 60601-2-25 IEC/EN 60601-1-2 Protection class Device as a system: Class I in accordance with IEC/EN 60601-1 Conformity/classification CE/IIa in accordance with directive 93/42/EEC Protection This device is not designed for outdoor use (IP 20) 14.4... - Page 112 Technical Data 14.4 WLAN standards CT8000P-2 Page 110...
-
Page 113: 15 Index
Index CT8000P-2 User guide 15 Index Accessories and disposables ....Operation – Overview ......Address Headquarters ......Options ..........Baseline filter ......... Potential equalisation ......Battery Power supply ......... Battery life ........Capacity .......... Recharging time ......Reciving a Joblist ........ - Page 114 Index CT8000P-2 Page 112...
Need help?
Do you have a question about the CT8000P-2 and is the answer not in the manual?
Questions and answers
Why is my ECG printing on 2 pages 6 leads on each page
The Seca CT8000P-2 ECG prints on 2 pages with 6 leads on each page because the ECG trace format can be selected as 6 x 2, showing 6 leads per page. This format option is available according to the device’s features, which allow easy selection of traces from formats like 12 x 1, 6 x 2, or 4 x 3.
This answer is automatically generated