Table of Contents
Advertisement
Quick Links
1. Congratulations!
In the seca 240 mechanical measuring
rod, you have acquired a highly accurate
and simultaneously sturdy piece of equip-
ment.
seca has been putting its experience at
the service of health for over 150 years
now, and as market leader in many coun-
tries of the world, is always setting new
standards with its innovative develop-
ments for weighing and measuring.
seca 240 measuring rod is used for diag-
nosis and treatment in hospitals and doc-
tors' surgeries.
2. Safety
Before using the new measuring rod, please take a little time to read the following safety
instructions.
• Follow the safety instructions in the in-
struction manual.
• Attach the measuring rod only to safe,
solid walls.
• Use the assembly material supplied.
8
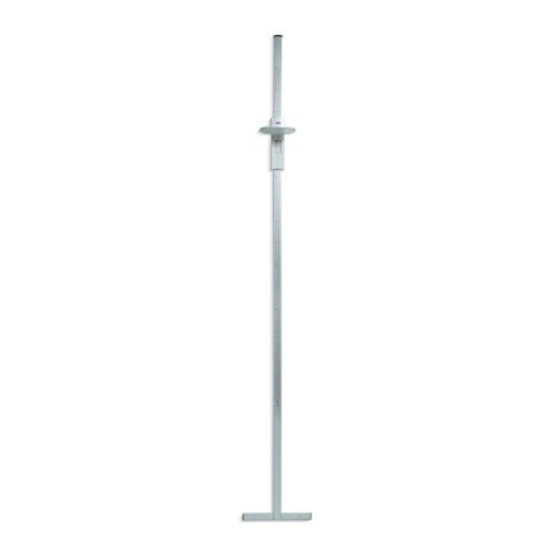
The measuring rod seca 240 is attached
directly to the wall. It has a heel plate to en-
sure that the patient is correctly posi-
tioned. The dual track and the large
surface of the head stop ensure that the
height of individuals can be determined
with precision.
The measuring rod is of a very sturdy con-
struction, and will give you long and relia-
ble service.
• When assembling, ensure that screws
are tight and that the rod has been as-
sembled correctly (see "Assembly" on
page 9).
• After measuring height, push the slide
unit back up – risk of injury!
Advertisement
Table of Contents

Related Manuals for Seca 240


Summary of Contents for Seca 240
- Page 1 240 measuring rod is used for diag- nosis and treatment in hospitals and doc- tors’ surgeries. 2. Safety Before using the new measuring rod, please take a little time to read the following safety instructions.
-
Page 2: Before You Start
You need to use at least one spacer for each of the two mounting points. – Place the spacers on top of one another and screw them to the heel plate using the plastic nuts and bolts. Alternatively.. Model 240... - Page 3 – Mark drill holes for the heel plate. – Drill using a 5 mm drill bit. – Push the rawlplugs supplied into the holes. – Mount the heel plate and the spacers using two screws. – Remove the cable tie (provided for transport purposes) on the top measur- ing rod.
- Page 4 Under no circumstances use abrasive or acid cleaners, white spirit, benzene or the like for cleaning. Such substances can damage the high-quality surfaces and the printing. 6. What do I do if… … the slide unit slips down? – Tighten up the screw on the slide unit using a small screwdriver. Model 240...
-
Page 5: Technical Data
In the event of transport of a warranty matter. damage, claims under warranty can be QuickMedical is an authorized distributor for seca. See the complete line of seca products at : www.medicalscales.com/seca Call toll free: 1-888-345-4858 Fax: 425-831-6032...
Need help?
Do you have a question about the 240 and is the answer not in the manual?
Questions and answers