Makita DUH602 Instruction Manual
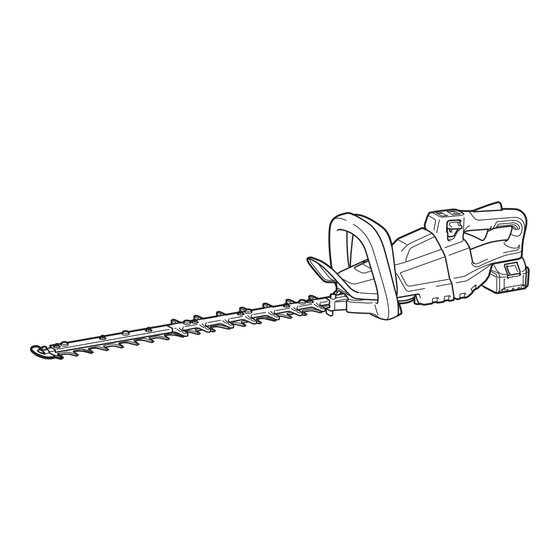
Cordless hedge trimmer
Hide thumbs
Also See for DUH602:
- Instruction manual (113 pages) ,
- Instruction manual (17 pages) ,
- Instruction manual (85 pages)

Related Manuals for Makita DUH602


Summary of Contents for Makita DUH602
- Page 1 INSTRUCTION MANUAL Cordless Hedge Trimmer DUH501 DUH601 DUH751 DUH502 DUH602 DUH752 Read before use.
-
Page 2: Specifications
3.6 kg 3.8 kg 3.8 - 4.2 kg 4.0 - 4.3 kg 4.2 - 4.5 kg Model: DUH502 DUH602 DUH752 Blade length 500 mm 600 mm 750 mm Strokes per minute 0 - 2,000 / 0 - 3,600 / 0 - 4,400 min... -
Page 3: Intended Use
Uncertainty (dB(A)) L (dB(A)) Uncertainty K (dB(A)) K (dB(A)) DUH501 DUH601 DUH751 DUH502 DUH602 DUH752 NOTE: The declared noise emission value(s) has been measured in accordance with a standard test method and may be used for comparing one tool with another. NOTE: The declared noise emission value(s) may also be used in a preliminary assessment of exposure. WARNING: Wear ear protection. The noise emission during actual use of the power tool can differ from the declared val- WARNING: ue(s) depending on the ways in which the tool is used especially what kind of workpiece is processed. -
Page 4: Declarations Of Conformity
Personal safety Declarations of Conformity Stay alert, watch what you are doing and use common sense when operating a power tool. For European countries only Do not use a power tool while you are tired or The Declarations of conformity are included in Annex A under the influence of drugs, alcohol or med- to this instruction manual. - Page 5 Power tool use and care Do not use a battery pack or tool that is dam- aged or modified. Damaged or modified batteries Do not force the power tool. Use the correct may exhibit unpredictable behaviour resulting in power tool for your application. The correct fire, explosion or risk of injury. power tool will do the job better and safer at the Do not expose a battery pack or tool to fire or rate for which it was designed.
-
Page 6: Additional Safety Warnings
Avoid dangerous environment. Don't use the Additional safety warnings tool in damp or wet locations or expose it to Preparation rain. Water entering the tool will increase the Check the hedges and bushes for foreign risk of electric shock. objects, such as wire fences or hidden wiring Maintenance and storage before operating the tool. -
Page 7: Functional Description
► 1 . Red indicator 2. Button 3. Battery cartridge SAVE THESE INSTRUCTIONS. To remove the battery cartridge, slide it from the tool CAUTION: Only use genuine Makita batteries. Use of non-genuine Makita batteries, or batteries that while sliding the button on the front of the cartridge. have been altered, may result in the battery bursting To install the battery cartridge, align the tongue on the causing fires, personal injury and damage. It will... - Page 8 Tool / battery protection system CAUTION: Always install the battery cartridge fully until the red indicator cannot be seen. If not, The tool is equipped with a tool/battery protection sys- it may accidentally fall out of the tool, causing injury to tem. This system automatically cuts off power to the you or someone around you. motor to extend tool and battery life. The tool will auto- CAUTION: Do not install the battery cartridge matically stop during operation if the tool or battery is forcibly. If the cartridge does not slide in easily, it is placed under one of the following conditions: not being inserted correctly.
- Page 9 Press the main power button to turn on the tool. The Angle setting of the handle power lamp lights up when the tool is turned on. To turn off the tool, press and hold the main power button. The power lamp goes off when the tool is turned off. CAUTION: Always make sure that the handle is locked in the desired position before operation. CAUTION: Do not pull down the lever to unlock the handle while pulling the switch trigger.
- Page 10 Indicator Mode Stroke speed ASSEMBLY High 4,400 min CAUTION: Always be sure that the tool is switched off and the battery cartridge is removed before carrying out any work on the tool. Medium 3,600 min CAUTION: When replacing the shear blades, always wear gloves so that your hands do not directly contact the blades.
- Page 11 Align the protrusions on the shear blades vertically NOTE: The plate may remain on the cover. at the same position. Remove the rod. Fig.13 ► 1 . Protrusion Fig.10 ► 1 . Rod Attach the felt pad to the shear blades. NOTE: The rod may remain on the cover. Remove 2 screws, the felt pad and the sleeves, and then remove the shear blades. Fig.14 ► 1 .
- Page 12 10. Insert the protrusion on the shear blades to the 12. Attach the rod. hole on the rod, then align the position of the felt pad with the holes on the tool, and then attach new sleeves. Fig.17 ► 1 . Rod 2. Small hole NOTICE: Apply a small amount of grease to the inner periphery of the small hole of the rod.
- Page 13 Install the shear blades again. NOTICE: If the parts other than the shear blades such as the rods are worn out, ask Makita Authorized Service Centers for parts replacement or repairs. Installing or removing the chip receiver...
-
Page 14: Operation
Align the holes on the chip receiver with the OPERATION screws on the shear blades, and then attach the chip receiver to the shear blades securely. WARNING: Keep hands away from shear blades. CAUTION: Avoid operating the tool in very hot weather as much as practicable. When operat- ing the tool, be careful of your physical condition. - Page 15 Hold the tool with both hands, press the switch lever If the chip receiver is attached to the shear blades, it and pull the switch trigger while pressing the lock-off gathers discarded leaves and makes clean-up after- lever, and then move it forward. ward much easier. Fig.29 Fig.32 To cut a hedge side evenly, cut from the bottom to top.
-
Page 16: Maintenance
Store the tool out of the reach attempting to perform inspection or maintenance. of children. Store the tool in a place not exposed to To maintain product SAFETY and RELIABILITY, moisture or rain. repairs, any other maintenance or adjustment should be performed by Makita Authorized or Factory Service Centers, always using Makita replacement parts. Cleaning the tool Clean the tool by wiping off dust with a dry cloth or one dipped in soapy water and wrung out. Never use gasoline, benzine, thinner, NOTICE: alcohol or the like. -
Page 17: Grease Lubrication
Remove the screw, and then remove the branch Grease lubrication catcher. Interval of lubrication: Every 100 operating hours Remove 3 bolts, and then remove the bottom cover. Fig.39 ► 1 . Screw 2. Branch catcher Set the angle of a file to 45°, and grind the upper Fig.42 blade from 3 directions with the file. ► 1 . Bolt 2. Bottom cover Remove the cap from the grease vessel, and then attach the grease vessel to the hole on the cover by turning the grease vessel. -
Page 18: Optional Accessories
OPTIONAL ACCESSORIES CAUTION: These accessories or attachments are recommended for use with your Makita tool specified in this manual. The use of any other accessories or attachments might present a risk of injury to persons. Only use accessory or attachment for its stated purpose. If you need any assistance for more details regard- ing these accessories, ask your local Makita Service Center. • Shear blade assembly • Shear blade cover •... - Page 20 Makita Europe N.V. Jan-Baptist Vinkstraat 2, 3070 Kortenberg, Belgium Makita Corporation 3-11-8, Sumiyoshi-cho, Anjo, Aichi 446-8502 Japan 885633E226 20231016...
Need help?
Do you have a question about the DUH602 and is the answer not in the manual?
Questions and answers