Z Grills 7002B - Smoker Grill Manual
- Owner's manual (24 pages) ,
- Owner's manual (24 pages)
Advertisement
- 1 Quick Reference Guide
- 2 Technical Specifications
- 3 Food Minimum Temperature Chart
- 4 Cleaning the Grill
- 5 Controller Operation
- 6 Error Codes
- 7 Main Grill Components
- 8 Unpacking & Assembly Instructions
- 9 Wiring Diagram
- 10 Spare Parts List
- 11 Initial Startup Instructions
- 12 New Grill Burn-In
- 13 Normal Operation
-
14
Troubleshooting
- 14.1 Grill not turning on
- 14.2 Controller display not showing any numbers
- 14.3 No fan or auger operating noises.
- 14.4 LEr Error
- 14.5 No smoke or fire
- 14.6 HEr High Temperature Error on Controller Display
- 14.7 Incorrect Grill Temperature
- 14.8 Excessive or discoloured smoke
- 14.9 Grill not able to reach desired temperature
- 14.10 Noisey Auger
- 15 Grill Repair Instructions
- 16 IMPORTANT SAFETY INFORMATION
- 17 Documents / Resources
Quick Reference Guide
INITIAL STARTUP PROCEDURE
- The Initial Startup Procedure must be completed before first use and each time after the grill runs out of wood pellets.
NEW GRILL BURN IN
- It is important to complete a 45 minute HIGH temperature BURN IN before cooking any food on a new Z Grill.
NORMAL STARTUP PROCEDURE
- Open the grill lid, turn the power ON and set the controller to Smoke.
- Keep the lid OPEN until smoke clears and the "roaring" fire sound is heard.
- Shut the lid and turn the Temperature Dial to the desired setting.
- Wait 10 minutes, or until the temperature is reached before putting food in.
NORMAL SHUTDOWN PROCEDURE
- After cooking, always turn the Temperature Dial to Shut Down and let the grill run until the fan turns off (do not disconnect the power until fan is off).
- If cooking at 190ºC or higher, turn to Smoke setting and let the grill run for at least 10 minutes before turning to Shut Down.
GREASE FIRE
- Turn the grill OFF and leave the grill Lid CLOSED until the fire is out.
- Do NOT apply water or try to smother the flames.
- Clean the grill regularly to avoid grease fires.
ERRORS
- Never turn the grill straight back on after any error is displayed.
- Open the grill lid, unplug from power and then complete troubleshooting diagnosis.
Technical Specifications
| Grill Model | ZPG-7002B V2 |
| Bottom Grill Rack | 488 x 660 mm (0.322m2) |
| Top Grill Rack | 175 x 700 mm (0.122m2) |
| Grease Tray Type | Vented holes for BBQ plate searing |
| Total Grilling Area | 0.45 m2 (700 square inches) |
| Power Supply | 240VAC 50Hz |
| Max Power Usage | 250W |
| Normal Power Usage | 25 ~ 50W after 5 min startup period |
| Hopper Capacity | 10 kg |
| Assembled Dimensions | 1230 wide x 570 deep x 1300 mm tall |
Food Minimum Temperature Chart
- When cooking meat and fish use food probes to monitor the internal temperature.
- Minimum temperatures must be reached to kill bacteria ensuring the meat is safe to eat. It can also indicate how well cooked it is.
- Below chart is provided as a reference only.
- Check online for more detailed temperature values for the specific food you are cooking.
Minimum Safe Internal Temperatures
| Beef & Veal (Whole cuts) | 63ºC |
| Lamb (Whole cuts) | 63ºC |
| Pork (Whole cuts) | 63ºC |
| Minced Beef | 72ºC |
| Sausages | 74ºC |
| Fish | 63ºC |
| Poultry | 74ºC |
Cleaning the Grill
Clean the Grill after each use, as accumulation of grease, ash and soot can increase the risk of a grease fire and result in inefficient operation.
Grease Tray, Drain & Bucket
- Remove foil from the grease tray and wipe off any surface grease.
- Clean out the the V-shaped drain and spout to the grease bucket. This is easiest to do while the grill is still warm (but not hot). Be careful!
- Dispose of any grease in the grease bucket and wash clean with warm soapy water. For easy clean up, line the bucket with foil.
Grilling Racks
- Use a Koala Claw wood scraper or other gentle material to scrape off any large chunks.
- Do NOT use a stainless steel wire brush as it can damage the ceramic coating.
- Using a wet cloth while the grill racks are still hot can remove the majority of the grease (use tongs, Koala Claw or wear heat proof gloves).
- Do NOT use acidic or strong chemical cleaners as they may damage the grill rack ceramic coating.
Fire-pot and Chimney
- Ash accumulates in the fire-pot and the base of the grill drum. Vacuum out after each long cook or every 5kg of wood pellets used. Only vacuum when the grill is cold, switched OFF and unplugged from power supply.
- Once every 50+ hours of use, remove the chimney cap and clean off any soot with old toothbrush and wipe clean with BBQ wipes.
Grill Surfaces
- Wipe down the inside and outside of the grill with BBQ cleaning wipes, or warm soapy water and moist (not too wet) cloth.
- Cover the grill with the protective cover when not in use if stored outdoors. The grill must not be exposed to rain.
- Gently clean the temperature sensor inside the grill periodically to ensure accurate temperature readings.
Food Temperature Probes
- Food probes must be scrubbed thoroughly after each use with hot soapy water to avoid food contamination.
- Do not immerse the entire probe or cable in water.
Wood Pellets
- Wood pellets can absorb moisture if sitting for an extended period of time in the hopper. They may not burn properly and, if very moist, can even cause the auger to become blocked.
- Always store wood pellets in an air tight bag or container.
- If not using the grill for several weeks, scoop out wood pellets in the hopper and run the grill until all pellets are depleted.
Controller Operation
The controller monitors the temperature sensor inside the grill and turns on/off the auger motor to deliver wood pellets into the fire-pot as well as managing the fan speed. The grill internal temperature and two food temperature probes can be monitored on the controller LCD display.
ON/OFF Switch
- This switch is the master power to the controller. Always ensure the dial is set to Shut Down when switching the power on otherwise error ER2 will be displayed on the screen.
- After using the grill, only switch OFF once the grill has shut itself down after completing the Shut Down cycle.
Controller Dial Settings
- Shut Down: Safe shutdown after operation.
- Smoke: Low temperature operation with maximum amount of smoke. Smoke will appear in cycles. The operating temperature will swing between around 75 to 90ºC.
- 82 ~ 232ºC Settings: Target temperature settings shown in both Celsius and Fahrenheit. Note the LCD screen only displays temperature in Celsius (ºC).
FOOD PROBE TEMP Button
- The default is the current internal grill temperature
- Press the FOOD PROBE TEMP button to cycle through:
Grill Temperature ➤Probe 1 ➤Probe 2 ➤Grill Temperature


Error Codes
Error codes will be displayed on the controller LCD screen. All grill operation will cease when there is an Error, so the problem must be solved before the grill can operate normally again.
Check Troubleshooting for more detailed information, or scan the QR code beside the error to visit our help page online for a more detailed explanation.
Er1 = Temperature Sensor Error

- Controller is not receiving a signal from the temperature sensor.
- May be due to bad wire connection on the controller, loose plug in middle of the cable or faulty temperature sensor.
Er2 = Controller System Error

- Reset the controller by following these steps:
- Switch the grill OFF and turn to Shut Down position.
- Switch grill back ON and then turn to SMOKE to start normal operation
- Er2 will be displayed if the controller dial is already turned to a temperature setting when switching the power on.
LEr = Low Temperature Error

- Grill internal temperature has fallen below 49ºC for too long.
- Possible reasons include:
- Grill may have run out of pellets (if mid cook)
- Fire has gone out due to moist pellets (if mid cook)
- Ignition rod is not operating (if during startup period).
HEr = High Temperature Error.

- Grill internal temperature has exceed 287ºC
- Turn to Shut Down and switch the Grill OFF
- Open the grill lid then switch the grill back ON and turn to Smoke position. Wait to confirm that fire has been established.
- Wait until the controller display has dropped below 90ºC, then close the grill lid and turn to the desired temperature.
- High temperature error can also occur in hot weather when the grill in direct sun. Open the grill lid and move it into the shade to reduce the temperature.
- If HEr occurs when the grill is definitely NOT too hot, the grill temperature sensor or controller may not be functioning properly. Please contact our support team.
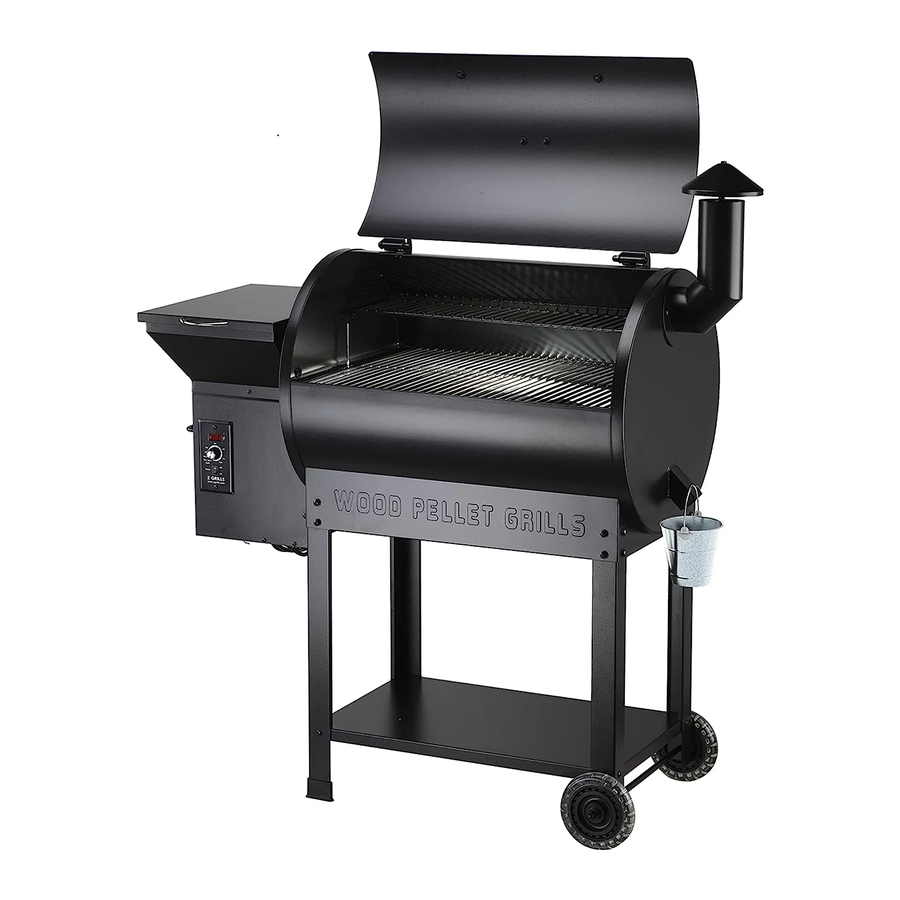
Main Grill Components

- Hopper Bottom Assembly
- Hopper Feed Chute
- Grill Lid
- Grill Temperature Sensor
- Fire Pot
- Grill Lid Handle
- Grill Lid
- Chimney Cap
- Chimney Stack
- Chimney Gasket
- Grill Drum
- Grease Bucket
- Grill Base
- Heat Baffle
- Grease Tray
- Bottom Grilling Rack (Right)
- Bottom Grilling Rack (Left)
- Top Grilling Rack
Unpacking & Assembly Instructions
The boxes and some of the components are heavy. Two people are required to safely complete the assembly process.
Unpacking
- Do not place painted metal components directly on bricks or concrete as it may scratch the paint. Lay down a sheet of cardboard to sit them on.
- It is recommended to unpack all components and lay them out before beginning assembly.
Assembly Process
- Follow the step by step assembly instructions on the following pages.
- Wear gloves when handling the grease tray and baffle plate it they have a layer of oil to prevent rusting during storage in the box.
Tools and Fasteners

- All the required fasteners (screws, nuts and bolts) and tools are provided in the shrinkwrapped package. Note the number code beside each fastener as they are referred to in the assembly instructions.
- Take care when doing up screws not to damage the heads as they are are made of a corrosion resistant metal alloy which is not very hard.
- Always start the thread by hand before final tightening. If using the electric screwdriver, use a low torque, low speed setting to avoid damaging the threads or screw heads.
- LEGS & DRUM

- LEGS & BASE

- WHEELS

- GRILL LID
TIP: Screws and washers are already on the drum, not in the tool & fastener kit. Hold the lid firmly against the drum ensuring left and right sides are evenly aligned, then tighten the screws.

- HOPPER ASSEMBLY
TIP: Cover the opening of the hopper with a piece of cardboard to prevent the kep nuts (59) from accidentally falling into the Auger. If they do fall in, remove with a magnetic screwdriver.

-
HOPPER & DRUM


TIPS:- Remove the Bolts and Washers from the hopper. Use them to attach the Hopper to the Drum.
- Connect the Temperature Sensor Cable BEFORE positioning the Hopper into the Grill Drum.
- The Hopper is heavy so get assistance from a 2nd person when sliding into the Grill Drum and securing the bolts.
- Finger tighten all 4 bolts evenly before tightening each fully with the spanner. Do NOT over tighten the bolts.
- Use the black twist tie from the power cable to neatly secure the cable in a bundle. Tuck it down between the Hopper and Drum.
- HOPPER LID HANDLE
TIP: Cover Hopper opening with cardboard to prevent screws accidentally falling into the Auger.

- GRILL LID HANDLE
TIP: Only tighten with spanner once both bolts have been threaded into the handle.

- CHIMNEY STACK
TIP:
Screw down the chimney cap until nut makes contact with rail. Do not fully close chimney cap, a 5 to 10mm gap should remain.

- HEAT BAFFLE

TIPS:


- Always position the heat baffle over the fire-pot whenever using the grill. It acts to dissipate the heat more evenly throughout the grill, avoiding a hot spot in the middle of the grill.
- The surface of the baffle will form black soot layers which will peel off, which is normal.
- Surface rust may also appear on the baffle which is also normal as the material is mild steel and will last many years.
- GREASE TRAY

TIPS:- Cover the whole grease tray with heavy duty aluminium foil for normal use. Replace foil as required.
- When using a cast iron BBQ plate for searing, do not foil over the air vents. This will allow heat to pass through the vents to achieve high BBQ plate temperatures. Position the BBQ plate left, over the vents.
- GRILL RACKS

- GREASE BUCKET
TIP:
Regularly clean grease bucket with warm soapy water, or line with foil.


Wiring Diagram

Spare Parts List
If a component is damaged, lost or just worn out through normal use, spares are available. Please refer to the chart below for most common spare components.
Contact support@zgrills.com.au to order spare parts.
| Component Description | Part Name |
| Grill Temperature Sensor | ZG-700-TSENSOR |
| Controller Board | ZG-CONT |
| Fire-pot Fan | ZG-FPFAN |
| Ignition Rod | ZG-IROD |
| Auger Shaft | ZG-700-AUGER |
| Auger Motor | ZG-AMOTOR-2.0 |
| Heat Baffle | ZG-7002B-HBAFF |
| Great Tray with Heat Vent Holes | ZG-700-GTRAY-H |
| Small Top Grill Rack | ZG-700-SGRACK |
| Main Twin Grill Rack | ZG-700-TWIN-MGRACK |
Initial Startup Instructions
Follow the initial startup process before first use, and each time after the grill runs out of wood pellets.
- Remove grill racks, grease tray and heat baffle from the grill.
- Open the pellet hopper and grill lids and check to ensure there are no foreign objects in the hopper or auger.
- With the power switch in the OFF position, plug in the power cord to 240V grounded 10 Amp power supply. It is ok to use a 10 Amp extension power cable.
- With the controller dial in the shut down position, switch the grill ON and then turn the temperature dial to the SMOKE position.
- Check the following:
✓ Confirm the auger is rotating (turns very very slowly and will stop/start intermittently)
✓ Hold you hand above the fire-pot to confirm air flow - Pour some wood pellets into the hopper (Up to the guard plate level is sufficient)
- Turn the controller dial to the highest temperature (232ºC). It will take 7-8 minutes for the pellets to begin to drop into the fire-pot. If LEr is displayed, just turn to Shut Down and then back to SMOKE (make sure the grill lid is open).
- Once pellets begin to drop into the fire-pot, turn the dial to Shut Down then immediately back to SMOKE. After 3-4 minutes a big cloud of smoke will be released then a fire will be established.
- Place the heat baffle, grease tray and grill racks back into the grill. The grill is now ready to complete the New Grill Burn-In (first time use), or normal cooking.
New Grill Burn-In
This process runs the grill at the highest temperature setting (burning wood pellets for heat) to burn off any surface oils on the baffle and grease tray. This must be completed before cooking any food. The smoke will have an oily odour, so avoid breathing in the smoke or completing the Burn-In near an open window.
- If you have just completed the Initial Startup Process, the unit should already be running on the Smoke setting with the heat baffle, grease tray (no foil) and grill racks all placed inside. Proceed to step 3.
- If OFF, turn ON, open the grill lid and turn to Smoke. Once lots of smoke appears, then begins to clear and you hear the roaring sound of the fire, proceed to step 3.
- Close the grill lid and turn the dial to 232ºC.
- Run on 232ºC setting for 45 minutes. The grill should reach over 200ºC after about 15 to 20 minutes. During the burn in the grill may not quite reach 232ºC, which is normal.
- After 45 minutes, turn the dial to Smoke and run for another 10 minutes. If you accidentally turn to Shut Down, just immediately turn to Smoke.
- After waiting for at least 10 minutes, turn the dial to Shut Down. The fan will continue to run for about 10minutes then the grill will turn itself off.
- Wipe down the grill racks with a moist cloth and cover the grease tray with foil before using. Follow the Normal Operation process to start the grill up and begin cooking.
Normal Operation
How It Works
- The controller monitors the grill temperature and intermittently runs the auger motor to deliver wood pellets into the fire-pot. The frequency and duration of the auger motor operation depends on how far above or below the temperature setting the grill currently is. The fan speed is also adjusted up and down to help maintain the desired temperature.
- Each time the pellets are delivered into the fire-pot and ignite, a small batch of heat is released resulting in small temperature swings around the setting, which is normal.
Startup Procedure
- With the controller dial on Shut Down, switch the power ON.
- Open the grill lid and turn the dial to Smoke.
- A big cloud of smoke should be released after 3-4 minutes. Once it clears and the "roaring" sound of the fire can be heard (after 5-7 minutes), close the grill lid and turn to the desired temperature setting.
- Wait for the grill to reach the target temperature before placing in food.
Shutdown Procedure
- If set to 190ºC or above, first turn to Smoke setting for 10min. For lower temperature settings proceed directly to step 2.
- Turn the controller dial to Shut Down
✓ The auger will stop turning and no more pellets will be delivered to the fire-pot. ✓ The fan will run for ~10 minutes until all pellets in the fire-pot burn to ash. - Once the fan has stopped, turn the power switch OFF and disconnect the power.
- During operation if power is accidentally turned OFF, or if there is a power outage:
✓ If power immediately comes back on: Turn the dial to Shut Down, then to the desired temperature setting to continue normal operation.
✓ If no power for more than 30 seconds: OPEN THE GRILL LID and switch the grill back ON and turn the dial to Smoke. Once there is smoke, or it is clear that fire is burning, turn the dial to SHUT DOWN (if turning off), or turn to the desired temperature setting (if still cooking).
Inaccurate Temperature
- Temperature spikes above a low temperature setting are common in the first 10-15 minutes of operation due to the large amount of pellets delivered into the fire-pot during the startup cycle. Open the lid for a minute to release some heat, or just wait for the temperature to gradually come back down. Next time, leave the lid open a bit longer after the initial cloud of smoke clears to release some more heat.
- The grill will gradually settle at the desired setting but small swings of +/- 5ºC around the setting are normal. Because the heat is indirect this temperature cycling will not adversely effect the cooking of food.
- The displayed grill temperature may differ by +/- 10 to 15ºC from the grill rack temperatures, especially during the heating up phase.
- When the grill lid is opened the temperature reading can drop due to cool air entering the grill drum area. Opening the lid too often or for too long can cause temperature spikes as more pellets are delivered into the fire-pot."If you keep looking, you're not cooking!"
Changing from High to Low Temperature Setting
- If the grill has been operating at a high temperature and is then set to a lower temperature, the grill will take a long time to cool down as fire in the fire-pot will keep producing heat.
- Open the lid to release heat until the displayed temperature drops close to the lower set temperature, then shut the lid and continue cooking.
Wood Pellet Tips
- The grill only uses as many pellets from the hopper as required to maintain the desired temperature. It will not use all the pellets in the hopper each time it is used.
- The grill uses pellets at a rate of 0.3 to 0.5kg per hour at low temperatures (<121ºC) and up to 1.5kg per hour at high temperatures. Just pour in as many pellets as required for the cook (plus a bit extra). Only fill the hopper if doing a very long cook.
- Leaving pellets sitting for a long time (weeks) in the hopper can result in poor burning results as the pellets can absorb moisture. Very moist pellets can even clog up the auger. It is best to keep the pellets in an air-tight bag or container.
- If not planning to use the grill for several weeks or longer, scoop out most of the pellets with a plastic cup or bowl. Start the grill and run at a high temperature setting until the remaining pellets in the hopper are used up. The grill will automatically turn OFF and display LEr (low temp error) once the pellets run out, which is normal.
- If the hopper is totally empty of wood pellets, follow the Initial Startup Instructions to prime the the auger tube with fresh wood pellets. As soon as pellets drop into the fire-pot, turn the controller dial to Shut Down then SMOKE to startup as normal.
High Temperature Searing
This Z Grills 7002B (V2, late 2021) features a vented grease tray that allows for high temperature searing on the left hand side of the grill.
A BBQ plate or skillet located above the vent holes can reach temperatures of up to 300ºC, perfect for searing steaks.
Cast iron plates or skillets work best for searing as they have a large thermal mass (compared to thin trays or racks), and so provide a more even and consistent temperature. They also avoid grease dripping down onto the grease tray or through the holes into the grill area below, making a mess that needs to be cleaned up.
This air vent design prevents direct flame contact, greatly reducing the chance of flare ups and grease fires, while still providing high temperatures needed for effective searing.

Important tips:
- Remove foil from the left hand side of the grease tray to uncover the vent holes. Keep the holes covered during normal operation for even temperatures across the grilling area.
- If using BBQ plates that fit front to back in the grill, the left grill rack can be removed.
Skillets or other trays can sit directly on the grill rack (trays must be rated for >320ºC). - For highest searing temperatures, set the grill to the highest temperature setting and wait until the grill temperature stabilises before placing on food.
- Cast iron plates and skillets take a long time to heat up, so put them into the grill as early as possible, not just before placing on food.
- The grill will loose heat rapidly with the lid open, so if you need to flip food, do it fast and close the lid.
- Never pour cold liquid onto a hot cast iron plate as it can crack due to rapid cooling.
Troubleshooting
Visit zgrills.com.au/help or scan the QR code for the latest troubleshooting guides and videos.
Scan for help information

| Problem | Reason | Investigation/Solution |
Grill not turning onController display not showing any numbersNo fan or auger operating noises. | NO POWER |
|
| BLOWN FUSE |
| |
| WIRING NOT CONNECTED |
| |
| CONTROLLER FAILURE |
| |
LEr ErrorNo smoke or fire | NO PELLETS IN FIRE-POT |
|
| AUGER MOTOR FAILURE |
| |
| IGNITION ROD FAILURE |
| |
| MOIST PELLETS |
| |
| TOO MUCH ASH |
| |
HEr High Temperature Error on Controller Display | OPERATING WITH GRILL LID OPEN FOR TOO LONG CAUSING FIRE POT TO BE TOO FULL OF PELLETS | If the grill is operated with the lid open for an extended period of time at a high temperature setting, the set temperature will not be reached and too many pellets may be delivered into the fire-pot. Once the lid is shut the temperature can shoot up to very high levels (too many pellets burning) causing a high temperature error.
|
| LOOSE TEMPERATURE SENSOR CONNECTION Or FAULTY GRILL TEMPERATURE SENSOR | If the HEr error is happening when the grill is NOT very hot it may be a loose temperature sensor connection or faulty temperature sensor.
| |
Incorrect Grill Temperature | DIRTY TEMP SENSOR |
|
| FAULTY CONTROLLER or FAULTY TEMPERATURE SENSOR |
| |
| TOO MUCH ASH |
| |
| WEATHER TOO HOT |
| |
| LID OPEN TOO MUCH |
| |
| Temperature rises too high (above temperature setting) in first 15-20 minutes of operation | LID CLOSED TOO SOON AFTER STARTUP. |
|
Excessive or discoloured smokeorGrill not able to reach desired temperature | MOIST PELLETS |
|
Noisey Auger | LONG PELLETS |
|
| Lots of smoke appearing from the Pellets in Hopper. Tiny amounts of smoke may appear in windy conditions which is normal. | WOOD DUST in AUGER TUBE and HOPPER or HIGH TEMP OPERATION WITH LID OFTEN OPEN or HIGH TEMP OPERATION IN WINDY CONDITIONS or DIRECTLY TURNING FROM HIGH TEMPERATURE TO SHUT DOWN | DO NOT pour any water into the Hopper
Clean the Grill
Future Prevention
|
Grill Repair Instructions

HIGH VOLTAGE: Unplug the grill from electric power supply before completing any repairs. Only plug into power once all repairs are complete and covers are back in place.
Scan for help information

- All key components can be replaced DIY by a "handy person".
- If a handy person is not available to complete the repairs, a BBQ repair shop, mechanical or electrical equipment repairer should be able to complete the work.
- Do not complete any repair work yourself unless suitably experienced and confident to do so.
- Refer to the table below for estimated time, difficulty, parts and tools required.
- How to repair videos are available on the Z Grills Australia website.
| Component | Time | Difficulty | Spare Parts | Tools Required |
| Fuse | 5 min |  | 3A M205 Fast Blow Fuse 5 x 20mm * |
|
| Temperature Sensor | 5 min | | ZG-700-TSENSOR |
|
| Controller Board | 20-30 min | | ZG-CONT |
|
| Fire-pot Fan | 20-30 min | | ZG-FPFAN |
|
| Ignition Rod | 30-40 min | | ZG-IROD |
|
| Auger Motor | 30-40 min | | ZG-AMOTOR-2.0 |
|
* This is standard type of fuse widely available from electrical suppliers and retailers.
Questions?
- Send a product support request on our website. (BEST OPTION)
- Contact Z Grills Australia customer support at support@zgrills.com.au
Scan to go to support request page

Register Your Grill

Scan QR code
Or go to: zgrills.com.au/product-registration
Registration is only required if you did NOT purchase from the Z Grills website. By registering, you will receive useful tips on how to use your grill
and we will have your information on file should you ever need any support.
Get Help

Scan QR code
Or go to: zgrills.com.au/help/
Join Our Community

Scan QR code
Or go to: zgrills.com.au/fb-group
www.zgrills.com.au
IMPORTANT SAFETY INFORMATION
- FLAMMABLE LIQUIDS: Never use or store flammable liquids near the grill, or use flammable liquids to light the grill.
- OUTDOOR USE ONLY: Do not operate the grill indoors or in enclosed spaces as carbon-monoxide poisoning may occur. The grill may be used in an open air deck or balcony as long as SAFE DISTANCE guidelines are met and smoke is able to freely vent from the ceiling/roof area.
- RAINING: Do not operate outside in the rain. The electrical components are not water proof and wood pellets must not be exposed to water.
- HIGH VOLTAGE ELECTRICITY: Plug the grill into an earthed AC power supply with safety switch fitted in the house power box. Extension cable can be used.
- DISCONNECT POWER: Always disconnect the power supply (unplug) before completing any servicing of the grill.

- FOLLOW INSTRUCTIONS: Assemble and use this grill ONLY in accordance with the instructions in this manual.
- SAFE DISTANCE: Ensure the grill has a MINIMUM of 1m overhead clearance and 0.3m side/rear clearance from any wall or combustible material.
- HOT SURFACES: This grill will be extremely hot during operation and for some time after turning off. Take care to avoid burns. Use heat resistant gloves.
- CHILDREN: Never leave the grill unattended when young children are present.

- PELLET STORAGE: Always store wood pellets in a dry location, away from heat or ignition sources. The wood pellets will expand, break apart and even jam the auger feed system if they get wet or are exposed to high humidity. Store pellets in air tight containers and only pour as much as required for your cook into the hopper.
- PELLET TYPE: Only use wood pellets which are made specifically for pellet grills and no larger than 6mm in diameter and 20mm long.
- CLEANING: Keep the grill clean in line with the instructions in this manual. A dirty grill can result in dangerous grease fires or a fire out situation.
- TIP OVER RISK: Take care when moving the grill as it can tip over, especially on uneven surfaces. Lock the wheels when in position ready for use.
- FLAT SURFACE: The grill must be positioned on a flat surface for safe and clean operation.
Documents / Resources
References
![zgrills.com.au]() Z Grills Australia Knowledge Centre - Get To Know Your Z Grills Smoker
Z Grills Australia Knowledge Centre - Get To Know Your Z Grills Smoker![zgrills.com.au]() Z Grills Australia Knowledge Centre - Get To Know Your Z Grills Smoker
Z Grills Australia Knowledge Centre - Get To Know Your Z Grills Smoker![zgrills.com.au]() Product support - Z Grills Australia
Product support - Z Grills Australia![zgrills.com.au]() Product registration - Z Grills Australia
Product registration - Z Grills Australia![zgrills.com.au]() Z Grills Australia Knowledge Centre - Get To Know Your Z Grills Smoker
Z Grills Australia Knowledge Centre - Get To Know Your Z Grills Smokerhttp://zgrills.com.au/fb-group
![www.zgrills.com.au]() Z Grills Australia - Australia's Favourite Pellet Smoker
Z Grills Australia - Australia's Favourite Pellet Smoker
Download manual
Here you can download full pdf version of manual, it may contain additional safety instructions, warranty information, FCC rules, etc.
Advertisement


Need help?
Do you have a question about the 7002B and is the answer not in the manual?
Questions and answers