
Related Manuals for Z GRILLS 700E-XL


Summary of Contents for Z GRILLS 700E-XL
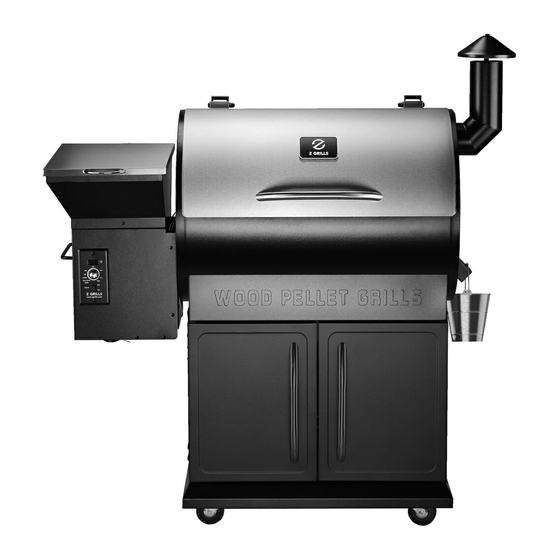
- Page 1 Z Grills 700E-XL Wood Pellet Smoker Grill Owner Manual www.zgrills.com.au This owner manual edition is for Z Grills 700E-XL (V5)
- Page 2 IMPORTANT SAFETY INFORMATION DANGER! • FLAMMABLE LIQUIDS: Never use or store flammable liquids near the grill, or use flammable liquids to light the grill. • OUTDOOR USE ONLY: Do not operate the grill indoors or in enclosed spaces as carbon-monoxide poisoning may occur. The grill may be used in an open air deck or balcony as long as SAFE DISTANCE guidelines are met and smoke is able to freely vent from the ceiling/roof area.
-
Page 3: Table Of Contents
9. Wiring Diagram 10. Spare Parts List 11. Initial Startup Instructions 12. New Grill Burn In 13. Normal Operation 14. Troubleshooting 15. Grill Repair Instructions 16. Limited Product Warranty © Z Grills Australia Pty Ltd - 2021 Document Date: 10-05-2021... -
Page 4: Quick Reference Guide
1. Quick Reference Guide INITIAL STARTUP PROCEDURE • The Initial Startup Procedure must be completed before first use and each time after the grill runs out of wood pellets. See section 11 for details. NEW GRILL BURN IN • It is important to complete a 45 minute HIGH temperature BURN IN before cooking any food on a new Z Grill. -
Page 5: Technical Specifications
2. Technical Specifications Grill Model ZPG-700E (V5) also called 700E-XL Bottom Grill Rack 488 x 660 mm (0.322m Top Grill Rack 345 x 660 mm (0.228m Grease Tray Type Vented holes for BBQ plate searing Total Grilling Area 0.55 m... -
Page 6: Cleaning The Grill
4. Cleaning the Grill Clean the Grill after each use, as accumulation of grease, ash and soot can increase the risk of a grease fire and result in inefficient operation. Grease Tray, Drain & Bucket • Remove foil from the grease tray and wipe off any surface grease. •... -
Page 7: Controller Operation
5. Controller Operation The controller monitors the temperature sensor inside the grill and turns on/off the auger motor to deliver wood pellets into the fire-pot as well as managing the fan speed. The grill internal temperature and two food temperature probes can be monitored on the controller LCD display. -
Page 8: Error Codes
6. Error Codes Error codes will be displayed on the controller LCD screen. All grill operation will cease when there is an Error, so the problem must be solved before the grill can operate normally again. Check section 14 Troubleshooting for more detailed information, or scan the QR code beside the error to visit our help page online for a more detailed explanation. -
Page 9: Main Grill Components
7. Main Grill Components Hopper Bottom Assembly Chimney Stack Hopper Feed Chute Chimney Gasket Grill Lid Grease Bucket Grill Lid Handle Grill Base & Cabinet Fire-pot Heat Baffle Grill Temperature Sensor Grease Tray Thermal Insulating Liner Bottom Grilling Rack (Right) Grill Drum Bottom Grilling Rack (Left) Chimney Cap... -
Page 10: Unpacking & Assembly Instructions
8. Unpacking & Assembly Instructions The boxes and some of the components are heavy. Two people are required to safely complete the assembly process. Unpacking • Do not place painted metal components directly on bricks or concrete as it may scratch the paint. - Page 11 STEP 1 - WHEELS STEP 5 - FRONT BRACE Two holes towards the front Rear Wheels with Lock STEP 2 - DOOR MAGNETS Screws are already attached to the base STEP 6 - HOPPER ASSEMBLY If the magnets don’t lock into place, pinch the sides so the “wings”...
- Page 12 STEP 7 - DRUM & BASE ASSEMBLY TIPS: 1. Lock the rear wheels so the base doesn’t move around. 2. Make sure the base is on a flat surface. 3. Use two people to lift the drum up onto the base. 4.
- Page 13 STEP 9 - HOPPER LID HANDLE STEP 11 - CHIMNEY White Fibre Handle Gasket TIP: Cover the opening of the hopper with a piece of cardboard to prevent the kep nuts accidentally falling into the auger. STEP 10 - GRILL LID HANDLE STEP 12 - DOOR HANDLES Left &...
- Page 14 STEP 14 - HEAT BAFFLE TIPS: 1. Gently slide the heat baffle in and out of the slots. Using force will make it more difficult to remove. 2. Only remove the heat baffle once the grill has completely cooled down. REMOVE INSERT STEP 15 - GREASE TRAY...
-
Page 15: Wiring Diagram
9. Wiring Diagram Electrical Connections Component TEMPERATURE SENSOR AUGER MOTOR & COOLING FAN (25 WATT) FIRE POT FAN (25 WATT) IGNITION ROD (200 WATT) 240V AC 50Hz RATED INPUT 10. Spare Parts List If a component is damaged, lost or just worn out through normal use, spares are available. -
Page 16: Initial Startup Instructions
11. Initial Startup Instructions Follow the initial startup process before first use, and each time after the grill runs out of wood pellets. Remove grill racks, grease tray and heat baffle from the grill. Open the pellet hopper and grill lids and check to ensure there are no foreign objects in the hopper or auger. -
Page 17: Normal Operation
13. Normal Operation How It Works The controller monitors the grill temperature and intermittently runs the auger motor to deliver wood pellets into the fire-pot. The frequency and duration of the auger motor operation depends on how far above or below the temperature setting the grill currently is. The fan speed is also adjusted up and down to help maintain the desired temperature. - Page 18 Shut Down then SMOKE to startup as normal. High Temperature Searing This Z Grills 700E-XL (V5, from late 2021) features a vented grease tray that allows for high temperature searing on the left hand side of the grill.
-
Page 19: Troubleshooting
• Check the auger motor and fan for any discolouration or heat damage. If they look ok the problem is most likely the ignition rod. • Contact Z Grills customer service to get replacement ignition rod. No fan or auger operating noises. - Page 20 • Check the sensor plug located between the grill drum and hopper. • Check the sensor connection into the back of the controller (with the grill power unplugged) FAULTY GRILL • If still getting HEr contact Z Grills customer support for a TEMPERATURE replacement temperature sensor. SENSOR •...
- Page 21 Problem Reason Investigation/Solution • After turning to Smoke for startup, don’t shut the lid until lots of smoke is released and the fire has burnt for a few minutes. Temperature rises • Shutting the lid too early results in the large initial quantity of too high (above pellets releasing lots of heat which easily overshoots lower temperature...
-
Page 22: Grill Repair Instructions
Do not complete any repair work yourself unless suitably experienced and confident to do so. • Refer to the table below for estimated time, difficulty, parts and tools required. • How to repair videos are available on the Z Grills Australia website. Component Time Difficulty Spare Parts Tools Required ✓... -
Page 23: Limited Product Warranty
Manufacturer’s Limited Warranty Policy Z Grills Australia Pty Ltd (Z Grills) provides a 3 years parts warranty from the date of purchase by the original owner. This warranty applies to defects in all materials and workmanship. - Page 24 Or go to: Registration is only required if you did NOT purchase from the Z Grills website. By registering, you will receive useful tips on how to use your grill and we will have your information on file should you ever need any support.
Need help?
Do you have a question about the 700E-XL and is the answer not in the manual?
Questions and answers