Advertisement
Advertisement
Table of Contents

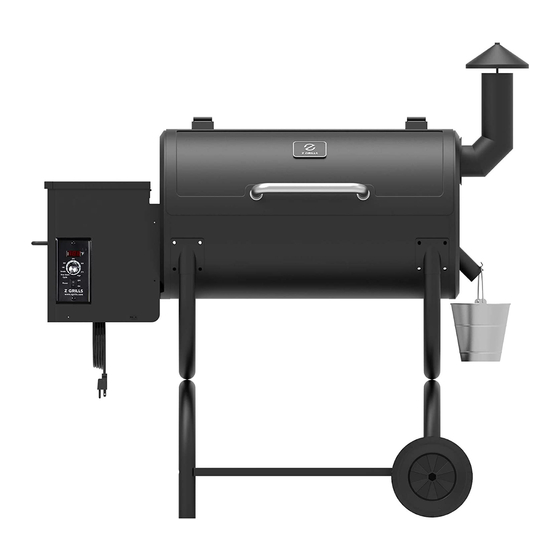
Summary of Contents for Z GRILLS ZPG-550B
- Page 1 550B...
-
Page 2: Table Of Contents
CONTENTS Warning Component List Assembly Instructions Initial Firing Instructions Subsequent Start-up Operating Tips Maintenance & Cleaning Troubleshooting Digital Thermostat Control Wiring Diagram Z Grills Support 3 Year Limited Warranty... - Page 3 SAVE THIS MANUAL FOR FUTURE REFERENCE...
-
Page 4: Warning
WARNINGS! -
Page 5: Component List
COMPONENT LIST ITEM DESCRIPTION ITEM DESCRIPTION Grill Chamber Assembly Digital Control Hopper Assembly Hopper Guard Warming Rack Auger Drive Motor Porcelain Grills Auger Nylon Ring Grease Drain Pan Auger Heat Baffle Foam Glue RTD Temperature Probe Hot Rod (Ignitor) RTD Guard Feeder Assembly Lid Handle Handle Guide... -
Page 6: Assembly Instructions
ASSEMBLY INSTRUCTIONS PARTS DIAGRAM... - Page 7 Hoppe / Burner Assembly...
- Page 8 I. Mounting the Body Frame to the Chamber 1. Unpack all the items, including the parts packed in the Grill Chamber (1). Turn the body upside down and place upon the original Styrofoam packing material from the carton. (CAUTION: Grill is heavy and requires two people to lift.) 2.
- Page 9 3.Place the Bottom Plate (20) in the middle position of the two legs; attach the Bottom Plate (20) on Legs by using the Bolt (C). The four positions are installed in the same manner. As shown.
- Page 10 4. Push the Axle (19) through the wheel and then through the hole in the legs as shown. The Flat Washer (E), Spring Washer (F), and Cap Nut (G) are used to secure the wheel assembly in place. Repeat for the other wheel.
- Page 11 II. Installing the Chamber Handle to the Lid 1. Lift the Grill Body Assembly (1), and place on the floor with wheels on the floor. CAUTION: Grill is heavy and requires two people to lift. 2. Raise the Grill Body Assembly (1) lid and align the holes of the handle with the lid. 3.
- Page 12 III. Installing the Smokestack and Chimney Cap 1. Twist Chimney Cap (9) on to Smoke Stack Assembly (10)t 2. Align the holes in the Smoke Stack Assembly (10) with the Holes in the Smoke Stack Gasket (11) and the Grill Chamber Assembly (1). 3.
- Page 13 IV. Installing the heat baffle 1. Place the lower bracket of the Heat Baffle (6) into the groove of the feeder.
- Page 14 V. Installing the Grease Drain Pan 1. Place the Grease Drain Pan (5) on the Pan Support in the Grill Chamber Assembly (1) The 2 slots in the Grease Drain Pan should fit over the corners of the Pan Support.
- Page 15 VI. Installing the Cooking Grate and Warming Rack 1. Place the Porcelain Grill (8) inside the cooking area in the Grill Chamber Assembly (1) 2. Place the Warming Rack (7) on the rack support with the lip facing toward the back of the Grill Chamber Assembly (1)
-
Page 16: Initial Firing Instructions
Please read this manual carefully and follow it step by step before starting your Z Grills for the first time and each time the grill runs out of pellets. 1.Remove the Porcelain Grills, Grease Drain Pan and Heat Baffle from the interior of the grill. -
Page 17: Subsequent Start-Up
Temperature Dial to any cooking setting desired. 5.If this step is not successful, see TROUBLESHOOTING or contact Z GRILLS Techni- cal Support to help diagnose the problem. DO NO PROCEED TO THE MANAUL LIGHTING INSTRUCTIONS. - Page 18 8. Turn on the grill and turn the Temperature Dial to any setting desired. With the lid closed, preheat the grill for 10 minutes before placing food. 2.Shutdown Cycle Auger turns off Fan continues to run for 5 minutes After finished cooking, turn the Temperature Dial to Shutdown Cycle position, the function of this setting to leave the Draft Induction Fan running for 10 minutes to burn redundant pellets in the fire pot.
-
Page 19: Operating Tips
OPERATING TIPS 1. Just like other barbecues, the actual temperature of this grill or the cooking times will be affected by external temperature, humidity, wind conditions, quality of pellets and so on. 2. It is better to shelter your grill from the wind, this will aid in temperature output, heat retention and heat recovery time when opening the grill lid. -
Page 20: Maintenance & Cleaning
Use a warm soap water to wipe the grease. Do not use oven cleaner, abrasive cleans- ers or abrasive cleaning pads on the outside grill surfaces. Use Z Grills Cover to protect your grill is highly recommended. Use a high-quality car wax on the outside surfaces of the grill can protect your paint finish. -
Page 21: Troubleshooting
Please state your authorized dealer, Contact Z Grills Customer Service your name, phone number, address, to place an order Z Grills model number, serial number, Get your new parts and part identification number from Contact your the COMPONENT LIST. Z Grills dealer... - Page 22 DIGTAL THERMOSTAT CONTROL WIRING DIAGRAM...
-
Page 23: Z Grills Support
Thank you for shopping with us! If you have any question, feel free to contact us or your dealer. Z GRILLS INC. will offer the best technical and sales support in the industry. Please be prepared to provide the following information:... - Page 24 Z Grills Inc shall not be liable if you install, operate, clean, and maintain your grill with- following the owners' manual strictly. Also misuse, abuse, alteration and natural disaster are not included in this warranty.


Need help?
Do you have a question about the ZPG-550B and is the answer not in the manual?
Questions and answers