Advertisement
Quick Links
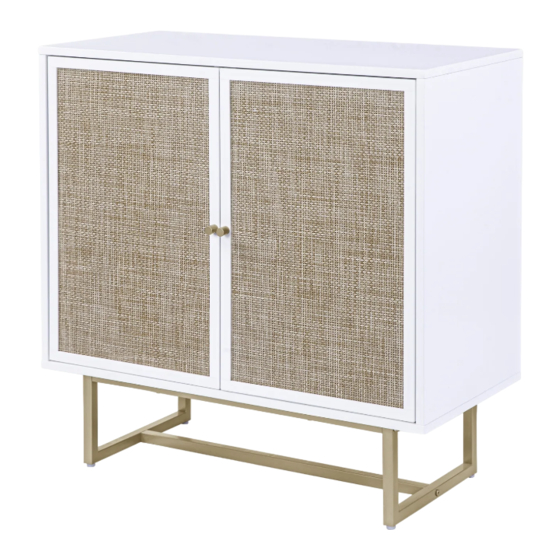
User Manual of Product 1:
Nathan James Sideboard Buffet Modern Storage, Free
Standing Accent Cabinet for Hallway, Entryway or Living Room,
1, White/Cane/Brass
User Manual of Product 2:
Nathan James Enloe Modern Storage, Free Standing Accent
Cabinet with Doors in a Rustic Fir Wood Finish Powder-coated
Metal Base for Hallway, Entryway or Living Room, White/Gold
Advertisement

Subscribe to Our Youtube Channel
Related Manuals for NATHAN JAMES Kova 71303


Summary of Contents for NATHAN JAMES Kova 71303
- Page 1 Standing Accent Cabinet for Hallway, Entryway or Living Room, 1, White/Cane/Brass User Manual of Product 2: Nathan James Enloe Modern Storage, Free Standing Accent Cabinet with Doors in a Rustic Fir Wood Finish Powder-coated Metal Base for Hallway, Entryway or Living Room, White/Gold...
- Page 2 Let’s build the Kova Cabinet SKU 71303 Scan me! Inspiration Digital Instructions Free Lifetime Warranty 23-0228...
- Page 3 Ok, let’s What’s included get rolling Description Top Panel This should be easy, just follow Left Side Panel our instructions and you will be back to Netflix in no time. Right Side Panel Estimated time for assembly Bottom Panel 60:00 Shelf Door Panel What you need...
- Page 4 The goods IMPORTANT 1. Do not tighten bolts / screws completely until all bolts / screws are lined up and inserted into holes. 2. Do not over tighten screws and bolts to avoid stripping. 3. Please use hand tools to assemble this product. Do not use power tools.
- Page 5 What’s included Description M6*30mm Cam Bolt 8*30mm Wooden Dowel 15*9.5mm Cam Lock Hinge Plastic Strip Metal Connector M6*30mm Wall Anchor M4.2*32mm Screw M4.2*17mm Screw M4*14mm Screw Handle M4*20mm Bolt M6*30mm Bolt M4.2*40mm Screw Magnetic Door Catcher M3*16mm Screw M3*12mm Screw Adjustable Leveler Metal Support for Shelf Allen Key...
- Page 6 The goods 6 10 6 11 6 12 6 13 6 14 6 15 6 20 6 16 6 17 6 18 6 19 6 21...
- Page 7 Step 1 Let’s get this thing fired up! Lay down packaging carton or use carpet as a working surface. We’re startin’ off easy. Secure the Hinges (4) and Metal Plates (21) to both sets of doors. Tip from a friend to a friend: save yourself some trouble and make sure the hinge lays flat against the door when securing!
- Page 8 Step 2 How much wood would a woodchuck chuck If a woodchuck could chuck wood? It’s time to put in your wooden dowels (2)! Repeat this step with both of the Top Rails (H).
- Page 9 Step 3 Screw the Cam Bolts (1) and Magnetic Door Catcher (15) to the Top Panel (A). Tip! Door Catcher can be adjusted from front to back for proper door alignment.
- Page 10 Step 4 Attach the other Magnetic Door Catcher (15) to the Bottom Panel (D).
- Page 11 Step 5 Secure the Cam Bolts (1) and Wooden Dowels (2) to the Left Side Panel (B).
- Page 12 Step 6 No, this isn’t Deja Vu! Repeat Step 5 with the Right Side Panel (C).
- Page 13 Step 7 Attach the Top Rails (H) and Bottom Back Rail (I) to Left Side Panel (B) using the Cam Locks (3). 6 x3 Important Note: The cam lock must point toward the hole on the edge of the board. Arrow Hole...
- Page 14 Step 7 cont. Next, attach the Right Side Panel (C) to the Top Rails (H) and Bottom Rack Rail (I) using the Cam Locks (3). 6 x3...
- Page 15 Step 8 Using the Cam Bolts (A) again, secure the Top Panel to what you built from Step 7. Spoiler alert: you’re over halfway finished!
- Page 16 Step 9 First, unfold the Back Panel (G) then carefully slide it into place with the taped seam facing back. Step 10 Attach the Bottom Panel (D) as well as securing the Metal Connector (6) to Part H.
- Page 17 Step 11 Time to get the legs built! We take leg day very seriously around here. Using the provided Allen Key, tighten all pieces shown to 75%.
- Page 18 Step 12 Time to get those gorgeous legs onto the unit! You can tighten these bolts to 100%. Once tightened, twist on the Adjustable Levelers (18) to the corner of the legs. Now would be a great time to grab a sparkling water or snack as we head into the final steps!
- Page 19 Step 13 Carefully flip the unit over (grab a friend if you need help!) and twist on the Metal Supports (19) to where you want your shelf to rest. Step 14 Is it just us or is it extremely satisfying to finally put that shelf in? It’s all coming together!
- Page 20 Step 15 Let’s get those doors and handles on and then you’re two steps away from being done! We’re sorry to keep you from your Netflix series for so long.
- Page 21 Is your cabinet door looking crooked or unevenly spaced? Then you’ve come to the right place. Follow the illustrations below to get your cabinet door aligned and ready for action. If your door is too low or too high… Loosen the height screws, then move the door up or down to make it level. If the space between your doors is off…...
- Page 22 Is your cabinet door looking crooked or unevenly spaced? (Cont.) If you’re still having trouble lining everything up, your next step should be to try to adjust the feet slightly to square up the cabinet & doors. Follow the illustrations below: If the right door appears to be hanging low, you can adjust the adjustable leveler on the front right until the door is better aligned.
- Page 23 Step 16 Wobbly or unlevel? Adjust feet until stable!
- Page 24 Step 17 Our favorite step! Because it’s the last step! Take your beautiful cabinet and secure it to the wall by looping the Plastic Strip (5) through the Metal Connector (6) and screwing it into the wall using the Wall Anchor (7). Wall You did it! Now all that’s left is finding...
- Page 25 No heartburn, when we handle the return Give us a call 1-866-619-1004 or shoot us a message at help@nathanjames.com we will issue you a free replacement with zero hassle. Our way Their way Give us a call Re-package item Replacement Schedule pick up Track package Replacement...
-
Page 26: Proper Use
Any modifications will Nathan James and its parent companies cannot present the risk of creating significant safety issues which NJ will not be responsible for. be held legally responsible for any injuries or death resulted from failure to follow instructions or improper use of this product. - Page 27 If you are happy with your product, tell your friends and family about us or even better leave us a review online. Spreading the word gives us the opportunity to make more people happy and keep our prices low for your next purchase. Brooklyn Burdon Founder, Nathan James...
- Page 28 Let’s build the Enloe Storage Unit SKU 71201 Scan me! Inspiration Digital Instructions Free Lifetime Warranty 22-0829...
- Page 29 Ok, let’s What’s included get rolling Description Top Panel This should be easy, just follow Shelf our instructions and you will be back to Netflix in no time. Bottom Panel Estimated time for assembly Left Side Panel 60:00 Right Side Panel Back Vertical Stretcher What you need Back Panel...
- Page 30 The goods 6 10 6 11 6 12 6 11 6 10 IMPORTANT 1. Do not tighten bolts / screws completely until all bolts / screws are lined up and inserted into holes. 2. Do not over tighten screws and bolts to avoid stripping. 3.
- Page 31 What’s included Description M6*35mm Cam Bolt 15x10mm Cam Lock M6*30mm Wooden Dowel M4*35mm Screw Magnetic Door Catch Hinge Metal Pin M4*14mm Screw M6*40mm Bolt M3*12mm Screw M6*30mm Bolt Allen Key M4*14mm Screw Anti-tip Bracket Handle Wall Anchor Door Catch Plate M3*14mm Screw...
- Page 32 The goods...
- Page 33 Step 1 Let’s get this thing fired up! Lay down packaging carton or use carpet as a working surface. Attach the Back Metal Stretcher (11) and Center Metal Stretcher (12) to the Metal Frames (10) using the M6*40mm Bolts (I). Tighten using the provided Allen Key (L).
- Page 34 Step 2 First, attach the Anti-Tip Bracket (N) to the Top Panel (1) using a M4*14mm Screw (M). Next, attach the Magnetic Door Catches (E) to the Top Panel (1) and Bottom Panel (3) using the M3*14mm Screws (R). You’ll need two screws per catch.
- Page 35 Step 3 Let’s get started on the doors! First, attach Part (Q) to the top and bottom corners of the Left Door (8) and Right Door (9) using the M3*12mm Screws (J). Then, attach the Hinges (F) to the doors using two of the M4*14mm Screws (H) per hinge.
- Page 36 Step 4 Insert Wooden Dowels (C) into the side of the Right Side Panel (5). Align the Dowels with the corresponding holes in the Bottom Panel (3) and slide together. Secure using the M4*35mm Screws (D).
- Page 37 Step 5 First, attach the Stretcher (13) to the Right Side Panel (5) by aligning the hole in the Stretcher (13) with the cam bolt you previously inserted in the Right Side Panel (5). Next, attach the Left Side Panel (4) to the rest of the cabinet by aligning it with the cam bolts and wooden dowels you previously inserted.
- Page 38 Step 6 Now, carefully flip the cabinet upright and slide in the Back Panel (7). Stay strong, you’re over halfway there! Time to get out those muscles! Flip the unit onto its top.
- Page 39 Step 7 Now would be a good time to order that pizza you’ve been thinking about since Step 1. Okay, time to attach the top panel that you completed in Step 2. First, insert the M6*30mm Wooden Dowels (C) into the corresponding holes in the top of the Left Side Panel (4) and Right Side Panel (5).
- Page 40 Step 8 Carefully flip the unit over and attach the base that you completed from Step 1 to the Bottom Panel (3) using eight of the M6*30mm Bolts (K). Tighten using the provided Allen Key (L). Next, secure the Stretcher (13) to the Top Panel (1) using two of the M4*35mm Screws (D).
- Page 41 Step 9 Flip the unit over again so that it’s right-side up (we promise this is the last time) and then it’s time to attach the doors! Attach the doors (8) by securing the Hinges (F) to the cabinet using the M4*14mm Screws (H). You’ll need four screws per hinge, for a total of 16.
- Page 42 Is your cabinet door looking crooked or unevenly spaced? Then you’ve come to the right place. Follow the illustrations below to get your cabinet door aligned and ready for action. If your door is too low or too high… Loosen the height screws, then move the door up or down to make it level. If the space between your doors is off…...
- Page 43 Is your cabinet door looking crooked or unevenly spaced? (Cont.) If you’re still having trouble lining everything up, your next step should be to try to adjust the feet slightly to square up the cabinet & doors. Follow the illustrations below: If the right door appears to be hanging low, you can adjust the...
- Page 44 Step 10 Twist on the Metal Pins (G) at your desired height and slide the Shelf (2) in the unit.
- Page 45 Step 11 Safety first! Use the wall anchors to attach your storage unit to the wall. First, insert the Wall Anchor (P) into the wall, then secure the Anti-Tip Bracket (N) to the wall using a M4*35mm Screw (D). *Cue the party music* You did it! Time to get in your sweats and check on that pizza order.
- Page 46 No heartburn, when we handle the return Give us a call 1-866-619-1004 or shoot us a message at help@nathanjames.com we will issue you a free replacement with zero hassle. Our way Their way Give us a call Re-package item Replacement Schedule pick up Track package Replacement...
- Page 47 Any modifications will Nathan James and its parent companies cannot present the risk of creating significant safety issues which NJ will not be responsible for.
- Page 48 If you are happy with your product, tell your friends and family about us or even better leave us a review online. Spreading the word gives us the opportunity to make more people happy and keep our prices low for your next purchase. Brooklyn Burdon Founder, Nathan James...
Need help?
Do you have a question about the Kova 71303 and is the answer not in the manual?
Questions and answers