Advertisement
Quick Links
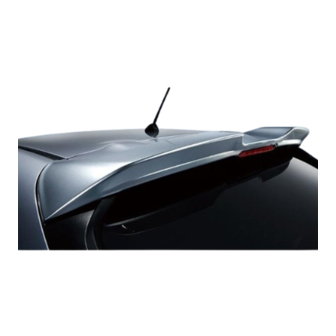
This manual describes how to install and handle the roof spoiler.
Before installing the part, please be sure to read this manual for proper
installation.
Precautions
1. Be sure to observe the contents in CAUTION for installation described in the main text during
the work. Neglecting it may cause coming-off or peeling-off of the part, and also may prevent
the vehicle from functioning.
2. Before the installation, turn the ignition switch to OFF, and apply the parking brake without
fail.
3. Do not use thinner or the like, otherwise the surface of the roof spoiler may be corroded. Also,
keep the part away from fire, otherwise it may be deformed.
4. When the ambient temperature is 15°C or lower, warm up all strips of the double-sided tape
and around the installation portion of the roof spoiler to approximately 30 to 50°C using a
dryer or infrared lamp. Local warm-up may deform the part. Do not use an industrial dryer.
5. Firmly press the double-sided tape to adhere well.
If it is reattached, the adhesive performance will extremely decrease. To avoid redoing, posi-
tion the tape correctly before attachment.
6. The adhesive strength of the double-sided tape increases gradually after the attachment. Do
not wash the vehicle within 24 hours after installing the part.
7. When washing the vehicle or applying wax to the vehicle is required on the day when the
part is installed, leave the vehicle for at least 1 hour, and seal the double-sided tape attached
portions with tape or the like to prevent water intrusion.
(Do not perform a high-pressure or automatic car wash on the day when the part is installed.)
When performing an air blow after the installation of the part, keep the nozzle 300 mm or
more away from the part. If it is too close, the surface of the part may be peeled off.
8. After installi ng the part, leave it for 2 to 3 hours, and do not drive the vehicle.
Revision history
Newly created
ROOF SPOILER
Content
Sold by: SUBARU CORPORATION
INSTALLATION MANUAL
Date
February 2, 2023
1
Advertisement

Related Manuals for Subaru E7217FN020 Series


Summary of Contents for Subaru E7217FN020 Series
- Page 1 Precautions 1. Be sure to observe the contents in CAUTION for installation described in the main text during the work. Neglecting it may cause coming-off or peeling-off of the part, and also may prevent the vehicle from functioning. 2. Before the installation, turn the ignition switch to OFF, and apply the parking brake without fail. 3. Do not use thinner or the like, otherwise the surface of the roof spoiler may be corroded. Also, keep the part away from fire, otherwise it may be deformed. 4. When the ambient temperature is 15°C or lower, warm up all strips of the double-sided tape and around the installation portion of the roof spoiler to approximately 30 to 50°C using a dryer or infrared lamp. Local warm-up may deform the part. Do not use an industrial dryer. 5. Firmly press the double-sided tape to adhere well. If it is reattached, the adhesive performance will extremely decrease. To avoid redoing, posi- tion the tape correctly before attachment. 6. The adhesive strength of the double-sided tape increases gradually after the attachment. Do not wash the vehicle within 24 hours after installing the part. 7. When washing the vehicle or applying wax to the vehicle is required on the day when the part is installed, leave the vehicle for at least 1 hour, and seal the double-sided tape attached portions with tape or the like to prevent water intrusion. (Do not perform a high-pressure or automatic car wash on the day when the part is installed.) When performing an air blow after the installation of the part, keep the nozzle 300 mm or more away from the part. If it is too close, the surface of the part may be peeled off. 8. After installi ng the part, leave it for 2 to 3 hours, and do not drive the vehicle. Revision history Content Date Newly created February 2, 2023 Sold by: SUBARU CORPORATION...
-
Page 2: Tools To Be Used
Roof spoiler Genuine part number: E7217FN020## Applicable model: CROSS TREK (GU) Type A and later Components Part name Qty. Roof spoiler ① Tapping screw ② Speed nut ③ Template ④ Instruction Manual ⑤ PAC primer *: Included for unpainted part ⑥ *: Included for unpainted part Molding (T-shape) 1 pc each ⑦ Molding (E-shape) *: Included for unpainted part 1 pc each ⑧ *: Included for unpainted part Molding (L-shape) ⑨ ① Small bag ② ③ ④ ⑤ ⑥ ⑦ ⑧ ⑨... - Page 3 Completion image ①Roof spoiler * When the product is already painted, proceed to “Installation procedure”. Painting of unpainted part and installation procedure 1. Painting Fig. 1 (1) Paint the roof spoiler ① with the vehicle body color. ①Roof spoiler Mask the double-sided tape area on the backside of the product at that time. Paint with vehicle (Fig. 1) body color. After completion of painting, remove the masking. Mask the double-sided tape. [Rear view] At that time, be careful not to peel off the Caution baking paper of the double-sided tape. Mask the double-sided tape. [Sectional view of double-sided tape area] Masking tape ①Roof spoiler Double-sided tape 2. Attachment of molding...
- Page 4 Installation procedure 3. Preparation for installation (1) Fully open the rear gate to make the center part and Fig. 3 side parts inside the back door visible, and remove Rear gate the ground terminal from the battery sensor. Side parts (Fig. 3) Note that the back door can no longer be opened if it is closed after the ground terminal Caution is removed. The removed vehicle parts will be reused. Be Center part Caution careful not to damage or lose them. ...
- Page 5 (4) Remove the bolts of the vehicle roof spoiler from the Fig. 6 Clips (3 locations) vehicle, and detach the spoiler while paying atten- Rear gate tion to the tabs. (Clip: 3 locations in total) (Bolt: 6 locations in total) (Fig. 6) The removed vehicle parts will be reused. Be Vehicle roof spoiler Caution careful not to damage or lose them. Detailed figure of installation area Clips (3 locations) Bolts (6 locations) (5) Remove the vehicle roof spoiler from the rear gate by lifting it from the underside. Fig. 7 Remove Grommet from the rear gate. Rear gate (Fig. 7) When removing the vehicle roof spoiler, do Caution not apply a force from the top.
- Page 6 (9) Remove the templates ④. Fig. 10 Enlarged view of center lower (10) Apply a drill to the center of the position marked in surface of vehicle roof spoiler the step (8) to make a hole. After making a prepared hole with a 3 mm drill bit Drill bit and 6 mm drill bit, make a hole with a 8 mm drill bit. 3 mm→6 mm→8 mm (Fig. 10) (1 location each on RH and LH, 2 locations in total) (11) After making the hole, remove burrs around the hole. Before the work, make a stopper with fabric adhesive tape to a position approximately 10 mm away from the tip of the drill bit to prevent interference caused by the drill bit. Drill bit 10 mm Caution...
- Page 7 4. Spoiler installation work Fig. 14 ①Roof spoiler (1) Place the roof spoiler ① on the vehicle roof spoiler. (Fig. 14) When placing the roof spoiler ①, be careful not to damage the vehicle roof spoiler and roof spoiler ①. Caution This work is recommended to be performed with 2 workers. Vehicle roof spoiler ②Tapping screws (2) Insert the tapping screws ② into the holes made on Sectional view of tightening portion the high mount stop lamp installation portion of the ①Roof spoiler vehicle roof spoiler in 3.(10) attach the roof spoiler ① at the speed nut of ③ portions. (Bolt: 2 locations in total) Vehicle roof spoiler Tightening torque for reference: 2.0 N·m (0.2 kgf·m) ③Speed nut (Fig. 14) ②Tapping screws (3) Referring to 3.(6), restore the high mount stop lamp. Fig. 15 Fig. 15 Tightening torque for reference: 4.5 N·m (0.5 kgf·m)
- Page 8 (7) While holding the end positions aligned in the step Fig. 17 ①Roof spoiler (4) along the vehicle roof spoiler, slowly pull off the backing paper of the double-sided tape outward from the center in the order of “a → b → c” so that the backing paper will not break at midpoint, and firmly press the double-sided tape area to the vehicle roof spoiler. (Fig. 17) (8) While holding the entire shape of the roof spoiler ① Fig. 18 along the vehicle roof spoiler, slowly pull off the backing paper of the double-sided tape outward from the center in the order of “d → e → f” so that the backing ...
Need help?
Do you have a question about the E7217FN020 Series and is the answer not in the manual?
Questions and answers