Advertisement
Quick Links
Advertisement

Related Manuals for AJ QBUS 1621422


Summary of Contents for AJ QBUS 1621422
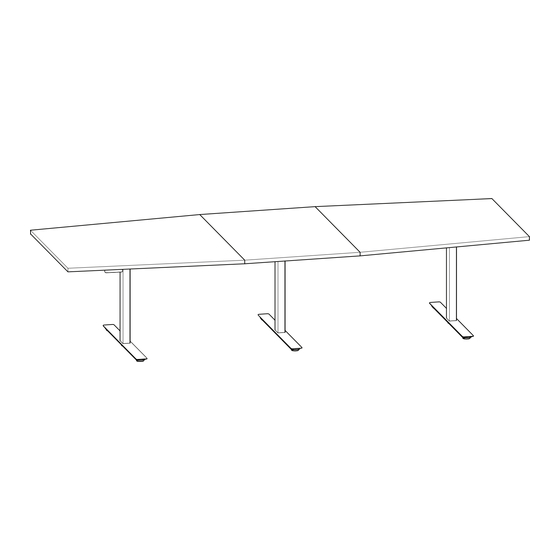
- Page 1 Electric height adjustable table Assembly instructions Conference table...
- Page 2 PACKAGE CONTENTS (3-LEG TABLE) DESK COMPONENTS Crossbar rail Foot Side bracket Crossbar rail (Addon leg) Addon bracket HARDWARE 2mm rubber Screw clamp M8x14 M6x12 M6x10 5mm rubber Screw guide bush Control box Handset Power cable Leg cable (short) Leg cable (long) Tapping screw 5x20 Tapping screw 5x16 Hex key...
- Page 3 Screw clamp Screw guide bush 2mm rubber 5mm rubber D3 & D8 M6x12...
- Page 4 M6x12 M8x14...
- Page 5 M6x12 M6x10 Addon bracket M6x12 M8x14...
- Page 6 M6x12 M6x10 15-25cm 15-25cm Table length 3200 mm (3-leg) X = 150 mm 4000 mm (3-leg) X = 250 mm Leg placement guide...
- Page 7 Tapping screw 5x20 Handset Tapping screw 5x20 Control box Tapping screw 5x16...
- Page 8 Leg cable Leg cable Power cable (long) (short) Underside view...
-
Page 9: Top View
LEG PLACEMENT GUIDE TOP VIEW 3200 2900 4000 3500... - Page 10 Assembly instructions - 3 leg conference table English Step 1 (D3 & D8) The crossbar rails are compressed when delivered. 1. Loosen the set screws slightly and extend the inner rail. 2. Attach rubber bushing (H6) and plastic screw guide bushing (H4) on the thicker part of the crossbar rail.
- Page 11 Assembly instructions - 3 leg conference table English Step 9 1. Fix the tabletops to the frame, using the included tapping screws 5x20mm (H8). Step 10 1. Use two tapping screws 5x20 (H8) to fix the control box (H10). Place it between the two crossbars, near one of the legs so the leg cable have sufficient length to the control box.
Need help?
Do you have a question about the QBUS 1621422 and is the answer not in the manual?
Questions and answers