
Subscribe to Our Youtube Channel
Related Manuals for FLENDER K.SH


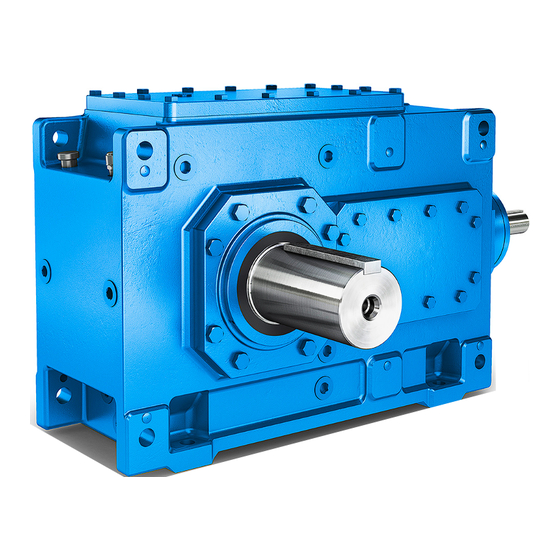
Summary of Contents for FLENDER K.SH
- Page 1 Crane gear unit Assembly and operating instructions A5850-02en Edition 06/2022 K.SH, K.VH, K.HH, K.DH, K.SM 215...222...
- Page 2 Original assembly and operating instructions A5850-02 Edition 06/2022 29/07/2022 Copyright (©2022 Flender GmbH) 13:27:44...
-
Page 3: Table Of Contents
Table of contents Introduction...............................11 Legal information ........................11 General information .........................12 Lubricants ..........................14 Safety instructions ...........................15 Security notes ..........................15 The five safety rules .........................15 General information .........................15 General warnings and symbols....................17 Special types of danger and personal protective equipment ........... 17 Intended use ..........................20 Description ..............................23 General description ........................23... - Page 4 Table of contents Shrink disk ..........................36 3.10 Heating.............................37 3.11 Oil level indicator........................38 3.12 Oil temperature monitoring ......................38 3.13 Bearing monitoring ........................39 3.13.1 Bearing monitoring by shock-pulse transducer................ 39 3.13.2 Bearing monitoring by acceleration sensor................40 3.14 Gear changing .........................42 Application planning ..........................43 Scope of delivery ........................43 Transport..........................43 Attachment points ........................45...
- Page 5 Table of contents 5.3.7 Mounting the torque arm for the gear unit housing ..............68 5.3.7.1 Mounting the torque arm......................68 Couplings ..........................69 5.4.1 Assembling the coupling ......................70 5.4.2 Aligning the coupling........................71 Connecting components ......................73 5.5.1 Gear units with mounted components ..................73 5.5.2 Connecting the cooling coil ......................73 5.5.3...
- Page 6 Table of contents 8.3.6 General inspection of the gear unit ..................91 8.3.7 Check that all of the fastening bolts are tight ................91 8.3.8 Final work..........................91 Possible faults ..........................91 Service & Support.............................95 Contact.............................95 Disposal..............................97 Spare parts ..............................99 Declaration of Incorporation........................101 UK Declaration of Incorporation.....................101 Technical data............................103 General technical data ......................103...
- Page 7 List of tables Table 2-1 Symbols and markings .......................16 Table 2-2 General warnings ........................17 Table 3-1 Designs and associated directions of rotation................23 Table 3-2 Taconite seal versions........................29 Table 3-3 Information about the specific heat output .................37 Table 5-1 Information on tightening fastening bolts ...................76 Table 5-2 Preload forces and tightening torques ..................77 Table 7-1 Operating data..........................85 Table 8-1...
- Page 8 List of tables Edition 06/2022 A5850-02en...
- Page 9 List of figures Figure 3-1 Output shaft versions .........................24 Figure 3-2 Gear unit equipment on gear units of type K..H .................25 Figure 3-3 Gear unit equipment on gear units of type K..M.................26 Figure 3-4 Rotary shaft sealing ring......................27 Figure 3-5 Labyrinth seal ..........................28 Figure 3-6 Taconite seal ..........................28 Figure 3-7 Design variants of Taconite seals ....................29 Figure 3-8...
- Page 10 List of figures Figure 5-7 Dismantling using an end plate ....................61 Figure 5-8 Preparation for gear units with hollow shaft and shrink disk ............62 Figure 5-9 Mounting with a screw spindle ....................64 Figure 5-10 Dismantling using an end plate ....................67 Figure 5-11 Dismantling using hydraulic pulling equipment ................67 Figure 5-12 Mounting the torque arm ......................68 Figure 5-13...
-
Page 11: Introduction
Introduction Legal information 1.1 Legal information Warning system These instructions contain information you must observe for your own personal safety as well as to avoid damage to property and persons. The information regarding your personal safety is highlighted with a warning triangle. Information exclusively regarding property dam- age alone is not marked with a warning triangle. -
Page 12: General Information
Please note the following: WARNING Flender products are only suitable for the uses set out in the catalogue and associated technical documentation. If third-party products and components are used, these must be recommended and/or authorised by Flender. Safe and flawless operation of the products requires proper transport, proper storage, setup, assembly, installation, commissioning, operation and maintenance. - Page 13 Failure to observe these operating instructions can cause product or property damage or personal injury. Flender does not accept any liability for damage or operating failures which are due to non- adherence to these operating instructions.
-
Page 14: Lubricants
Flender recommends regular inspection to ascertain whether the selected lubricating oil is still approved by Flender. If it is not, another brand of oil should be selected instead. Edition 06/2022... -
Page 15: Safety Instructions
In order to safeguard plants, systems, machines and networks against cyber threats it is ne- cessary to implement (and continually maintain) a holistic industrial security concept that cor- responds to the current state of the art. Flender products and solutions undergo continuous development in this respect. - Page 16 Safety instructions 2.3 General information Symbols on the gear unit The following symbols apply to the gear unit; some of which are found as coloured markings on the gear unit: Points labelled on the gear unit Symbol Coloured markings Earth connection point Air relief point yellow Oil filling point...
-
Page 17: General Warnings And Symbols
Safety instructions 2.4 General warnings and symbols Points labelled on the gear unit Symbol Coloured markings These symbols indicate that the oil dip- stick must be firmly screwed in. Table 2-1: Symbols and markings General warnings and symbols 2.4 General warnings and symbols The following table contains general warnings and their associated symbols. - Page 18 Safety instructions 2.5 Special types of danger and personal protective equipment DANGER Electric shock Live parts can cause electric shock. Ensure that the entire plant is de-energised before starting electrical installation work. Protective equipment Wear the following personal protective equipment when handling the gear unit: •...
- Page 19 Safety instructions 2.5 Special types of danger and personal protective equipment Surface temperature The surface temperatures of the gear unit can become very extreme depending on the oper- ating conditions. WARNING Risk of burns Possible risk of serious burn injury from hot surfaces (> 55 °C). Wear suitable protective gloves and protective clothing.
-
Page 20: Intended Use
Flender will accept no liability or warranty whatsoever for damage occurring as a result of the use of non-approved replacement parts. The same applies to any accessories which were not supplied by Flender. - Page 21 Safety instructions 2.6 Intended use • Cleaning the outside of the gear unit with a high-pressure cleaning device is not permit- ted. • Do not perform any welding work anywhere on the gear unit or connected parts. Do not use the gear unit or connected parts as an earthing point for electric-welding operations. Gear parts and rolling-contact bearings may be irreparably damaged by welding.
- Page 22 Safety instructions 2.6 Intended use Edition 06/2022 A5850-02en...
-
Page 23: Description
General description 3.1 General description ® The FLENDER CHG helical gear unit (referred to below simply as "gear unit") described in these operating instructions has been developed for use as a hoist and luffing gear unit. Po- tential applications for this series of gear units include, for example, conveyor systems and lifting equipment. -
Page 24: Output Shaft Versions
Description 3.2 Output shaft versions Design Type K3.H, K3SM K4.H, K4SM Table 3-1: Designs and associated directions of rotation Output shaft versions 3.2 Output shaft versions The following versions of output shaft are available: • S = Solid shaft • V = Solid shaft, reinforced •... -
Page 25: Figure 3-2 Gear Unit Equipment On Gear Units Of Type K
Description 3.3 Housing • Oil filling point for refilling with oil • Oil level indicator or dipstick for checking the oil level • Oil drain screw or oil drain valve for changing the oil • Air filter or wet-air filter for ventilation and bleeding Further information You can find additional information and a detailed illustration of the gear unit and the position of the mounted components in the dimension drawings in the complete documentation for... -
Page 26: Oil Supply To The Gear Unit
Description 3.4 Oil supply to the gear unit The diagram below shows the available gear unit equipment on gear units of type K..M: Figure 3-3: Gear unit equipment on gear units of type K..M ① Lifting eye ⑥ Cover ② Cover ⑦ Shaft seal ③... -
Page 27: Shaft Seal
Description 3.6 Shaft seal Shaft seal 3.6 Shaft seal Introduction Depending on requirements, shaft seals prevent oil from escaping from the gear unit or dirt from entering the gear unit. 3.6.1 Rotary shaft sealing rings 3.6 Shaft seal Rotary shaft sealing rings are the standard seal used. Wherever possible, rotary shaft seal- ing rings are equipped with an additional dust lip which protects the actual sealing lip against external contaminants. -
Page 28: Taconite Seal
Description 3.6 Shaft seal A labyrinth seal is illustrated in the diagram below: Figure 3-5: Labyrinth seal To ensure reliable operation of these seals, the gear unit must be permanently installed in a horizontal position and not exposed to waste water or high dust loads. Overfilling the gear unit can result in leaks, the same applies to oil with a high foam content. -
Page 29: Figure 3-7 Design Variants Of Taconite Seals
Description 3.6 Shaft seal The following design variants of Taconite seal are available: Figure 3-7: Design variants of Taconite seals ① Taconite F-F ③ Taconite F-K ② Taconite F-H ④ Output The various Taconite seals are described in the following table: Taconite seal versions Application Remarks "E"... -
Page 30: Tacolab Seal
Description 3.6 Shaft seal Taconite seal versions Application Remarks "F-H" Output shaft • Regreasable labyrinth on the output side, dust-proof protection cover on the oppos- Design H: Hollow shaft with parallel keyway ite side Design K: Hollow shaft with spline according to DIN 5480 "F-K"... -
Page 31: Cooling
Description 3.7 Cooling A Tacolab seal is illustrated in the diagram below: Figure 3-8: Tacolab seal ① Outer labyrinth seal ④ Labyrinth, filled with grease, can be re- greased ② Inner labyrinth seal ⑤ Grease nipple ③ Lamellar seal To ensure reliable operation of Tacolab seals, the gear unit must be permanently installed in a horizontal position and not exposed to waste water. -
Page 32: Fan
Description 3.7 Cooling 3.7.1 3.7 Cooling Principle of operation Generally, the fan is mounted on the high-speed shaft of the gear unit and is protected from accidental contact using an air guide cover. The fan draws in air through the protective grille of the air guide cover and blows it along the lateral air ducts on the gear unit housing. -
Page 33: Cooling Coil
Description 3.7 Cooling 3.7.2 Cooling coil 3.7 Cooling Introduction The gear unit can be equipped with a cooling coil in the oil sump. The cooling coil is connec- ted to a cooling water supply. The cooling water connection must be provided by the oper- ator. -
Page 34: Mounted Oil Supply System
Description 3.7 Cooling The diagram below shows the cooling coil connections: Figure 3-10: Cooling coil on type K..H and K..M gear units ① Output shaft ③ Cooling water connection ② Reducer screw Further information You can find additional information and a detailed illustration of the gear unit and the connec- tion dimensions in the dimension drawings in the complete gear unit documentation. -
Page 35: Pump
Description 3.7 Cooling Information Observe the flow direction of the pump When connecting the valves, observe the flow direction of the pump. Refer to the pump operating instructions in the complete gear unit documentation to ascer- tain whether the flow direction of the pump used depends on the direction of rotation. Further information You can find additional information about the oil supply system in the separate data sheet, in the list of equipment and in the oil supply system operating instructions provided in the com-... -
Page 36: Separate Oil Supply System
Description 3.7 Cooling 3.7.4 Separate oil supply system 3.7 Cooling A separate oil supply system can be used to cool the oil. When installing the gear unit, make sure that unhindered convection across the housing sur- face is possible in order to protect the gear unit against overheating. Further information You can find additional information about separate oil supply systems in the operating in- structions for the oil supply system, which are part of the complete documentation of the... -
Page 37: Heating
Description 3.10 Heating 3.10 Heating 3.10 Heating Introduction At low ambient temperatures it may be necessary to preheat the gear unit oil before switch- ing on the drive or while it is in operation. Heating elements Heating elements can be used for these applications, for example. Heating elements convert electricity into heat and transfer this to the oil in which they are immersed. -
Page 38: Oil Level Indicator
Description 3.11 Oil level indicator Heating element control Heating elements can be controlled by a temperature monitor. The temperature monitor provides a signal to be amplified when the minimum and maximum temperatures are reached. Further information You can find additional information about the position of the mounted components and a de- tailed illustration of the gear unit in the dimension drawing in the complete documentation for the gear unit. -
Page 39: Bearing Monitoring
Description 3.13 Bearing monitoring Figure 3-12: Oil temperature monitor mounted on the gear unit ① Pt 100 resistance thermometer Further information Further information and a detailed illustration of the gear unit and the position of the mounted components can be found in the dimension drawing in the complete documentation for the gear unit. -
Page 40: Bearing Monitoring By Acceleration Sensor
Description 3.13 Bearing monitoring The diagram below shows a bearing monitoring system with shock-pulse transducer on type K..H and K..M gear units: Figure 3-13: Bearing monitoring system with shock-pulse transducer on type K..H and K..M gear units: Further information You can find additional information and a detailed illustrated description of the gear unit and the position of the mounted components in the dimension drawing, which is part of the com- plete documentation of the gear unit. -
Page 41: Figure 3-14 Fully Assembled Acceleration Sensor (A), And Threaded Connector (B) For Variants 1 To 4
Description 3.13 Bearing monitoring The following diagram shows the fully assembled acceleration sensor (A), and the threaded connector (B) for variants 1 to 4: Figure 3-14: Fully assembled acceleration sensor (A), and threaded connector (B) for variants 1 to 4 ① Shielded cable (oil-proof) ④... -
Page 42: Gear Changing
Description 3.14 Gear changing Further information You can find additional information and a detailed illustrated description of the gear unit with attached sensors in the dimension drawing in the complete documentation for the gear unit. You can find additional information about the sensors in the sensor operating instructions in the complete documentation for the gear unit. -
Page 43: Application Planning
Application planning Scope of delivery 4.1 Scope of delivery The scope of delivery is listed in the shipping documents. Immediately upon receiving the gearbox, check that everything has been delivered. Report any damaged and/or missing parts to Customer Services (Page 95) immediately. WARNING Serious injury through defective product Serious injury may occur. -
Page 44: Figure 4-1 Transport Symbols
Application planning 4.2 Transport Attaching the gear unit To transport the gear unit, only attach slings to the marked attachment points that are provided for this purpose. Please observe the following when attaching slings to the load or raising, lowering or moving •... -
Page 45: Attachment Points
Application planning 4.3 Attachment points Attachment points 4.3 Attachment points Lifting eyes Lifting eyes are fitted to the gear unit to assist with its transportation during manufacture and installation. Carefully ensure that the angle of the vertical load at the gear units lifting eyes does not ex- ceed 45°. -
Page 46: Figure 4-3 Position Of Attachment Points On Gear Unit
Application planning 4.3 Attachment points Position of attachment points The following diagram shows the position of the attachment points on the gear unit: Figure 4-3: Position of attachment points on gear unit The following diagram shows the position of the attachment points on a gear unit with motor: Figure 4-4: Position of attachment points on gear unit with motor Drive units with additional components mounted on the gear unit (such as drive motor, coup- ling, etc.) may require an extra attachment point owing to the displacement in the centre of... -
Page 47: Special Aspects Of Gear Unit Lubrication And Preservation
Application planning 4.4 Special aspects of gear unit lubrication and preservation Special aspects of gear unit lubrication and preservation 4.4 Special aspects of gear unit lubrication and preservation 4.4.1 Oil filling point and oil drain 4.4 Special aspects of gear unit lubrication and preservation The following diagram shows the oil filling point and the oil drain on the gear unit: Figure 4-5: Oil filling point and oil drain ①... - Page 48 Application planning 4.4 Special aspects of gear unit lubrication and preservation Edition 06/2022 A5850-02en...
-
Page 49: Assembly
Assembly General assembly instructions 5.1 General assembly instructions The assembly work must be performed very carefully by authorised, trained and suitably in- structed personnel. Liability will be disclaimed for damage caused by the incorrect perform- ance of this work. Requirements Improper use can damage the gear unit. -
Page 50: Unpacking The Gear Unit
Assembly 5.2 Unpacking the gear unit If you use a temperature monitoring device, it must be capable of issuing an alarm when the maximum permissible oil sump temperature is reached. It must also be capable of tripping the drive when the maximum permissible oil sump temperature is exceeded. The operator's process might be interrupted when the drive is shut down. -
Page 51: Gear Unit Assembly
Assembly 5.3 Gear unit assembly Gear unit assembly 5.3 Gear unit assembly 5.3.1 Foundation 5.3 Gear unit assembly Properties of the foundation The foundation must have the following properties: • Horizontal and flat • Stability • Designed for torsional rigidity •... -
Page 52: Description Of Assembly Work
Assembly 5.3 Gear unit assembly 5.3.2 Description of assembly work 5.3 Gear unit assembly CAUTION Risk of chemical burns from chemical substances There is a risk of chemical burns when handling aggressive cleaning agents. Please observe the manufacturer’s instructions on how to handle cleaning agents and solvents. -
Page 53: Alignment
Assembly 5.3 Gear unit assembly Gap dimension at the grease labyrinth The diagram below shows the gap dimension at the grease labyrinth: Figure 5-1: Gap dimension at the grease labyrinth NOTICE Sparking, inadmissible temperature rise and shaft seal wear due to insufficient gap dimension An insufficient gap dimension can cause sparking, inadmissible temperature rise and shaft seal wear. -
Page 54: Figure 5-2 Alignment Surface
Assembly 5.3 Gear unit assembly Procedure The gear unit can be equipped with alignment threads in the housing feet to make it simpler to align. Figure 5-2: Alignment surface Proceed as follows to align the gear unit at the alignment surface: 1. For the precise position of the alignment surfaces, refer to the dimension drawings in the complete documentation. -
Page 55: Mounting The Gear Unit On The Housing Mounting Foot
Assembly 5.3 Gear unit assembly 5.3.3 Mounting the gear unit on the housing mounting foot 5.3 Gear unit assembly 5.3.3.1 Installation on a foundation frame 5.3 Gear unit assembly Requirements The following requirements must be fulfilled before the assembly work commences: •... -
Page 56: Shaft-Mounted Gear Unit With Solid Shaft
Assembly 5.3 Gear unit assembly NOTICE Damage caused by unevenly tightening the fastening bolts The gear unit can be damaged by unevenly tightening the fastening bolts. Evenly tighten the fastening bolts. When tightening the fastening bolts, make sure that the gear unit is free of mechanical stress. -
Page 57: Shaft-Mounted Gear Unit With Hollow Shaft And Parallel Keyway
Preparations 5.3 Gear unit assembly To facilitate removal, Flender recommends that you insert a pressurized oil connection into the shaft end of the driven machine until it is flush with the bore of the hollow shaft. This con- nector can also be used to feed in rust remover. Failure to follow this recommendation shall not give rise to any liability of the plant constructor towards the plant operator. -
Page 58: Mounting
Assembly 5.3 Gear unit assembly 5.3.5.2 Mounting 5.3 Gear unit assembly Measures to be taken prior to assembly CAUTION Risk of chemical burns due to chemical substances There is a risk of chemical burns when handling corrosive cleaning agents. Please observe the manufacturer's guidelines on how to handle cleaning agents and solvents. -
Page 59: Axial Locking
Assembly 5.3 Gear unit assembly NOTICE Damage to the rolling-contact bearings The rolling-contact bearings can become damaged if the gear unit skews during mounting. The hollow shaft may be mounted on a machine shaft shoulder only if the gear unit fea- tures one of the following: •... -
Page 60: Dismantling
Assembly 5.3 Gear unit assembly 5.3.5.3 Dismantling 5.3 Gear unit assembly Measures prior to dismantling NOTICE Damage to the gear unit due to skewing The gear unit can become damaged if it skews during dismantling. Do not allow the gear unit to skew as you remove it from the machine shaft. When remov- ing the gear unit using hydraulic pulling equipment, excessive force can be placed on the housing, rolling-contact bearings and other gear unit components. -
Page 61: Shaft-Mounted Gear Unit With Hollow Shaft And Shrink Disk
Assembly 5.3 Gear unit assembly The following diagram shows the dismantling procedure using an end plate for gear units with a hollow shaft and parallel keyway: Figure 5-7: Dismantling using an end plate ① Jacking screws ④ Machine shaft ② Bolts ⑤ Hollow shaft ③... -
Page 62: Preparations
Preparations 5.3 Gear unit assembly To facilitate removal, Flender recommends that you insert a pressurized oil connection into the shaft end of the driven machine until it is flush with the bore of the hollow shaft. This con- nector can also be used to feed in rust remover. Failure to follow this recommendation shall not give rise to any liability of the plant constructor towards the plant operator. -
Page 63: Pulling On With Integrated Du Bushing
Assembly 5.3 Gear unit assembly CAUTION Risk of injury due to chemically aggressive operating materials There is a risk of injury to eyes and hands when handling chemically aggressive operating materials. Please observe the safety instructions in the data sheets of the oil used. Wear suitable protective equipment (gloves, safety goggles). -
Page 64: Figure 5-9 Mounting With A Screw Spindle
Assembly 5.3 Gear unit assembly NOTICE Damage to the rolling-contact bearings The rolling-contact bearings can become damaged if the gear unit skews during mounting. The hollow shaft may be mounted on a machine shaft shoulder only if the gear unit fea- tures one of the following: •... -
Page 65: Mounting With Du Bushing As A Separate Component
Assembly 5.3 Gear unit assembly 5.3.6.2.2 Mounting with DU bushing as a separate component 5.3 Gear unit assembly Procedure NOTICE Damage to the gear unit The gear unit can become damaged if it skews during assembly. The hollow shaft must be flush with the machine shaft during assembly of the gear unit on the machine shaft. -
Page 66: Dismantling
Assembly 5.3 Gear unit assembly 5.3.6.3 Dismantling 5.3 Gear unit assembly Measures prior to dismantling NOTICE Damage to the gear unit The gear unit can become damaged if it skews during dismantling. Do not allow the gear unit to skew as you remove it from the machine shaft. When remov- ing the gear unit using hydraulic pulling equipment, excessive force can be placed on the housing, rolling-contact bearings and other gear unit components. -
Page 67: Figure 5-10 Dismantling Using An End Plate
Assembly 5.3 Gear unit assembly The following diagram shows the dismantling procedure using an end plate for gear units with a hollow shaft and shrink disk: Figure 5-10: Dismantling using an end plate ① Pressure oil connector ④ Hollow shaft ② DU bushing ⑤... -
Page 68: Mounting The Torque Arm For The Gear Unit Housing
Damage to the gear unit due to incorrect mounting of the motor and torque arm is possible The motor and torque arm may only be mounted after prior consultation with Flender. Mount the torque arm to the machine side without causing any distortion or deformation. -
Page 69: Couplings
The torque arm is not included as standard in the scope of delivery. It is only permissible to mount a torque arm after prior consultation with Flender. Mount the torque arm at the end face of the gear unit in such a way that it is free of mechanical stress. -
Page 70: Assembling The Coupling
Assembly 5.4 Couplings 5.4.1 Assembling the coupling 5.4 Couplings Introduction The method used to assemble the coupling varies according to type. The procedure de- scribed in these operating instructions is general rather than specific to one type of coupling. Assemble the coupling as described in the operating instructions for the specific coupling. Improper use can damage the gear unit. -
Page 71: Aligning The Coupling
This displacement is not measurable when the drive is at a standstill. – If you are using couplings supplied by Flender, you will find the maximum permissible misalignment values in the operating instructions for the coupling. -
Page 72: Figure 5-14 Alignment Process Based On The Example Of A Flexible Coupling
Assembly 5.4 Couplings Alignment Align the individual components in two mutually perpendicular axial planes. The following can be used as alignment tools: • Ruler (radial displacement) • Feeler gauge (angular displacement) • Spirit level • Dial gauge • Laser alignment system You will achieve a greater degree of alignment accuracy by using a dial gauge or laser align- ment system. -
Page 73: Connecting Components
Assembly 5.5 Connecting components Connecting components 5.5 Connecting components 5.5.1 Gear units with mounted components 5.5 Connecting components Depending on the order specification, the gear unit can be equipped with various compon- ents. Connect the closed-loop control and open-loop control electrical devices corresponding to the specifications of the device supplier. -
Page 74: Connecting The Heating Element
Assembly 5.5 Connecting components 2. Mount the system on the gear unit in accordance with the dimension drawings in the complete documentation, or install it as a separate system. 3. Avoid distorting the piping when installing. Further information You can find additional information on the oil supply system in the operating instructions of the oil supply system, which are part of the complete documentation of the gear unit. -
Page 75: Electrical Connections
Assembly 5.5 Connecting components 5.5.6 Electrical connections 5.5 Connecting components Procedure DANGER Electric shock Live parts can cause electric shock. Ensure that the entire plant is de-energised before starting electrical installation work. Carefully observe the five safety rules (Page 15). To connect the motors and monitoring devices, proceed as follows: 1. -
Page 76: Bolt Connection Classes
Assembly 5.6 Tightening procedure Information Using a lubricant As a rule, lubricants may not be used, because this can result in the bolt connection becom- ing overloaded. 5.6.2 Bolt connection classes 5.6 Tightening procedure In order to affix fastening bolts, note the information in the following table: Mounting Bolt connection Scatter of the... - Page 77 Assembly 5.6 Tightening procedure Nominal Bolt Preload force for bolt connection Tightening torque for bolt connec- thread dia- strength classes from the table in chapter tion classes from the table in meter class Bolt connection classes chapter Bolt connection classes (Page 76) (Page 76) M min.
-
Page 78: Final Work
Assembly 5.7 Final work Nominal Bolt Preload force for bolt connection Tightening torque for bolt connec- thread dia- strength classes from the table in chapter tion classes from the table in meter class Bolt connection classes chapter Bolt connection classes (Page 76) (Page 76) M min. - Page 79 Assembly 5.7 Final work • Perform potential equalisation in accordance with the applicable regulations and guidelines. If no threaded holes are available on the gear unit for an earth connection, please take suitable alternative measures. This work must always be done by specialist electricians.
- Page 80 Assembly 5.7 Final work Edition 06/2022 A5850-02en...
-
Page 81: Commissioning
Commissioning Measures prior to commissioning 6.1 Measures prior to commissioning Take the following measures before commissioning the gear unit: • Read and observe the operating instructions. • Replace the screw plug with the air filter or the wet-air filter. Note the instructions 7300 for this. -
Page 82: Gear Unit With Oil Supply System
Carefully ensure that the pre-lubrication phase is not longer than 5 minutes as the oil can foam up at low temperatures. For oil temperatures below 10 °C, heat up the oil using suit- able measures and consult Flender in this regard. Further information You can find additional information on the oil cooling system in the separate data sheet, and in the equipment list in the complete gear unit documentation. -
Page 83: Initial Test Run
Commissioning 6.2 Measures during commissioning More information You can find additional information on the topic of oil in the instructions 7300, which are part of the complete documentation of the gear unit. More information about the oil supply system can be found in the oil supply system operating instructions contained in the complete documentation for the gear unit. - Page 84 Commissioning 6.2 Measures during commissioning Edition 06/2022 A5850-02en...
-
Page 85: Operation
Operation Operating data 7.1 Operating data Introduction To ensure correct, trouble-free operation of the system, observe the operating data of the gear unit and, depending on the order specification, the data in the operating instructions for the oil supply system. The valid operating data can be found in the annex Technical data (Page 103). -
Page 86: Taking The Unit Out Of Service
Operation 7.3 Taking the unit out of service Rectifying irregularities in operation Proceed as follows to rectify any irregularities in operation: 1. Switch off the drive assembly if it exhibits irregular behaviour during operation. 2. Refer to the Fault information (Page 91) to find the cause of the fault. 3. -
Page 87: Servicing
Servicing General maintenance information 8.1 General maintenance information The operator must ensure compliance with the stipulated time limits. This also applies if the maintenance activities are included in the operator’s internal maintenance schedules. The gear unit could be damaged if the stipulated time limits for maintenance and servicing are not observed. -
Page 88: Maintenance And Servicing Work
Servicing 8.3 Maintenance and servicing work Intervals and time limits Measures 400 operating hours after commissioning Check the water content of the oil Change the oil (or depending on the result of the oil sample test) Check that the fastening bolts are tight Every 3 months Clean the oil filter Clean the air filter... -
Page 89: Checking The Oil Temperature
3. Measure the temperature of the oil in the oil sump. 4. Compare the measured value with the maximum permissible oil temperature (Page 85). 5. Immediately stop the gear unit if the maximum permissible oil temperature is exceeded. Contact Flender Customer Services. 8.3.2 Measure the vibration levels of the rolling-contact bearings 8.3 Maintenance and servicing work... -
Page 90: Checking The Cooling Coil
– Replace especially severely soiled cooling coils by new ones. Please consult Flender Customer Services (Page 95)for further advice. 4. Reconnect the cooling water inlet and drain lines to the cooling coil. -
Page 91: Inspecting The Shrink Disk
8.4 Possible faults The faults listed below are only intended as a troubleshooting guide. If any faults occur while the unit is still under warranty, do not allow anyone except Flender Customer Services to attempt a repair. Even after the warranty period has expired, you should still arrange for faults to be rectified by Flender Customer Services. - Page 92 You will invalidate the warranty for the gear unit if you modify it in any way without seeking the approval of Flender beforehand, or if you do not use original spare parts. Only use original spare parts from Flender. Always arrange for Flender Customer Services to repair any faults that develop while the unit is still under warranty.
- Page 93 Servicing 8.4 Possible faults Possible faults Causes Possible remedies Oil escaping from the Inadequate sealing of the housing • Check the seals and replace if necessary gear unit cover or joints • Seal housing cover or joints • Check the compression seals and retighten bolts if ne- cessary Defective rotary shaft sealing rings •...
-
Page 94: Table 8-2 Possible Faults And How To Rectify Them
Servicing 8.4 Possible faults Possible faults Causes Possible remedies Elevated vibration Defective rolling-contact bearings • Contact Customer Service amplitude at bearing • Inspect the rolling-contact bearings and replace if neces- points sary Gear wheels defective • Contact Customer Service • Inspect the gear wheels and replace if necessary Water in the oil Oil supply system or cooling coil •... -
Page 95: Service & Support
Customer Service addresses: Flender GmbH Am Industriepark 2 46562 Voerde Germany Tel.: +49 (0)2871 / 92‐0 Fax: +49 (0)2871 / 92‐1544 More information Further information about service and support can be found on the Internet: Service & Support (https://www.flender.com/service) A5850-02en Edition 06/2022... - Page 96 Service & Support 9.1 Contact Edition 06/2022 A5850-02en...
-
Page 97: Disposal
Disposal Disposal of the gear unit When disposing of the gear unit after its useful life, please observe the following measures: • Remove operating oil, preservative agents and coolant from the gear unit and dispose of it according to regulations. •... - Page 98 Disposal Edition 06/2022 A5850-02en...
-
Page 99: Spare Parts
Information Damage to the gear unit due to use of unsuitable spare parts Only use original spare parts from Flender. Flender shall not accept any warranty claims for spare parts that are not supplied by Flender. Other spare parts are not tested and approved by Flender. Non-approved spare parts may possibly change the design characteristics of the gear unit and thus impair its active or passive safety. - Page 100 Spare parts Edition 06/2022 A5850-02en...
-
Page 101: Declaration Of Incorporation
United Kingdom Description and identification of the partly completed machine: Crane gear unit K.SH, K.VH, K.HH, K.DH, K.SM Sizes 215 to 222 to drive machines The following “Essential Health and Safety Requirements” from the – Regulations 2008 No. 1597, are applied and are fulfilled: 1.1, 1.1.2, 1.1.3, 1.1.5;... - Page 102 Declaration of Incorporation UK Declaration of Incorporation Edition 06/2022 A5850-02en...
-
Page 103: Technical Data
⑭ Hotline The limits of the intended use of the gear unit are defined on the basis of these data and the contractual agreements concerning the gear unit concluded between Flender and the cus- tomer. More information Further information about these technical data can be found in the separate data sheet and the dimension drawings in the complete documentation for the gear unit. -
Page 104: Ambient Temperature
By applying various suit- able measures, the gear unit can be used in the ambient temperature range extending from -40 °C up to 60 °C. However, this must always be authorised by Flender and specified in the order text. -
Page 105: Weights
Technical data Weights K.SH, K.VH K.SM K.HH K.DH Weights Weights The precise weights are specified in the dimension drawings in the complete documentation or on the rating plate. All weight specifications refer to units without oil filling or mounted components. - Page 106 Technical data Enveloping surface sound pressure level You can assume with statistical certainty that the limit values are complied with under the specified Flender test conditions. Edition 06/2022 A5850-02en...
-
Page 107: Index
Index Attachment points, 49 Position, 46 Air guide cover, 32 Principle of operation, 32 Fastening bolts, 91 Bolt connection class, 76 Bolts, 75 Bearing monitoring Mating threads, 75 Acceleration sensor, 40 Preload force, 76 Shock-pulse transducer, 39 Tightening procedure, 76 Tightening torque, 76 Fault, 91 Fault rectification, 92 Coloured markings, 16 Filter, 35 Cooling, 31 Final work, 78 Cooling coil Commissioning, 81 Connecting, 73 Design, 34... - Page 108 Index Shaft-mounted gear unit Auxiliary plate, 61, 67 Axial locking, 59, 65 Maintenance activities, 87 Dismantling, 60, 66 Maintenance information, 87 End plate, 61, 67 Maintenance schedule, 87 Hydraulic pulling equipment, 67 Measures Mounting, 57, 61 during commissioning, 82 Shear pulling, 45 Prior to commissioning, 81 Shipping documents, 43 Mounted components, 73 Shrink disk Mounting position, 49 Checking, 91 Splash lubrication, 26...
- Page 110 Crane gear unit Assembly and operating instructions A5850-02en Edition 06/2022 Flender GmbH Alfred-Flender-Straße 77 46395 Bocholt Germany...
Need help?
Do you have a question about the K.SH and is the answer not in the manual?
Questions and answers