Advertisement
Quick Links
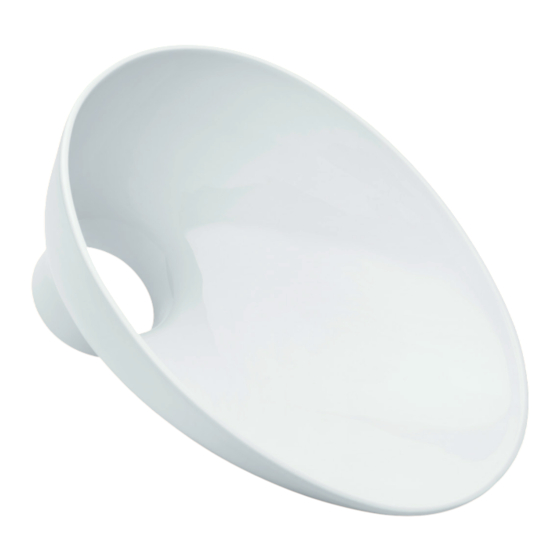
Installing Twusch with Twusch installation set. This includes high
performance special sealant, cleaner and stick. Make sure the Twus-
ch inlay is the correct one for your Thetford Cassette toilet. Read the
enclosed safety information leaflet before working with the provided
installation products.
The installation of your Twusch is the same for all cassette toilets;
therefore, only this cassette toilet is depicted.
Installation disclaimer
Thetford explicitly rejects any liability and accountability for damage
or injuries directly or indirectly resulting from repair, installation,
maintenance or troubleshooting performed by any parties other
than our designated service partners, dealers or OEMs. Furthermore,
Thetford reserves the right to take the necessary legal measures if
such use, repair, maintenance, installation and troubleshooting leads
to any direct or indirect damage to Thetford.
1. Take out the waste holding tank | 2. Clean the surfaces of the toilet bowl and Twusch inlay |
3. Apply a sealant layer in the toilet bowl | 4. Insert the Twusch inlay into the toilet bowl
01
02
5. Push the Twusch inlay into the toilet bowl | 6. Seal the top edge between the Twusch inlay and the toilet bowl
with sealant | 7. Remove excess sealant | 8. Leave to cure for a minimum of 24h
05
06
Copyright 2023-2023 Thetford B.V. All rights reserved.
INSTRUCTION TWUSCH INSTALLATION
Removing Twusch may affect product performance, and its original
functionality cannot be guaranteed afterward. Consequences are
at the user's discretion, and complete reinstatement of the original
product's performance is not assured. Consider carefully before
proceeding with Twusch removal.
OTTOSEAL S100 information
• Skin-forming time at 23 °C/50 % RH [minutes] ~ 10
• Curing in 24 hours at 23 °C/50 % RH [mm] ~ 2-3
• Processing temperature from/to [°C] + 5 / + 35
• Viscosity at 23 °C pasty, stable
• Density at 23 °C according to ISO 1183-1 [g/cm³] ~ 1,0
• Shore-A-hardness according to ISO 868 ~ 20
• Ventilate well during curing
03
04
2x
07
08
CZ
3. Appliquer une couche de joint d'étanchéité dans la
1. Vyjměte odpadní nádrž
cuvette
2. Vyčistěte povrch záchodové mísy a vložky Twusch
4. Positionnez l'insert Twusch dans la cuvette
3. Naneste vrstvu těsnicí hmoty do záchodové mísy
5. Appuyer fermement l'insert Twusch contre la cuvette
4. Vložte vložku Twusch do záchodové mísy
6. Scellez le bord supérieur entre l'insert Twusch et la
5. Zatlačte vložku Twusch do záchodové mísy
cuvette avec un jointt d'étanchéité
6. Utěsněte horní okraj mezi vložkou Twusch a
7. Enlever l'excès de mastic
záchodovou mísou těsnicí hmotou
8. Laisser durcir pendant au moins 24 heures
7. Odstraňte přebytečný tmel
HU
8. Tmel nechte vytvrdnout po dobu minimálně 24 hodin
1. Vegye ki a hulladék-gyűjtőtartályt
DA
2. Tisztítsa meg a toalett csésze és a Twusch betét
1. Tag affaldstanken ud
illeszkedő felületét
2. Rengør overfladerne på toiletkummen og Twusch-in-
3. Vigyen fel egy tömítőanyag-réteget a toalett csészére
dlægget
4. Helyezze be a Twusch betétet a toalett csészébe
3. Påfør et tætningslag i toiletkummen
5. Nyomja bele a Twusch betétet a toalett csészébe
4. Indsæt Twusch-indlægget i toiletkummen
6. Vigyen fel egy tömítő réteget a toalett csésze és a
5. Skub Twusch-indlægget ind i toiletkummen
Twusch betét közé
6. Forsegl den øverste kant mellem Twusch-indlægget og
7. Távolítsa el a felesleges tömítőanyagot
toiletkummen med fugemasse
8. Legalább 24 órán át hagyja megkötni
7. Fjern overskydende fugemasse
IT
8. Lad det hærde i mindst 24 timer
1. Estrarre il serbatoio di scarico
DE
2. Pulire le superfici del vaso e dell'inserto Twusch
1. Nehmen Sie den Fäkalientank heraus
3. Applicare uno strato di sigillante nella tazza della
2. Reinigen Sie die Oberfläche der Toilettenschüssel
toilette
und Twusch
4. Inserire l'inserto Twusch nella tazza della toilette
3. Tragen Sie eine Versiegelungsschicht in der
5. Spingere l'inserto Twusch nel vaso della toilette
Toilettenschüssel auf
6. Sigillare il bordo superiore tra l'inserto Twusch e il vaso
4. Einsetzen der Twusch in die Toilettenschüssel
con il sigillante
5. Drücken Sie die Twusch in die Toilettenschüssel
7. Rimuovere il sigillante in eccesso
6. Dichten Sie den oberen Rand zwischen Twusch und
8. Lasciare indurire per almeno 24 ore
Toilettenschüssel mit Dichtungsmasse ab
NL
7. Überschüssige Dichtungsmasse entfernen
1. Verwijder de afvaltank
8. Mindestens 24 Stunden aushärten lassen
2. Reinig de oppervlakken van de toiletpot en het Twusch
ES
inzetstuk
1. Sacar el depósito de residuos
3. Breng een kitlaag aan in de toiletpot
2. Limpie las superficies de la taza del inodoro y la taza
4. Plaats het Twusch inzetstuk in de toiletpot
Twusch
5. Druk het Twusch inzetstuk stevig in de toiletpot
3. Aplique una capa de sellado en la taza del inodoro
6. Kit de bovenrand tussen het inzetstuk en de toiletpot
4. Inserte la taza Twusch en la taza del inodoro
af met kit
5. Empuje la taza Twusch dentro de la taza del inodoro
7. Verwijder overtollige kit
6. Selle el borde superior entre la taza Twusch y la taza del
8. Laat het geheel minimaal 24 uur uitharden
inodoro con sellador
NO
7. Elimine el exceso de sellador
1. Ta ut avfallstanken
8. Deje secar durante un mínimo de 24h
2. Rengjør overflatene på toalettskålen og
FI
Twusch-innlegget
1. Ota jätesäiliö pois
3. Påfør et forseglingslag i toalettskålen
2. Puhdista wc-altaan ja Twusch-sisäkkeen pinnat
4. Sett Twusch-innlegget inn i toalettskålen
3. Levitä kerros tiivistysainetta wc-altaaseen
5. Skyv Twusch-innlegget inn i toalettskålen
4. Aseta Twusch-sisäkappale wc-altaaseen
6. Forsegl den øvre kanten mellom Twusch-innlegg og
5. Työnnä Twusch-sisäkappale wc-altaaseen
toalettskålen med fugemasse
6. Tiivistä Twusch-sisäkkeen ja WC-altaan välinen
7. Fjern overflødig fugemasse
yläreuna tiivisteellä
8. La det herde i minst 24 timer
7. Poista ylimääräinen tiiviste
PL
8. Anna kovettua vähintään 24 tuntia
1. Wyjmij zbiornik na odpady
FR
2. Wyczyść powierzchnie muszli klozetowej i wkładki
1. Retirer le réservoir à matières
Twusch
2. Nettoyez la cuvette et l'insert Twusch
3. Nałóż warstwę uszczelniającą na muszlę klozetową
More video instructions on YouTube
4. Włóż wkładkę Twusch do muszli klozetowej
5. Wciśnij wkładkę Twusch do muszli klozetowej
6. Uszczelnij górną krawędź między wkładką Twusch a
muszlą klozetową za pomocą szczeliwa
7. Usuń nadmiar uszczelniacza
8. Pozostaw do utwardzenia na minimum 24h
PT
1. Retirar o depósito de resíduos
2. Limpar as superfícies da sanita e do encaixe Twusch
3. Aplicar uma camada de vedante na sanita
4. Inserir o Twusch inlay na sanita
5. Empurrar a incrustação Twusch para dentro da sanita
6. Vede o rebordo superior entre a incrustação Twusch e a
sanita com vedante
7. Remova o excesso de vedante
8. Deixe curar durante um mínimo de 24 horas
RO
1. Scoateți rezervorul de deșeuri
2. Curățați suprafețele vasului de toaletă și ale inserției
Twusch
3. Aplicați un strat de etanșare în vasul de toaletă
4. Introduceți inserția Twusch în vasul de toaletă
5. Împingeți inserția Twusch în vasul de toaletă
6. Sigilați marginea superioară dintre inserția Twusch și
vasul de toaletă cu un material de etanșare
7. Îndepărtați excesul de material de etanșare
8. Lăsați să se întărească timp de minimum 24 de ore
SK
1. Vyberte odpadovú kazetu toalety
2. Vyčistite povrch záchodovej misy a vložky Twusch
3. Naneste tesniacu vrstvu do záchodovej misy
4. Vložte vložku Twusch do záchodovej misy
5. Zatlačte vložku Twusch do záchodovej misy
6. Horný okraj medzi vložkou Twusch a záchodovou misou
utesnite tmelom
7. Odstráňte prebytočný tmel
8. Nechajte vytvrdnúť minimálne 24 hodín
SI
1. Odstranite rezervoar za odpadke
2. Očistite površine straniščne školjke in vložka Twusch
3. V straniščno školjko nanesite plast tesnilne mase
4. Vstavite vložek Twusch v straniščno školjko
5. Vstavek Twusch potisnite v straniščno školjko
6. Zgornji rob med vložkom Twusch in straniščno školjko
zatesnite s tesnilno maso
7. Odstranite odvečno tesnilno maso
8. Pustite, da se strdi najmanj 24 ur
SV
1. Ta ut avfallstanken
2. Rengör ytorna på toalettskålen och Twusch-inlägget
3. Applicera ett tätskikt i toalettskålen
4. Sätt in Twusch-inlägget i toalettskålen
5. Tryck ned Twusch-inlägget i toalettskålen
6. Försegla den övre kanten mellan Twusch-inlägget och
toalettskålen med tätningsmedel
7. Ta bort överflödigt tätningsmedel
8. Låt härda i minst 24 timmar
thetford.com
Advertisement

Related Manuals for Thetford Twusch


Summary of Contents for Thetford Twusch
- Page 1 8. Laat het geheel minimaal 24 uur uitharden 3. V straniščno školjko nanesite plast tesnilne mase 5. Push the Twusch inlay into the toilet bowl | 6. Seal the top edge between the Twusch inlay and the toilet bowl inodoro con sellador 4.
- Page 2 Thetford B.V. Thetford Ltd. Nijverheidsweg 29 Unit 6, Brookfields Way 4879 AP Etten-Leur Manvers, Rotherham The Netherlands S635DL England T. +31 76 504 2200 United Kingdom E. info@thetford.eu T. +44 1709766750 www.thetford.com infogb@thetford.eu Copyright 2023-2023 Thetford B.V. All rights reserved. thetford.com...
Need help?
Do you have a question about the Twusch and is the answer not in the manual?
Questions and answers