
Subscribe to Our Youtube Channel
Related Manuals for VeriFone T650T


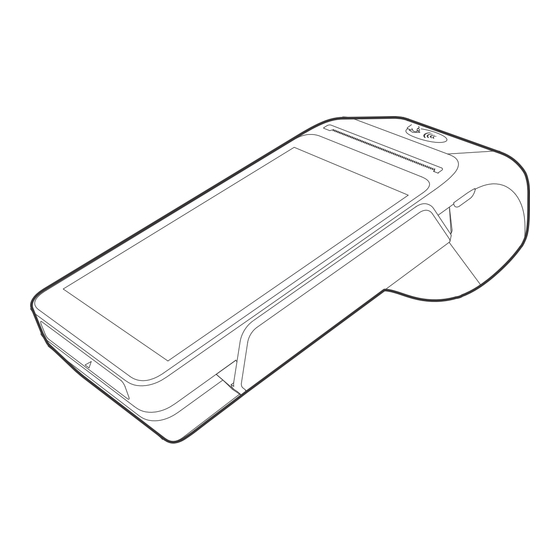
Summary of Contents for VeriFone T650T
- Page 1 T650T Installation Guide Verifone Part Number: DOC560-030-EN-B, Revision B02 www.verifone.com...
- Page 2 The information contained in this document is subject to change without notice. Although Verifone has attempted to ensure the accuracy of the contents of this document, Verifone shall not be liable for technical or editorial errors or omissions contained herein. Verifone and the Verifone logo are registered trademarks of Verifone.
-
Page 3: Table Of Contents
Device Features ........... . . 17 © VeriFone, Inc. All rights reserved. - Page 4 External Dimensions ..........32 © VeriFone, Inc. All rights reserved.
- Page 5 Verifone Certified Power Adapter ........
-
Page 6: Audience
- Provides guidance for addressing issues that may arise during Troubleshooting Guidelines device installation. Related Documentation To learn more about the T650T, refer to the following documents associated with the Verifone Part Numbers (VPNs). T650t Certifications and Regulations VPN - DOC560-031-EN-A... -
Page 7: Conventions
The lightning symbol is used as a For safety, do not string cables or warning when bodily injury might cords across a walkway. occur. © VeriFone, Inc. All rights reserved. - Page 8 T650T 1. Device Overview This chapter provides an overview of the T650T device: The Verifone T650T device is a powerful countertop device, 4G LTE (Long-Term Evolution), provides a dedicated cellular IP (Internet Protocol) connection with strong battery backup, ensures uninterrupted transaction flow in the event of power failure.
-
Page 9: Processor
Installation Guide T650T The T650T device supports Bluetooth and Wi-Fi (Wireless Fidelity) and meets PCI (Payment Card Industry) - PTS (PIN Transaction Security) 6.x SRED (Secure Reading and Exchange of Data) requirements for maximum security. Figure: 1 T650T Device Key Features and Benefits Processor •... -
Page 10: Physical Interface
• NFC/CTLS Printer • Built-in high-speed thermal printer with print speed greater than 25 lines per second, support paper roll with a width of 58mm and diameter of 50mm, support black mark positioning. © VeriFone, Inc. All rights reserved. -
Page 11: Leds
Security • Incorporates tamper-sensing circuitry to detect unauthorized intrusion and supports a broad spectrum of software-based security features. • PCI-PTS 6.x approved for debit and other PIN-based transactions. • EMV Level 1 Type approval. © VeriFone, Inc. All rights reserved. -
Page 12: Contactless Capability
Bluetooth: Simple, plug-and-play installation for locations that need short- Technology range wireless capability. Eddystone and iBeacon profiles are also supported. • Dual band Wi-Fi. Connectivity • 4G LTE/Wi-Fi; 5 GHz + 2.4 GHz/Bluetooth • Ethernet, USB-C/ USB-A/ serial RS-232 © VeriFone, Inc. All rights reserved. -
Page 13: Environmental Factors
Keep the device away from direct sunlight and anything that radiates heat. Contactless Avoid having metallic objects in proximity of the contactless antenna. If you need to mount the device onto a vertical or inclined surface, use Verifone approved Considerations stand. -
Page 14: Inside The Shipping Carton
PIN-entry process difficult. • Position in-store security cameras so that the PIN-entry keypad is not visible. Verifone also recommends instructing the cardholder regarding safe PIN-entry. This can be done with a combination of: •... -
Page 15: Periodic Inspection
If any device is found to have been tampered with, please remove it from service immediately, keep it available for potential forensics investigation, and notify your company security officer and your local Verifone representative or service provider. To contact Verifone, please see Service and Support. -
Page 16: Device Features
Front Panel The front panel offers the following features: • The T650T device has a colored touch screen display. • A smart card reader is built into the front of the device to process smart card-based debit or credit transactions. For directions on how to use a smart... - Page 17 Cable Cover Connect required cables or optional devices. Cable is connected to the rear of the unit. Figure: 4 Connecting the Cable Route the cable through the cable cover first, as shown in the picture. © VeriFone, Inc. All rights reserved.
-
Page 18: Sam Card
T650T SAM CARD When you first receive your T650T device, you may need to install one or more SAM cards, or you may need to replace old cards. You may need to install one or two Multiple Security Access Module cards or replace an old one. -
Page 19: Initial Battery Charging
To replace SIM/SAM card, gently slide out the old SIM/SAM card before inserting a new one. Initial Battery After unpacking your T650T device, connect the power pack to the unit for eight Charging hours or until fully charged. The battery has a safety circuit to protect the Li-ion cells from overcharging and over-discharging. -
Page 20: Using The Battery
To manually shut down, hold the red key down for about 4 seconds until the device screen stays blank. The T650T device will only operate when the battery is installed unless connected to AC (Alternating Current) power, for example, in a stand. -
Page 21: Battery Life
Amber: indicates that it is charging. • White: indicates that it is fully charged. Battery Life Charging and discharging the T650T battery hundreds of times will wear out the battery. Significantly reduced operating times indicate the need for battery replacement (see Accessories and Cables for ordering information). -
Page 22: Charging Via The Power Pack
Insert the USB-C plug into the USB-C port of the wireless charging accessory. Plug the AC power pack into a wall outlet or powered surge protector. Set the rear cover of the Folio-equipped T650T device against the front face of the wireless charger. -
Page 23: Examining Connection Port
The device has dedicated input/output connectors: Ethernet, RS-232, USB-A, USB-C and DC power. Connection Port To Connect the Insert the power supply cable into the T650T device and plug the other end to the power supply. Terminal Power Supply Figure: 7 T650T Power... -
Page 24: To Connect The Terminal To A Pc
Installation Guide T650T To Connect the Insert the RS-232 cable to the T650T device and to the PC (Personal Computer). Terminal to a PC Figure: 8 Connecting to a PC To Connect the Insert the Ethernet cable to the T650T device and to the socket. -
Page 25: To Connect The Device To The External Pinpad
Installation Guide T650T To Connect the Insert the USB-A cable to the T650T device and the external PINpad (P400). Device to the External PINpad Figure: 10 Connecting to an External PINpad To Connect the Insert the USB-C cable to the T650T device and USB-A to download. -
Page 26: Manual Shutdown
Loading a Install a paper roll before you can start transactions that require a receipt. Paper Roll in The T650T stand uses a roll of 58 mm x 50 mm, single-ply, thermal-sensitive Device paper. A pink out-of-paper indicator line appears on the edge of the paper before the end of the roll. -
Page 27: Using The Smart Card Reader
Using the Insert the smart card to proceed with the EMV transaction. EMV supports credit card and debit card transactions. Smart Card Reader © VeriFone, Inc. All rights reserved. -
Page 28: To Conduct A Smart Card Transaction
To ensure a proper read of the magnetic swipe card, insert the magnetic card from the side of the device, as shown in the illustration below. Debit or Credit Card Transaction Figure: 14 Using Magnetic Stripe Card Swipe the card through the magnetic card reader. © VeriFone, Inc. All rights reserved. -
Page 29: Ctls Transaction
Figure: 15 Using the CTLS Reader Camera/QR The T650T device extends the use of the countertop device by providing the capabilities for barcode and OCR (Optical Character Recognition) scanning. Code Reader Wi-Fi/BT The T650T device includes an integrated WLAN (Wireless Local Area Network) RF... -
Page 30: External And Optional Devices
Installation Guide T650T External and Multiple cable configurations are provided for the T650T device that supports peripheral devices designed for use with electronic point-of-sale systems such as Optional Devices ECR (Electronic Cash Register), cash drawer, barcode scanner, external keyboard, weighing scale, external printer, external speakers, battery, and a USB connection. -
Page 31: Specifications
456 g Audio Jack • Audio: headphone jack, speaker and microphone Memory • 2GB RAM/16GB ROM or 1GB RAM/8GB ROM • 64GB Micro-SD Magnetic Card • Triple track Reader • Supports bi-directional card read © VeriFone, Inc. All rights reserved. -
Page 32: Smart Card Reader
Paper roll: Max 58 mm Length x Max 40 mm Diameter Camera/ • 5MP (front QR/Barcode Scanner) Barcode Scan • Embedded forward facing camera - 5MP • Front facing camera - 2MP • LED torch © VeriFone, Inc. All rights reserved. -
Page 33: General Care
Verifone authorized service provider for maintenance or replacement. Cleaning & Verifone devices should only be gently cleaned to remove dirt, residue, or debris using a lightly water-damped, clean microfiber cloth. One or two Sanitizing drops of pH-neutral, non-scrubbing soap may be used. -
Page 34: Cleaning Instructions
Installation Guide T650T Cleaning Turn off your device. Instructions Disconnect it from the power source. Clean it following the instructions and guidelines as mentioned above. Once completely dry, reconnect to power up. © VeriFone, Inc. All rights reserved. -
Page 35: Returning A Device For Service
Il est conseillé aux clients en dehors des États-Unis de contacter leur Verifone local représentant pour obtenir de l'aide concernant l'entretien, le retour ou le remplacement des appareils Et accessoires. - Page 36 • Reference the model and part number in the Note box. Each T650T returned to Verifone requires a distinct MRA number to be issued. Even if you are returning multiple terminals of the same model, ensure that a separate MRA number is issued for each unit.
-
Page 37: Verifone Certified Power Adapter
Installation Guide T650T 6. Accessories and Cables Verifone provides a range of accessories and documentation for the T650T. When placing orders, it is essential to reference the specific part numbers. Here are the available channels for ordering: Verifone online store: •... - Page 38 Utilizing services from unauthorized parties may potentially void any existing warranty. All units require the use of a power supply. Only use a Verifone-supplied power pack. Using an incorrectly rated power supply may damage the unit or cause it to malfunction. Ensure that the power supply used to power the unit matches...
-
Page 39: Device Does Not Start/Does Not Display Correct Readable Information
Verify all the cable connections including the proper insertion of the power Correct cable connector. Readable • If the problem persists, reach out to your local Verifone representative for Information assistance. Blank Display When the device display is blank: •... -
Page 40: Checking Smart Card Reader
(refer to Installing or Replacing SIM/SAM Card). If the issue persists, get in touch with your local Verifone representative. Checking CTLS To check the CTLS reader: Make sure there are no obstructions between the contactless logo and the... - Page 41 As commerce experts, we are here for you and your business. With our payment devices, our systems & solutions and our support. Everywhere. Anytime. So that your customers feel enabled, recognized and well taken care of, even beyond their expectations. Verifone. Creating omni-commerce solutions that simply shape powerful customer experiences.
Need help?
Do you have a question about the T650T and is the answer not in the manual?
Questions and answers