Sennheiser SKM 5200 Instructions For Use Manual
Hide thumbs
Also See for SKM 5200:
- Product sheet (3 pages) ,
- Specification (1 page) ,
- Specification (1 page)
Table of Contents
Advertisement
Advertisement
Table of Contents

Related Manuals for Sennheiser SKM 5200


Summary of Contents for Sennheiser SKM 5200
- Page 1 SKM 5200 Instructions for use...
-
Page 2: Table Of Contents
Overview of the operating menu ..........21 Adjustment tips for the operating menu ........23 Selecting a channel – CHAN ............23 Selecting the frequencies to be stored in the channel bank “VAR” – TUNE ................23 Entering a name –... -
Page 3: Safety Instructions
Safety instructions Please read these instructions carefully and completely before using the radio microphone. Make these instructions easily accessible to all users at all times. Always include these instructions when passing the radio microphone on to third parties. Never open electronic units! If units are opened by customers in breach of this instruction, the warranty becomes null and void. -
Page 4: Delivery Includes
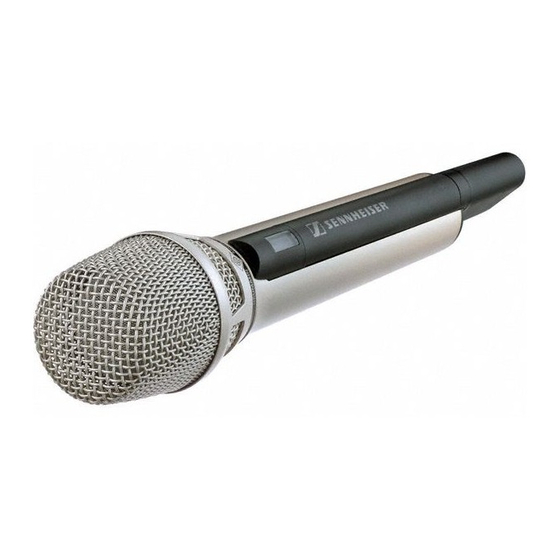
The SKM 5200 radio microphone The SKM 5200 is a professional hand-held radio microphone trans- mitter that is easy to use and is easily adaptable to a wide variety of applications: Suitable for all-purpose use, e.g. for reporting, stage and studio applications. - Page 5 Can be operated either on rechargeable or standard alkaline batteries – with LC display (in percent) of charging status on suitable receivers. HiDyn plus™ noise reduction system ensures a wide dynamic range and low residual noise. Color-coded identification markers for quick and unambiguous identification.
-
Page 6: The Operating Controls
Alphanumeric display (not included in the Level display for audio delivery) signal “AF” Body of radio microphone “RF” – appears when an Power pack RF signal is transmitted (not included in the “CH” – appears when the delivery) channel number is displayed Battery compartment “dB”... -
Page 7: Indications And Displays
Transmitter activity indication A short time after switch-on, “RF” appears on the display panel, indicating that the transmitter is active. Display backlighting When the lock mode is deactivated, the display remains backlit for approx. 20 seconds after pressing a button. -
Page 8: Preparing The Radio Microphone For Use
Inserting, removing and changing the power pack For powering the radio microphone, you can either use the Sennheiser B 5000 battery box (1.5 V AA size batteries) or the rechargeable Sennheiser BA 5000 battery pack. For regular use, we recommend using the environmentally friendly rechargeable BA 5000 battery pack. - Page 9 Recharging the BA 5000 battery pack Before using the BA 5000 battery pack for the first time or if you have not used it for several weeks, you must charge the battery pack completely.
-
Page 10: Changing The Microphone Head
Note: The battery pack is carefully charged using the − ΔU-method. For further details, please refer to the user manual of the L 50 charger. LC display shown on the example of the BA 5000-1 battery pack 6-step LC display for (remaining) battery pack capacity. -
Page 11: Switching The Radio Microphone On/Off
The LC display remains backlit for approx. 20 seconds. Note: Remove the batteries or the battery pack when the radio mi- crophone will not be used for extended periods of time. The radio microphone can only be switched off when the... -
Page 12: Doing A Frequency Check
Doing a frequency check The radio microphone has a frequency check mode that prevents that the radio microphone transmits on an unwanted frequency after switch-on. When switching on the device, keep the red button depressed. The current frequency is displayed on the display panel without the ra- dio microphone transmitting. -
Page 13: The Operating Menu
( ) or changing to the next parameter ( ) Selection mode Changing to the previous menu ( ) or changing to the next menu ( ) Setting mode Increasing ( ) or reducing ( ) the setting of the selected menu... -
Page 14: The Automatic Lock Mode (Autolock Function)
The automatic lock mode (autolock function) The radio microphone has a lock mode that prevents that the radio microphone is accidentally programmed while operating. When the autolock function is activated via the “LOCK” menu (see “Activating/deactivating the automatic lock mode – LOCK” on page 27) the lock mode is automatically activated 10 seconds after pressing the last button and remains activated. -
Page 15: Working With The Operating Menu
– even when the lock mode is activated. Selection mode In selection mode, you can select the menu whose setting you want to change. To change to the selection mode, the lock mode must be deactivated. Setting mode In setting mode, you can change the setting of the selected menu. - Page 16 Displaying the menu settings in display mode In display mode, and with the lock mode activated, you can display the current menu settings one after the other (see “Overview of the operating menu”...
- Page 17 (DOWN), the multi-function switch features a “fast search” function, i.e. the display cycles continuously. In the “TUNE” menu, the cycling of the display is continuously accelerated. The “fast search” function allows you to get fast and easily to your desired setting.
- Page 18 With most menus, new settings become effective immediately without having to be stored. An exception are the “TUNE” and “CHAN” menus. With these menus, new settings only become effective after they have been stored (“STORED” appears on the display panel, indicating that the setting has been stored).
-
Page 19: Overview Of The Operating Menu
Overview of the operating menu Deactivate the lock mode before adjusting the settings (see “Deactivating the autolock function temporarily” on page 16). Pressing the red button will cancel your entry (ESC function) and return you to the display mode. Display mode... - Page 20 SET: Stores the setting Current attenuation STORED LOWCUT Adjusting the Current Current FLAT, low-cut-frequency low cut frequency low-cut-frequency 120 Hz, 190 Hz STORED VAR. 01 VIEW NAME FREQ Selecting the Current FREQ, standard display standard display CHAN, NAME STORED RESET RST.
-
Page 21: Adjustment Tips For The Operating Menu
Adjustment tips for the operating menu Selecting a channel – CHAN Via the “CHAN” menu, you can switch between the channels in the channel banks “FIX“ and “VAR“. The radio microphone is not transmitting while this adjustment is being made. - Page 22 (UP) or (DOWN). Store your setting. You can change to a different channel and set a new frequency for the new channel: Press the multi-function switch for a longer time (switch position ). The current channel flashes on the display.
-
Page 23: Entering A Name - Name
Entering a name – NAME Via the “NAME” menu, you can enter a freely selectable name for the radio microphone. This name can be displayed on the standard display and can consist of up to six characters such as: letters (without pronounciation marks), numbers from 0 to 9, special characters and spaces. -
Page 24: Adjusting The Low-Cut Frequency - Lowcut
190 Hz or 120 Hz. If you do not want to reduce low-frequency signal portions, select the setting “FLAT”. Selecting the standard display – VIEW Via the “VIEW” menu, you can select one of the following standard displays: Transmission Channel Name “NAME”... -
Page 25: Activating/Deactivating The Automatic Lock Mode - Lock
Store your setting. Exiting the operating menu – EXIT Via the “EXIT” menu, you can exit the operating menu and return to the standard display. When in the operating menu, briefly pressing the red button will cancel your entry (ESC function) and return you to the standard... -
Page 26: If Problems Occur
Receiver’s output level Reduce the line output is adjusted too high level If problems occur that are not listed in the above table or if the problems cannot be solved with the proposed solutions, please contact your local Sennheiser agent for assistance. -
Page 27: Maintenance And Care
Tips for optimum reception The transmission range depends to a large extent on the location and can be up to 150 m. There should be a “free line of sight” between transmitting and receiving antennas. To avoid overmodulating the receiver, observe a minimum distance of 5 m between transmitting and receiving antennas. -
Page 28: Specifications
FM Frequency range 450–960 MHz Switching bandwidth 36 MHz Transmission frequencies channel bank “FIX” with customer- specific frequencies channel bank “VAR” with 20 freely selectable frequencies (frequencies tunable in steps of 5 kHz) 50 mW (–3 dB) at 50 Ω... -
Page 29: Accessories
008534 Neumann KK 104 S microphone head 005273 B 5000-1 battery box 005274 BA 5000-1 battery pack incl. charging adapter for the L 50 charger 003554 L 50 charger (for BA 5000 battery pack) 051662 Charging adapter for L 50 charger... -
Page 30: Manufacturer Declarations
The guarantee is void if the product is manipulated by non-authorised persons or repair stations. In the case of a claim under the terms of this guarantee, send the device, inclu- ding acces-sories and sales receipt, to the responsible service partner. To mini- mise the risk of transport damage, we recommend that the original packaging is used. - Page 32 Sennheiser electronic GmbH & Co. KG 30900 Wedemark, Germany Phone +49 (5130) 600 0 Fax +49 (5130) 600 300 www.sennheiser.com Printed in Germany Publ. 01/07 512717/A03...
Need help?
Do you have a question about the SKM 5200 and is the answer not in the manual?
Questions and answers