Telex AIRMAN8P-0211 Operation Manual
Double side anr headset, 2pj,xlr5,p5p, 600 ohm
Hide thumbs
Also See for AIRMAN8P-0211:
- Customer maintenance manual (48 pages) ,
- Operation manual (41 pages) ,
- Operation manual (38 pages)

Subscribe to Our Youtube Channel
Related Manuals for Telex AIRMAN8P-0211


Summary of Contents for Telex AIRMAN8P-0211
- Page 1 AIRMAN8+ AIRMAN8P‑0210 DOUBLE SIDE ANR HEADSET, 2PJ, 600 OHM AIRMAN8P‑0211 DOUBLE SIDE ANR HEADSET, XLR5, 600 OHM AIRMAN8P‑0212 DOUBLE SIDE ANR HEADSET P5P, XLR5, 600 OHM Operation manual...
-
Page 3: Table Of Contents
AIRMAN8+ Table of contents | en Table of contents Front matter Important! Introduction Reference View Connection Installation Plug the headset into the aircraft 5.1.1 Install the dual plug headset in an aircraft 5.1.2 Install the XLR plug headset in an aircraft Adjust the headband Adjust the microphone Clothing clip assembly and attachment... -
Page 4: Front Matter
**All other trademarks are property of their respective owners. Warranty and service For warranty and service information, see http://www.telex.com/warranty. Customer support Technical questions should be directed to: Customer Service Department Bosch Security Systems, LLC http://www.telex.com/aviation... -
Page 5: Important
Always keep the headset dry and do not expose it to extreme temperatures to avoid corrosion or deformation. – Never attempt to repair a headset which is not operating correctly. Contact the Telex dealer you purchased the headset through or an authorized repair facility. –... -
Page 6: Introduction
The Airman 8+ is among the lightest Active Noise Reduction headsets on the market and one of only three FAA TSO C139a approved ANR headsets to utilize Telex’s proprietary battery-free system. Soft pliable ear cushions and headband pads combine with dual direction ear cup pivots to provide long flight wearing comfort. - Page 7 AIRMAN8+ Introduction | en Environmental Qualification Form Conditions DO-160G Section Description of Tests Conducted Temperature and Altitude Ground Survival Low-Temp / 4.5.1 Equipment tested to Short-Time Operating Low-Temp Category A1 Operating Low Temperature 4.5.2 Equipment tested to Category A1 Ground Survival High-Temp & 4.5.3 Equipment tested to Short-Time Operating High Temp...
- Page 8 en | Introduction AIRMAN8+ Conditions DO-160G Section Description of Tests Conducted Salt Fog Test 14.0 Not Applicable Magnetic Effect 15.0 Equipment tested to Category Z Power Input 16.0 Equipment tested to Category A Voltage Spike 17.0 Equipment tested to Category A Audio Frequency Susceptibility 18.0 Not Applicable...
-
Page 9: Reference View
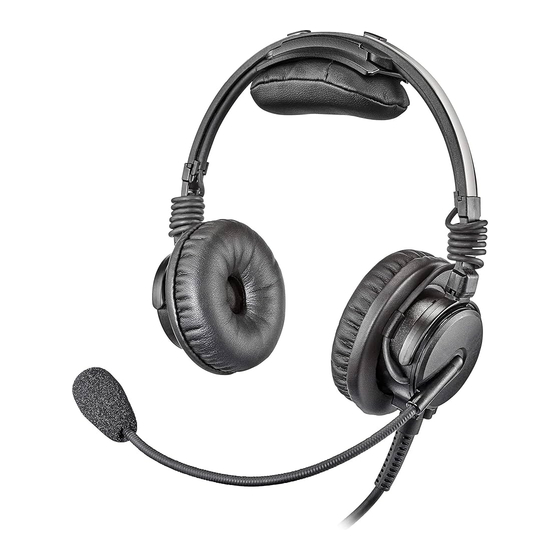
AIRMAN8+ Introduction | en Reference View Headband Pad Headband Pad Holder Headset Gliders Ear Cushions Boom Rotator Windscreen / Microphone Cord with Strain Relief Boom Bosch Security Systems, LLC 2022-05 | 03 | F.01U.380.818 Operation manual... -
Page 10: Connection
Mic Signal (ANR Power +) Sleeve Mic GND (ANR Power -) PJ-055 or equivalent Description Headphone Signal Sleeve Headphone GND 5-Pin XLR Aircraft Cable Figure 4.2: 5-pin XLR Connector, AIRMAN8P-0211 Pin Description Color Headphone Signal Yellow Headphone GND Black/Outer Shield Mic Power and White Signal... - Page 11 AIRMAN8+ Connection | en Notice! The Airman8P-0211 automatically uses power from pin 5 if it is provided by the aircraft. 5-Pin XLR Aircraft Cable, AIRMAN8P-0212 Figure 4.3: 5-pin XLR Connector, AIRMAN8P-0212 Pin Description Color Headphone Signal Yellow Headphone GND Black (ANR Power -)
-
Page 12: Installation
en | Installation AIRMAN8+ Installation To install the headset for use, do the following: Inspect the headset for signs of damage. Do not use the headset if signs of damage are evident. Plug the headset into the aircraft console. For more information, see Plug the headset into the aircraft, page 12 . -
Page 13: Adjust The Headband
AIRMAN8+ Installation | en Adjust the headband The Airman 8+ headset is designed to rest evenly on top of the head with each ear cup sitting centered and flush on each ear. The headset should fit over the head without pinching or gapping. -
Page 14: Clothing Clip Assembly And Attachment
en | Installation AIRMAN8+ Caution! There are boom rotation stops on each side of the boom rotation. The boom mic is adjusted upward to move to the other side of the headset. Do not adjust the boom past the built-in stops. Adjusting the boom past the built-in stops will damage the microphone. - Page 15 AIRMAN8+ Installation | en Depress the button. Thread the headset cable through the cable tunnel. Release the button to secure the cable. To attach the clothing clip, do the following: Pinch the levers together to open the clip. Attach the clip to the clothing. Allow enough slack in the cable for movement. Release the clip to secure it to your clothing.
-
Page 16: Operation
The AIRMAN8P-0211 and AIRMAN8P-0212 use power obtained from the aircraft through the boom microphone connection (microphone bias voltage). The AIRMAN8P-0211 can also use power from pin 5 of the XLR connection, if available. The AIRMAN8P-0212 requires 8-28 VDC applied to pin 5 of the XLR for ANR operation. - Page 17 AIRMAN8+ Operation | en Switch Volume Adjustment ANR ON ANR ON ANR OFF ANR OFF Figure 6.1: ANR Switch Notice! The ANR switch ships in the on position and usually does not need to be turned off. To start ANR, do the following: Move the ANR switch into the up position (located on the ear cup with the mic).
-
Page 18: Headphone Volume Adjustment
en | Operation AIRMAN8+ Headphone volume adjustment The Airman 8+ is equipped with a headset volume adjustment switch. When required, the user can increase or decrease the headphone volume level by moving the switch from normal to high. Notice! The Airman 8+ is shipped in the normal position and functions properly with most avionics equipment. - Page 19 AIRMAN8+ Operation | en Notice! Because this switch is inside the headset, use a small pointed object, such as a paperclip, to change the switch setting. Bosch Security Systems, LLC 2022-05 | 03 | F.01U.380.818 Operation manual...
-
Page 20: Faq
en | FAQ AIRMAN8+ Refer to – Replace the windscreen, page 31 – Headphone volume adjustment, page 18 – Replace the ear cushions, page 26 – Adjust the microphone, page 13 – Adjust the headband, page 13 Troubleshooting Issue Possible Cause Solution No one can hear me when I Microphone not connected... - Page 21 AIRMAN8+ FAQ | en Issue Possible Cause Solution Microphone windscreen is Replace the windscreen. For missing or needs to be more information on replaced. windscreen replacement, see Replace the windscreen, page 31 . Pilot is speaking too loudly or Alter speaking level. Increase too quietly into the the sidetone level on the microphone.
- Page 22 en | FAQ AIRMAN8+ Issue Possible Cause Solution Sidetone volume levels are Adjust the sidetone level on not correct (only applies to the intercom or radio system, not being able to hear if applicable. The headset yourself over sidetone. does not create or modify sidetone level.
- Page 23 AIRMAN8+ FAQ | en Issue Possible Cause Solution Headphones are not worn Reposition headphones to properly ensure properly covering the ear. For more information on proper position, see Adjust the headband, page 13 . ANR system is not After verifying all proper functioning.
-
Page 24: Label Information
| FAQ AIRMAN8+ Issue Possible Cause Solution ANR function is not Contact Telex customer compatible with Aircraft service to determine if there systems. are any known compatibility issues. Refer to – Adjust the microphone, page 13 – Replace the windscreen, page 31 –... -
Page 25: Maintenance
AIRMAN8+ Maintenance | en Maintenance Recommended maintenance schedule Notice! Ear cushions, headband pads, and microphone wind screens are considered wear items. For proper headset performance, these items need to be inspected and replaced at regular intervals. See the maintenance schedule below for more information. Headset performance diminishes if items are not replaced when deterioration or damage is apparent. -
Page 26: Clean The Ear Cushions And Headband Pads
en | Maintenance AIRMAN8+ Clean the ear cushions and headband pads Notice! Do not soak cushions or pads. To clean the ear cushions and headband pads, do the following: Gently wipe the ear cushions and headband pad thoroughly with a damp (not wet) soft towel or isopropyl alcohol wipe. - Page 27 AIRMAN8+ Maintenance | en Secure the cushion in place around the bottom of the ear cup. Make sure the cushion is seated properly on the ear cup. Bosch Security Systems, LLC 2022-05 | 03 | F.01U.380.818 Operation manual...
-
Page 28: Replace The Headband Pads
en | Maintenance AIRMAN8+ Replace the headband pads To remove the headband pads, do the following: Grasp the edge of the headband pad. Gently pull the headband pad away from the headband. 2022-05 | 03 | F.01U.380.818 Bosch Security Systems, LLC Operation manual... - Page 29 AIRMAN8+ Maintenance | en To replace the headband cushions, do the following: Align the headband pad with the recessed area on the headband. Firmly press the headband cushion into place. Bosch Security Systems, LLC 2022-05 | 03 | F.01U.380.818 Operation manual...
-
Page 30: Replace The Headband Pad Holder
en | Maintenance AIRMAN8+ Replace the headband pad holder The Airman 8+ comes with two headband pads, a small one and a large one. To replace the headband pad, do the following: Slide the existing headband pad holder left or right to remove it from the headband. Align and push the smaller headband pad holder onto the headband. -
Page 31: Replace The Windscreen
AIRMAN8+ Maintenance | en Replace the windscreen The foam windscreen can be cleaned using low pressure air to blow contaminates off from the exterior. If low pressure air does not provide effective results, the windscreen should be replaced. Notice! Do not use any liquid on the foam windscreen. To remove the windscreen, do the following: Grasp the microphone windscreen and gently pull away from the microphone. -
Page 32: Headset Storage
en | Maintenance AIRMAN8+ To replace the windscreen, do the following: Slide the new windscreen over the microphone. Headset storage Figure 8.2: Airman 8+ carrying case To store the headset, do the following Move the boom mic above the headband. Wind the cord into a loop. Place the coiled cord and headset in the carrying case. -
Page 33: Technical Data
AIRMAN8+ Technical data | en Technical data Headphones Type: Dynamic Impedance: 600 Ω ±20% @ 1 kHz Frequency Response: (Per RTCA DO-214a) < 15 dB max. to min. over the range 315 to 3150 Hz Sensitivity (Per RTCA DO-214a) 92 dB ±5 dBSPL (normal) 98 dB ±5 dBSPL (high) Microphone and Amplifier Element Type:... - Page 34 15 dB (minimum) of attenuation between 100 Hz and 300 Hz. Connector Type For model AIRMAN8P-0210 Dual Plug Connector Microphone: PJ-068 or equivalent Headphones: PJ-055 or equivalent For model AIRMAN8P-0211, -0212 XLR Connector Microphone and 5-pin Male XLR Headphones: Physical Weight: Headset weight (with...
-
Page 35: Appendix A - Ordering And Part Number Information
Appendix A - Ordering and Part Number Information Part Number Information Item Type Description AIRMAN8P-0210 Double Side ANR Headset, 2PJ, 600 Ohm AIRMAN8P-0211 Double Side ANR Headset, XLR5, 600 Ohm AIRMAN8P-0212 Double Side ANR Headset, P5P, XLR5 600 Ohm AIRMAN8P-0908 Replacement... - Page 36 | Appendix A - Ordering and Part Number Information AIRMAN8+ 2022-05 | 03 | F.01U.380.818 Bosch Security Systems, LLC Operation manual...
- Page 37 AIRMAN8+ Appendix A - Ordering and Part Number Information | Bosch Security Systems, LLC 2022-05 | 03 | F.01U.380.818 Operation manual...
- Page 38 | Appendix A - Ordering and Part Number Information AIRMAN8+ 2022-05 | 03 | F.01U.380.818 Bosch Security Systems, LLC Operation manual...
- Page 40 TELEX 12000 Portland Avenue South Burnsville MN 55337 www.telex.com © Bosch Security Systems, LLC, 2022 F 0 1 U3 8 0 8 1 8 202205252147...
Need help?
Do you have a question about the AIRMAN8P-0211 and is the answer not in the manual?
Questions and answers