Table of Contents
Advertisement
Advertisement
Table of Contents

Related Manuals for Telex Ascend Series


Summary of Contents for Telex Ascend Series
- Page 1 LIT000403000 Rev A 12/2009...
- Page 2 ROPRIETARY OTICE IMITATION OF EMEDIES ERTAIN AMAGES XCLUDED : The product information and design disclosed herein were originated by and are the property of Bosch Security Systems, Inc. Bosch reserves all REPAIR OR REPLACEMENT OF DEFECTIVE PRODUCTS ARE patent, proprietary design, manufacturing, reproduction, use and sales THE SOLE AND EXCLUSIVE REMEDIES PROVIDED BY BOSCH rights thereto, and to any article disclosed therein, except to the extent TO THE CUSTOMER OR TO ANY OTHER PERSON AND SHALL...
- Page 3 TSO standards. TSO articles may have separate approval for installation on aircraft. The article may be installed only if performed under 14 CFR part 43 or the applicable air-worthiness requirements. The Telex Ascend Headset is TSO-C139 approved. Tests were conducted using RTCA DO-214 and DO-160E. The headset was designed and is manufactured to meet the following environmental categories:...
- Page 4 Headset Configuration Table NOTE: The table below displays the combination of the headset and cord/boom assembly which have been FAA TSO C139 approved. An Airworthy headset consists of at minimum two (2) pieces: 1 - headset frame 1 - cable or cable boom assembly TSO Approved Final Assembly Headset Frame Part Number Cord/Boom Part Number...
-
Page 5: Table Of Contents
Table Contents ............................4 EADSET ONFIGURATION ABLE INTRODUCTION ............................3 Important Safety Instructions ............................3 General Description ..............................3 Features ..................................4 Headset – Single-Sided ..............................5 Dual-Sided Headset Reference Diagram ........................6 Filler Module ................................7 Battery Charger .................................7 Battery Charger Power Supply ..........................8 CONFIGURATION AND INSTALLATION ....................9 Before First Use ................................9 .................................9 ATTERY... - Page 6 ................................25 EPLACE THE ATTERY ................................26 HARGE THE ATTERY WIRING DIAGRAMS ..........................29 SPECIFICATIONS .............................31 Specifications ................................31 TROUBLESHOOTING AND FAQS ......................33 ? .........................33 HERE DO SEND MY HEADSET FOR REPAIR ANR (A ....................33 CTIVE OISE EDUCTION IS NO LONGER WORKING .
- Page 7 List Figures FIGURE 1. Single-Sided Headset Reference View ....................5 FIGURE 2. Dual-Sided and ANR Dual-Sided Headset Reference View ..............6 FIGURE 3. Filler Module ............................7 FIGURE 4. Battery Charger Reference Diagram ....................7 FIGURE 5. Standard Power Supply and Plug Adapters ..................8 FIGURE 6.
-
Page 9: Introduction
The battery used with these headsets is a Lithium based unit. This unit must only be charged with the Telex specified battery charger. Care should be used when transporting the battery; when not installed in a headset, battery terminals must not contact any continuous conductive surface, as this may result in a short circuit situation. -
Page 10: Headset Configuration Table
Features Three (3) Headset Frame The Ascend gives you three (3) options when selecting the type of headset perfect for your Options - environment: Single-Sided Headset without ANR (Active Noise Reduction) • Dual-Sided Headset without ANR • Dual-Sided Headset with ANR •... -
Page 11: Headset - Single-Sided
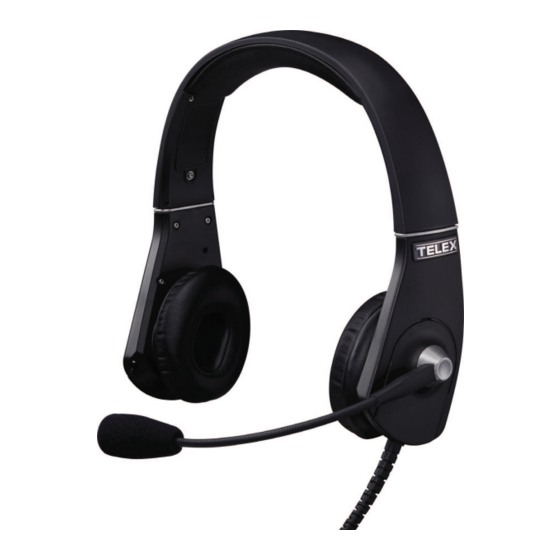
Headset – Single-Sided Single-Sided Headset Reference View FIGURE 1. Headset Adjustment Slider. For more information, see “Headset Adjustment and Sizing” on page 15. Headband Cushion Temple Pad Ear Cushion Windscreen Boom Mic... -
Page 12: Dual-Sided Headset Reference Diagram
Dual-Sided Headset Reference Diagram Dual-Sided and ANR Dual-Sided Headset Reference View FIGURE 2. Headset Slider Headband Cushion ANR Switch (ANR equipped module only) Battery Module/Filler Module Ear Cup Cushions Microphone Module Microphone Windscreen... -
Page 13: Filler Module
Filler Module Filler Module FIGURE 3. The Filler Module can be used to fill any unused module spots. It can be used on either side of the headset, left or right ear cup. Battery Charger Battery Charger Reference Diagram FIGURE 4. Operation Mode LED - For more information, see “Battery Module”... -
Page 14: Battery Charger Power Supply
Battery Charger Power Supply Standard Power Supply and Plug Adapters FIGURE 5. Standard Power Supply Wall Pack US Plug (standard) World Power Supply Adapters (Optional - p/n PRD000253005) UK Plug (optional) Euro Plug (optional) Australian Plug (optional) -
Page 15: Configuration And Installation
CHAPTER 2 Configuration and Installation CAUTION: The Ascend was designed for use in multiple application settings. When using the headset in an aviation application, use the following sections to verify the proper configuration and settings. Before First Use Battery Charging For information on charging the battery, see “Charge the Battery”... -
Page 16: Installation Instructions
Installation Instructions NOTE: The Ascend headset dip switches have been set from the factory for use in the most common applications. We recommend these switches not be changed unless necessary. Aircraft Installation REQUIREMENTS: The minimum requirements (see “Headset Configuration Table” on page 4) needed for a typical aviation configuration include the following: Headset (either single-sided or dual-sided) •... -
Page 17: Audio Input Installation
Install the XLR Plug Headset in an Aircraft To install the XLR plug headset in an aircraft, do the following: Insert the XLR plug into the XLR jack on the aircraft audio panel. > XLR Plug Installation FIGURE 7. For a detailed XLR plug wiring diagram, see Figure 28 on page 29. Audio Input Installation The Ascend headset can also be used to listen to music, GPS information, etc. -
Page 19: Operation And Maintenance
CHAPTER 3 Operation and Maintenance Operation Instructions Remove and Replace Modules All input modules, batteries, filler modules, etc. are removed and replaced the same way. When removing a module, put only enough pressure on the module release button to pop the module IMPORTANT: out. - Page 20 Slide the module out and up taking care to clear the mounting tab from the mounting tab hole. Sliding module out of ear cup FIGURE 9. To replace a module, do the following: Align the mounting tab with the mounting tab hole (see Figure 10). Align Mounting Tab FIGURE 10.
-
Page 21: Headset Adjustment And Sizing
Press down on the module, snapping it into the ear shell. Snap Module in Place FIGURE 11. Headset Adjustment and Sizing The headset should fit comfortably over the head and ears without pinching or gapping. A comfortable fit is conducive to effective and pleasant use. -
Page 22: Boom Mic Adjustment
Swivel the ear shell left or right to position the ear cup straight on the ear. Up and Down Movement of headband and Side to Side Movement of Ear Cup FIGURE 13. Boom Mic Adjustment From the factory, the boom mic is installed on the left side of the headset. However, you can interchange the boom mic for right-side use, see “Remove and Replace Modules”... -
Page 23: Turn The Anr On/Off (Anr Capable Headset Only)
Turn the ANR On/Off (ANR Capable Headset Only) ANR is used to reduce unwanted noise in the headset from the surrounding environment. The ANR switch is located on the left ear shell, as seen in Figure 15. ANR Switch FIGURE 15. To turn ANR on, do the following: On the left ear cup, move the ANR switch to the up position. -
Page 24: Configure The Speaker Volume
Configure the Speaker Volume Speaker Volume is configured using dip switch settings located on the main board of the headset. The switch bank is located on the boom mic module and the listen only module. To access the dip switches, do the following: NOTE: Dip switches are located on the boom mic module and the listen only module. -
Page 25: Set Mono Or Left Only Mode
Set Mono or Left Only Mode Audio on the headset can be configured to be heard either Mono or Left Only. This means it can come from both sides of the headset or from the left side only. This configuration is done through setting dip switches located on the interface module. Dip Switch Settings NOTE: The two (2) left-most switches are used to configure mono or left only operation. -
Page 26: Replace The Earcup And Headband Cushion
Replace the Earcup and Headband Cushion There are two (2) cushion replacement points on the Ascend Headset; two (2) ear cup cushions for dual-sided headsets (one (1) ear cup cushion for single-sided headsets) and one (1) headband cushion. To replace the ear cup cushion, do the following: Grasp the old ear cushion and pull it off the ear cup. -
Page 27: Replace The Windscreen
Align the new headband cushion (loop) to the headband loop material. Firmly press the new headband cushion in place. Replace the Windscreen To replace the wind screen, do the following: Remove the existing windscreen from the boom mic and throw away. Gently push the new windscreen over the boom mic (see Figure 19). -
Page 28: Adjust Microphone Gain
Adjust Microphone Gain The microphone gain has been factory-adjusted to the nominal level required for aviation use, and should not require adjustment. Any changes to the microphone gain should be done by a qualified avionics technician. NOTE: Adjustments should be made in small increments. To adjust the gain trimmer, do the following: Insert a small, flathead screwdriver through the access hole in the boom mic module. -
Page 29: Store/Transport The Headset
Store/Transport the Headset For storing or transporting your Ascend headset, use the protective carrying case the headset is shipped in. For placement of the headset in the carrying case, see Figure 21. Carrying Case FIGURE 21. -
Page 31: Battery Module
CHAPTER 4 Battery Module Battery Module The battery module is only used to: provide power for the ANR when the aircraft does not • provide power for the ANR when not connected to the aircraft • provide enhanced audio quality when the audio input module is installed. •... -
Page 32: Charge The Battery
Charge the Battery Before installing the battery for the first time, charge the battery for at least an hour and a half to ensure IMPORTANT: a fully charged unit. A fully charged battery lasts approximately 40 hours between charges. Battery Charger Reference Diagram FIGURE 22. - Page 33 Turn the new adapter clockwise to lock it in place. To charge a battery, do the following: Plug the power supply into an electrical outlet. Attach the power supply to the charger. The LED lights green. Attach Power Supply to Charger FIGURE 24.
- Page 34 Press down on the battery module, snapping it into the battery module. The LED lights red while the battery is charging, and lights green when it is finished charging. Snap Module in Place FIGURE 26.
-
Page 35: Wiring Diagrams
CHAPTER 5 Wiring Diagrams Dual Plug Wiring Diagram FIGURE 27. 5-Pin XLR (male) Wiring Diagram FIGURE 28. - Page 36 Music/Entertainment Module Connector Wiring Diagram FIGURE 29.
-
Page 37: Specifications
CHAPTER 6 Specifications Specifications Headset XLR panel power / input power 6mA @ 28Vdc Speaker Frequency Response ±6dB, 350Hz - 6kHz Distortion <10% @ 110dB SPL, 350Hz - 3kHz Sensitivity 90 ±5dB SPL/mW (standard volume setting) Impedance at Plug 600: ±20% Overload 300mW @ 1kHz, 8hr Acoustic Quality... - Page 38 Insulation Resistance >10M between exposed materials and electrical circuit Cord Flexibility No damage when coiled Connector Flexibility >25,000 cycles Pullout Strength >10kg Drop Resistance No failures after 12 drops from 1m onto concrete floor Final Distortion Meets mic and speaker distortion requirements after applicable environmental tests of DO-160 Noise Reduction (where applicable) Up to 12dB noise reduction between 100Hz to 2000kHz Receives power from boom microphone connection (microphone equipped versions only)
-
Page 39: Troubleshooting And Faqs
CHAPTER 7 Troubleshooting and FAQs PROBLEM SOLUTION Where do I send my headset for repair? If the headset is new (less than 30 days), call the dealer • you purchased it from and get a replacement. If the headset is more than 30 days old and less than •... -
Page 40: Ineed Parts For My Headset
PROBLEM SOLUTION I need parts for my headset. Contact technical support for the part number you are • looking for. Technical Support phone number 1.800.898.6723 • I want to repair my headset at home. We have custom developed test equipment which is •... -
Page 41: Available Accessories
Available Accessories Ear Cushion, Pair ..................................PRD000253000 Microphone Windscreen ................................PRD000253001 Headband Pad ....................................PRD000253002 Battery......................................PRD000253003 Battery Charger North America..............................PRD000253004 World Power Supply Adapters..............................PRD000253005 Audio Input Cable..................................PRD000253006 Single-Sided Passive Headset Frame Assembly.......................... PRD000253007 Double-Sided Passive Headset Frame Assembly ........................PRD000253008 Analog ANR Headset Frame Assembly ............................ - Page 42 Bosch Security Systems, Inc. Telex Headsets Phone: 1.800.898.6723 (technical support) Email: acttechsupport@us.telex.com Website: www.telex.com/aircraft...
Need help?
Do you have a question about the Ascend Series and is the answer not in the manual?
Questions and answers