Table of Contents
Advertisement
Quick Links
Advertisement
Table of Contents

Subscribe to Our Youtube Channel
Related Manuals for Chauvet Professional STRIKE Bolt 1C


Summary of Contents for Chauvet Professional STRIKE Bolt 1C
- Page 1 User Manual Model ID: STRIKEBOLT1C...
- Page 2 Edition Notes The STRIKE Bolt 1C User Manual includes a description, safety precautions, installation, programming, operation, and maintenance instructions for the STRIKE Bolt 1C as of the release date of this edition. Trademarks Chauvet, Chauvet Professional, the Chauvet logo, and STRIKE are registered trademarks or trademarks of Chauvet &...
-
Page 3: Table Of Contents
DMX Channel Assignments and Values ............Control Chart ..................... 20 Beam Patterns ....................20 40Ch / 27Ch / 25Ch ..................21 20Ch /17Ch / 13Ch / 11Ch ................23 10Ch........................24 Standalone Configuration................STRIKE Bolt 1C User Manual Rev. 1... - Page 4 Display Back Light....................27 Product Information.................... 28 Upgrade Firmware ..................... 28 Factory Reset..................... 28 Master/Slave ...................... 28 5. Maintenance................Product Maintenance ..................Torque Measurements .................. 6. Technical Specifications ............Contact Us ..................Warranty & Returns..................STRIKE Bolt 1C User Manual Rev. 1...
-
Page 5: Before You Begin
Any reference to data or power connections in this manual assumes the use of Seetronic IP rated cables. The term “DMX” used throughout this manual refers to the USITT DMX512-A digital data transmission protocol. STRIKE Bolt 1C User Manual Rev. 1... -
Page 6: Safety Notes
• In the event of a serious operating problem, stop using immediately. If this Chauvet product requires service, contact Chauvet Technical Support. STRIKE Bolt 1C User Manual Rev. 1... -
Page 7: Fcc Statement Of Compliance
LEDs, contributing to shorter lifespans if always used at full intensity. The average LED lifespan is 40,000 to 50,000 hours. To extend LED lifespan, maintain proper ventilation around the product, and limit the overall intensity. STRIKE Bolt 1C User Manual Rev. 1... -
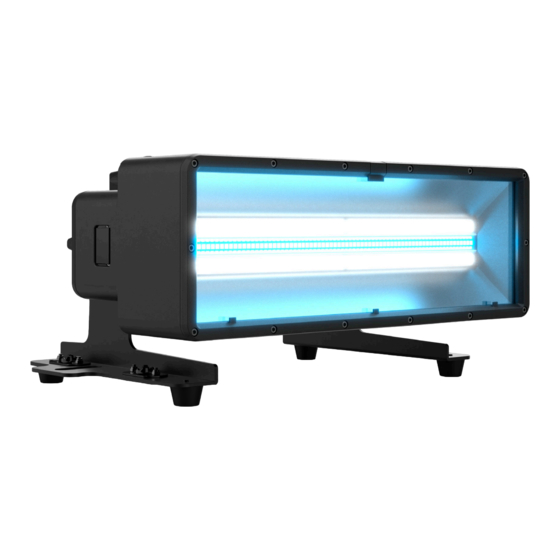
Page 8: Introduction
Its included stealth filter can be attached to make the fixture nearly disappear for on-camera use. STRIKE Bolt 1C delivers a classic strobe look with modern performance ideal for concert and touring, festivals and event productions in any environment, live or broadcast, indoors or out. -
Page 9: Product Dimensions
Introduction Product Dimensions 15 in 380 mm 5.2 in 131 mm 7.6 in 192 mm 9.1 in 232 mm 8.4 in 213 mm STRIKE Bolt 1C User Manual Rev. 1... -
Page 10: Setup
3. Setup AC Power The STRIKE Bolt 1C has an auto-ranging power supply and it can work with an input voltage range of 100 to 240 VAC, 50/60 Hz. To determine the product’s power requirements (circuit breaker, power outlet, and wiring), use the current value listed on the label affixed to the product’s back panel, or refer to the product’s specifications chart. -
Page 11: Usb Software Update
Other Fixture Type: The target fixture and main fixture are from different product series (e.g., a STRIKE Bolt 1C as the target fixture and a Maverick Silens 2 Profile as the main fixture). 6. Select the file that needs to be uploaded. The message “Are you sure?” will appear on the screen. -
Page 12: Fixture To Fixture
Fixture to Fixture The Fixture to Fixture software update option allows users to update the STRIKE Bolt 1C with another STRIKE Bolt 1C via DMX connection. To update the STRIKE Bolt 1C software using the Fixture to Fixture option: 1. Power on two or more fixtures and link the target fixture to the main fixture via a DMX 5-pin connection. -
Page 13: Mounting
When rigging the product onto a truss, use a mounting clamp of appropriate weight capacity. Procedure The STRIKE Bolt 1C comes with an Omega bracket. The user can directly attach a mounting clamp to this Omega bracket. Make sure the clamp is capable of supporting the weight of this product. For the Chauvet Professional line of mounting clamps, go to http://www.trusst.com/products. -
Page 14: Multi-Product Mounting
Setup Multi-Product Mounting The STRIKE Bolt 1C has an interlocking system to connect multiple STRIKE Bolt 1C products vertically, or horizontally. Multi-Product Horizontal Mounting Remove the retaining pins Press and hold the latch to release the integrated button to remove or... - Page 15 Press and hold the latch button to remove or insert the retaining pins Latch button When mounting vertically using the pin and block hangers, never hang more than 15 units from a single mounting point. STRIKE Bolt 1C User Manual Rev. 1...
-
Page 16: Mounting Products Attached In Series
When using a single omega bracket, never hang more than 10 units vertically from a single mounting point. • When using 2 omega brackets with the product’s feet, never hang more than 10 units vertically from a single mounting point. STRIKE Bolt 1C User Manual Rev. 1... - Page 17 Up to 15 units When mounting using the feet and a STRIKE Array Flush Bracket, never hang more than 15 units vertically from a single mounting point. STRIKE Bolt 1C User Manual Rev. 1...
- Page 18 Up to 15 units When mounting using the feet and without an omega bracket, never hang more than 15 units vertically from a single mounting point. STRIKE Bolt 1C User Manual Rev. 1...
-
Page 19: Operation
Press <MENU> repeatedly to exit to the previous main level. Passcode After being prompted to enter the passcode, press <UP>, <DOWN>, <UP>, <DOWN>, <ENTER>. Menu Map Refer to the STRIKE Bolt 1C product page on www.chauvetprofessional.com for the latest menu map and software. - Page 20 <000–255> Adjusts the duration of the beam flash Duration Beam Flash <000–255> Adjusts the beam flash rate Rate Frost <000–255> Increase or decrease the frost Master Standalone mode Master/ Slave Slave Slave mode STRIKE Bolt 1C User Manual Rev. 1...
- Page 21 38. B B S & Dir 39. B B Crossfade 40. Control Instantaneous dimmer Dimmer Mode Dimmer 1–3 Dimmer mode, fast (1) to slow (3) S-Curve Linear Dimmer Sets the dimmer curve Curve Square Inverse Square STRIKE Bolt 1C User Manual Rev. 1...
- Page 22 Firmware Other Fixture connected products, or shows “No such Type file!” _ _ _ _ _ _.CHL Selects an update file for other Fixture to connected products, or shows “No such Fixtue file!” STRIKE Bolt 1C User Manual Rev. 1...
-
Page 23: Dmx Configuration
The highest recommended starting address for 20 Ch is 493. • The highest recommended starting address for 25Ch is 488. • The highest recommended starting address for 27 Ch is 486. • The highest recommended starting address for 40 Ch is 473. STRIKE Bolt 1C User Manual Rev. 1... -
Page 24: Dmx Channel Assignments And Values
131 135 Reserved for future use 061 065 Fan mode on 136 140 Reserved for future use 066 070 Linear dimmer 141 255 No function 071 075 Square dimmer Beam Patterns STRIKE Bolt 1C User Manual Rev. 1... -
Page 25: 40Ch / 27Ch / 25Ch
000 255 0–100% – Beam pixel 13 000 255 0–100% – Beam pixel 14 000 255 0–100% – Beam pixel 15 000 255 0–100% – Beam pixel 16 000 255 0–100% STRIKE Bolt 1C User Manual Rev. 1... - Page 26 Bottom beams FX 000 002 snap, cell to cell – – crossfade (cells 003 255 Fade duration, short to long 15–28) Control (Hold – 000 255 See the Control Chart 3seconds) STRIKE Bolt 1C User Manual Rev. 1...
-
Page 27: 20Ch /17Ch / 13Ch / 11Ch
125 130 Beam FX stop (no function) – – – movement speed & Beam FX Movement: right to left, slow to direction 131 249 fast 250 255 Beam FX stop (no function) STRIKE Bolt 1C User Manual Rev. 1... -
Page 28: 10Ch
171 190 Beam macro 9 (slow to fast) 191 210 Beam macro 10 (slow to fast) 211 230 Beam macro 11 (slow to fast) 231 250 Beam macro 12 (slow to fast) 251 255 No function STRIKE Bolt 1C User Manual Rev. 1... - Page 29 171 190 Plate macro 9 (slow to fast) 191 210 Plate macro 10 (slow to fast) 211 230 Plate macro 11 (slow to fast) 231 250 Plate macro 12 (slow to fast) 251 255 No function STRIKE Bolt 1C User Manual Rev. 1...
-
Page 30: Standalone Configuration
2. Choose the intensity from 000 (darkest) to 255 (brightest). Plate Flash Duration To adjust the duration of the plate flash of the STRIKE Bolt 1C: 1. Go to the Plate Flash Duration main level. 2. Choose the intensity from 000–009 (always on), 010 (slowest), 250 (longest) to 251–255 (always on). -
Page 31: Settings Configuration
To set how long the display will stay lit without activity: 1. Go to the Back Light main level. 2. Select from 10S (10 seconds), 30S (30 seconds), 2Min (2 minutes), or Always On. STRIKE Bolt 1C User Manual Rev. 1... -
Page 32: Product Information
2. Select No (do not reset) or Yes (reset). Master/Slave To set the STRIKE Bolt 1C product to master or slave mode: 1. Go to the Master/Slave main level. 2. Select from Master (sends control signal) or Slave (receives control signal). -
Page 33: Maintenance
To maintain the IP rating when reassembling the product, use the given torque measurements for each of the following screws and bolts: Fixture Parts Torque Rating (Kgf.cm) Torque Rating (lbf.in) Covers, stands 8.6796 Sockets 5.20776 STRIKE Bolt 1C User Manual Rev. 1... -
Page 34: Technical Specifications
Seetronic EtherCON 10, 11, 13, 17, 20, 25, 27, or 40 Ordering Product Name Item Name Item Code UPC Number STRIKE Bolt 1C STRIKEBOLT1C 03052014 781462223625 UL 1573 CSA C22.2 No. 166 E113093 STRIKE Bolt 1C User Manual Rev. 1... -
Page 35: Contact Us
For warranty terms and conditions and return information, please visit our website. For customers in the United States and Mexico: www.chauvetlighting.com/warranty-registration. For customers in the United Kingdom, Republic of Ireland, Belgium, the Netherlands, Luxembourg, France, and Germany: www.chauvetlighting.eu/warranty-registration. STRIKE Bolt 1C User Manual Rev. 1...
Need help?
Do you have a question about the STRIKE Bolt 1C and is the answer not in the manual?
Questions and answers