Advertisement
Advertisement
Table of Contents

Summary of Contents for Timeguard SupplyMASTER FST77N
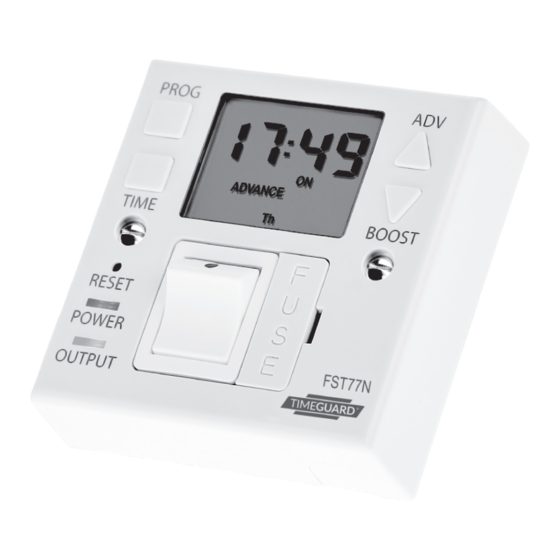
- Page 1 24 Hour /7 Day Fused Spur Time Switch Model: FST77N...
-
Page 2: General Information
1. General Information These instructions should be read carefully and retained for further reference and maintenance. Timeguard reserve the right to alter these instructions at any Note: time. Up to date instructions will always be available for download at www.timeguard.com 2. - Page 3 • Contact Type: Normally Open • Minimum Wall Box Depth: 25mm • Boost Times: 30, 60, 90, 120 minutes • Power Status Indicator: Red LED • Output Status Indicator: Green LED • Operating Temperature: 0°C to +40°C • Power Reserve: Up to 672 Hours (28 Days) •...
-
Page 4: Installation
4. Installation • Ensure the mains supply is switched off and the circuit supply fuses are removed or the circuit breaker turned off. • Connect the incoming 230V 50Hz supply and outgoing load cables to the relevant terminals ensuring correct polarity is observed and that all bare conductors are sleeved (see section 5. -
Page 5: Connection Diagram
5. Connection Diagram The terminals are marked as follows on the rear of the switch; Supply neutral terminal Supply live terminal Switched neutral terminal (load neutral Switched live connection) terminal (load live conneciton) Loop terminal for earth continuity Supply L IN Live (Brown or Red) to N IN Neutral (Blue or Black) to... - Page 6 6. Battery • The unit has an in built non replaceable, rechargeable battery, which will keep the programmed times during power down situations for up to 4 weeks. • If the screen goes blank, once power is restored, and 4 hours have elapsed (to give a working battery charge), Reset must be pressed, and times/programmes re-entered.
-
Page 7: Setting The Clock
8. Setting The Clock • Press and hold the Time button for 3 seconds, the word Hold will show on the screen. • After 3 seconds release the Time button and the screen will show the year; • Use the Adv/Ovr to increase (or the Boost buttons to decrease) the value and set to the correct year. - Page 8 • The display should now show the correct time/day of the week, with the output status showing as OFF for example; Modifying the date and time of day If for any reason the display requires an adjustment for the displayed current time press and hold the time button for 3 seconds and repeat the same process described in this section.
- Page 9 Note: Programmes can be omitted either by leaving dashes in all the locations for ON/OFF times for that day or group of days. Alternatively, leaving the programme entry mode before filling in all the ON/OFF times will leave the remaining times blank. •...
- Page 10 • Use Adv/Ovr or Boost button to set the minutes for the first ON period. • Press the Prg button once to set and move you to the Programme 1 OFF time. • Use Adv/Ovr or Boost button to set the hour for the first OFF period.
- Page 11 Note: At any stage in programming, if the Prg button is pressed and held for 3 seconds, the timer will return to normal operating mode. • The display will now show the correct time and day as per this example; •...
- Page 12 If programming across midnight is required to repeat once a week vs daily, set as below. Prog 1 ON Prog 1 OFF Prog 1 ON Prog 1 OFF 22:00 00:00 00:00 05:00 Monday Monday Tuesday Tuesday The above shows swtiching ON at 22:00 every Monday evening and OFF at 05:00 every Tuesday morning only.
-
Page 13: Boost Button
10. Advance/Override button In normal operating mode the Adv/Ovr button advances the programme to the next time change. • If the output is currently OFF, it will change the output to ON ADVANCE, until the next programmed OFF time. • If the output is currently ON, it will change the output to OFF ADVANCE, until the next programmed ON time. - Page 14 If a boost period should overlap a scheduled ON time, the programme will continue to run as normal and the programmed OFF time will switch OFF as expected. The example below assumes a programme of 22:00 ON and 05:00 OFF being used with a 30 minute boost. At 21:45 Boost Boost duration Boost time has ended.
-
Page 15: Year Guarantee
Note: a proof of purchase is required in all cases. For all eligible replacements (where agreed by Timeguard), the customer is responsible for all shipping/postage charges outside of the UK. All shipping costs are to be paid in advance before a replacement... - Page 16 If you experience problems, do not immediately return the unit to the store. Email the Timeguard Customer Helpline: HELPLINE helpline@timeguard.com or call the helpdesk on 020 8450 0515 Qualified Customer Support Coordinators will be online to assist in resolving your query.


Need help?
Do you have a question about the SupplyMASTER FST77N and is the answer not in the manual?
Questions and answers