Advertisement
Quick Links
WARNINGS:
• TO AVOID FIRE, SHOCK, OR DEATH, TURN OFF POWER AT CIRCUIT
BREAKER OR FUSE, AND TEST THAT THE POWER IS OFF BEFORE WIRING!
• To be installed and/or used in accordance with electrical codes and regulations.
• If you are not sure about any part of these instructions, consult an electrician.
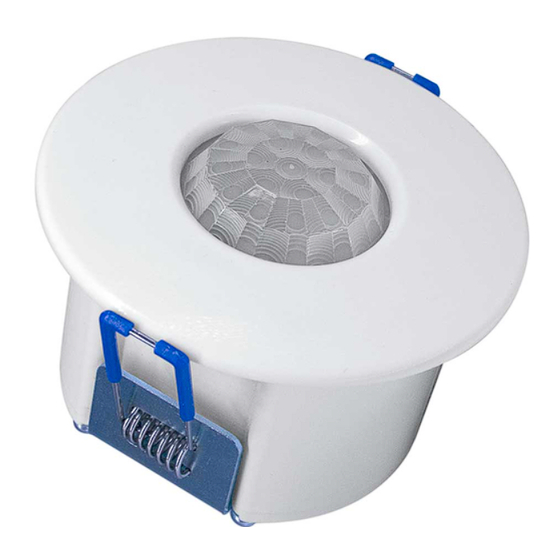
Product Description
The GreenMax DRC Sensor is a direct network-connected device, which can
detect both Occupancy and Light levels within a specified range. It reports data with
LumaCAN™ Sensor messages over the network for receipt by any Sapphire or
GreenMAX DRC Room Controller.
Occupancy Sensor Technology and Application Notes:
• The OSR15-MCx sensor uses Microwave technology at 5.8 GHz frequency to
detect motion. Make sure to select a mounting location that is at least 6 ft away
from an HVAC source, as this technology is sensitive to air movement.
• In addition, this sensor uses PIR (Passive InfraRed) detection technology. This
technology uses a lens to establish dozens of detection zones. The sensor is
sensitive to the heat emitted by the human body. To trigger the sensor, the source
of the heat must move from one detection zone to another. The device is effective
in sensing motion across its field-of-view. Be conscientious of this when you select
an installation location.
• Occupancy sensors respond to rapid changes in temperature, and hot or cold drafts
look like body motion to the device if it mounted to close to a climate control source.
Make sure to mount this device approximately 6 ft away from a climate control
source, such as radiators, air exchanges, and air conditioners.
• Do NOT mount the Occupancy Sensor directly under a high-wattage light source.
High-wattage bulbs (greater than 100 W incandescent) give off a lot of heat and
switching the bulb may cause a temperature change that can be detected by the
device. Mount the Occupancy Sensor at least 6 ft away. If you must mount the
device closer, lower the bulb's wattage.
• The field-of-view of this sensor is 750 to 1,500 sq. ft. when the sensor is located in
the middle of the desired detection area.
Before Installation
• Requires installation into a 2 7/8 in. to 3 1/4 in. diameter (73.03 mm to 82.55 mm)
mounting hole.
• Requires 4 in. (102 mm) of vertical clearance.
• When installation requires conduit for Class 2 LumaCAN wiring, drill a 2 7/8 in.
opening into the side of the junction box, and install the junction box in the ceiling,
directly above the sensor.
• LumaCAN wiring requires a Category-rated cable for power and data. Use Category
6 or better cable with quality RJ-45 connections. Wire per TIA-568B standards.
• For compliance with Chicago Plenum requirements, install in a metal box in the
ceiling. See the 3rd bullet point above.
• All LumaCAN wire segments must be tested and validated prior to powering up
the system.
• The end of each LumaCAN network must be terminated for proper data flow. A
termination plug is pre-installed into one of the RJ-45 receptacles. If this is the end of
the network, only one of the RJ-45 receptacles are used. Leave the termination plug
in the unused RJ-45 receptacle. If this is in the middle of the network, both RJ-45
receptacles are required. Remove and discard the termination plug.
Specifications
Input Voltage
+12-24VDC, 90-45mA
IP Rating
IP30
• (2) RJ-45 Cat. 6 or better to connect to a
LumaCAN network.
• 1,600' maximum length per Daisy-Chain Segment.
Network
• Home-Run topology supported when using
Connections
repeaters, which may extend the network's length.
NOTE: Pass-Through RJ-45 connectors are prohibited
from use. Use of these connectors, voids all warranties,
and any promise of product suitability of operation.
Operating
32°F to 131°F (0°C to 55°C), 0 to 85% relative humidity
Temperature
Storage
14°F to 185°F (-10°C to 85°C)
Temperature
Sensor Range
1,500 sq. ft.
Sensor Technology
PIR + Microwave + Photocell
Warm-Up Time
15 seconds
GreenMax
®
DRC Sensor
Cat. No. OSR15-MCx
CAUTIONS:
• ESD Sensitive Device: Use safe handling procedures when installing.
• For indoor applications ONLY.
INSTALLATION INSTRUCTIONS
B
A
Reference
A.
LumaCAN Connections
B.
Reset Switch - Push and hold down for 5 seconds to reset the sensor's settings
to their factory default settings.
For Application Reset: If your device is "bricked" and you power up the device
by pushing and holding down the reset switch for 10 seconds, the current
application is deleted. As a result, the device becomes inoperable, and you must
perform a software update.
C. LumaCAN Communication Indicator Light - Normal Operation: Stays solid Green
when there is power, but no communication. Blinks Green when communicating.
D. Occupancy Detector, Light Level Sensor, and Occupancy
Indicator Light:
• Blinks Red when PIR detects occupancy.
• Blinks Green when the microwave or photocell detects occupancy.
• Blinks White rapidly when a firmware update is in process.
• Blinks White slowly when in boot loader.
• Cycles colors when an address assignment is pending from a DRC or other
compatible controller.
DI-000-OSR15-00C
ENGLISH
C
D
Advertisement

Related Manuals for Leviton GreenMax OSR15-MC Series


Summary of Contents for Leviton GreenMax OSR15-MC Series
- Page 1 GreenMax ® DRC Sensor Cat. No. OSR15-MCx WARNINGS: CAUTIONS: • TO AVOID FIRE, SHOCK, OR DEATH, TURN OFF POWER AT CIRCUIT • ESD Sensitive Device: Use safe handling procedures when installing. BREAKER OR FUSE, AND TEST THAT THE POWER IS OFF BEFORE WIRING! •...
- Page 2 LIMITED 5 YEAR WARRANTY AND EXCLUSIONS Leviton warrants to the original consumer purchaser and not for the benefit of anyone else that this product at the time of its sale by Leviton is free of defects in materials and workmanship under normal and proper use for five years from the purchase date.
Need help?
Do you have a question about the GreenMax OSR15-MC Series and is the answer not in the manual?
Questions and answers