
Related Manuals for Bluetti AC300


Summary of Contents for Bluetti AC300
- Page 1 AC300 Portable Power Station User Manual V1.0 Please Read This Manual Before Use And Follow Its Guidance. Keep This Manual For Future Reference.
- Page 3 Thank You! Thank you for making BLUETTI a part of your family. From the very beginning, BLUETTI has tried to stay true to a sustainable future through green energy storage solutions for both indoor and outdoor use while delivering an exceptional eco-friendly experience for our homes and our world.
-
Page 4: Table Of Contents
4. Installation ( for home back up system ) 4.1 Personnel Requirements 4.2 Anti-static requirements 4.3 Drilling 4.4 Installation environment requirements 5. IN THE BOX 6. BLUETTI APP 6.1 Introduction 6.2 Download 6.3 Operation 7. OVERVIEW OF AC300 8. POWER ON & POWER OFF... - Page 5 10. HOW TO RECHARGE AC300+B300 (INPUT) 10.1 AC Input (1st Charging Port: CP1) 10.2 DC Input (2nd Charging Port: CP2) 10.3 Dual Charging 10.4 How to calculate the recharging time of AC300 11. DISCHARGE (OUTPUT) 11.1 Output Ports 11.2 Runtime 11.3 How to Calculate the Device Runtime...
-
Page 6: Before You Begin
• BLUETTI recommends that you use genuine accessories from BLUETTI. • BLUETTI shall not be responsible for any damage or expense that might result from the use of parts other than genuine parts from the BLUETTI. • For your safety and benefit, please read carefully before using and keep it handy for future reference. -
Page 7: Safety Instructions
2. Safety Instructions 2.1 General Safety BLUETTI products are developed to be safe and reliable. Please read this guide for important safety information about your device. The guide is intended to help you be more comfortable and productive while using this device. Failure to follow these ... -
Page 8: Maintenance
C-45 C ), clean and dry environment is strongly recommended. • BLUETTI Power Stations are NOT permitted to be carried on board as checked or carry-on baggage. • Dispose of the unit and related accessories in accordance with local laws, regulations and other provisions. -
Page 9: Ac300 Introduction
3. AC300 INTRODUCTION 3.1 Introduction The BLUETTI AC300 excels with a dual-core controller (ARM controller and DSP controller), an AC Inverter Module and a DC-to-DC module. The controller can perfectly manage and control the MPPT module by integrating digital and analog signals. -
Page 10: Abbreviation
3.2 Abbreviation • BMS: Battery Management System • MPPT: Maximum Power Point Tracking • SOC: State of Charge • UPS: Uninterruptible Power Supply • AC: Alternating Current • DC: Direct Current • PV: Photovoltaic (Solar Panels) • DOD: Depth of Discharge •... -
Page 11: Installation ( For Home Back Up System )
4. Installation ( for home back up system ) • The installation should be done by a licensed electrician. • DO NOT place the power station near heat sources. It is prohibited to place the equipment in an environment with flammable, explosive gas or smoke. It is also prohibited to operate the equipment in this environment. -
Page 12: Personnel Requirements
4.1 Personnel Requirements The personnel responsible for the installation and maintenance must first undergo rigorous training to understand all necessary safety precautions and grasp the correct method of operation, and can take measures to reduce the danger to himself or other personnel to be at the lowest limit. 4.2 Anti-static requirements When installing the sub-panel with the main panel, you must wear an anti-static gloves or wrist strap which should be appropriately grounded. -
Page 13: In The Box
AC Charging Cable Charge AC300+B300 at 15A. DC Charging Cable For solar, car, lead-acid battery charging. Car Charging Cable Charge AC300+B300 via vehicle cigarette lighter port. AC300 Portable Power Station User Manual Please Read This Manual Before Use And Follow Its Guidance. - Page 14 Optional Category Lead-acid Battery Charging Cable Charge AC300+B300 via lead-acid battery. PV Voltage Step Down Module (D300S) Connect to rigid panels. For 30A 12V/30A XT60 to Aviation Cable Output XT60 to SPC45 Cable 100W USB-C to USB-C Cable AC Adapter...
-
Page 15: Bluetti App
6. BLUETTI APP 6.1 Introduction BLUETTI app allows you to monitor and control the AC300 inverter system in the palm of your hand via Bluetooth or WiFi, with features like In-time Alarm, Error Mes- sage, Data Collection, Operation Status, Parameter Configuration, and Firmware Up- grade. - Page 16 App to remotely control your AC300+B300. • Tap the "Login" to register your BLUETTI account. Fill in the necessary information to continue. • Check your email for verification code from BLUETTI server, and fill in the code to activate your BLUETTI account. JUST POWER ON...
- Page 17 Step 2: • Connect AC300 with B300. Scan the unique QR code on AC300 to add the unit to the available device list in the App, and fill in the password of your 2.4G Wi-Fi network to activate the communication function of AC300 for data syncing.
- Page 18 SN (Serial Number) of your device. Find the SN on the unit or from the "Product Info.". • Tap to customize the working mode and parameters of your AC300 on the Setting page. JUST POWER ON...
- Page 19 • AC300 supports Over-the-air (OTA) firmware upgrade via BLUETTI app. Tap "About Device" on the Settings page and check the firmware version. Notes: • Keep your phone no more than 16.4ft/5m away from the unit during the upgrade. • You cannot turn on AC300 via BLUETTI App.
-
Page 20: Overview Of Ac300
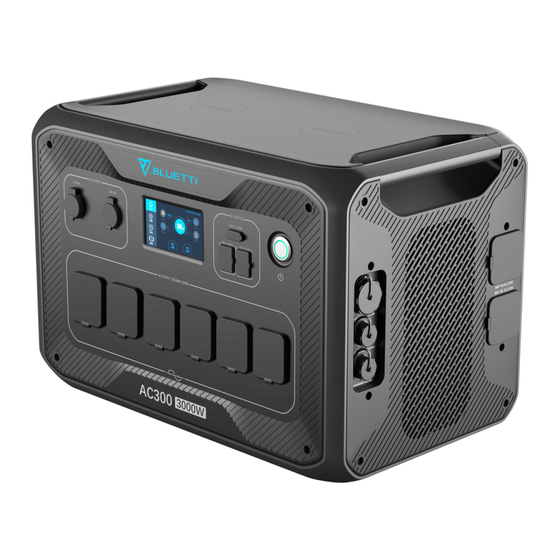
7. OVERVIEW OF AC300 ① 24V/10A Cigarette Lighter Port ⑧ Wireless Charging Pad ② 12V/30A RV Port ⑨ USB-C PD3.0 ③ LCD Screen ⑩ Battery Expansion Port ④ 18W USB-A Port ⑪ AC Input (CP1) ⑤ USB-A Port ⑫ DC1/DC2 Input (CP2) ⑥... -
Page 21: Power On & Power Off
Connect AC300 with B300. Please follow the steps in B300 User Manual. Note: Please connect the AC300 and B300 with the Battery Expansion Cable. • Power ON: Press and hold the power button on the AC300 or B300 till the button indicator illuminates. -
Page 22: User Interface
9. USER INTERFACE 9.1 Homepage Tip: It's recommended to touch the LCD resistive touchscreen lightly with the edge of your fingernail until it "beeps" when it registers a press. NOTE: Touchscreen sounds can be turned ON/OFF in the Settings menu. ⓐ... -
Page 23: Settings
• Voltage and Frequency Reference: AU: 240V/50Hz; EU/UK: 230V/50Hz. 9.2.2 DC Input Source AC300 features dual MPPT charge controllers for a maximum of 2400W solar input. Along with the DC input cable, it supports two DC input sources simultaneously, namely DC1 and DC2. - Page 24 9.2.3 Language Setting & ECO Mode & Buzzer Setting • Tap to choose "English" or "Deutsch" to be the system language of AC300. • ECO mode: When in ECO mode, the AC output will automatically turn OFF after 4-hour low (≤30W) or no load to save power.
- Page 25 • Max. Grid Input Current: limit the Max. input current of the utility grid, when the current exceeds the preset value, AC300 will take charge to be the power source of the circuit.
- Page 26 Note: The Grid Input Current is set at 10A by default. The change only takes effect when AC300 connects to the grid. Email BLUETTI Customer Service for the password. 9.2.7 Date and time & Touch Sound & Backlight Brightness •...
- Page 27 9.2.9 Bluetooth & Wi-Fi Connection • The Bluetooth and Wi-Fi connection can be turned ON/OFF by tapping the ON and OFF icons. • You cannot connect AC300+B300 to BLUETTI App when both of the Wi-Fi and Bluetooth functions are disabled. JUST POWER ON...
-
Page 28: Data
• This section includes the information about product model, serial number (SN), control firmware (DSP), monitoring firmware (ARM), BMS, and display firmware (HMI). • The Serial Number (SN) can also be used to pair to BLUETTI APP manually. JUST POWER ON... - Page 29 9.3.2 Inverter & Charger Info. This section displays the input and output status of the unit. These information is also displayed on the homepage. 9.3.3 Battery Information This section is about the connection and operation status of battery pack(s), which can also be accessed directly from the homepage.
-
Page 30: How To Recharge Ac300+B300 (Input)
This section records all alarms generated. For corresponding solutions, please refer to Chapter 14-Troubleshooting. 10. HOW TO RECHARGE AC300+B300 (INPUT) AC300+B300 supports AC charging (wall outlet, generator), DC charging (solar, AC adapter, car, lead-acid battery), and DUAL charging through AC Charging Port[CP1] and DC Charging Port[CP2]. -
Page 31: Ac Input (1St Charging Port: Cp1)
Pin2:N Pin3:PE 10.1.1 Charging Method 1: AC charging Connect the AC300+B300 to a wall outlet via the AC charging cable. The charging automatically stops when the AC300 system reaches 100% capacity. The maximum charging power allowed is up to 3000W. -
Page 32: Dc Input (2Nd Charging Port: Cp2)
Voltage: 207-253VAC Frequency: 47Hz-53Hz/57Hz-63Hz* * If the AC input frequency of AC300 is set to 50Hz, use a generator with a frequency of 47Hz-53Hz; if it is set to 60Hz, the generator frequency should be 57Hz-63Hz. 10.2 DC Input (2... - Page 33 Set “PV Parallel Enable” to “OFF” . c. Connect solar panels in series (Figure 1). d. Connect the solar panels to AC300 via the DC charging cable (Figure 2, 3 ,4). ( Easy steps to solar charging ) JUST POWER ON...
- Page 34 Note: Roof/Rigid panel can charge AC300. If the panel's open circuit voltage falls in 150-550V, use D300S to lower the voltage. • How to connect AC300 to rooftop solar i) 150V<Voc of PV<550V: - Connect to D300S - DC Input Source: Others...
- Page 35 - PV Parallel Enable: ON 10.2.2 Charging Method 4: Car Charging Connect the AC300+B300 to the vehicle plug-in cigarette lighter port via the DC input cable and car charging cable. Note: Set "Others" as DC1/DC2 input source to enable car charging.
-
Page 36: Dual Charging
10.2.3 Charging Method 5: Charging via a 12V/24V Lead-acid battery Connect the AC300+B300 to the lead-acid battery via the DC input cable and lead-acid battery charging cable. Clamp the positive connector(red) to the positive battery terminal and negative(black) to the other. -
Page 37: How To Calculate The Recharging Time Of Ac300
* Trickle charge time for BLUETTI power stations is typically 0.5-1 hour. E.g. : Connecting the AC300 to two B300s brings the total capacity to 6144 Wh. If you charge the system via AC and dual PV inputs together, the charging power reaches 5400W and the charging time will be 1.6-2.1 hours. -
Page 38: Discharge (Output)
11.1 Output Ports 11.1.1 AC Output Port AC300 has 6 AC output ports with a total power of 3000W. Its pure sine wave invert- er can also handel up to a surge of 6000W, covering most of your start-up needs. -
Page 39: Runtime
11.2 Runtime AC300 + 2*B300 = 6144Wh • Home & Kitchen Appliances Refrigerator Fry Pan Microwave Oven Washer 700W(24h) 1500W 1000W 500W(1000W) 2.8 Days 3.3 Hrs 5.0 Hrs 4.8-9.2 Hrs Space Heater Air Conditioner Smart Phone Laptop Desktop CPAP 1500W... -
Page 40: How To Calculate The Device Runtime
11.3 How to Calculate the Device Runtime Runtime = 6144Wh* × DoD × η ÷ (load power) * Take the AC300+2*B300 combo as an example. Note: DoD refers to the Depth of Discharge, η is the local inverter efficiency. DoD=90%, η=90%. -
Page 41: Ups
12. UPS 12.1 UPS Description An uninterruptible power supply or uninterruptible power source (UPS) is an electrical apparatus that provides emergency power to a load when the input power source or mains power fails. A UPS differs from an auxiliary or emergency power system or standby generator in that it will provide near-instantaneous protection from input power interruptions, by supplying the energy stored in backup batteries. - Page 42 Load ≥ 3000W Backup Load AC300 Sub Panel Grid Main Panel ≤3000W BLUETTI Solar Panel PV Module (Grid-tied UPS) Note: Refer to “How to build a partial-home backup system with AC300+B300” for more details about Grid-tied UPS. JUST POWER ON...
- Page 43 Tie the AC300 to the grid with sub panel or plug it into the wall outlet with AC charging cable. Then connect loads to the AC output ports of AC300. Note: The output power in Plug-in UPS Mode is subject to the specification of the current and voltage from home circuit.
-
Page 44: Enable The Ups
12.2 Enable the UPS 12.2.1 Standard UPS Mode AC300+B300 plays as a backup power source when the grid presents, immediately charging your loads when the grid fails. 12.2.2 Time Control UPS Mode • AC300+B300 charges and discharges at specific time periods, greatly cutting your electricity bills. - Page 45 12.2.3 PV Priority UPS Mode • AC300+B300 is mainly charged by solar energy to save power. Reserved capacity for PV charging: AC300+B300 charges to this SOC from the grid, then from solar panels or other sources. • Note: When battery SOC is higher than set value, devices on AC outlets are powered by grid and the combo together.
- Page 46 12.2.4 Customized UPS Mode AC300+B300 operates based on your energy plan, charging and discharging on schedule, prioritizing solar charging, and more. In this mode, you can also maximize solar energy, or even live completely off the grid by disabling grid charging.
-
Page 47: Technical Specifications
13. TECHNICAL SPECIFICATIONS AC300 General Battery Capacity (With 1-4 B300) 3072-12288Wh/60-240Ah Dimensions (L*W*H) 520*320*358mm/20.5*12.5*14.1in Weight 21.6kg/47.62lbs Discharging Temperature -20°C-40°C/-4°F-104°F Charging Temperature 0°C-40°C/32°F-104°F Storage Temperature -20°C-40°C/-4°F-104°F Discharging 65°C (Recovery at 55°C) Over Temperature Protection (With B300) Charging 55°C (Recovery at 45°C) - Page 48 AC Input Power 3000W Max. Voltage 196V-253VAC Current 16A Max. Frequency 47-63Hz DC Input Power 2400W Max. (DC1 + DC2) Voltage 12V-150VDC Current 12A Max. JUST POWER ON...
-
Page 49: Troubleshooting
14. TROUBLESHOOTING Error Description Solution Code Please contact the dealer if the symptom D-AMCU Warning persists after rebooting the unit. Please contact the dealer if the symptom D-BMS Warning persists after rebooting the unit. Please contact the dealer if the symptom D-A Communication Error persists after rebooting the unit. - Page 50 Please contact the dealer if the symptom DC Input Voltage Low persists after rebooting the unit. Please contact the dealer if the symptom DC Input Over Current persists after rebooting the unit. Please contact the dealer if the symptom Inverter Output Over Current persists after rebooting the unit.
- Page 51 AC300. D-BAT Full The battery is full. Out of battery. Charge the AC300+B300. The alarm D-BAT Drained sutomatically disappear when the battery SOC reaches 5%. Turn ON AC on the screen. Disconnect the load. Please make sure your Inverter Overload Warning loads meet the specifications of the unit.
- Page 52 Please check if the input of the AC voltage meets the specifications of the unit. Multi Brak Phase Error Clear the alarm history or restart the unit. Please check if the "PV parallel enable" setting is consistent with PV input. PV Paralleling Error Please contact the dealer if the symptom persists after rebooting the unit.
- Page 53 24V/10A DC Port Locked Please contact the dealer if the symptom persists after rebooting the unit. Turn OFF the AC300+B300 and cool it down. BMS Temperature abnormal Please keep the AC300 at the recommended temperature...
-
Page 54: Faq (Frequently Asked Questions)
DoD indicates the fraction of power that can be withdrawn from the battery. The BLUETTI AC300 sets the DoD to 90%, which means that 90% of the capacity is available to power your device, while the reserved is used to protect the battery from over-discharging. -
Page 55: Declaration
• Please note that specifications and appearance are subject to improvement without prior notice. • BLUETTI shall not be liable for any damage caused by force majeure, such as fires, typhoons, floods, earthquakes, or the user's intentional negligence, misuse, or other abnormal conditions. - Page 57 AC300 Estação elétrica portátil Manual do usuário V1.0 Leia este manual antes do uso e siga as orientações. Guarde este manual para referência futura.
- Page 59 É por isso que a BLUETTI está presente em mais de 70 países e tem a confiança de milhões de clientes em todo o mundo.
- Page 60 4. Instalação (para sistema de backup doméstico) 4.1 Requisitos de pessoal 4.2 Requisitos antiestáticos 4.3 Perfuração 4.4 Requisitos do ambiente de instalação 5. NA CAIXA 6. APP BLUETTI 6.1 Introdução 6.2 Download 6.3 Operação 7. VISÃO GERAL DO AC300 8. COMO LIGAR E DESLIGAR...
- Page 61 10. COMO RECARREGAR O AC300+B300 (ENTRADA) 10.1 Entrada CA (1ª porta de carregamento: CP1) 10.2 Entrada CC (2ª porta de carregamento: CP2) 10.3 Carregamento duplo 10.4 Como calcular o tempo de recarga do AC300 11. DESCARGA (SAÍDA) 11.1 Portas de saída 11.2 Tempo de operação 11.3 Como calcular o tempo de operação do dispositivo...
-
Page 62: Antes De Começar
• A BLUETTI recomenda que você use acessórios originais da BLUETTI. • A BLUETTI não será responsável por quaisquer danos ou despesas que possam resultar do uso de peças não genuínas da BLUETTI. • Para sua segurança e benef ício, leia atentamente antes de usar e mantenha-o à... -
Page 63: Instruções De Segurança
2. Instruções de segurança 2.1 Segurança geral Os produtos BLUETTI são desenvolvidos para serem seguros e confiáveis. Leia neste guia as informações importantes de segurança sobre o seu dispositivo. O guia ajudará você a se sentir mais à vontade e produtivo ao usar este dispositivo. O não cumprimento destas diretrizes para configuração, uso e cuidados adequados de seu... -
Page 64: Manutenção
• Evite expor a unidade à chuva ou ambiente úmido e à luz solar direta (32-113 °F, 0-45 °C), recomenda-se sempre um ambiente limpo e seco. • As Centrais Elétricas BLUETTI NÃO podem ser transportadas a bordo como bagagem despachada ou de mão. -
Page 65: Introdução Ao Ac300
O inversor CA torna possível o carregamento CA rápido reverso com topologia bidirecional. Além disso, nenhum outro sistema com bateria embutida permite que você use seu AC300 livremente de 3.072 Wh a 12.288 Wh de capacidade impressionante, usando 1 a 4 BLUETTI B300. -
Page 66: Abreviaturas
3.2 Abreviaturas • BMS: Sistema de gerenciamento de bateria • MPPT: Rastreamento do ponto de potência máxima • SOC: Estado de carga • UPS: Fonte de alimentação ininterrupta • CA: Corrente alternada • CC: Corrente contínua • FV: Fotovoltaica (painéis solares) •... -
Page 67: Instalação (Para Sistema De Backup Doméstico)
4. Instalação (para sistema de backup doméstico) • A instalação deve ser feita por um eletricista licenciado. • NÃO coloque a estação de energia perto de fontes de calor. É proibido colocar o equipamento em ambiente com gases inflamáveis, explosivos ou fumaça. Também é... -
Page 68: Requisitos De Pessoal
4.1 Requisitos de pessoal O pessoal responsável pela instalação e manutenção deve primeiro passar por um treinamento rigoroso para compreender todas as precauções de segurança necessárias e compreender o método correto de operação, e pode tomar medidas para reduzir o perigo para si mesmo ou para outro pessoal até o limite mais baixo. 4.2 Requisitos antiestáticos Ao instalar o subquadro com o quadro principal, use pulseira ou luvas antiestáticas que devem ser devidamente aterradas. -
Page 69: Na Caixa
Carregue AC300+B300 a 15A. Cabo de carregamento CC Para carregamento de bateria solar, automotiva e chumbo-ácida. Cabo de carregamento do carro Carregue o AC300+B300 através da saída do isqueiro do veículo. AC300 Estação elétrica portátil Manual do usuário Leia este manual antes do uso e siga as orientações. - Page 70 Opcional N° Categoria Cabo de carregamento de bateria chumbo-ácida Carregue o AC300+B300 com uma bateria chumbo-ácida. Módulo de redução de tensão FV (D300S) Conecte a painéis rígidos. Para XT60 12 V/30 A para cabo de aviação saída CC de 30 A...
-
Page 71: App Bluetti
firmware. 6.2 Download Digitalize o código QR abaixo ou busque “BLUETTI” na App Store ou no Google Play para baixar o aplicativo BLUETTI. Veja os detalhes em https://www.bluettipower.com. - Page 72 Etapa 1: • Pesquise “BLUETTI” na App Store ou Google Play Store para baixar o aplicativo BLUETTI para controlar remotamente seu AC300+B300. • Toque em “Login” para registrar sua conta BLUETTI. Preencha as informações necessárias para continuar. • Verifique seu e-mail para obter o código de verificação do servidor BLUETTI e preencha o código para ativar sua conta BLUETTI.
- Page 73 • Conecte o AC300 ao B300. Digitalize o código QR exclusivo no AC300 para adicionar a unidade à lista de dispositivos disponíveis no aplicativo e preencha a senha da sua rede Wi-Fi 2,4G para ativar a função de comunicação do AC300 para sincronização de dados.
- Page 74 SN (número de série) do seu dispositivo. Encontre o SN na unidade ou em “Informações do produto”. • Toque em para personalizar o modo de funcionamento e os parâmetros do seu AC300 na página Configuração. BASTA LIGAR...
- Page 75 • Você não pode ligar o AC300 usando o aplicativo BLUETTI. • Se a conexão WiFi falhar, vá para Configurações (no seu telefone) - role para baixo e toque em “BLUETTI” e depois permita a rede (iOS). - toque em “Gerenciamento de aplicativos” e “BLUETTI” e depois permita a rede (Android).
-
Page 76: Visão Geral Do Ac300
7. VISÃO GERAL DO AC300 ① Saída de isqueiro 24 V/10 A ⑧ Pad de carregamento sem fio ② Porta RV 12 V/30 A ⑨ USB-C PD3.0 ③ Tela LCD ⑩ Porta de expansão da bateria ④ Porta USB-A de 18 W ⑪... -
Page 77: Como Ligar E Desligar
8. COMO LIGAR E DESLIGAR Conecte o AC300 ao B300. Siga as etapas no Manual do Usuário do B300. Nota: Conecte o AC300 e o B300 com o cabo de expansão da bateria. • LIGAR/DESLIGAR: Mantenha pressionado o botão liga/desliga no AC300 ou B300 até... -
Page 78: Interface Do Usuário
9. INTERFACE DO USUÁRIO 9.1 Página inicial Dica: Recomenda-se tocar levemente a tela LCD resistiva sensível ao toque com a ponta da unha até ouvir um “bip” ao registrar um pressionamento. NOTA: Os sons da tela sensível ao toque podem ser ativados/desativados no menu Configurações. -
Page 79: Configurações
Referência de tensão e frequência: AU: 240 V/50 Hz; UE/Reino Unido: 230 V/50 Hz. 9.2.2 Fonte de entrada CC O AC300 tem controladores de carga MPPT duplos para uma entrada solar máxima de 2.400 W. Juntamente com o cabo de entrada CC, ele suporta duas fontes de entrada CC simultaneamente, chamados DC1 e DC2. - Page 80 9.2.3 Configuração de idioma e modo ECO e configuração de campainha • Toque para escolher “English” ou “Deutsch” como o idioma do sistema do AC300. • Modo ECO: Quando estiver no modo ECO, a saída CA será desligada automaticamente após 4 horas de baixa carga (≤30 W) ou sem carga, para economizar energia.
- Page 81 • Corrente de entrada máx. da rede: Limite a corrente de entrada máx. da rede elétrica, quando a corrente exceder o valor predefinido, o AC300 irá alimentar o circuito. BASTA LIGAR...
- Page 82 Nota: A corrente de entrada da rede é definida como 10 A por padrão. A alteração só entra em vigor quando o AC300 se conecta à rede. Envie um e-mail para o Atendimento ao Cliente da BLUETTI para obter a senha.
- Page 83 9.2.9 Conexão Bluetooth e Wi-Fi • A conexão Bluetooth e Wi-Fi pode ser LIGADA/DESLIGADA tocando nos ícones ON e OFF. • Você não pode conectar o AC300 + B300 ao aplicativo BLUETTI se ambas as funções Wi-Fi e Bluetooth estiverem desativadas. BASTA LIGAR...
-
Page 84: Dados
Esta seção inclui informações sobre modelo do produto, número de série (SN), firmware de controle (DSP), firmware de monitoramento (ARM), BMS e firmware de exibição (HMI). • O número de série (SN) também pode ser usado para emparelhar manualmente com o APP BLUETTI. BASTA LIGAR... - Page 85 9.3.2 Informações do inversor e do carregador. Esta seção exibe o status de entrada e saída da unidade. Essas informações também são exibidas na página inicial. 9.3.3 Informações sobre a bateria Esta seção é sobre o status de conexão e operação das baterias, que também pode ser acessado diretamente na página inicial.
-
Page 86: Como Recarregar O Ac300+B300 (Entrada)
Capítulo 14 – Solução de problemas. 10. COMO RECARREGAR O AC300+B300 (ENTRADA) O AC300 + B300 suporta carregamento CA (tomada de parede, gerador), carregamento CC (solar, adaptador CC, carro, bateria chumbo-ácida) e carregamento DUAL através da porta de carregamento CA [CP1] e porta de carregamento CC [CP2]. -
Page 87: Entrada Ca (1ª Porta De Carregamento: Cp1)
Pino 2: N Pino3: Terra 10.1.1 Método de carregamento 1: Carregamento CA Conecte o AC300+B300 a uma tomada de parede com o cabo de carregamento CA. O carregamento para automaticamente quando o sistema AC300 alcança 100% da capacidade. A potência máxima de carregamento permitida é de até 3.000 W. -
Page 88: Entrada Cc (2ª Porta De Carregamento: Cp2)
Tensão: 207-253 Vca Frequência: 47-53 Hz / 57-63 Hz* * Se a frequência de entrada CA do AC300 estiver configurada para 50 Hz, use um gerador com frequência de 47-53 Hz; se estiver configurada para 60 Hz, a frequência do gerador deverá ser 57-63 Hz. - Page 89 Defina “PV Parallel Enable” (Habilitação de FV paralela) como “OFF”. c. Conecte painéis solares em série (Figura 1). d. Conecte os painéis solares ao AC300 através do cabo de carregamento CC (Figuras 2, 3, 4). (Etapas fáceis para carregamento solar)
- Page 90 Nota: Um painel de teto/rígido pode carregar o AC300. Se a tensão de circuito aberto do painel for de 150 a 550 V, use o D300S para diminuir a tensão. • Como conectar o AC300 à energia solar do telhado i) 150 V<Voc de FV<550 V:...
- Page 91 - Habilitação de FV paralela: LIGADO 10.2.2 Método de carregamento 4: Carregamento de carro Conecte o AC300 + B300 à porta do isqueiro do veículo por meio do cabo de entrada CC e do cabo de carregamento do carro. Nota: Defina “Others” (Outros) como fonte de entrada DC1/DC2 para permitir o carregamento do carro.
-
Page 92: Carregamento Duplo
10.2.3 Método de carregamento 5: Carregamento por bateria chumbo-ácida de 12/24 V Conecte o AC300+B300 à bateria chumbo-ácida usando o cabo de entrada CC e do cabo de carregamento da bateria chumbo-ácida. Fixe o conector positivo (vermelho) no terminal positivo da bateria e o negativo (preto) no outro. -
Page 93: Como Calcular O Tempo De Recarga Do Ac300
* O tempo de carga lenta para estações de energia BLUETTI é normalmente de 0,5 a 1 hora. Por exemplo: Conectar o AC300 a dois B300s eleva a capacidade total para 6.144 Wh. Se você carregar o sistema via entradas CA e duas entradas fotovoltaicas juntas, a potência de carregamento alcançará... -
Page 94: Descarga (Saída)
11.1 Portas de saída 11.1.1 Porta de saída CA O AC300 tem 6 portas de saída CA com potência total de 3.000 W. Seu inversor de onda senoidal pura também pode suportar até 6.000 W, cobrindo a maioria das suas necessidades iniciais. -
Page 95: Tempo De Operação
11.2 Tempo de operação AC300 + 2x B300 = 6.144 Wh • Eletrodomésticos e cozinha Refrigerador Frigideira Forno de Máquina de lavar 700 W (24 h) 1.500 W micro-ondas 500 W (1.000 W) 2,8 dias 3,3 horas 1.000 W 4,8-9,2 horas... -
Page 96: Como Calcular O Tempo De Operação Do Dispositivo
11.3 Como calcular o tempo de operação do dispositivo Tempo de operação = 6.144 Wh* × DoD × η ÷ (potência de carga) * Tomemos como exemplo o combo AC300 + dois B300. Nota: DoD refere-se à profundidade de descarga, η é a eficiência do inversor local. -
Page 97: Ups
12. UPS 12.1 Descrição da UPS Uma fonte de alimentação ininterrupta ou fonte de energia ininterrupta (UPS) é um aparelho elétrico que fornece energia de emergência a uma carga quando a fonte de alimentação de entrada ou a rede elétrica falha. Uma UPS difere de um sistema de energia auxiliar ou de emergência ou de um gerador de reserva porque fornecerá... - Page 98 Quadro Subquadro backup AC300 Rede principal ≤ 3.000 W Módulo fotovoltaico Painel solar BLUETTI (UPS conectada à rede) Nota: Veja mais detalhes sobre UPS conectada à rede em “Como montar um sistema de backup parcial doméstico com AC300+B300”. BASTA LIGAR...
- Page 99 Conecte o AC300 à rede com o subquadro ou conecte-o à tomada com um cabo de carregamento CA. Em seguida, conecte as cargas às portas de saída CA do AC300. Nota: A potência de saída no modo UPS plug-in depende da especificação da corrente e tensão do circuito doméstico.
-
Page 100: Habilite A Ups
• O AC300+B300 carrega e descarrega em períodos de tempo específicos, reduzindo significativamente as suas contas de eletricidade. Hora de carga: O período em que o AC300+B300 carrega através da rede. Opte por carregar o sistema fora dos horários de pico, quando os preços da eletricidade são menores. - Page 101 12.2.3 Modo UPS com prioridade fotovoltaica • O AC300+B300 é carregado principalmente por energia solar para economizar energia. Capacidade reservada para carregamento fotovoltaico: O AC300+B300 carrega para esta SOC a partir da rede e, em seguida, de painéis solares ou outras fontes.
- Page 102 12.2.4 Modo UPS personalizada O AC300+B300 opera com base no seu plano de energia, carregando e descarregando dentro do cronograma, priorizando o carregamento solar e muito mais. Neste modo, você também pode maximizar a energia solar ou até mesmo viver completamente fora da rede, desativando o carregamento da rede.
-
Page 103: Especificações Técnicas
13. ESPECIFICAÇÕES TÉCNICAS AC300 Geral Capacidade da bateria (com 1 a 4 B300) 3.072-12.288 Wh / 60-240 Ah Dimensões (C x L x A) 520 x 320 x 358 mm/ 20,5 x 12,5 x 14,1 pol. Peso 21,6 kg / 47,62 lb Temperatura de descarregamento -20 °C a 40 °C / -4 °F a 104 °F... - Page 104 Entrada CA Potência 3.000 W máx. Tensão 196-253 Vca Corrente 16 A máx. Frequência 47-63 Hz Entrada CC Potência 2.400 W máx. (CC1 + CC2) Tensão 12-150 Vcc Corrente 12 A máx. BASTA LIGAR...
-
Page 105: Solução De Problemas
14. SOLUÇÃO DE PROBLEMAS Código Descrição Solução do erro Entre em contato com o revendedor se Aviso do D-AMCU o sintoma persistir após reiniciar a unidade. Entre em contato com o revendedor se Aviso do D-BMS o sintoma persistir após reiniciar a unidade. Entre em contato com o revendedor se Erro de comunicação D-A o sintoma persistir após reiniciar a unidade. - Page 106 Entre em contato com o revendedor se Tensão de entrada CC baixa o sintoma persistir após reiniciar a unidade. Entre em contato com o revendedor se Sobrecorrente de entrada CC o sintoma persistir após reiniciar a unidade. Entre em contato com o revendedor se Sobrecorrente de saída do inversor o sintoma persistir após reiniciar a unidade.
- Page 107 AC300. D-BAT completa A bateria está carregada. Sem bateria. Carregue o AC300+B300. O alarme para D-BAT drenada automaticamente quando o SOC da bateria alcança 5%. Ligue CA na tela.
- Page 108 Verifique se a entrada de tensão CA atende às especificações da unidade. Erro de fase Multi Brak Limpe o histórico de alarmes ou reinicie a unidade. Verifique se a configuração “Ativação paralela FV” é consistente com a entrada FV. Erro de paralelo fotovoltaico Entre em contato com o revendedor se o sintoma persistir após reiniciar a unidade.
- Page 109 às especificações da unidade. Porta 24 V/10 A CC bloqueada Entre em contato com o revendedor se o sintoma persistir após reiniciar a unidade. DESLIGUE o AC300+B300 e resfrie-o. Temperatura BMS anormal Mantenha o AC300 na temperatura recomendada Entre em contato com o revendedor se Sobretensão do BMS...
-
Page 110: Perguntas Frequentes (Faq)
DoD indica a fração de energia que pode ser retirada da bateria. O BLUETTI AC300 define o DoD como 90%, o que significa que 90% da capacidade está disponível para alimentar o seu dispositivo, enquanto o reservado é usado para proteger a bateria contra descarga excessiva. -
Page 111: Declaração
• Observe que as especificações e a aparência estão sujeitas a melhorias sem aviso prévio. • A BLUETTI não será responsável por quaisquer danos causados por motivos de força maior, como incêndios, furacões, inundações, terremotos ou negligência intencional, uso indevido ou outras condições anormais do uso. - Page 112 SHENZHEN POWEROAK NEWENER CO., LTD. Address: F19, BLD No.1, Kaidaer, Tongsha Rd No.168, Xili Street, Nanshan, Shenzhen, China Customer Service Email: support-br@bluettipower.com , suporte@bluetti.com Web: https://br.bluettipower.com/ P/N: 17.0303.0672-00A0...
Need help?
Do you have a question about the AC300 and is the answer not in the manual?
Questions and answers