
Related Manuals for Bluetti AC240


Summary of Contents for Bluetti AC240
- Page 1 AC240 Portable Power Station User Manual V 1 . 0 Please read this manual carefully before use and keep it for future reference.
- Page 2 Warning 1. Charge the unit before first use. 2. Do not use solar panels with open circuit voltage higher than 60V. Solar input voltage range for the unit is 11V-60VDC. 3. Charge the unit immediately when the SoC drops below 5%. If the SoC drops to 0, power off the unit and charge it for at least 30 minutes before restarting.
- Page 3 Thank You! Thank you for making BLUETTI a part of your family. From the very beginning, BLUETTI has tried to stay true to a sustainable future through green energy storage solutions while delivering an exceptional eco-friendly experience for our homes and our world.
-
Page 4: Table Of Contents
Contents Safety Instructions Packing List Product Introduction Product Overview Power ON / OFF LED Screen Charging Discharging Settings AC240 + B210 Expansion Connection Parallel Operation BLUETTI App Specifications Button Operation Instructions Troubleshooting Appx. 1 Estimating Operation Time Appx. 2 FAQ... -
Page 5: Safety Instructions
The safety instructions provided herein are for illustrative purposes that include but are not limited to those listed in this manual. Actual operation shall comply with all applicable safety standards. If you have any questions, feel free to contact BLUETTI support or your local BLUETTI dealers. - Page 6 ports of the product. • Use of an attachment not recommended or sold by the manufacturer may result in a risk of fire, electric shock, or injury to persons. • To reduce the risk of damage to the electric plug and cord, pull the plug rather than the cord when disconnecting the product.
- Page 7 • Do not stack anything on top of the product while in storage or while in use. Do not move the product while operating as vibrations and sudden impacts may lead to poor connections to the hardware inside. • CAUTION: Do not use this product in the rain •...
- Page 8 Please refer to the information on the exterior bottom enclosure for electrical and safety information before installing or operating the apparatus. SAVE THESE INSTRUCTIONS BLUETTI shall not be liable for any equipment damage caused by the violation of the above instructions. JUST POWER ON...
-
Page 9: Packing List
Portable Power Station AC Charging Cable RV Power Cable (For RV's 12V devices) Solar Charging Cable Grounding Screw AC240 Portable Power Station User Manual V 1.0 Please read this manual carefully before use and keep it for future reference. User Manual... - Page 10 Item Picture B210 Expansion Battery USB-C to USB-C Cable (output) Lead-acid Battery Charging Cable (Charge the AC240 via a lead-acid battery) Parallel Box AC Parallel Charging Cable (The appearance of the cable is subject to the cable received) Car Charging Cable...
-
Page 11: Product Introduction
AC240 for uninterrupted power for days on end. Managing the AC240 is a breeze thanks to the BLUETTI App, which lets you control the unit's various functions and settings with ease. With features like ECO Mode and UPS Mode, you can optimize your power consumption and protect your device at all times. -
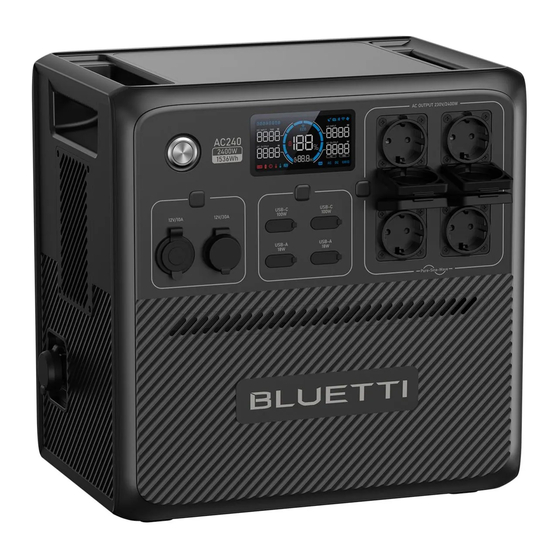
Page 12: Product Overview
4. Product Overview 4 5 6 7 AU Version ZA Version Battery Expansion Port USB-C Port ① ⑨ USB-A Port Cigarette Lighter Port ② ⑩ ⑪ Power Button RV Port ③ ⑫ DC Power Button DC Input ④ ⑬ AC Input LED Screen ⑤... -
Page 13: Power On / Off
Power OFF: Press and hold the Power Button for 2 seconds to turn off the unit. • AC ON / OFF: When the AC240 is on, press the AC Power Button to turn it on / off. • USB ON / OFF: When the AC240 is on, press the USB Power Button to turn it on / off. -
Page 14: Led Screen
6. LED Screen The AC240 features an informative LED screen that offers easy access to all the essential information about the unit's status and performance. When you power on the unit, the LED screen lights up, and when you power off the unit, the screen turns off as well. - Page 15 Each icon represents an attached expansion battery. The AC240 can display up to 4 battery icons. The AC240 is charging in Silent Charging Mode. The AC240 is charging from a DC power source, such as solar panels, lead-acid batteries, etc. The AC240 connects to BLUETTI App via Bluetooth.
-
Page 16: Charging
Connect the solar panels (in series or parallel) to AC240 via the solar charging cable. When receiving a continuous input of 1200W, the AC240 can be charged up to 80% in about 1.3 hours.. However, please be aware that the charging time may vary based on weather conditions, sunlight intensity, panel orientation, and other variables. - Page 17 For solar panels with an open circuit voltage between 60V and 145V, you can still use them to charge the AC240. Simply connect the solar panels to the AC240 via the PV Voltage Regulator, and you can enjoy seamless and hassle-free solar charging.
- Page 18 7.4 Generator Charging Connect the AC240 to a generator via the AC charging cable. The AC240 also automatically stops charging when it's fully charged. Note: Make sure your generator delivers the AC output with charging voltage, frequency, and Grid Self-adaption Mode voltage that meet AC240's specifications.
-
Page 19: Discharging
8. Discharging Besides the cigarette lighter port, USB-A, and USB-C, AC240 also features two types of AC outlets and an RV port, expanding your charging options. 8.1 AC Discharging Port Description AC Outlet For AC electrical devices. 8.2 DC Discharging... -
Page 20: Settings
In this mode, if the AC power output falls below a certain level for a set period of time, the AC power will automatically turn off. Note: This mode is not available when the AC240 is charging from an AC source like a wall outlet or generator. - Page 21 Note: Turn off AC Power Button before setting Frequency. 9.4 WiFi & Bluetooth Connection To connect the AC240 to the BLUETTI App, turn on the WiFi or Bluetooth first. In the Setting Mode, press the DC Power button to navigate through the setting items. When icon flashes on the screen, press the AC Power Button to turn Bluetooth on.
- Page 22 • PV Priority UPS Mode In this mode, the AC240 is mainly charged by solar energy to save power. You can also set a specific State of Charge (SoC) threshold. AC240 charges from the grid until reaching the designated SoC, and then seamlessly switches to solar charging for the remaining capacity.
- Page 23 Service and request a password to make the necessary adjustments. 9.10 Exit Setting Mode To save your AC240 settings and exit the Setting Mode, press and hold down both the DC and AC Power Buttons at the same time. Note: If you do not perform any operation in 1 minute, the AC240 will automatically exit the Setting Mode, and no changes will be saved.
-
Page 24: Ac240 + B210 Expansion Connection
10. AC240 + B210 Expansion Connection The AC240 unit supports up to 4 B210 expansion batteries, providing a total capacity of up to 10,136Wh. Follow these steps to connect the two units: 1. Make sure both the AC240 and B210 are turned off. -
Page 25: Parallel Operation
Note: • All the settings made on one AC240 unit will be synchronized to the other unit. If you need to adjust the Max. Grid Input Current, please use the BLUETTI App and make the necessary changes. • Charge the two AC240s using the Parallel Charging Cable(with parallel box in Optional Accessories)... -
Page 26: Bluetti App
12. BLUETTI App Scan the QR code below or search "BLUETTI" in the App Store or Google Play to download the BLUETTI App. For more details, please refer to BLUETTI APP INSTRUCTIONS. 13. Specifications Model AC240 Battery Capacity 1,536Wh (30Ah) - Page 27 AC Output Power 2,400W in total 2500W<load<3000W@2min; Overload Power 3000W<load<3600W@10s; 3600W<load@500ms; Voltage 230VAC Current Frequency 50Hz / 60Hz DC Output Cigarette Lighter Port × 1 12VDC / 10A USB-A × 2 18W Max. (QC3.0: 5V / 3A; 9V / 2A; 12V / 1.5A) USB-C ×...
-
Page 28: Button Operation Instructions
2 seconds till the If you do not perform any operation output frequency flashes in 1 minute, the AC240 will automatically exit the Setting Mode, and no changes will be saved. The flashing setting item is selected and editable. -
Page 29: Troubleshooting
15. Troubleshooting In the Setting Mode, press and hold the DC power button to switch the status page until icon and the error code appear simultaneously on the screen. Please refer to the table below for helpful guidance. Error Code Alarm Icon Description Troubleshooting... -
Page 30: Appx. 1 Estimating Operation Time
Operation time = Battery Capacity (Wh) x DoD x η ÷ (Load Power + AC240 Self-consumption) Note: DoD refers to the depth of discharge. AC240 works at 95% DoD for longer battery life. η is the conversion efficiency of the inverter, typically over 85% for AC240. - Page 31 For more information, please visit: @ BLUETTI Support @ BLUETTI Official @bluetti_official @ bluetti.inc @ bluetti_inc sale-au@bluettipower.com Customer Service(AU) Email: sale-au@bluettipower.com Address: Unit 15, 25 Gibbes Street Chatswood NSW 2067 Customer Service(ZA) Email: sale-za@bluettipower.com SHENZHEN POWEROAK NEWENER CO., LTD. F19, BLD No.1, Kaidaer, Tongsha Rd No.168,...
- Page 32 Cer t ifi ca te Inspector: Q C :...
Need help?
Do you have a question about the AC240 and is the answer not in the manual?
Questions and answers