Table of Contents
Advertisement
Available languages
Available languages
Quick Links
Created 09/23
533908
Eclipse 360
BNF Basic
Scan the QR code and select the Manuals and Support quick links from the
product page for the most up-to-date manual information.
Scannen Sie den QR-Code und wählen Sie auf der Produktseite die Quicklinks
Handbücher und Unterstützung, um die aktuellsten Informationen zu Handbücher.
Scannez le code QR et sélectionnez les liens rapides Manuals and Support sur la
page du produit pour obtenir les informations les plus récentes sur le manuel.
Scannerizzare il codice QR e selezionare i Link veloci Manuali e Supporto dalla
pagina del prodotto per le informazioni manuali più aggiornate.
Instruction Manual
Bedienungsanleitung
Manuel d'utilisation
Manuale di Istruzioni
BLH01250
Advertisement
Chapters
Table of Contents

Related Manuals for Horizon Hobby Blade Eclipse 360 BNF Basic


Summary of Contents for Horizon Hobby Blade Eclipse 360 BNF Basic
- Page 1 BLH01250 Eclipse 360 BNF Basic Instruction Manual Bedienungsanleitung Manuel d’utilisation Manuale di Istruzioni Scan the QR code and select the Manuals and Support quick links from the product page for the most up-to-date manual information. Scannen Sie den QR-Code und wählen Sie auf der Produktseite die Quicklinks Handbücher und Unterstützung, um die aktuellsten Informationen zu Handbücher.
- Page 2 This product is not intended for use by children without direct adult supervision. Do not use with incompatible components or alter this product in any way outside of the instructions provided by Horizon Hobby, LLC. This manual contains instructions for safety, operation and maintenance.
-
Page 3: Table Of Contents
Table of Contents NX and DX Series Transmitter Setup ..............4 Advanced Tuning (Forward Programming) ............11 iX Series Transmitter Setup ................5 Troubleshooting Guide ..................13 Installing the Flight Battery ................6 Limited Warranty .....................14 Smart Throttle ....................7 Warranty and Service Contact Information ............14 Throttle Hold .....................7 FCC and Canada Compliance Information ............15 Control Tests .....................8... -
Page 4: Nx And Dx Series Transmitter Setup
NX and DX Series Transmitter Setup 1. Power ON your transmitter, click on scroll wheel, roll to System Setup and click 20. Scroll down to Pitch curve and press the scroll wheel the scroll wheel. Choose yes. Scroll to the N box for curve selection and press the scroll wheel to select the Normal curve 2. -
Page 5: Ix Series Transmitter Setup
iX Series Transmitter Setup 1. Power ON your transmitter and begin once the Spektrtum Airware app is open. 19. Tap on Pitch curve Select the orange pen icon in the upper left corner of the screen, the system Ensure Switch H is set to the O position Set the B switch to the 0 position to select the Normal curve asks for permission to Turn Off RF, select PROCEED Set the Curve values to... -
Page 6: Installing The Flight Battery
Installing the Flight Battery 1. Lower the throttle. 7. Bind your transmitter to the helicopter to establish a connection. See the Binding section below for more information. 2. Power on the transmitter. 8. Connect the battery cable to the ESC. The swashplate will center, indicating that 3. -
Page 7: Smart Throttle
Smart Throttle The ESC in this helicopter paired with the FC6250HX flight controller and the 4. In your transmitter, go to the Function List 4651T receiver enables the use of Smart technology. This system can provide a (Model Setup in iX series transmitters). variety of real-time power system related telemetry data while you fly, including 5. -
Page 8: Control Tests
Control Tests CAUTION: You must complete the Cyclic tests prior to every flight. Failure to complete the tests and ensuring the sensor corrects in the proper direction can cause the helicopter to crash, resulting in property damage and injury. Cyclic It is normal for the swashplate to slowly move back to its original position •... -
Page 9: Low Voltage Cutoff (Lvc)
Motor Test Place the helicopter outdoors on a clean, flat and level surface (concrete or 2. Ensure the throttle is lowered completely and is in normal flight mode. asphalt) free of obstructions. Always stay clear of moving rotor blades. 3. Turn throttle hold off. 4. -
Page 10: Pre-Flight Checklist
Pre-Flight Checklist ❏ Check all screws and ensure that they are tight ❏ Check gears and make sure no teeth are missing ❏ Check main and tail blades to ensure they are not damaged ❏ Do a complete control test ❏... -
Page 11: Post-Flight Inspections And Maintenance
Post-Flight Inspections and Maintenance Make sure the plastic ball link holds the control ball, but is not tight (binding) on the ball. When a link is too loose on the ball, it can separate Ball Links from the ball during flight and cause a crash. Replace worn ball links before they fail. Cleaning Make sure the battery is not connected before cleaning. - Page 12 Trim Flight Perform this procedure if the model is not performing well or has been recently The trim flight is used to determine the optimal settings for SAFE® technology rebuilt from a crash. during flight. The trim flight procedure was performed during the factory test flight and only The trim flight must be performed in calm conditions.
-
Page 13: Troubleshooting Guide
Troubleshooting Guide Problem Possible Cause Solution Low flight battery or transmitter battery voltage Fully charge or replace the flight battery and/or transmitter batteries receiver is not in bind mode Make sure the bind plug is connected to the receiver BND/DAT port Helicopter will not bind Power on the transmitter while holding the Trainer/Bind switch. -
Page 14: Limited Warranty
Please note that original boxes may be included, but are not designed than a Horizon Hobby authorized service center, (v) Product not purchased from an to withstand the rigors of shipping without additional protection. Ship via a carrier that... -
Page 15: Fcc And Canada Compliance Information
Compliance Information for the European Union EU Compliance Statement: EU Manufacturer of Record: Horizon Hobby, LLC Blade Eclipse 360 BNF Basic (BLH01250) Hereby, Horizon Hobby, 2904 Research Road LLC declares that the device is in compliance with the following: EU Champaign, IL 61822 USA Radio Equipment Directive 2014/53/EU;... - Page 16 Sachwerten führen. Dieses Produkt eignet sich nicht für die Verwendung durch Kinder ohne direkte Überwachung eines Erwachsenen. Versuchen Sie nicht ohne Genehmigung durch Horizon Hobby, LLC, das Produkt zu zerlegen, es mit inkompatiblen Komponenten zu verwenden oder auf jegliche Weise zu erweitern.
- Page 17 Inhaltsverzeichnis Konfiguration von Sendern der NX- oder DX-Serie ........18 Kontrollen nach dem Flug und Wartung............25 Konfiguration von Sendern der iX-Serie ............19 Erweitertes Tuning (Forward Programming/Vorwärtsprogrammierung) ..25 Installieren des Flugakkus ................20 Trimmflug ..................... 26 Smart Throttle ....................21 Leitfaden zur Fehlerbehebung...............
-
Page 18: Konfiguration Von Sendern Der Nx- Oder Dx-Serie
Konfiguration von Sendern der NX- oder DX-Serie 1. Schalten Sie Ihren Sender EIN, klicken Sie das Scrollrad an, gehen Sie zu 20. Scrollen Sie nach unten zu Pitchkurve und drücken Sie das Scrollrad Systemkonfiguration und klicken Sie das Scrollrad an. Wählen Sie Ja. Scrollen Sie zum Feld N für die Kurvenauswahl und drücken Sie das Scrollrad, um die normale Kurve auszuwählen 2. -
Page 19: Konfiguration Von Sendern Der Ix-Serie
Konfiguration von Sendern der iX-Serie 1. Schalten Sie Ihren Sender EIN und beginnen Sie, sobald die App Spektrum AirWare 19. Tippen Sie auf die Pitchkurve geöffnet ist. Sicherstellen, dass sich Schalter H in Position O befindet Wählen Sie das orangene Stiftsymbol oben links auf dem Bildschirm. Das System erfragt Schalter B auf Position 0 stellen, um die normale Kurve auszuwählen eine Erlaubnis zum „Ausschalten HF“, wählen Sie „FORTFAHREN“... -
Page 20: Installieren Des Flugakkus
Installieren des Flugakkus 1. Den Gashebel senken. 7. Binden Sie Ihren Sender an den Hubschrauber, um eine Verbindung herzustellen. Weitere Informationen finden Sie im Abschnitt Bindung. 2. Den Sender einschalten. 8. Das Akku-Kabel mit dem Geschwindigkeitsregler verbinden. Die Taumelscheibe 3. Alle Trimmungen zentrieren. wird sich zentrieren und anzeigen, dass das Gerät bereit ist. -
Page 21: Smart Throttle
14. Auf den Hauptbildschirm zurückkehren. 3. Das Flugzeug einschalten und Initialisierung ermöglichen. Technologie Die revolutionäre SAFE Technologie von Horizon Hobby (Sensor Assited Flight SAFE Technologie im Überblick: Envelope) verwendet eine innovative Kombination aus Multi-Achs Sensoren und • Flugstabilisierung über einen Schalter zuschaltbar. -
Page 22: Kontrolltests
Kontrolltests ACHTUNG: Sie müssen den Seitenruder- und zyklischen Test durchführen, bevor Sie einen Flug starten. Wenn Sie die Tests nicht durchführen und sich somit nicht der korrekten Sensorrichtungen vergewissern, kann der Helikopter abstürzen und Sachschäden sowie Verletzungen verursachen. Zyklisch Es ist normal, dass sich die Taumelscheibe nach einem Steuerknüppelbefehl •... -
Page 23: Niederspannungabschaltung (Lvc)
Motortest Den Hubschrauber auf eine saubere, ebene und flache Außenfläche stellen (Beton 2. Achten Sie darauf, dass der Gashebel vollständig heruntergedrückt ist und sich oder Asphalt), die frei von Hindernissen ist. Halten Sie sich stets von den sich im normalen Flugmodus befindet. bewegenden Rotorblättern fern. -
Page 24: Checkliste Für Den Flug
Checkliste für den Flug ❏ Überprüfen Sie, ob alle Schrauben fest angezogen sind Überprüfen Sie, ob die ❏ Überprüfen Sie alle Stecker und Kabelverbindungen Riemenspannung richtig eingestellt ist ❏ Überprüfen Sie die Zahnräder auf fehlende Zähne ❏ Überprüfen Sie die Haupt- und Heckblätter auf Schäden ❏... -
Page 25: Kontrollen Nach Dem Flug Und Wartung
Kontrollen nach dem Flug und Wartung Stellen Sie sicher, dass der Kunststoff-Gelenkkopf die Rollkugel hält, aber nicht an der Kugel haftet (fest verbunden). Wenn ein Gelenkkopf Gelenkköpfe zu locker auf der Kugel sitzt, kann er sich während des Fluges von der Kugel lösen und einen Absturz verursachen. Tauschen Sie abgenutzte Gelenkköpfe aus, bevor sie ausfallen. -
Page 26: Trimmflug
Trimmflug Führen Sie diesen Vorgang durch, wenn die Leistung des Modells unbefriedigend Anhand des Trimmflugs werden die optimalen Einstellungen ermittelt, die von der ist oder nach einem Absturz vor kürzerer Zeit repariert wurde. SAFE®-Technologie während des Flugs angewendet werden. Das Trimmflug-Verfahren wurde bei den Testflügen im Werk vorgenommen und Der Trimmflug muss bei ruhigen Windbedingungen erfolgen. -
Page 27: Leitfaden Zur Fehlerbehebung
Leitfaden zur Fehlerbehebung Problem Mögliche Lösung Hubschrauber reagiert nicht richtig und er- Hubschrauber ist nicht korrekt initialisiert oder Vibrationen Trennen Sie den Flugakku, zentrieren die Trimmung und fordert extra Trimmung um die Bewegung stören die Sensoren initialisieren den Hubschrauber erneut zu stoppen Trennen Sie den Flugakku, bringen Sie den Gashebel in die niedrigste Postion und stellen die Gastrimmung ein paar... -
Page 28: Garantie Und Service Informationen
Kaufdatum hervorgeht. Sollte sich ein Garantiefall bestätigen wird das Produkt gegen geltendes Recht, Gesetze oder Regularien verstoßen haben. Rücksendungen repariert oder ersetzt. Diese Entscheidung obliegt einzig Horizon Hobby. durch den Käufer direkt an Horizon oder eine seiner Landesvertretung bedürfen der Kostenpflichtige Reparaturen—Liegt eine kostenpflichtige Reparatur vor, erstel-... -
Page 29: Garantie Und Service Kontaktinformationen
Konformitätshinweise für die Europäische Union EU Konformitätserklärung: Offizieller EU-Hersteller: Horizon Hobby, LLC Blade Eclipse 360 BNF Basic (BLH01250): Hiermit erklärt Horizon 2904 Research Road Hobby, LLC, dass das Gerät den folgenden Richtlinien entspricht: Champaign, IL 61822 USA EU-Richtlinie über Funkanlagen 2014/53/EU; RoHS 2-Richtlinie 2011/65 / EU;... - Page 30 REMARQUE La totalité des instructions, garanties et autres documents est sujette à modification à la seule discrétion d’Horizon Hobby, LLC. Pour obtenir la documentation à jour de ce produit, veuillez consulter le site www.horizonhobby.com ou www.towerhobbies.com et cliquez sur l’onglet de support du produit.
- Page 31 Table des matières Configuration d’un émetteur des séries NX et DX ..........32 Inspections après-vol et Maintenance .............39 Configuration d’un émetteur de la série iX ............33 Réglage avancé (programmation prévisionnelle) ..........39 Installation de la batterie de vol ...............34 Guide de dépannage ..................41 Accélération Smart ..................35 Garantie limitée ....................41 Safe Technologie .....................35...
-
Page 32: Configuration D'un Émetteur Des Séries Nx Et Dx
Configuration d’un émetteur des séries NX et DX 1. Mettez l’émetteur en marche, cliquez sur la molette, allez à System Setup (Configuration 20. Faites défiler jusqu’à la courbe Pitch (Tangage) et appuyez sur la molette du système) et cliquez sur la molette. Choisissez yes (oui). Faites défiler jusqu’à... -
Page 33: Configuration D'un Émetteur De La Série Ix
Configuration d’un émetteur de la série iX 1. Mettez l’émetteur en marche et commencez dès que l’application Spektrum Airware est ouverte. 19. Tapez sur la courbe Pitch (Tangage) Sélectionnez l’icône du crayon orange dans le coin supérieur gauche de l’écran, le système Assurez-vous que le commutateur H est en position O demande l’autorisation de Turn Off RF (Désactiver le RF), sélectionnez PROCEED (POURSUIVRE) Placez le commutateur B en position 0 pour sélectionner la courbe Normal (Normale). -
Page 34: Installation De La Batterie De Vol
Installation de la batterie de vol 1. Abaissez les gaz. 7. Affectez votre émetteur à l’hélicoptère pour établir une connexion. Consultez la section Affectation ci-dessous pour de plus amples informations. 2. Allumez l’émetteur. 8. Raccordez le câble de la batterie au variateur ESC. Le plateau cyclique se 3. -
Page 35: Accélération Smart
Accélération Smart 5. Sélectionnez l’option de menu Telemetry (Télémétrie). Le variateur ESC de cet hélicoptère associé au contrôleur de vol FC6250HX et au récepteur 4651T permet d’utiliser la technologie Smart. Ce système peut fournir 6. Rendez-vous dans l’option de menu Smart Battery (batterie Smart). plusieurs données de télémétrie liées au système de puissance en temps réel pen- 7. -
Page 36: Test Des Commandes
Test des commandes ATTENTION: Il vous faut, avant d’effectuer un vol, avoir effectué les tests de Direction et de Cyclique. Ne pas avoir effectué ces tests qui permettent de s’assurer que les directions du capteur ne sont pas inversées, comporte le risque d’écrasement au sol de l’hélicoptère, avec pour conséquences des dégâts matériels et des blessures corporelles. -
Page 37: Coupure Par Tension Faible (Lvc)
Test du moteur Placez l’hélicoptère à l’extérieur sur une surface propre, plate et à niveau (du 2. Assurez-vous que les gaz sont complètement abaissés et que l’hélicoptère est béton ou de l’asphalte) sans obstructions. Restez toujours à l’écart des pales de en mode de vol Normal. -
Page 38: Check-List Avant Vol
Check-list avant vol ❏ Contrôlez toutes les vis et assurez-vous qu’elles sont bien serrées ❏ Contrôlez tous les câbles pour vous assurer qu’ils ne sont ni coupés, ni coincés, ni mis à nu par frottement et qu’ils sont sécurisés correctement ❏ Contrôlez la tension de la courroie et assurez-vous que cette dernière n’est ni trop lâche ni trop tendue ❏... -
Page 39: Inspections Après-Vol Et Maintenance
Inspections après-vol et Maintenance Assurez-vous que l’articulation à bille en plastique maintient la rotule de commande en place, mais sans la comprimer (grippage). En re- Articulations à bille vanche, un serrage insuffi sant de l’articulation peut entraîner sa séparation de la rotule pendant un vol et provoquer la chute de l’appareil. Remplacez les articulations à... - Page 40 Vol compensé Effectuez cette procédure si le modèle ne fonctionne pas bien ou s’il a été recons- pirouettes fixes. truit suite à un crash. Le vol compensé est utilisé pour déterminer les paramètres optimaux pour la La procédure de vol compensé a été effectuée au cours du vol d’essai en usine technologie SAFE®...
-
Page 41: Guide De Dépannage
Horizon Hobby ne saurait être tenu responsable (c) Recours de l’acheteur – Il est de la seule discrétion d’Horizon de déterminer si d’une utilisation ne respectant pas les lois, les règles ou ... -
Page 42: Informations De Contact Pour Garantie Et Réparation
Hobby. Horizon Hobby ne saurait être tenu responsable d’une utilisation ne respectant pas Réparations payantes—En cas de réparation payante, nous établissons un devis les lois, les règles ou règlementations en vigueur. - Page 43 AVVISO Tutte le istruzioni, le garanzie e altri documenti pertinenti sono soggetti a modifiche a totale discrezione di Horizon Hobby, LLC. Per una documentazione aggiornata sul prodotto, visitare il sito www.horizonhobby.com o www.towerhobbies.com e fare clic sulla sezione Support del prodotto.
- Page 44 Indice Impostazione delle trasmittenti serie NX e DX..........45 Tuning avanzato (Forward Programming) ............52 Configurazione delle trasmittenti serie iX ............46 Guida alla risoluzione dei problemi ..............54 Installazione della batteria di bordo ..............47 Garanzia ......................55 Smart Throttle ....................48 Garanzia e Assistenza - Informazioni per i contatti...........55 Mantenimento gas ..................48 Dichiarazione di conformità...
-
Page 45: Impostazione Delle Trasmittenti Serie Nx E Dx
Impostazione delle trasmittenti serie NX e DX 1. Accendere la trasmittente, premere la rotella di scorrimento, scorrere fino a System 20. Scorrere fino alla curva Pitch e premere la rotella Setup (Impostazione sistema) e premere di nuovo sulla rotella. Scegliere Yes (Sì). Scorrere fino alla casella N per la selezione della curva e premere la rotella per selezionare la curva Normal 2. -
Page 46: Configurazione Delle Trasmittenti Serie Ix
Configurazione delle trasmittenti serie iX 1. Accendere la trasmittente e attendere che l’applicazione Spektrum AirWare si apra. 19. Toccare la curva Pitch Selezionare l’icona della penna arancione nell’angolo in alto a sinistra; il sistema chiede Assicurarsi che l'interruttore H sia impostato sulla posizione O Impostare l'interruttore B di poter spegnere la trasmissione RF, selezione PROCEDI sulla posizione 0 per selezionare la curva Normale Impostare i valori della curva su... -
Page 47: Installazione Della Batteria Di Bordo
Installazione della batteria di bordo 1. Abbassare lo stick del motore. 7. Collegare il trasmettitore all'elicottero per stabilire una connessione. Vedere la sezione Binding (accoppiamento) per maggiori informazioni. 2. Accendere la trasmittente. 8. Collegare il cavo della batteria all’ESC. Il piatto ciclico si centrerà a indicare che 3. -
Page 48: Smart Throttle
Smart Throttle L’ESC di questo elicottero, abbinato al controller di volo FC6250HX e alla ricevente 4. Nella trasmittente, andare in Function List (Lista funzioni) (Model Setup nelle trasmittenti della serie iX). 4651T, consente di utilizzare la tecnologia Smart. Questo sistema è in grado di fornire una serie di dati telemetrici in tempo reale relativi al sistema di alimenta- 5. -
Page 49: Test Di Controllo
Test di controllo ATTENZIONE: è necessario eseguire i test del timone e del comando ciclico prima di effettuare il volo. La mancata esecuzione dei test per verifi care che la direzione dei sensori non sia invertita può far schiantare l’elicottero provocando lesioni e danni materiali. Comando ciclico È... -
Page 50: Taglio Di Bassa Tensione (Lvc)
Test motore Posizione l’elicottero all’aperto su una superficie piana e pulita (calcestruzzo o asfal- 2. Assicurarsi che l'acceleratore sia completamente abbassato e che sia in moda- to), priva di ostacoli. Tenersi sempre lontani dalle pale del rotore in movimento. lità di volo normale. 3. -
Page 51: Elenco Di Controllo Prima Del Volo
Elenco di controllo prima del volo ❏ Controllare tutte le viti e assicurarsi che siano strette ❏ Controllare che tutti i cavi siano collegati ❏ Controllare la tensione della cinghia e assicurarsi che non siano troppo stretta ❏ Controllare gli ingranaggi e assicurarsi che non manchino denti o troppo allentata ❏... -
Page 52: Ispezioni Dopo Il Volo E Manutenzione
Ispezioni dopo il volo e manutenzione Verifi care che le sfere siano tenute saldamente, ma che non siano troppo strette. Se un attacco è troppo largo, potrebbe staccarsi in volo e Attacchi a sfera causare un incidente. Sostituire gli attacchi usurati prima che cedano. Accertarsi che la batteria non sia collegata prima di effettuare la pulizia. - Page 53 Volo di trimmaggio Eseguire questa procedura se l’aeromodello non si comporta bene o se è stato Il volo di trimmaggio viene utilizzato per determinare le impostazioni ottimali per la recentemente ricostruito dopo un incidente. tecnologia SAFE® durante il volo. Il modello è stato trimmato in durante la prova in volo di fabbrica e la procedura va Il volo di trimmaggio deve essere eseguito in condizioni di vento calmo.
-
Page 54: Guida Alla Risoluzione Dei Problemi
Guida alla risoluzione dei problemi Problema Possibile causa Soluzione Tensione bassa della batteria di volo o della batteria del trasmettitore Ricaricare completamente o sostituire la batteria di volo e/o le batterie del trasmettitore Accertarsi che lo spinotto di binding sia collegato alla porta BND/DAT dell’SPM- Il ricevitore SPM4649TA non è in modalità... -
Page 55: Garanzia
Garanzia Periodo di garanzia—Garanzia esclusiva - Horizon Hobby, LLC (Horizon) garantisce Indicazioni di sicurezza—Questo è un prodotto sofisticato di hobbistica e non è che il prodotto acquistato (il “Prodotto”) sarà privo di difetti relativi ai materiali e di un giocattolo. Esso deve essere manipolato con cautela, con giudizio e richiede delle eventuali errori di montaggio alla data di acquisto. -
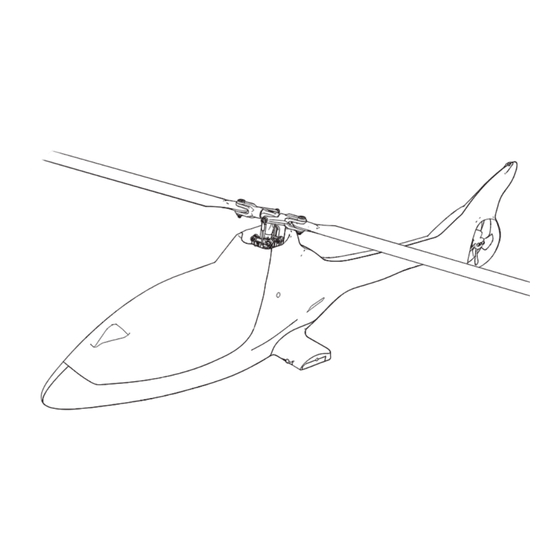
Page 56: Exploded View
Exploded View / Explosionszeichnung / Vue Éclatée / Vista Esplosa... -
Page 58: Parts List
Parts List / Ersatzteile / Pièces de Rechange / Pezzi di Ricambio Part # English Deutsch Français Italiano Hauptflügelblattgriffe (2): Eclipse Poignées de la pale principale (2) : Impugnature della lama principale (2): 1 BLH01201 Main Blade Grips (2): Eclipse 360 Eclipse 360 Eclipse 360 2 BLH01202... -
Page 59: Optional Parts
Optional Parts / Optionale Bauteile / Pièces Optionnelles / Pezzi Opzionali Part # English Deutsch Français Italiano Ensemble poignée du rotor principal FBL en Set di gruppi di montaggio princi- BLH4317A Alu FBL Main Rtr Grp Set: B450 X Alu FBL Hauptrotorhaltersatz: B450 X aluminium : B450 X pale FBL in alluminio: B450 X Bracci di scorrimento Alu FBL:... - Page 60 ©2023 Horizon Hobby, LLC. Blade, the Blade logo, SAFE, The SAFE logo, DSM2, DSMX, BNF, the BNF logo, IC3, and the Horizon Hobby logo are trademarks or registered trademarks of Horizon Hobby, LLC. The Spektrum trademark is used with permission of Bachmann Industries, Inc.
Need help?
Do you have a question about the Blade Eclipse 360 BNF Basic and is the answer not in the manual?
Questions and answers