Table of Contents
Advertisement
Quick Links
INTRO |
Hey there, thanks for buying this DIY kit! We - Erica Synths and Moritz Klein - have
developed it with one specific goal in mind: teaching people with little to no prior
experience how to design analog synthesizer circuits from scratch. So what you'll find in
the box is not simply meant to be soldered together and then disappear in your rack.
Instead, we want to take you through the circuit design process step by step, explaining
every choice we've made and how it impacts the finished module. For that, we strongly
suggest you follow along on a breadboard , which is a non-permanent circuit prototyping
1
tool that allows you to experiment and play around with your components. To help you
with this, we've included suggested breadboard layouts in select chapters.
In addition to this, you can also play around with most of the chapter's circuits in a circuit
simulator called CircuitJS. CircuitJS runs in your browser. You'll find weblinks in the
footnotes which will direct you to an instance that already has example circuits set up for
you. We strongly encourage you to fiddle with the component values and general
structure of those circuits to get a better understanding of the concepts we're laying out.
Generally, this manual is intended to be read and worked through front to back, but there
were a few things we felt should go into a dedicated appendix. These are general
vignettes on electronic components & concepts, tools, and the process of putting the
module together once you're done experimenting. Don't hesitate to check in there
whenever you think you're missing an important piece of information. Most importantly
though: have fun!
TABLE OF CONTENTS
CIRCUIT SCHEMATIC .................................................................................... 2
BILL OF MATERIALS ..................................................................................... 3
POWERING YOUR BREADBOARD ................................................................... 6
USAGE WITH MKI x ES LABOR ....................................................................... 7
CIRCUIT DESIGN CLOSE-UP .......................................................................... 9
COMPONENTS & CONCEPTS APPENDIX ....................................................... 26
TOOLS APPENDIX ....................................................................................... 39
MODULE ASSEMBLY APPENDIX ................................................................... 41
SOLDERING APPENDIX ................................................................................ 55
Note that there is no breadboard included in this kit! You will also need a pack of jumper wires
1
and two 9 V batteries with clips. These things are cheap & easy to find in your local electronics
shop. Alternatively, consider investing in MKI x ES LABOR, our circuit prototyping board.
1
Advertisement
Table of Contents

Related Manuals for Erica Synths mki x es.EDU Snare Drum


Summary of Contents for Erica Synths mki x es.EDU Snare Drum
-
Page 1: Table Of Contents
INTRO | Hey there, thanks for buying this DIY kit! We – Erica Synths and Moritz Klein – have developed it with one specific goal in mind: teaching people with little to no prior experience how to design analog synthesizer circuits from scratch. So what you’ll find in the box is not simply meant to be soldered together and then disappear in your rack. -
Page 2: Circuit Schematic
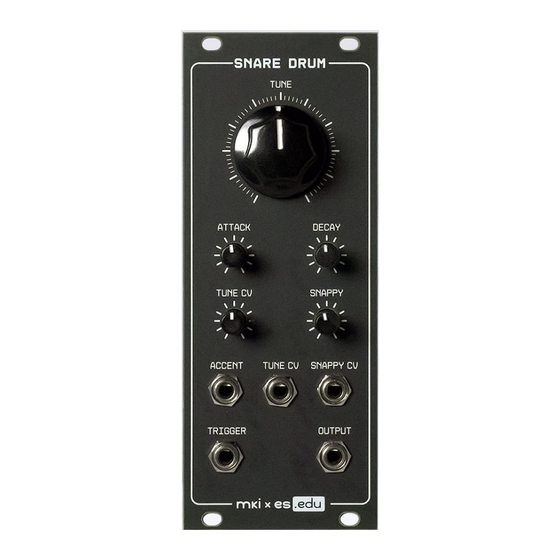
SNARE DRUM No drum machine is really complete without a punchy, snappy snare. Together with the kick, it creates the rhythmic backbone for most grooves. So in my ongoing quest for creating a Roland-inspired modular drum machine, I knew I had to come up with a snare circuit that would complement the kick and hi-hat I’ve already designed. -
Page 3: Bill Of Materials
BILL OF MATERIALS Before we start, please check if your kit contains all of the necessary components. In addition to a PCB, panel and power cable, your box should also contain: An array of resistors. The specific values (in ohms, which you should check for with a multimeter) are 910k x1 470k x1... - Page 4 Some diodes. The specific model names (which are printed onto their bodies) are 1N4148 (signal) 1N5819 (schottky) x2 A couple of transistors. The specific model names (which are printed onto their bodies) are BC558 (PNP) BC548 (NPN) A handful of potentiometers. Their specific values (which may be encoded &...
- Page 5 A couple chips. Their specific models (which are printed onto their bodies) are TL072 (dual op amp) You will also find a few sockets that are only relevant when assembling the module in the end.
-
Page 6: Powering Your Breadboard
POWERING YOUR BREADBOARD Before we can start building, you’ll need to find a way of providing your breadboard with power. Ideally, you’d use a dual 12 V power supply for this. Dual power supplies are great – and if you want to get serious about synth design, you should invest in one at some point. -
Page 7: Usage With Mki X Es Labor
USAGE WITH MKI x ES LABOR Alternatively, you can follow this guide using an MKI x ES Labor prototyping board. Labor comes equipped with everything you need for testing the circuits we lay out: a standard 830 tie point breadboard, an integrated dual power supply with over current protection, a manual gate/trigger/envelope generator, an LFO, a variable CV source, an output amplifier, and a modular interfacing section where you can insert all of your interfacing components like potentiometers, jack sockets, and switches. - Page 8 To listen to your circuit, you don’t even need to set up an output jack socket. Instead, use the built-in output amplifier at the top of the device. Just plug your circuit’s signal output into the header labeled AUDIO IN, and then connect your headphones to the PHONES output jack (or a line-level device like a standalone external speaker to the AUDIO output jack).
-
Page 9: Circuit Design Close-Up
SNARE DRUM BASICS As always when designing a drum voice, I’ll start by mapping out the functional blocks we need for a classic analog snare. There are two main components to the sound: the drum (i.e. a pitched oscillation) and the snare wires (i.e. the noisy rattling). We’ll tackle the drum first. - Page 10 DRUM OSCILLATOR As I said before, we’ll simply repurpose the oscillator I used in my kick drum for this. You can check that DIY kit’s guide for an in-depth explanation, but here’s the basic gist. By plugging a bridged-t network consisting of two capacitors and two resistors into the feedback path of an op-amp, we create a highly resonant filter.
- Page 11 Using a 910k bridge resistor, two 33n capacitors and a 470 ohms resistor to ground combined with a 1k potentiometer should allow us to roughly cover that range. Now, to actually test this, we’ll need a quick voltage pulse (also called a trigger). Thankfully, we can reuse the gate-to-trigger converter I’ve come up with for my kick drum for this.
- Page 12 By using a 250k potentiometer in parallel with the 47k feedback resistor, we can dial in any amount of gain between 0 and about 0.8, which should give us a decently long tail on the drum sound. Try increasing the decay to the max – you should be able to get a much longer drum sound out of this.
- Page 13 ATTACK STAGE Next, I want to add a punchy attack to the drum sound via a pitch envelope. For that, we’ll take another cue from my kick drum circuit: bridging the resistance to ground in the oscillator with an NPN transistor. It works like this: if we apply a voltage to the transistor’s base, it will allow current to bypass the potentiometer and 470Ω...
- Page 14 Then, when the trigger disappears, current slowly flows from the capacitor through the voltage divider, opening up the transistor in the process. Why do we need the voltage divider, though? Wouldn’t a single bigger resistor connecting the cap and transistor have the same effect? Not quite, since the transistor wouldn’t allow the capacitor to fully discharge.
- Page 15 As expected, you should now be able to vary the attack’s intensity from pretty punchy to really subtle. Great!
- Page 16 NOISE GENERATOR Right now, our circuit sounds more like a 606-style tom than a snare. That’s because we’re missing the second main component of the sound: the snare wires. To implement it, we’ll first need to set up a white noise generator. Here, we can again re-use part of a circuit I already designed.
- Page 17 SWING TYPE VCA Next, we’ll need to shape the noise into a percussive burst. For that, we’ll go with the swing type VCA that Roland used all over their 606 and 808 drum voices. Again, I did a thorough analysis of this little circuit in my previous DIY hi-hat kit guide, but here’s a quick summary.
- Page 18 To test this, you need to connect some sort of CV source to the VCA’s CV input (e.g. a sequencer or an LFO). That CV should then control the volume of the noise signal at the output. Great!
- Page 19 NOISE ENVELOPE With the VCA done, we’ll now want to add another envelope generator, so we can make our noise match the volume contour of the drum sound. We’ll deviate a little from the attack stage envelope design for this, though. First, we don’t want the noise to come in gradually, but rather hit at full volume.
- Page 20 HIGH PASS FILTER Next, let’s get rid of the noise’s low end by routing it through an aggressive high pass. For that, we’ll use a sallen-key high pass filter. You might recognize this topology from our hi-hat circuit – though we used an op amp instead of a transistor as the active element there.
- Page 21 If you try this, the filter should remove a big chunk of the signal’s low end – while also introducing a bit of bite via the added resonance.
- Page 22 MIXING Almost done! Now all that’s left to do is properly mix both signal paths together. For that, we’ll first set up an op amp in the inverting configuration. This configuration is great for mixing audio signals, since it isolates the different inputs from each other.
- Page 23 PITCH CV For the pitch CV input, there’s a super simple solution: keeping the attack stage transistor open to varying degrees. Because remember: if that transistor is open, the oscillator’s frequency increases. To open it, we can simply connect our control voltage to the 47k resistor at the transistor’s base –...
- Page 24 Once you set this up, use a CV sequencer or an LFO to manipulate the drum’s pitch. The attenuator should allow you to adjust the effect’s intensity on the fly. Cool!
- Page 25 SNAPPY CV Next, we’ll add a CV input for the snare wire sound. This is thankfully super simple: we only need to adjust the decay of the envelope that is controlling the swing type VCA. To do that, we’ll simply establish a second path for that envelope’s capacitor to discharge through.
-
Page 26: Components & Concepts Appendix
COMPONENTS & CONCEPTS APPENDIX In this section, we’ll take a closer look at the components and elemental circuit design concepts we’re using to build our module. Check these whenever the main manual moves a bit too fast for you! THE BASICS: RESISTANCE, VOLTAGE, CURRENT There are three main properties we’re interested in when talking about electronic circuits: resistance, voltage and current. - Page 27 USING TWO 9 V BATTERIES AS A DUAL POWER SUPPLY Dual power supplies are great – and if you want to get serious about synth design, you should invest in one at some point. But what if you’re just starting out, and you’d like to use batteries instead? Thankfully that’s totally doable.
- Page 28 RESISTORS While a conductive wire is like a very big pipe where lots of water can pass through, a resistor is like a narrow pipe that restricts the amount of water that can flow. The narrowness of that pipe is equivalent to the resistance value, measured in ohms (Ω). The higher that value, the tighter the pipe.
- Page 29 CAPACITORS A capacitor is a bit like a balloon that you can attach to the open end of a pipe. If there’s some pressure in the pipe, the balloon will fill up with water until the pressure equalizes. (Since the balloon needs some space to expand into, both of the capacitor’s legs need to be connected to points in your circuit.) Then, should the pressure in the pipe drop, the balloon releases the water it stored into the pipe.
- Page 30 DIODES Diodes are basically like one-way valves. Current can only pass through in one direction – from anode to cathode. That direction is indicated by the arrow in the diode symbol and by a black stripe on the diode’s casing. So any current trying to move in the opposite direction is blocked from flowing.
- Page 31 VOLTAGE DIVIDERS A voltage divider is really just two resistors set up like this: input on the left, output on the right. If R1 and R2 are of the same value, the output voltage will be half of what the input voltage is. How does it work? Let’s use our analogy again: so we have a pipe on the left, where water is being pushed to the right with a specific amount of force.
- Page 32 POTENTIOMETERS Potentiometers can be used as variable resistors that you control by turning a knob. But, and that’s the handy part, they can also be set up as variable voltage dividers. To see how that works, let’s imagine we open one up. Inside, we would find two things: a round track of resistive material with connectors on both ends plus what’s called a wiper.
- Page 33 AC COUPLING What is AC coupling – and how does it work? Imagine two adjacent pipes with a balloon between them. Now, no water can get from one pipe into the other, since it’s blocked by the balloon. But, and that’s the kicker, water from one side can still push into the other by bending and stretching the balloon, causing a flow by displacement.
- Page 34 OP AMPS Op amps might seem intimidating at first, but they’re actually quite easy to understand and use. The basic concept is this: every op amp has two inputs and one output. Think of those inputs like voltage sensors. You can attach them to any point in your circuit and they will detect the voltage there without interfering.
- Page 35 OP AMP BUFFERS/AMPLIFIERS Buffering, in the world of electronics, means that we provide a perfect copy of a voltage without interfering with that voltage in the process. With an op amp-based buffer, the buffering process itself works like this. We use the non-inverting input to probe a voltage, while the inverting input connects straight to the op amp’s output.
- Page 36 amplifier because the output signal is in phase with the input. For an inverting buffer/amplifier, the input signal is no longer applied to the non-inverting input. Instead, that input is tied directly to ground. So it’ll just sit at 0 V the entire time.
- Page 37 BIPOLAR JUNCTION TRANSISTORS Bipolar junction transistors (or BJTs for short) come in two flavors: NPN and PNP. This refers to how the device is built internally and how it’ll behave in a circuit. Apart from that, they look pretty much identical: a small black half-cylinder with three legs. Let’s take a look at the more commonly used NPN variant first.
- Page 38 collector current. (At least not without some unwanted side effects.) Third, also unlike a resistor, a BJT is not a linear device. Meaning that a change in collector voltage will not affect the collector current. And fourth, the collector current is affected by the transistor’s temperature! The more it heats up, the more current will flow.
-
Page 39: Tools Appendix
TOOLS APPENDIX There are two types of tools that will help you tremendously while designing a circuit: multimeters and oscilloscopes. In this appendix, we’ll take a quick look at each of these and explore how to use them. MULTIMETERS Multimeters come in different shapes and sizes, but the most common type is probably the hand-held, battery powered variant. - Page 40 OSCILLOSCOPES While multimeters are fairly cheap and compact, oscilloscopes are usually somewhat pricey and bulky. If you’re willing to make the investment, they are a huge help with the troubleshooting process, though. Using one is, again, surprisingly straightforward – if you manage to work your way through the sometimes quite convoluted UI, especially on digital models.
- Page 41 BUILD GUIDE...
-
Page 42: Module Assembly Appendix
MODULE ASSEMBLY APPENDIX Before we start building, let’s take a look at the complete mki x es.edu Snare Drum schematics (see next page) that were used for the final module’s design and PCB fabrication. Most components on the production schematics have denominations (a name – like R1, C1, VT1, VD1, etc.) and values next to them. - Page 43 Capacitors C2 – C5 and C21, C22 are additional decoupling capacitors. If you inspect the PCB, you’ll see that these are placed as close to the power supply pins of the ICs as possible. For well-designed, larger PCBs you will find decoupling capacitors next to each IC. Like the others, their job is to simply compensate for any unwanted noise in the supply rails.
- Page 45 Before you start soldering, we highly recommend printing out the following part placement diagrams with designators and values. Because some of our PCBs are rather densely popu- lated, this will help you to avoid mistakes in the build process.
- Page 46 Place the Snare Drum PCB in a PCB holder for soldering or simply on top of some spacers (I use two empty solder wire coils here). I usually start populating PCBs with lower, horizontally placed components. In this case, these are 10 Ohm resistors, switching diodes and the power protection diodes.
- Page 47 Next, insert the first DIP socket, hold it in place and solder one of the pins. Continue with the next DIP socket. Make sure the DIP sockets are oriented correctly – the notch on the socket should match the notch on the PCB’s silkscreen. Now, turn the PCB around and solder all remaining pins of the DIP sockets.
- Page 48 In order to save space on the PCB, some of our projects, including the Snare Drum, have vertically placed resistors. The next step is to place & solder those. Bend a resis- tor’s legs so that its body is aligned with both legs and insert it in its designated spot. Then solder the longer lead from the top side of the PCB to secure it in place, turn the PCB around and solder the other lead from the bottom.
- Page 49 Now, proceed with other vertically placed resistors. If you are not sure about resistor value, use the multimeter to measure resistance of each resistor before solder- ing them. Once you have completed installing the resistors, your PCB should look like this: Next, insert and solder transistors.
- Page 50 Also, insert & solder the electrolytic capacitors. Electrolytic capacitors are bipolar, and you need to mind their orien- tation. The positive lead of each electrolyt- ic capacitor is longer, and there is a minus stripe on the side of the capacitor’s body to indicate the negative lead.
- Page 51 Now, turn the PCB around and inspect your solder joints. Make sure all compo- nents are soldered properly and there are no cold solder joints or accidental shorts. Clean the PCB to remove extra flux, if necessary. Insert the top potentiometer and jack sockets and solder them.
- Page 52 Insert other potentiometers, but don’t solder them yet! Fit the front panel and make sure that the potentiometer shafts are aligned with the holes in the panel – and that they’re able to rotate freely. Now, go ahead and solder the potentiometers. Now, insert the ICs into their respective DIP sockets.
- Page 53 Finally fit the Tune potentiometer knob and we are done!
- Page 54 Congratulations! You have completed the assembly of the mki x es.edu Snare Drum module! Connect it to your eurorack power supply and switch it on. If there’s no "magic smoke”, it’s a good sign that your build was successful. The module doesn’t need any calibra- tion.
-
Page 55: Soldering Appendix
SOLDERING APPENDIX If you’ve never soldered before – or if your skills have become rusty – it’s probably wise to check out some THT (through-hole technology) soldering tutorials on YouTube. The main thing you have to remember while soldering is that melted solder will flow towards higher temperature areas. - Page 56 DIY electronics is a great (and quite addictive) hobby, therefore we highly recommend you invest in good tools. In order to really enjoy soldering, you’ll need: A decent soldering station. Top-of-the-line soldering stations (brands like Weller) will cost 200€ and above, but cheaper alternatives around 50€...
- Page 57 A solder suction pump. No matter how refined your soldering skills are, you will make mistakes. So when you’ll inevitably need to de-solder components, you will also need to remove any remaining solder from the solder pads in order to insert new components.
Need help?
Do you have a question about the mki x es.EDU Snare Drum and is the answer not in the manual?
Questions and answers