
Related Manuals for Cebora CP 180C


Summary of Contents for Cebora CP 180C
- Page 1 MANUALE DI ISTRUZIONI PER TORCE PLASMA CEBORA CP 180C Istruzioni originali INSTRUCTION MANUAL FOR CEBORA CP 180C PLASMA TORCHES Translation of the original instructions 3301302 16/04/2024...
- Page 2 KAIKESTA VASTUUSTA VIRTALÄHTEIDEN JA PLASMALEIKKAUSPOLTINTEN OSALTA. DA BRUG AF FORBRUGSMATERIALER, SOM IKKE ER FREMSTILLET AF CEBORA, MEDFØRER AUTOMATISK BORTFALD AF ENHVER FORM FOR GARANTI OG/ELLER ANSVAR VEDRØRENDE STRØMKILDER OG SVEJSESLANGER TIL PLASMASKÆRING. DOOR HET GEBRUIK VAN CONSUMPTIEMATERIAAL DAT NIET DOOR CEBORA GELEVERD WORDT, VERVALT AUTOMATISCH ELKE GARANTIE EN/OF AANSPRAKELIJKHEID VOOR GENERATOREN EN PLASMA SNIJTOORTSEN.
- Page 3 MANUALE DI ISTRUZIONI PER TORCE PLASMA CEBORA CP 180C Prima di utilizzare questa torcia, leggere attentamente il quale prescrive che l'ugello, posto verticalmente su un presente manuale. piano orizzontale, essendo parte in tensione, non possa Questa torcia è costruita in stretta osservanza delle...
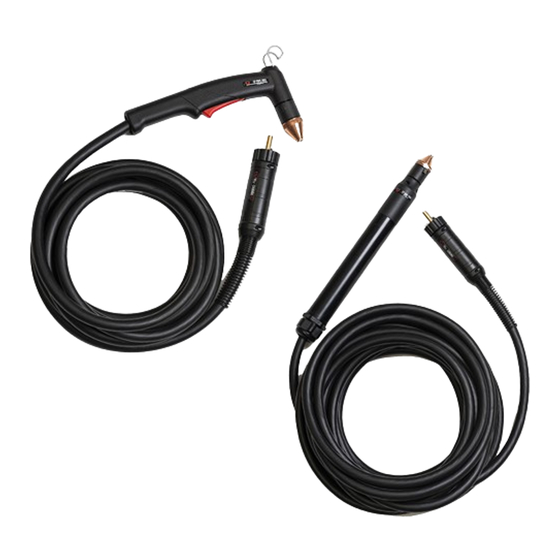
- Page 4 Prot. ugello Porta ugello Ugello Diffusore Elettrodo Corpo torcia Impugnatura Shield Nozzle holder Nozzle Swirl ring Electrode Torch body Handle Art. 1127 30-40A Art. 2743 Art.1613 70 A Art. 2732 110 A Art. 2733 Art. 1979 Art. 2372 Art. 2914 Art.
- Page 5 SOSTITUZIONE DEL CORPO TORCIA QUESTA PARTE È DESTINATA ESCLUSIVAMENTE AL PERSONALE QUALIFICATO. 5.3.1 Sostituzione corpo torcia CP180C MAR • Svitare le 6 viti V di Fig.3 e togliere l’impugnatura sinistra. • Con riferimento alla Fig.4, sollevare il corpo torcia T con cavo e disconnettere la connessione A (pulsante) e la connessione B (arco pilota) facendo attenzione che i Fig.
- Page 6 Fig. 7 Fig. 8 3301302...
- Page 7 5.5 SOSTITUZIONE DEL CAVO CON ATTACCO 5.5.2 CP180C DAR CENTRALIZZATO. • Togliere il pressacavo F di Fig.7; 5.5.1 CP180C MAR • Svitare i grani G1 e G2 e successivamente il manico M quindi tirarlo all’indietro sino a mostrare tutti i cavi (vedi Fig.8);...
- Page 8 EN INSTRUCTION MANUAL FOR CEBORA CP 180C PLASMA TORCHES Before using this welding torch, read carefully this manual. accordance with IEC 60974-7 Standard which requires This welding torch is made in accordance with IEC that when a live nozzle is vertically located on a flat 60974-7 standard safety requirements.
- Page 9 Prot. ugello Porta ugello Ugello Diffusore Elettrodo Corpo torcia Impugnatura Shield Nozzle holder Nozzle Swirl ring Electrode Torch body Handle Art. 1127 30-40A Art. 2743 Art.1613 70 A Art. 2732 110 A Art. 2733 Art. 1979 Art. 2372 Art. 2971 Art.
- Page 10 5.3.2 Replacing the torch body CP180C MAR • Unscrew the cable gland F Fig.7; • Unscrew the retention dowels G1 and G2, then handle M, pull it back until all cables are shown (see Fig. 8). • Disconnect connector A and connector B (pilot arc). •...
- Page 11 Fig. 7 Fig. 8 3301302...
- Page 12 5.5 REPLACING CABLE WITH CENTRAL WARNINGS ADAPTER Periodically make sure that the welding torch cable is 5.5.1 CP180C MAR intact and has no cuts or excessive wear. Replace it immediately if needed. Fig. 6 • Unscrew the 6 screws V Fig.3 and remove the LH grip. With reference to Fig.4, lift the welding torch body with cable and disconnect connector A of torch cable (push- button) and connector B (pilot arc).
- Page 13 3301302...
- Page 14 CP 180C MAR DESCRIZIONE DESCRIPTION ADATTATORE MOBILE MOVABLE ADAPTOR CAVO TORCIA TORCH CABLE IMPUGNATURA CON PULSANTE HANDGRIP WITH PUSHBUTTON O-RING O-RING TUBO RAFFREDDAMENTO COOLING PIPE CORPO TORCIA (TESTINA) TORCH BODY (HEAD) ELETTRODO (5 PZ) ELECTRODE (5 PCS) DIFFUSORE DIFFUSER 74 A UGELLO D.0,80 (5 PZ)
- Page 15 CP 180C MAR Not included CP 180C DAR Not included 70 7273 74 75 76 3301302...
- Page 16 CEBORA S.p.A - Via Andrea Costa, 24 - 40057 Cadriano di Granarolo - BOLOGNA - Italy Tel. +39.051.765.000 - Fax. +39.051.765.222 www.cebora.it - e-mail: cebora@cebora.it 3301302...
Need help?
Do you have a question about the CP 180C and is the answer not in the manual?
Questions and answers