Advertisement
Available languages
Available languages
Thank you for purchasing this instrument. In order to ensure that this product provides
many years of service please follow the guidance in this document. To register your
instrument with the manufacturer and print a warranty certificate visit:
www.bellinghamandstanley.com
Unpacking
WARNING: Risk of injury. This product is heavy. Single person lift could
cause injury. Use assistance when moving or lifting.
Carefully remove all of the packing material. It is recommended that the box and other packing materials are retained so that,
should the need arise, the instrument can be safely returned to the supplier for service. Check that all parts listed below are
present and that no transit damage has occurred. If any are damaged or missing, contact the supplier immediately.
Contents list
Quantity
1
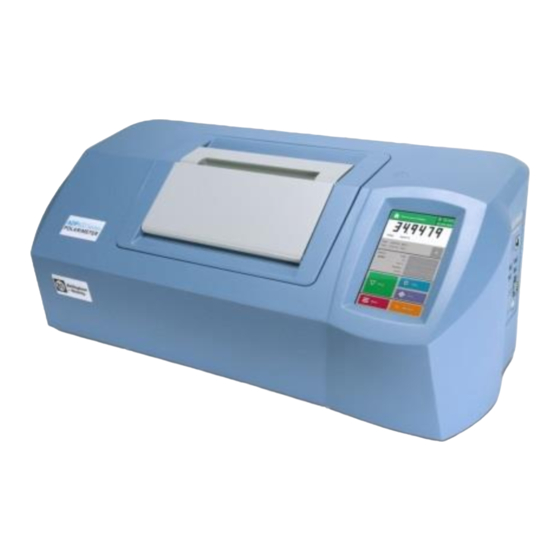
ADP600 Series Polarimeter
1
Mains lead set
1
Power supply
1
Quick Start Guide
2
Card type ID tag
1
Lamp alignment target
1
Spare lamp
1
Touchscreen protector
ADP600 polarimeter code numbers:
Model
Complete polarimeter
Polarimeter module only
ADP610
37-61
ADP620
37-62
ADP622
37-63
ADP640
37-64
ADP650
37-65
ADP660
37-66
ADP670
37-67
ADS620P
37-72
Place the adaptor on the instrument rails so that the flat surface is in contact with the temperature controlled plate.
This symbol is an internationally agreed indicator that the product bearing it should not be disposed of
as general waste or garbage which might end up in landfill sites, but should instead be sent for special
processing and/or recycling in those countries where appropriate legislation and facilities are in place.
ADP600 Series Polarimeter
Item
Code
See below
55-109
55-106
37-212
37-530
37-510
37-511
19-204
Wavelengths
37-M61
589nm
37-M62
546 & 589nm
37-M63
365 & 589nm
37-M64
405, 436, 546 & 589nm
37-M65
365, 405, 436, 546 & 589nm
37-M66
325, 365, 405, 436, 546 & 589nm
37-M67
325, 365, 405, 436, 546, 633 & 589nm
37-M72
880 & 589nm
Bellingham + Stanley, a Xylem brand, Xylem Analytics Germany GmbH, AM Achalaich 11, 82362 Weilheim, Germany
Positioning the system
•
Dry and indoors.
•
Capable of holding the instrument's weight.
•
Away from draughty or hot equipment like fans or
heaters.
•
Out of direct sunlight or strong ambient light.
Do not block the air vents.
Mains connection
The power supply adapter is supplied with a moulded mains cord and plug to suit one of several socket types. For UK leads,
replace the fuse only with the type indicated on the plug.
•
Voltage
110 to 230 V ~ ±10%
•
Maximum current
2 A
RISK OF ELECTRIC SHOCK:
•
For indoor use only.
•
Must be kept dry.
•
Disconnect the equipment from the mains supply before unplugging the mains lead from the instrument.
•
Do not cover, designed to operate with free air convection.
•
No cleaning required.
•
Do not jet wash
Switching on and off
Plug in the power supply and switch on the mains supply,
after startup the instrument will show a loading screen
indicating the software version. Once loaded, the instrument
will be in standby mode. To switch on, swipe a finger or stylus
across the display. After a few moments the instrument will
show the Measurement Display (or the Setup Wizard if
switching on for the first time).
Manoeuvring through menus
The instrument features a capacitive, high-resolution
touchscreen display. On-screen buttons can be easily used
by simply touching the display. Use the supplied stylus and
screen protector to keep the touchscreen clean and avoid
damage from improper use. The touchscreen should only be
used with a finger or stylus designed for use with a capacitive
touchscreen.
Alternatively, a USB keyboard, available from Bellingham +
Stanley, can be used to select items and navigate menus.
Setup Wizard
When switching on for the first time, after the instrument has completed its startup procedures, the Setup Wizard will appear.
First select the desired language. A list of different options will then appear:
Copy user guides and PC software to USB: Makes copies of the full User Guides and PC software compatible with the
instrument to a removable USB storage device. Insert a USB removable storage device before selecting. Full User Guides
provide detailed instructions on instrument operation.
Set clock: Set the instrument to local time and set the date format.
Set reading mode: Make changes to the measurement settings.
Set record settings: Specify how reading results will be printed or saved.
Set user settings: Alter the security settings to a level suitable for the area of operation.
Select each in turn and alter the settings as desired, then press Quit to return to the Setup Wizard Menu. Each menu will be
marked by a tick after the settings are altered. Once all required settings are changed press Quit on the Setup Wizard Menu to
show the Measurement Display.
Full User Guides can be downloaded from the
instrument's Help Menu or Setup Wizard
QUICK START GUIDE
37-212'02 REV A, OCT-2023
Email:
sales.bs.uk@xylem.com
•
Away from potential sources of interference, such as
RFI generating equipment.
•
Within reach of a power point.
•
Not using a power circuit that also has large motors
or noise generating equipment connected to it.
•
Frequency
50 to 60 Hz
To switch to standby mode press and hold the Menu Button
for several seconds and select Yes on the confirmation
screen. It is then safe to turn off the mains supply and
disconnect the power lead.
Many buttons feature a quick select option, indicated by the
two arrows on the right of the button. Simply touch either
arrow to cycle through the possible settings.
When in a menu, the Quit and Home buttons become
available. Press the Quit Button to return to the previous
menu. Any changes made will be saved. The Home Button
will exit to the Measurement Display, again any changes
made will be saved.
Caution or warning.
Electrical hazard.
Advertisement
Table of Contents

Related Manuals for Xylem Bellingham + Stanley ADP600 Series


Summary of Contents for Xylem Bellingham + Stanley ADP600 Series
- Page 1 QUICK START GUIDE ADP600 Series Polarimeter 37-212’02 REV A, OCT-2023 Bellingham + Stanley, a Xylem brand, Xylem Analytics Germany GmbH, AM Achalaich 11, 82362 Weilheim, Germany Email: sales.bs.uk@xylem.com Thank you for purchasing this instrument. In order to ensure that this product provides Positioning the system many years of service please follow the guidance in this document.
-
Page 3: Guide De Démarrage Rapide
GUIDE DE DÉMARRAGE RAPIDE Polarimètre Série ADP600 37-212’02 REV A, OCT-2023 Bellingham + Stanley, a Xylem brand, Xylem Analytics Germany GmbH, AM Achalaich 11, 82362 Weilheim, Germany Email: sales.bs.uk@xylem.com Nous vous remercions pour votre achat d'un l'instrument. Afin d'assurer que ce produit Positionnement du système... -
Page 5: Guía De Inicio Rápido
GUÍA DE INICIO RÁPIDO Polarímetro serie ADP600 37-212’02 REV A, OCT-2023 Bellingham + Stanley, a Xylem brand, Xylem Analytics Germany GmbH, AM Achalaich 11, 82362 Weilheim, Germany Email: sales.bs.uk@xylem.com Gracias por comprar este instrumento. Para asegurar una vida larga para el producto, Colocación del sistema... - Page 7 SCHNELLSTARTANLEITUNG ADP600 Serie Polarimeter 37-212’02 REV A, OCT-2023 Bellingham + Stanley, a Xylem brand, Xylem Analytics Germany GmbH, AM Achalaich 11, 82362 Weilheim, Germany Email: sales.bs.uk@xylem.com Vielen Dank, dass Sie sich für dieses Gerät entschieden haben. Um gewährleisten zu Ein- und Ausschalten können, dass Ihnen dieses Produkt viele Jahre nützlich sein wird, bitten wir Sie, die...
Need help?
Do you have a question about the Bellingham + Stanley ADP600 Series and is the answer not in the manual?
Questions and answers