
Related Manuals for Falcon DOMINATOR PLUS G3101 HD


Summary of Contents for Falcon DOMINATOR PLUS G3101 HD
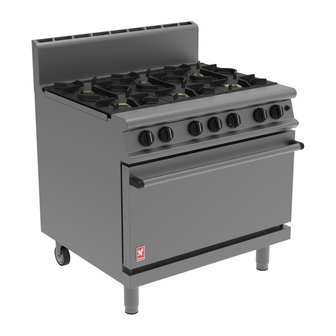
- Page 1 User, installation and servicing instructions GAS SIX BURNER RANGE G3101 HD Read these instructions before use DATE PURCHASED: MODEL NUMBER: SERIAL NUMBER: DEALER: SERVICE PROVIDER: T101014 Rev No: 6 Published: 01/09/22...
- Page 2 Dear Customer Thank you for choosing Falcon Foodservice Equipment. This manual can be downloaded from www.falconfoodservice.com or scan here: IMPORTANT: Please keep this manual for future reference. Falcon Foodservice Equipment HEAD OFFICE Wallace View, Hillfoots Road, Stirling. FK9 5PY. Scotland.
- Page 3 SYMBOLS SCREWDRIVER SPANNER COOKING OIL GREASE WARNING SPARK IGNITION FLAME VIEWPORT ALLEN KEY IGNITER C SPANNER REMOVE DEVICE PLUG REMOVER...
- Page 4 Ensure the supply cord is routed free from the appliance to avoid damage. • The appliance has been designed and approved to use Falcon kick plates; non Falcon kick plates could potentially adversely affect the performance of the appliance by restricting the air to the appliance.
- Page 5 Training and competence To help ensure the safe use of this appliance there is a requirement for you to provide whatever information, instruction, training and supervision as is necessary to ensure, so far as is reasonably practicable, the health and safety of all users. For further help and information on training and competence we would refer you the Health and Safety Executive website;...
-
Page 6: Table Of Contents
CONTENTS APPLIANCE INFORMATION ..................... 7 OPERATION ..........................8 COMPONENT PARTS ......................8 CONTROLS ..........................9 LIGHTING AND OPERATING THE OPEN TOP BURNERS ..........10 LIGHTING AND OPERATING THE OVEN BURNER............11 CLEANING AND MAINTENANCE ................... 12 CLEANING THE OPEN TOP BURNERS ................13 CLEANING THE OVEN ...................... -
Page 7: Appliance Information
1.0 APPLIANCE INFORMATION • This appliance has been UKCA/CE-marked based on compliance with the Gas Appliance Regulations/Product Safety and Metrology Regulations for the Countries, Gas Types and Pressures as stated on the data plate. -
Page 8: Operation
2.0 OPERATION 2.1 COMPONENT PARTS Hob control 1-6 Oven control Burner head Oven base tray Burner ring Oven door Hob drip shed Oven shelf Pan support Oven shelf hanger Oven ignition... -
Page 9: Controls
2.2 CONTROLS Hob control Zone indicator Oven control Oven spark ignition... -
Page 10: Lighting And Operating The Open Top Burners
2.3 LIGHTING AND OPERATING THE OPEN TOP BURNERS 2.3.1 The appliance must be as clean as possible before use as an appliance left with debris in or around its heating area can lead to fire. SUITABLE PROTECTIVE CLOTHING AND ALL CARE NECESSARY MUST BE USED WHEN WORKING ON A HOT APPLIANCE. -
Page 11: Lighting And Operating The Oven Burner
2.4 LIGHTING AND OPERATING THE OVEN BURNER 2.4.1 The appliance must be as clean as possible before use as an appliance left with debris in or around its heating area can lead to fire. SUITABLE PROTECTIVE CLOTHING AND ALL CARE NECESSARY MUST BE USED WHEN WORKING ON A HOT APPLIANCE. -
Page 12: Cleaning And Maintenance
3.0 CLEANING AND MAINTENANCE MAINTENANCE CHECK Regular servicing of the appliance should be undertaken to ensure correct operation, it is functioning as intended, and safe to use. We recommend servicing after 2,500 hours of use, or annually, whichever comes first. Any maintenance schedule should be carried out in accordance with SFG20 Maintenance Schedules. -
Page 13: Cleaning The Open Top Burners
Note: All surfaces are easier to clean if spillage is removed before it becomes burnt on, cleaned daily. It should be noted that certain scouring pads including nylon types can easily mark stainless steel. Care should be exercised during cleaning process. When rubbing stainless steel with a cloth, always rub in grain direction. -
Page 14: Cleaning The Oven
TO ENSURE LONGEVITY AND PREVENT CORROSION BURNERS AND PAN SUPPORTS MUST NOT BE CLEANED IN A DISHWASHER, WITH ANY CAUSTIC CLEANING PRODUCT OR LEFT TO DRY NATURALLY. 3.2 CLEANING THE OVEN 3.2.1 At the end of each day or cooking period, turn off and cool down. 3.2.2 Remove grid shelves, shelf runner and oven base plate. -
Page 15: Specification
4.0 SPECIFICATION 4.1 APPLIANCE WEIGHT TABLE APPLIANCE UNIT WEIGHT (kg) PACKED WEIGHT (kg) G3101HD Electrical DATA TABLE CURRENT POWER MIN (A) @ MAX (A) @ ACTUAL (A) (kW) @ APPLIANCE PHASE 230V 230V @ 230V 230V G3101HD IF ANY CURRENT IS OUT WITH THESE TOLERANCES, THE CAUSE MUST BE INVESTIGATED AND RECTIFIED. -
Page 16: Dimensions / Connection Locations
5.0 DIMENSIONS / CONNECTION LOCATIONS... -
Page 17: Installation
6.0 INSTALLATION Electrical Safety and Advice Regarding Supplementary Electrical Protection Commercial kitchens and foodservice areas are environments where electrical appliances may be located close to liquids, or operate in and around damp conditions, or where restricted movement for installation and service is evident. The installation and periodic inspection of the appliance should only be undertaken by a qualified, skilled and competent electrician;... -
Page 18: Ventilation
6.2 VENTILATION This appliance must be installed with sufficient ventilation to prevent the occurrence of unacceptable concentrations of substances harmful to health in the room in which they are installed. Installer must consult any additional local / national regulations. COMBUSTION AIR REQUIREMENTS APPLIANCE G3101HD 47 m... - Page 19 6.3.5 Position the appliance and level using feet & castor adjusters as shown below. TAKE CARE WHEN MOVING AN APPLIANCE FITTED WITH CASTORS. 6.3.6 Connect appliance to gas supply and test for gas tightness (see section 6.4) This appliance is also provided with a terminal for connection of an external equipotential conductor.
-
Page 20: Gas Supply & Connection
6.4 GAS SUPPLY & CONNECTION 6.4.1 Installation pipe work should be fitted in accordance with local / national standards. The pipe work must not be smaller than unit gas inlet connection. If using flexible hosing, the hose must be installed & sized to conform to BS 6173 and the length must not exceed 1.5m. -
Page 21: Commissioning
6.6 COMMISSIONING Refer to section 2.0 for operation. Carry out the following operation: 6.6.1 Turn the main gas supply on to the appliance. 6.6.2 Remove front facia as stated in section 8.1. Connect a suitable pressure gauge to the test point on the manifold shown below. 6.6.3 Light one open top burner 6.6.4 Natural Gas Appliance only –... -
Page 22: Conversion
7.0 CONVERSION BEFORE INSPECTION, SERVICING OR CONVERSION, TURN OFF GAS AT ISOLATOR. 7.1 GAS CONVERSION CHECK LIST Change injectors in burner(s) (see 8.5 & 8.6). Change By Pass screws Change gas type label. For natural gas (G20) an appliance governor is required For LPG (G31) an appliance governor is not required... -
Page 23: Servicing
8.0 SERVICING MAINTENANCE CHECK Regular servicing of the appliance should be undertaken to ensure correct operation, it is functioning as intended, and safe to use. We recommend servicing after 2,500 hours of use, or annually, whichever comes first. Any maintenance schedule should be carried out in accordance with SFG20 Maintenance Schedules. -
Page 24: Piezo Igniter
8.2 PIEZO IGNITER 8.2.1 Remove front facia as stated in section 8.1. 8.3 GAS VALVE 8.3.1 Remove front facia as stated in section 8.1. 8.3.2 Remove pan supports and drip trays. 8.3.3 Remove thermocouple and gas pipe from rear of valve. 8.3.4 Gas valves are saddle mounted onto the float rail and fixed using two M5 bolts. -
Page 25: Oven Thermostat
8.4 OVEN THERMOSTAT 8.4.1 Remove front facia as stated in section 8.1. 8.4.2 Remove pan supports and drip trays. 8.4.3 Remove thermocouple and gas pipe from rear of valve. 8.4.4 Remove thermostat phial from its mounting bracket and prepare capillary for feeding out of the oven. -
Page 26: Open Top Burner
8.5 OPEN TOP BURNER 8.5.1 Remove pan supports and drip sheds 8.5.2 Remove burner cap and head. 8.5.3 Remove burner Venturi fixings using 8mm spanner 8.5.4 Disconnect the thermocouple from the burner support rail 8.5.5 Remove burner support rail. 8.5.6 Remove injector housing. 8.5.7 If converting –... -
Page 27: Governor
8.7 GOVERNOR 8.7.1 Natural Gas Appliance only – Adjust Governor as shown. 1 – Gas in 2 – Gas out 3 – Direction of flow GOVERNOR SUPPLIED IS MAINTENANCE FREE. ENSURE THE BLUE DUST CAP COVERING THE VENT IS FITTED AND IN GOOD CONDITION. -
Page 28: Accessories
9.0 ACCESSORIES 9.1 DROP ON GRIDDLE 9.1.1 Before first use: Wash plate thoroughly and rinse. Dry off completely and lightly coat the surface with vegetable oil. 9.1.2 Ensure the plate is located front to back and central on the pan supports as indicated ensuring the drain notch is at the front. -
Page 29: Fault Finding
10.0 FAULT FINDING FAULT POSSIBLE CAUSES REMEDY USER *ENG Burner will not light/stay No gas to the unit. Check main gas is lit. turned on. Spark ignitor not Replace spark ignitor working Blocked injector. Clean or replace injector. ... -
Page 30: Service Information
1. Model number – found on data plate 2. Serial number – found on data plate 3. Brief description of the issue To contact Falcon for a warranty issue dial (UK only) 01786 455 200 and select Warranty Issues from the menu.
Need help?
Do you have a question about the DOMINATOR PLUS G3101 HD and is the answer not in the manual?
Questions and answers