Table of Contents
Advertisement
Quick Links
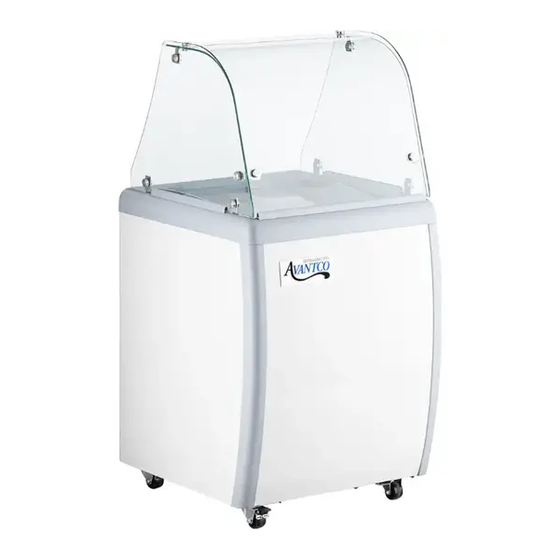
Gelato
Dipping Cabinets
Models:
#360ADCGEL4P
26" No Glass
#360ADCGEL9P
49" No Glass
#360ADCGEL13P
71" No Glass
Note:
You should read this manual in its entirety prior to equipment setup, operation, and maintenance.
www.AvantcoRefrigeration.com
#360ADCGEL4F
26" Flat Glass
#360ADCGEL8F
49" Flat Glass
#360ADCGEL13F
71" Flat Glass
User Manual
#360ADCGEL4C
26" Curved Glass
#360ADCGEL9C
49" Curved Glass
#360ADCGEL13C
71" Curved Glass
07/2023
Advertisement
Table of Contents

Related Manuals for Avantco Gelato 360ADCGEL4P


Summary of Contents for Avantco Gelato 360ADCGEL4P
- Page 1 User Manual 07/2023 Gelato Dipping Cabinets Models: #360ADCGEL4P 26" No Glass #360ADCGEL4F 26" Flat Glass #360ADCGEL4C 26" Curved Glass #360ADCGEL9P 49" No Glass #360ADCGEL8F 49" Flat Glass #360ADCGEL9C 49" Curved Glass #360ADCGEL13P 71" No Glass #360ADCGEL13F 71" Flat Glass #360ADCGEL13C 71"...
- Page 2 User Manual Gelato Dipping Cabinets Warnings DANGER – RISK OF FIRE OR EXPLOSION. FLAMMABLE REFRIGERANT USED. TO BE REPAIRED ONLY BY TRAINED SERVICE PERSONNEL. DO NOT PUNCTURE REFRIGERANT TUBING. PELIGRO – RIESGO DE INCENDIO O EXPLOSION. REFRIGERANTE INFLAMABLE UTILIZADO. PARA SER REPARADO SOLAMENTE POR PERSONAL DE SERVICIO CALIFICADO.
-
Page 3: Before Installation
User Manual Gelato Dipping Cabinets Installation This unit is intended for use in a temperature-controlled environment of less than 75°F and 55% relative humidity. Malfunction due to improper conditions is not covered under warranty. Before Installation • If the unit has recently been transported on its side, please let unit stand upright for a minimum of 24 hours before plugging it in. - Page 4 User Manual Gelato Dipping Cabinets Installation Cautions • Before placing food into the freezer, adjust the temperature control to the lowest point (highest number) and let it run for several hours. Put the food in, and after 12 hours adjust the temperature control to the normal point. •...
-
Page 5: Operation
User Manual Gelato Dipping Cabinets Operation Adjusting the Temperature • Your new freezer is already factory-set to run at optimum temperatures for food safety and should require no adjustments. • Freezers are set to cycle between a minimum temperature of -5°F and a maximum temperature of 2°F. •... -
Page 6: Serving Temperature
User Manual Gelato Dipping Cabinets Operation Serving Temperature • Ice Cream should be served between 6-10 degrees Fahrenheit. • Gelato and Sorbet should be served between 10-22 degrees Fahrenheit. • Frozen Yogurt should be served between 17-19 degrees Fahrenheit. • Açaí should be served between 10-14 degrees Fahrenheit. Loading Product •... -
Page 7: Troubleshooting
User Manual Gelato Dipping Cabinets Cleaning DISCONNECT POWER CORD BEFORE CLEANING ANY PARTS OF THE UNIT. It is strongly recommended that any servicing of the unit be performed by an authorized service technician. Interior • Use a soft cloth with some moderate detergent and warm water to clean the freezer. •... -
Page 8: Included Hardware
User Manual Gelato Dipping Cabinets Glass Canopy Assembly Included Hardware A 360BARFRNT Front Rail (x1) D 360CORNER L-Shaped Bracket (x8) B 360BARSIDE Side Rail (x2) E 360SCREW Small Screws for Rails (x11) C 360PLATE Metal Plate for Side Rails (x4) F 360GLSSCREW Large Screw for Glass Panels (x20) Assembly Instructions 1. - Page 9 User Manual Gelato Dipping Cabinets Glass Canopy Assembly 6. Insert the front glass panel into the front channel. 7. Install the gasket on the top edge of the front glass panel. 8. Use the L-shaped brackets and large screws to attach the front glass panel to each of the side panels.
Need help?
Do you have a question about the Gelato 360ADCGEL4P and is the answer not in the manual?
Questions and answers