Bosch HSG636B 1 Series User Manual And Installation Instructions
Hide thumbs
Also See for HSG636B 1 Series:
- User manual and installation instructions (48 pages) ,
- Instruction manual (68 pages)
Table of Contents
Advertisement
Quick Links
Advertisement
Table of Contents

Related Manuals for Bosch HSG636B 1 Series


Summary of Contents for Bosch HSG636B 1 Series
- Page 1 Oven HSG636B.1 User manual and installation instructions [en]...
-
Page 2: Table Of Contents
en Safety ¡ Keep the instruction manual and the Table of contents product information safe for future refer- ence or for the next owner. ¡ Do not connect the appliance if it has been USER MANUAL damaged in transit. Safety .............. 2 1.2 Intended use Preventing material damage ....... -
Page 3: Safety
Safety en on the oven door, as they may scratch the Loose food remnants, fat and meat juices surface. may catch fire. The hinges on the appliance door move when ▶ Before using the appliance, remove the the door is opened and closed, which could worst of the food residues and remnants trap your fingers. -
Page 4: Preventing Material Damage
en Preventing material damage Hot steam is generated in the cooking com- WARNING ‒ Risk of suffocation! partment. Children may put packaging material over ▶ Do not reach into the cooking compartment their heads or wrap themselves up in it and when using steam. suffocate. -
Page 5: Environmental Protection And Saving En- Ergy
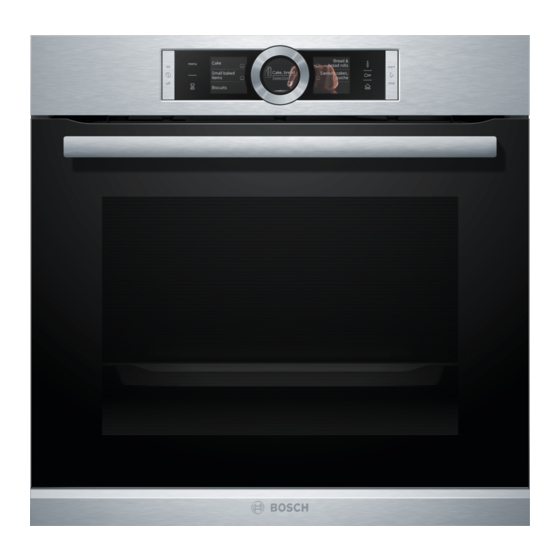
Environmental protection and saving energy en Hot water in the water tank may damage the steam 2.2 Steam system. Follow these instructions when using the steam func- Only fill the water tank with cold water. ▶ tion. If there is water on the cooking compartment floor ATTENTION! when operating the appliance at temperatures above Silicone bakeware is not suitable for combined opera-... - Page 6 en Familiarising yourself with your appliance 4 Familiarising yourself with your appliance 4.1 Control panel Buttons The buttons on the left- and right-hand side of You can use the control panel to configure all functions the control panel have a pressure point. Press- of your appliance and to obtain information about the ing a button will execute its function.
-
Page 7: Familiarising Yourself With Your Appliance
Familiarising yourself with your appliance en ¡ Heating line 4.4 Touch displays Once operation has started, the white line below the The touch displays act as both displays and controls. temperature turns red as the cooking compartment The touch displays are divided into several text fields. heats up. - Page 8 en Operating modes Lighting Water tank One or more oven lights illuminate the cooking com- You need the water tank for the types of steam heating. partment. The water tank is behind the control panel. When you open the appliance door, the light in the → "Filling the water tank", Page 15 cooking compartment switches on.
-
Page 9: Operating Modes
Operating modes en Symbol Type of heating Temperature What it's used for and how it works range Possible additional options 4D hot air 30–250 °C Bake and roast on one or more levels. The fan distributes the heat from the ring-shaped heating element in the back wall evenly around the cooking compartment. -
Page 10: Accessories
en Accessories 6 Accessories Use original accessories. These have been made espe- cially for your appliance. Note: Accessories may become deformed if they get hot. Deformation has no effect on function. As the ac- cessory cools down, it will regain its original shape. The accessories supplied may differ depending on the appliance model. -
Page 11: 7.1 Before Using For The First Time
You will find a comprehensive range of products for your appliance in our brochures and online: www.bosch-home.com Push the accessory all the way in, making sure that Accessories vary from one appliance to another. When it does not touch the appliance door. -
Page 12: Basic Operation
Carry out the procedures for initial start-up Type of heating Steaming and calibration again. 8 Basic operation 8.1 Switching on the appliance Press to switch the appliance on. ▶ a The Bosch logo appears in the display. The types of heating then appear. -
Page 13: Rapid Heating
Rapid heating en 8.2 Switching off the appliance 8.6 Setting the type of heating and temperature Switch your appliance off when you are not using it. The appliance will switch itself off automatically if it is Requirement: The operating mode "Types of heating" not used for a certain period of time. has been selected. - Page 14 en Time-setting options Press "Rapid heating". Place the food in the cooking compartment. a The text field shows "On". Cancelling rapid heating Press to start. Press "Rapid heating". ▶ a Rapid heating starts. a The text field shows "Off". a When rapid heating has come to an end, an audible signal sounds.
- Page 15 Steam en a The appliance continues to operate without a cook- a The display shows the start time. The appliance is in ing time. standby mode. a Once the start time has been reached, the appli- ance starts to heat up and the cooking time starts 10.4 Setting the end time counting down.
- Page 16 en Steam Slide the full water tank back into the recess Note: If the water tank runs dry during operation, a When doing so, make sure that the water tank clicks notification appears in the display. Operation is into place in the retainers . stopped.
- Page 17 Steam en Remove the water tank from the tank recess. Press "Added steam". ▶ Use the control ring to set the steam setting. ATTENTION! Drying the water tank in the hot cooking compartment Steam setting Added steam leads to damage to the water tank. None Do not dry the water tank in the hot cooking com- ▶...
- Page 18 en Assist 12 Assist The "Assist" operating mode helps you to use your ap- Category Foods pliance to prepare different dishes by selecting the op- Cakes Cakes in tins timum settings automatically. Cakes on a baking tray Small baked items 12.1 Cookware Biscuits Bread, Bread...
- Page 19 Childproof lock en To stop the signal early, press any touch field. 12.4 Adjusting the dish ‒ For some dishes, you can continue cooking if ne- ‒ Your appliance offers you a wide range of different cessary. dishes. You can use the control ring to scroll through → "Adding extra cooking time", Page 19 the various selection lists.
-
Page 20: Steam
en Basic settings Press to start the operation. Press to switch the appliance off. ‒ a The appliance starts to heat and the time starts to The appliance automatically switches off after ap- count down. prox. 10 to 20 minutes. Once the cooking time has elapsed, an audible sig- nal sounds. -
Page 21: Cleaning And Servicing
Cleaning and servicing en 16 Cleaning and servicing Do not use cleaning products with a high alcohol To keep your appliance working efficiently for a long ▶ content. time, it is important to clean and maintain it carefully. Do not use hard scouring pads or cleaning ▶... - Page 22 en Cleaning and servicing Cooking compartment Area Suitable cleaning agents Information Enamel surfaces ¡ Hot soapy water Soak any heavily soiled areas and use a brush or steel wool. ¡ Vinegar water Leave the appliance door open to dry the cooking compartment after cleaning it.
-
Page 23: Descaling
Cleaning assistance en Detach the shelf supports and remove them from Start the operation. the cooking compartment. Switch off the appliance after one hour. → "Rails", Page 24 Once the appliance has cooled down, wipe the Remove coarse dirt using soapy water and a soft cooking compartment with a damp cloth. -
Page 24: Drying
en Drying Press "Cleaning". 18.1 Preparing descaling Press "Descaling". ATTENTION! a The duration appears in the display. The duration The length of time for which the descaler is left to work cannot be changed. is based on the recommended, liquid descaler. Other Press to start. - Page 25 Appliance door en Pull the whole rail to the front and remove it. ¡ For both rails, ensure that the curved rods are at the front. First, push the rail into the middle of the rear socket until the rail rests against the cooking compartment wall, and then push this back ...
- Page 26 en Appliance door Close the appliance door fully . Grab hold of the Close the locking levers on the left- and right-hand appliance door with both hands (on the left and hinges . right) and pull it upwards and out . a The locking levers are closed.
- Page 27 Appliance door en Lift out the inner pane and set it down carefully 21.4 Fitting the door panes on a flat surface. Lift out the intermediate pane and set it down WARNING ‒ Risk of injury! carefully on a flat surface. The hinges on the appliance door move when the door is opened and closed, which could trap your fingers.
-
Page 28: Troubleshooting
en Troubleshooting Open the appliance door and attach the door seal. Push the inner pane upwards until it is in the left- and right-hand retainers . Slide the inner pane into the left- and right-hand retainers . Put the door cover in position and push down on it until you hear it click into place. -
Page 29: Customer Service
Troubleshooting en Fault Cause and troubleshooting "Sprache Deutsch" appears in There has been a power cut. the display. Implement the settings for the initial configuration. ▶ – Language – Clock – Water hardness The operation does not start or is Different causes are possible. interrupted. - Page 30 Setting values, e.g. temperature or cooking time, depend on the recipe, quantity and food. Next time, set lower or higher values. ▶ Tip: A lot of information about the food preparation and corresponding set- ting values can be found on our website www.bosch-home.com.
-
Page 31: How It Works
Disposal en 23 Disposal Find out here how to dispose of old appliances cor- This appliance is labelled in accord- rectly. ance with European Directive 2012/19/EU concerning used elec- trical and electronic appliances 23.1 Disposing of old appliance (waste electrical and electronic equip- Valuable raw materials can be reused by recycling. - Page 32 en How it works General information about roasting in cookware Baking on one level Shelf position ¡ Use heat-resistant, ovenproof cookware. Tall baked items and tins/dishes on ¡ Place the cookware on the wire rack. the wire rack ¡ Glass cookware is best. Shallow baked items/baking trays ¡...
- Page 33 How it works en ¡ If you are using several pieces which are the same 25.5 Cooking frozen products weight, the appliance's heating-up time is increased. ¡ Do not use heavily frosted frozen products. The cooking time remains the same. ¡ Remove any ice. ¡...
- Page 34 en How it works Food Accessories/cook- Shelf pos- Heating Temperature in Steam in- Cooking time ware ition function °C tensity in mins → Page 8 Bread, without a tin, Universal pan 1. 210–220 1. 10–15 1500 g 2. 180–190 2. 40–50 Loaf tin Bread, free-form, 1500 g Universal pan ...
- Page 35 How it works en Food Accessories/cook- Shelf pos- Heating Temperature in Steam in- Cooking time ware ition function °C tensity in mins → Page 8 Pot-roasted beef, 1.5 kg Uncovered cook- 1. 150 1. 30 ware 2. 130 2. 120 - 150 Pot-roasted beef, 1.5 kg Covered cookware ...
- Page 36 en How it works Food Accessories/cook- Shelf pos- Heating Temperature in Steam intens- Cooking ware ition function °C time in → Page 8 mins Yoghurt Individual moulds Cooking 35 - 40 300 - 360 compart- ment floor Rice pudding, 1:2.5 Universal pan ...
- Page 37 How it works en Recommended settings for hygiene Food Accessories/cook- Shelf pos- Heating Temperature in Steam intens- Cooking ware ition function °C time in → Page 8 mins Prepare jam jars or pre- Steam containers, 10 - 15 serving jars XL size Additional jam jar pro- Steam containers, 15 - 20 cessing step...
- Page 38 en How it works Recommended settings for reheating Food Accessories/cook- Shelf pos- Heating Temperature in Steam intens- Cooking ware ition function °C time in → Page 8 mins Pizza, cooked Wire rack 170 - 180 5 - 15 Bread rolls, baguette, Wire rack 160 - 170 10 - 20 baked...
- Page 39 How it works en Food Accessories/cook- Shelf pos- Heating Temperature in Steam intens- Cooking ware ition function °C time in → Page 8 mins Small cakes, on 2 levels Universal pan 25 - 35 Baking tray Small cakes, on 3 levels x 2 5+3+1 35 - 45 Baking tray x 1 Universal pan...
-
Page 40: Installation Instructions
en Installation instructions 26 Installation instructions Observe this information when installing the appliance. 26.1 General installation instructions Follow these instructions before you start with the installation of the appliance. ¡ The safe operation of this appliance can only be guaranteed if it has been installed ¡... - Page 41 Installation instructions en 26.2 Appliance dimensions 26.3 Installation below a worktop You will find the dimensions of the appliance here Observe the installation dimensions and the installation instructions when installing below a worktop. ¡ To ventilate the appliance, the intermediate floor must have a ventilation cut-out. ¡...
- Page 42 en Installation instructions ¡ The power cable must be plugged in at the rear of 26.5 Installation in a tall unit the appliance until you hear a clicking sound. A 3 m Observe the installation dimensions and the installation power cable can be obtained from the after-sales instructions when installing in a tall unit.
- Page 43 Installation instructions en Screw the appliance into place. Note: The gap between the worktop and the appliance must not be closed by additional battens. Thermal insulation strips must not be fitted to the side panels of the surround unit. 26.9 Removing the appliance Disconnect the appliance from the power supply.
- Page 44 Expert advice for your Bosch home appliances, help with problems or a repair from Bosch experts. Find out everything about the many ways Bosch can support you: www.bosch-home.com/service Contact data of all countries are listed in the attached service directory.
Need help?
Do you have a question about the HSG636B 1 Series and is the answer not in the manual?
Questions and answers