Table of Contents
Advertisement
Quick Links
Advertisement
Table of Contents

Subscribe to Our Youtube Channel
Related Manuals for Centrometal El-Cm Classic


Summary of Contents for Centrometal El-Cm Classic
- Page 1 H ATING T CHNIQU Centrometal d.o.o. - Glavna 12, 40306 Macinec, Croatia, tel: +385 40 372 600, fax: +385 40 372 61 1 echnical instructions or installation, handling and maintenance o electric block-boiler or heating systems with thermoregulatory microprocessor l-Cm Classic...
-
Page 2: Table Of Contents
ONTENT Content 1. Description of symbols and instructions for safe work 2. Device data 2.1. Typology 2.2.1 Statement on compliance 2.2.2 Regular application Instructions or mounting Instructions or work Anti- rost protection and inhibitors Norms, regulations and standards Tools, materials and auxiliary measures Minimum distances and In lammability o construction materials Product description 2.10... -
Page 3: Description Of Symbols And Instructions For Safe Work
Description o symbols and instructions or sa e work Description of symbols and instructions for safe work Description of symbols Instructions for safe work Warnings General safety instructions Non-compliance with sa ety instructions may cause Warnings in text are marked by gray heavy injuries –... - Page 4 Description o symbols and instructions or sa e work Life threat of electric power shock Secure electric power connecting is done by authorised service! Comply with connecting scheme. Prior to any work: turn o electric power supply. Secure against accidental turn on! Do not mount this device in moist rooms! Control examination / Maintenance...
- Page 5 Acceptable manner! Secure device in ecologically acceptable manner and in authorised place! Cleaning Clean outside o device with wet cloth...
-
Page 6: Device Data
Device data Device data These instructions contain important in ormation about Instructions for work sa e and pro essional assembly, commissioning and When working with heating installation follow next maintenance o the boiler. instructions: These instructions are or installers who have knowledge or work with heating installations due to their Boiler should work in working range up to max temperature pro essionalism and experience. -
Page 7: Norms, Regulations And Standards
Device data Norms, regulations and standards This product is in compliance with the ollowing regulations: • EN 50110-1:2003 – Handling and work with electrical installations • EN 55014:2001 – Electrical-magnetic compatibility – conditions or consumers’ devices or households, electric devices and similar devices •... -
Page 8: Product Description
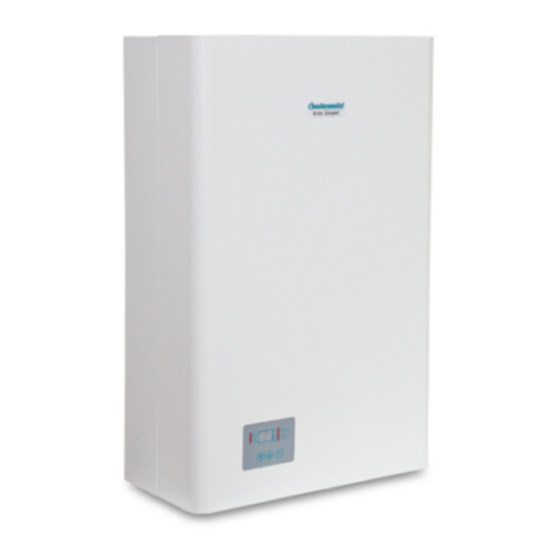
Device data inimum distances and burnable Product description construction materials Basic components o boiler: Depending on valid regulations, other minimum • Boiler body distances could be applied, di erent than mentioned • Device rame and casing below: • Control unit Comply with regulations o electrical installations and •... - Page 9 Device data 1 UL Return boiler’s line 12 Terminal or room thermostat 13 Microprocessor plate 2 IZ Start boiler’s line 14 Electric heaters contacts Boiler’s exchanger 15 Temperature sensor Electric heaters 16 Sa ety thermostat (STB) Expansion dish 17 Control panel with display Circulating pump 18 Flexible hose o expansion dish Vent valve (on pump)
-
Page 10: Waste Disposal
When delivery the boiler stick to the ollowing: Check i packaging is damaged during delivery. Check i delivery is complete. Part Pieces Boiler El-Cm Classic Assembly Set Instructions or handling 2.12 Factory plate Factory data plate is placed on the external side o the boiler and contains the ollowing technical data: •... -
Page 11: Dimensions And Technical Data
Device data 2.13 Dimensions and technical data 2.13.1 Dimensions and technical data for boiler El-Cm El-Cm Classic Figure 2: Dimensions and connections... - Page 12 12, 5 boiler Expansion dish volume Connection o start DN20 (”3/4”) line Connection o return DN20 (“3/4”) line Device mass (without water) Dimensions 7 710×430×230 (Height × Width × Depth) Microprocessor Unit EK_CPU_LCTR1 able 3: echnical data of El-Cm El-Cm Classic Device...
-
Page 13: Ransportation
Transportation ransportation NO E: Transport damages Pay attention on instructions or transportation on packaging! Use adequate transportation means, i.e. carts or bags with tighten strip. The product should be in horizontal position during transportation. Avoid shocks or collisions! Packed boiler put on carts or bags i needed secure it with strip and drive it to its mounting place. -
Page 14: 4.2 Distances
Installation Installation of device 4.2 Distances CAU ION: Human or material damages occurred because o irregular installation! DANGER: Fire threat due to burnable Never install boiler without expansion dish (AG) and materials and liquids! sa ety valve. Do not dispose burnable materials and liquids Boiler must not be installed in protective zone o close to the boiler. - Page 15 Installation Demounting front boiler casing Mounting boiler Boiler casing can be removed or simple handling and NO E: Material damage occurred by installation. irregular installation on the wall! Unscrew 3 bolts at top lid It is necessary to use proper material or ixing. Unscrew 3 bolts at bottom lid.
- Page 16 Installing Hydraulic attachments execution NO E: Installation damage due to bad quality o water! Heating installation can be damaged by NO E: Material damages caused by corrosion or scale depending on water permeable connections! characteristics Comply with illing requests or water according to Attachment duct lines install without connecting on boiler connections! VDI 2035 or project documentation and catalogue...
-
Page 17: Heating Pump Air Emission And De-Blocking
Installation Remove hose rom the illing/exhausting aucet Enter working pressure values and water quality into instructions or handling During the first filling of repeated filling or when change the water: Comply with requests or illing water 4.6.2 Heating pump air emission and de-blocking Pump that exists in this device has automatic air vent so it is not necessary to per orm any action about this. -
Page 18: Positions O Introducer Or The Introduction O The Power Cable
Electric connecting Electric connecting When connecting boiler on electric installation DANGER: Li e threat rom electric shock! take care on connections scheme and Electric works must be done only by connecting plans. Respect mandatory quali ied person. diameters o cables and usses power outside the boiler. - Page 19 Electric connecting This device is equipped with three (3) sets o introducers or power cable. I set introducers (main set) is on lower side (below) o device. They are on lower plate o device in the back le t corner (See Figure 6). It is intended or connecting device when power cable comes rom the lower side o the boiler.
-
Page 20: Connecting Power (Voltage) Cable
Electric connecting - Neutral (zero) duct line is connected to corresponding row Connecting power (voltage) cable immobilizer (N) which is placed on the right hand side o - Commencing should be per ormed according to the the uses set with voltage trigger. Row immobilizer o zero mounting scheme as given in the Figure7. -
Page 21: Scheme Or Connecting Power (Voltage) Cable
Electric connecting Scheme of power cable connecting Figure 8: Scheme of boiler connecting to mono-phase Power supply – ONLY FOR POWER OF 6kW AND 9kW Scheme of boiler connecting on Figure 9: three-phase power supply... -
Page 22: Connect Boiler's External Control (Room Thermostat)
Electric connecting Connect external control of boiler (room thermostat) Figure 10: Scheme o digital programmed room thermostat connecting with battery supply WARNING: Use room thermostat with no-voltage contacts Figure 11:... - Page 23 -3×2000W or boiler o 18kW -3×2667W or boiler o 24kW RE 3 –Heater relay or boiler o 6kW -3×3000W or boiler o 27kW –Contact K3 turn on relay ( or boilers o all other power) able 4: Legend of connecting schemes El-Cm El-Cm Classic...
- Page 24 Electric connecting Figure 12: Boiler electric scheme l-Cm l-Cm Classic with nominal power of 6kW...
- Page 25 Electric connecting Figure 13: Boiler electric scheme l-Cm l-Cm Classic with nominal power of 9kW and 12kW...
- Page 26 Electric connecting Figure 14: Boiler electric scheme l-Cm l-Cm Classic with nominal power of 18kW, 24kW and27kW...
-
Page 27: Commissioning
Commissioning Commissioning When complete below described works ill in the First turn on Commissioning log ( Chapter 6.3). NO E: Material damage due to incorrect handling Instruct client/user how to handle device Before commissioning NO E: Material damage occurred due to unpro essional operating! Prior to turn on check i heating installation is illed with Start-up without su icient quantity o water... - Page 28 Heating installation handling Heating installation handling Working Instruction Safety Instructions Only adults amiliar with instructions and working mode may operate the boiler Make sure there are no children in the boiler area. Do not dispose or store in lammable materials within sa e distance o 400 mm round the boiler In lammable materials must not be placed on the boiler.
-
Page 29: Device Unctions
To select other parameters that wish to adjust use characteristics o the boiler El-Cm El-Cm Classic: button P. - Electric boiler El-Cm El-Cm Classic contains all Given temperature can be set in the range between elements o the boiler sub-station or small boiler °... -
Page 30: Regulation O Heating
Regulation o heating Regulation of heating 7.3.2 Boiler given power adjusting - Circulating pump and electrical heaters turn on by command - Using button ▼ or ▲ select mode or adjusting given power – o room thermostat. Now press button Set power LED diode starts to lash. -
Page 31: Warnings Or Pressure
Heating installation handling 7.3.3 Warnings about pressure Pressure measurements are done by digital sensor I the pressure in the system decreases to P≤0.6 integrated in circular pump. I the sensor is stopped or in bar, the boiler works normally, but diode indicating circuit break, then all heaters and pump will turn o pressure measurements starts to lash slowly (Figure 18). - Page 32 Heating installation handling 7.3.4 Low temperature warning Present temperature displayed on the screen is possible I temperature o the system decreases to T≤4°C, or values T≤-9°C. Temperature below -9°C is not possible the boiler continues to work normally, but measuring to be displayed on the screen so the code EL will appear temperature indicator starts to lash slowly (Figure 21).
- Page 33 Heating installation handling 7.3.5 Warning with high temperature I temperature increases to T≥100 °C, display o its value is I temperature o the system increases to T≥85°C, not possible to see on the screen so in this will appear the pump works continually (due to taking heating energy code EH meaning that temperature is T≥100 °C (Figure through pipe routing network), but measuring temperature...
- Page 34 Signal and code o warning and mistakes 7.3.6 Signal and code of warning and mistakes ☼ Pressure - slow lashing Warning: Pressure near lower limit (0,4bar ≤ P ≤ 0,6bar) Or upper limit (2,2bar ≤ P ≤ 2,6bar) o allowed pressure Measure: Bring the system to the necessary pressure value ☼...
- Page 35 7.3.7 Room temperature regulator This device is not produced or work without room temperature regulator. It must be installed in re erence room. Managing temperature o all rooms is done by this remote control. Radiators in re erence room should not be equipped by thermo-static valves or these must always be open.
-
Page 36: Cleaning And Maintenance
Cleaning and maintenance Cleaning and maintenance 8.1 Boiler cleaning - Clean this device externally with wet cloth. DANGER: Life threat of electric power shock! Electric power work must be done only Check working pressure; re-fill By quali ied person water and air-vent installation Be ore opening device: turn heating DANGER: Health threat due to mix o installation o electric power supply using... - Page 37 Cleaning and maintenance Re-fill the water and air-vent the installation WARNING: Material damage due to heat tension. Filling heating installations in warm condition can produce cracks due to tension Fill heating installation only in cold condition (temperature o starting duct lines o max 40 °C) WARNING: Material damage due to requent re- illing!
-
Page 38: Inspection And Maintenance Log
Cleaning maintenance Inspection and maintenance log Perform maintenance on annual basis or Record on commissioning, inspection and maintenance when serves as addendum or photocopy. inspection indicates installation condition requesting maintenance. Executed works should be authorised by signature and date. Inspection and maintenance works when needed Page Date: ______ Date: ______... -
Page 39: Environment Protection / Waste Disposal
Environment protection/Waste disposal Environment protection / Waste disposal One o the basic concepts o business is environment protection. Quality o products, thri tiness and environment protection are equally valuable goals or us. It is critical to strictly comply with law and regulations on environment protection. -
Page 40: Roubles And Troubleshooting
Troubles and troubleshooting roubles and troubleshooting Troubleshooting on regulations and hydraulics must be done by an authorised irm. For repairs use only original spare parts. rouble: Description: Cause: Measure: Boiler does not react Display does not - Boiler is out o power supply - Provide power supply after turn on of main react, other... -
Page 41: Instructions For Design
- Energy Efficiency Index (EEI) ≤ 0.20 Max. Delivery Head = 6m Max. Volume Flow = 2,5m³/h 11.2 Systems on which the El-Cm Classic Plus Boiler can be connected - All systems or heating the space designed or 80/60 temperature regime (or lower) - Page 42 Centrometal d.o.o. shall not be responsible or possible incorrect data caused by printing errors or error made in transcription and all igures and diagrams are or explanatory purposes only and relevant adjustment have to be made at the spot. In any case, it reserves the right to modi y its products as deemed to be required and use ul without any prior noti ication.
Need help?
Do you have a question about the El-Cm Classic and is the answer not in the manual?
Questions and answers