Advertisement
Quick Links
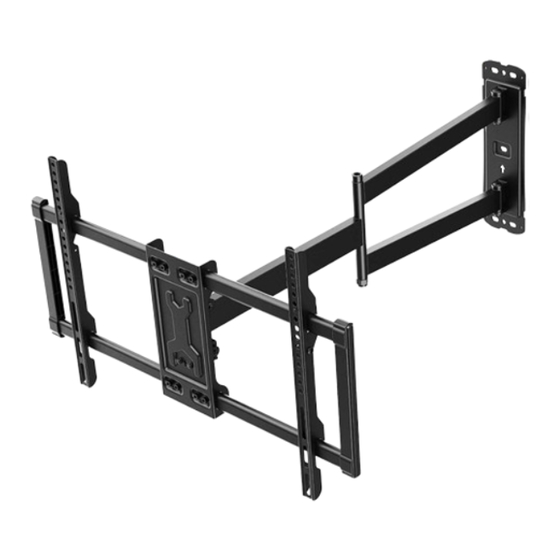
Full Motion Corner TV Mount
Thank you for choosing our product! We strive to provide the best quality
and services for our customers. Would you kindly share your experience
on Amazon if you are satisfied? If you have any questions, please feel
free contact us.
forgingmount888@163.com
Email:
We're ready to help!
Instruction Manual
Model: HY9390-B
VESA: 600X400mm(Max)
100X100mm(Min)
V1.0
Advertisement

Summary of Contents for Forging Mount HY9390-B
- Page 1 V1.0 VESA: 600X400mm(Max) 100X100mm(Min) Model: HY9390-B Thank you for choosing our product! We strive to provide the best quality and services for our customers. Would you kindly share your experience on Amazon if you are satisfied? If you have any questions, please feel free contact us.
- Page 2 Speci�ication Sheet...
-
Page 3: Weight Restrictions
IMPORTANT SAFETY INFORMATION Please read through these instructions completely to be sure you’re comfor table with this easy install process. Also check your TV owner’ s manual to see if there are any special requirements for mounting your TV. If you do not understand these instructions or have doubts abou t the safety of the installation, assembly or use of this product, please contact U S via: forgingmount888@163.com CAUTION: Avoid potential personal injur ies and property damage! -
Page 4: Supplied Parts And Hardware
Verify Your Wall Construction If you are not sure the wall CAUTION construction, p lease contact our DO NOT customer ser vice at install into forgingmount888@163.com drywall alone Wood Studs Solid Concret e (with Drywall) or Concrete Block Tools Needed ( Not lncluded) Stud Finder Tape Measure Pencil... - Page 5 Bolts [Only one bolt size fits your TV] Note: The bolts are shown in accordance with the actual size M4 x 12mm M4 x 30mm [D] x4 [E] x4 M6 x 15mm M6 x 35mm [F] x4 [G] x4 M8 x 15mm M8 x 45mm [H] x4 [I] x4...
- Page 6 Washer CAUTION! T he s e anch or s are f or Wall c onc rete or bric k walls Anchor ONLY . DO NOT use them in drywall or wood studs. Supplied P arts and Hardware for S tep 3 to S tep 6 Wrench Securement screw...
- Page 7 Note: If necessary, the spacers can be used in multi-layer. If the installation fails after trying various methods, please contact customer service at forgingmount888@163.com CAUTION: Ensure the TV brackets [03] are EQUALLY CENTERED on your TV AND securely fastened in place. Option A (For Flat Back TV) D/F/H...
- Page 8 Option C (For TV with A “Bump”) Spacers may be necessary for 2 holes ONLY. E/G/I Alternate Spacer Setups Option D For cable interference or inset holes, use spacers [06] to create extra space between the TV and TV brackets E/G/I Alternate Spacer Setups...
- Page 9 Step 2 Attach the Wall Plate [01] to Wall For wood stud installation, follow STEP 2A For concrete installation, follow STEP 2B Step 2A Wood Stud Option WARNING: ●Avoid potential personal injury or property damage! DO NOT over-tighten the lag screws [A]. Tighten the lag screws [A] only until the washers [B] are pulled firmly against the wall plate.
- Page 10 2A-3 3 in.(75mm) ø7/32 in.(5.5 mm) 2A-4 1/2 in.(13mm) Socket Wrench (Not included) You may need assistance with this step. Step 2B Solid Concrete or Concrete Block Option WARNING: ●Avoid potential personal injury or property damage! DO NOT over-tighten the lag screws [A].
- Page 11 2B-1 2B-2 Drill 6 pilot holes using a 3/8 in.(10mm)diameter drill bit. Make sure the depth is not less than 2 3/4 in.(70mm). Never drill into the mortar between blocks. 2 3/4 in.(70mm) ø3/8 in.(10mm) 2B-3 Use the hammer to knock anchors [C] into the wall.
- Page 12 Step 3 Secure the Arm Assembly [02] to Wall Plate [01] Step 3 Secure the Arm Assembly [02] to Wall Plate [01] 1.Remove the pre-assembed screws [S1] x4 from the front support [02-2] and save them 2.Fasten the screws [S1] x8 Allen Key S1x8 02-1...
- Page 13 Step 5 Hang the TV onto the Front Support Remove the bolt [S3] and hang the TV onto the front support [02] Screwdriver (Not lncluded) HEAVY! You may need assistance with this step. Press the safety locks down, then fasten the removed bolts [S3] Screwdriver (Not lncluded)
- Page 14 Step 6 Adjustments CAUTION! Level DO NOT over-loosen these four nuts when Wrench adjusting the level angle to prevent the TV from falling off. 1.Loosen the bolt [S2] . Loosen 2.Level your TV. 3.Tighten the bolt [S2] to secure the TV in place.
- Page 15 Arrange all the cable and tie Cabel them to the arm with velcro ties Management Cable placement chart - - based on TV Width Width NOTE: WIDTHS LESS than 30 in. (76 cm) will create a gap 45 in. (114 cm) 6 in.
- Page 16 Thank you again for choosing this forgingmount product!


Need help?
Do you have a question about the HY9390-B and is the answer not in the manual?
Questions and answers