Table of Contents
Advertisement
Quick Links
228-30772N
PHOTODIODE ARRAY UV-Vis DETECTOR FOR
SHIMADZU HIGH PERFORMANCE LIQUID
CHROMATOGRAPH
SPD-M20A
SERVICE MANUAL
CAUTION
This service manual has been edited for those that have received service related
training.
Those that have not been trained, should not use this manual.
Analytical & Measuring Instruments Division
Advertisement
Table of Contents

Related Manuals for Shimadzu SPD-M20A


Summary of Contents for Shimadzu SPD-M20A
- Page 1 228-30772N PHOTODIODE ARRAY UV-Vis DETECTOR FOR SHIMADZU HIGH PERFORMANCE LIQUID CHROMATOGRAPH SPD-M20A SERVICE MANUAL CAUTION This service manual has been edited for those that have received service related training. Those that have not been trained, should not use this manual.
-
Page 3: Table Of Contents
<PDA ASSY> ....................... 30 <Slit ASSY>......................30 <Mirror M1 ASSY> ....................31 < Mirror M2 ASSY> ....................31 <Shutter ASSY> ....................32 <W lamp ASSY> ....................32 <Guide fin D2> ..................... 33 <Lamp housing, D2> .................... 33 SPD-M20A Service Manual... - Page 4 < When LCsolution is installed > ................51 < When CLASS-VP is installed > ................51 < When PDA Utility software of SPD-M20A attachment is installed > ....52 < Select connect instrument > ................52 < Select System > ....................52 <...
- Page 5 > ........................ 79 < Preparative Flow cell(fixed path length,0.5mm) > ..........79 < High Sensitivity UHPLC Optional Flow cell > ............ 80 < Mechanical parts list > ..................81 < Electrical System Parts List > ................81 SPD-M20A Service Manual...
- Page 6 Table of Contents 8.3 Optional List ................81 CHAPTER 9: PARTS TABLE ..........82 9.1 SPD-M20A (P/N 228-45005) ............. 82 9.2 Optical Unit (OPTICAL UNIT P/N 228-42510) ......85 9.3 Control Unit (CONTROL UNIT P/N 228-42511) ......87 9.4 Temperature Controlled Cell ASSY (P/N 228-42593) ....89 CHAPTER 10: CIRCUIT DIAGRAMS ........
-
Page 7: Chapter 1: Introduction
<Scope of the Service Manual> This service manual describes maintenance procedures for the SPD-M20A photodiode array detector used in Shimadzu liquid chromatographs. The content of the service manual includes information concerning its operating principles and construction, a description of its control circuits and methods for testing its function and performance, and is compiled in a way that is easy to utilize by service personnel. - Page 8 P/N change of the maintenance part for "High Sensitivity UHPLC Optional Flow cell" 228-54357-45 -> 228-45609-41 Revision M: 7/Dec/2015 1 P/N of Cell window fixed screw ASSY and Heater SPD-20 ASSY is changed. Revision N: 26/Apr/2016 1 075-26489-11 IC,M95320-ZBN6 →S228-53010-41 PCB,EEPROM 32K SPD-M20A Service Manual...
-
Page 9: Chapter 2: Safety Precautions
CAUTION Used when there is the potential for physical damage to the instrument. NOTE Used when operational performance is improved, or understanding of explanatory content is facilitated. SPD-M20A Service Manual... -
Page 11: Chapter 3: Specifications
The operating temperature range of the entire system is influenced by the operating temperature range of the personal computer or printer. For the operating temperature ranges of the personal computer and printer, see the respective instruction manuals. SPD-M20A Service Manual... -
Page 12: Operating Principles
(dark current) signal or when the filter is undergoing automatic wavelength correction or during an automatic wavelength check. The figure on the following page is a view of the optical system from above and from the side. SPD-M20A Service Manual... - Page 13 Mirror 2 (M2 ASSY) 20 25 mm Top view D2 lamp W Lamp (W Lamp ASSY) Half mirror (LM ASSY) 16 1T Mirror 1 (M1 ASSY) 20 25 3t Flow cell (Temperature controlled cell ASSY) Side view SPD-M20A Service Manual...
-
Page 15: Chapter 4: Part Names
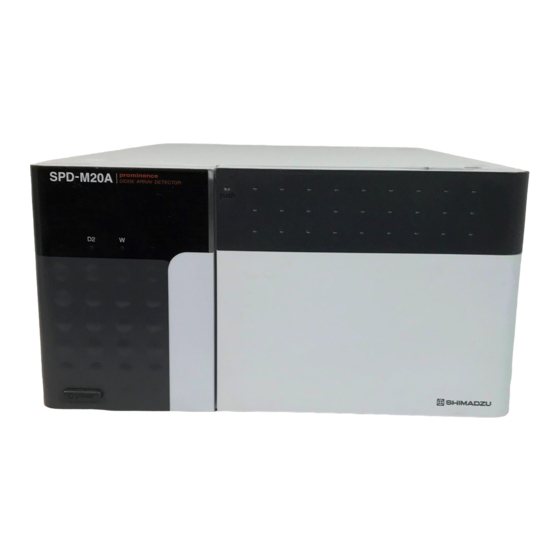
Chapter 4: Part Names Chapter 4: Part Names See the instruction manual for external appearance. SPD-M20A Service Manual... -
Page 17: Chapter 5: Assembly And Disassembly Of Parts
2) The internal parts are shown below. Optical system unit CPU board Main frame Duct Inside of main unit (with case cover removed) < Duct (P/N 228-42564)> SPD-M20A Service Manual... -
Page 18: Main Frame
3) Remove the connector that is attached to the leak sensor and panel from the CPU board. Positions of Leak Sensor and Panel Connector 4) Remove the two sets of two screws (M3x6) that fasten the hinges for the front panel and remove the hinges. Positions of Front Panel Fixing Screws SPD-M20A Service Manual... -
Page 19: Front Panel Adjustment Procedure
NOTE When adjusting, use the following jigs. ・ Jig, right upper hinge (P/N 228-43222-91) ・ Jig, right lower hinge (P/N 228-43223) Front panel adjustment procedure diagram Attaching the control panel ASSY (right door) SPD-M20A Service Manual... - Page 20 Temporarily placing the right hinge (top and bottom) 3) Attach the right panel ASSY, and place the upper left part of the right door on of the diagram below. Tighten the screw lightly. Detail SPD-M20A Service Manual...
- Page 21 [B][D], and hold while tightening the screws. Detail 3-(1)/(2) Detail Attaching the lower right hinge 7) Insert the lower right hinge jig (P/N 228-43223) in 7 of the diagram below (hatched parts in the diagram). Detail 7 SPD-M20A Service Manual...
- Page 22 Due to the gutter between the hinge and right panel, the right panel will lean under its own weight and will contact 3 to align the top surface ( about 0.1 mm depending on the intersection). SPD-M20A Service Manual...
- Page 23 Chapter 5: Assembly and Disassembly of Parts 9) When attached, check the following. SPD-M20A Service Manual...
-
Page 24: Sensors And Temperature Controlled Cell Connector
Positions of Respective Sensor <Leak sensor ASSY 700 MM> 1) Remove the leak sensor connector connected to the CPU board. Leak sensor connector 2) Remove the screw (M3x6) fixing the front panel hinge, and remove the hinge. SPD-M20A Service Manual... -
Page 25: Micro Sw Assy
The screw fixing the sponge (plate) also tightens the guide fin for the W lamp housing underneath, and should not be removed. 2) Remove the thermistor connector connected to the CPU board. Thermistor connector 3) Remove the screw (sems, P3 M3x6) fixing the thermistor, and detach it. <Temperature controlled cell connector> SPD-M20A Service Manual... - Page 26 2) Remove the two screws (M3x6) fixing the temperature controlled cell connector, and remove the cell connector together with the holder 3) Remove the screw (M2.5x8) fixing the holder and the temperature controlled cell connector, and remove the temperature controlled cell connector. SPD-M20A Service Manual...
-
Page 27: Printed Circuit Board
When replacing CPU board, it is necessary to insert it onto the new board. NOTE The EEPROM is not included on the replacement boards (board, PDA-CPU P/N 228-41823-91). Transfer the EEPROM on the old board to the new board. SPD-M20A Service Manual... - Page 28 3) Remove the spacer bolts to the left and right of the RS-232C connector. Positions of RS-232C Connector Fixing Bolts 4) Remove the four screws (sems, P3 M3x6) fixing the CPU board to the plate, and remove the CPU board. SPD-M20A Service Manual...
-
Page 29: Pcb Assy, Pda-Power
1) Remove the CPU board (see 5.1.5.1 CPU Board (PCB ASSY, PDA-CPU P/N 228-41820-91) ). 3) Remove each connector from the power supply board. 2) Remove four screws (sems, P3 M3x6) fixing the power supply board, and detach the power supply board. Positions of Power Supply Board Fixing Screws SPD-M20A Service Manual... -
Page 30: Optical System Unit
Bands for the ground and cable on the case cover. 3) Remove the three screws (truss head, M4x15) that attach the optical system unit, and slowly lift out the optical system unit. Positions of Optical System Unit Fixing Screws SPD-M20A Service Manual... - Page 31 33193) of the optical system unit, and remove the cover. Positions of Side Cover Fixing Screws 7) The inside of the cover is shown below. Half mirror LM ASSY P/N 228-33183-91 M1 ASSY P/N 228-33184-91 Optical system unit interior SPD-M20A Service Manual...
-
Page 32: Grating Assy
P/N 228-42561 Positions of PDA Holder Fixing Screws 5) Remove the PDA with the special tool (retraction tool, GX-3 P/N 086-16671-01, etc.). 6) To adjust the new PDA after installation, see 6.8 Photodiode Array (PDA) Adjustment. <Slit ASSY> SPD-M20A Service Manual... -
Page 33: Mirror M1 Assy
The mirror with a mask attached to the mirror is the M1 ASSY. < Mirror M2 ASSY> 1) Remove the two screws (sems, P4 M4x8) fixing the M2 ASSY, and remove the M2 ASSY. Positions of M2 Fixing Screws 2) To adjust after installation, see 6.4 Mirror 2 Adjustment. SPD-M20A Service Manual... -
Page 34: Shutter Assy
Be careful to avoid contamination of the filter (P/N 228-42613). Filter P/N 228-42613 <W lamp ASSY> 1) Remove the screw (sems, P3 M4x30) fixing the W lamp housing, and remove the lamp housing. Positions of W Lamp Housing Fixing Screws SPD-M20A Service Manual... -
Page 35: Guide Fin D2
1) Remove the single nut (M4) on the side of the case and the two nuts (M4) on the side of the lamp housing which attach the lamp housing. D2 lamp housing nut (left) and case nuts (right) <Half mirror (LM ASSY)> SPD-M20A Service Manual... -
Page 36: Electrical Unit
Simultaneously, detach the connectors that lead the cables around the lamp housing fan. 2) Remove the duct. 3) Remove the screws (sems, P3 M3x35) fixing the lamp housing fan, and detach Connector Positions of Lamp Housing Fan Fixing Screws <Fuses and Power Supply Voltage> SPD-M20A Service Manual... - Page 37 Fuse holders Voltage selector NOTE For details regarding fuse replacement and power supply voltage switching, see the Instruction Manual "8.7 Fuse Replacement, "9.1.3 Power Supply Connection". SPD-M20A Service Manual...
-
Page 39: Chapter 6: Maintenance And Adjustments
When performing adjustment of the optical axis, be sure to wear gloves. CAUTION Be careful to avoid scratching or contaminating mirrors, gratings, quartz plates, lenses, PDA and other optical elements. Tools Required for Adjustment and Testing SPD-M20A Service Manual... -
Page 40: Checks From Setup To Initialization
5) Check the connection to the PC. NOTE For details regarding network settings, see the instruction manual "5.3.3 Network Settings". For details regarding wiring, see the instruction manual "9.1.6 Wiring". < Filling Flow Cell with Water > SPD-M20A Service Manual... -
Page 41: Switching Lamps On/Off Manually
3) Pressing it once more lights the W lamp alone. 4) Pressing it once more turns off both lamps. 5) Thereafter, each time it is pressed, the sequence repeats from step 1) to 4) (D2→ D2+W → W → OFF). SPD-M20A Service Manual... -
Page 42: Mercury Lamp Holder Jig
Former jig New jig The new-model mercury lamp holder consists of the following parts. Set screw Frosted glass (Frosted glass side is on the lamp side.) Slit Set screw Packing SPD-M20A Service Manual... -
Page 43: Optical Axis Adjustment
6.3.1 Process when Performing Wavelength Calibration The SPD-M20A has 1.2 nm/8 nm wide slits to adjust the optical path. When wavelength calibration is performed, the reference point of PDA element is determined using the 656 nm light using the 1.2 nm slit and span adjustment (wavelength assignment for each PDA element) is performed using the 360 nm light. -
Page 44: Optical Axis Adjustment Procedure
4) Adjust the light image so that is on the center point of the target cell mark using the rotation direction adjustment screw and elevation angle adjustment screws. 5) Tighten the M1 ASSY installation screws. 6) Loosen the rotation direction adjustment screw. 7) Tighten the nut on the rotation direction adjustment screw. SPD-M20A Service Manual... -
Page 45: W Lamp House Adjustment
・ Should be no distortion of image shape 6.3.4 W Lamp House Adjustment (W Lamp Adjustment, Please read Instruction manual) 1) Turn OFF the D2 lamp, and turn ON the W lamp. 2) Attach the mask M1-L. SPD-M20A Service Manual... -
Page 46: Mirror 2 Adjustment (Back And Forth Direction)
Y direction is 1 mm away from each other, move the mirror of the M2 1 mm closer to the slit ASSY. 4) Loosen the slit ASSY fixing screws and remove the slit ASSY. Do not pull out the connector. SPD-M20A Service Manual... -
Page 47: Mirror 2 Adjustment (Rotation Direction, Elevation Angle Direction)
1) Press the slit ASSY in the Y direction shown in the figure below and move it in the X - X' direction so that the light spot on the slit aligns with the slit. SPD-M20A Service Manual... -
Page 48: Grating Adjustment
Adjust the rotation direction so that the end of the 0 order light contacts the 0 order light mark. 0次光 0 order light 5) Fix the GR ASSY and mount the mask GR. 6) Replace the target PDA with the PDA ASSY. SPD-M20A Service Manual... -
Page 49: Photodiode Array (Pda) Adjustment (Rough Adjustment)
ASSY at the position where the half bandwidth of the emission line becomes 1.18 ele max. 15) Adjust the position of the emission line peak within a range 60 ele to 63 ele (maximum adjustment range: 52 ele to 72 ele). SPD-M20A Service Manual... -
Page 50: Slit Adjustment (Fine Adjustment)
[OK] [NG] SLIT 8 nm 光点 Light spot A. The slit is at the center. B. The slit is off. Side L Slit ASSY SPD-M20A Service Manual... -
Page 51: Photodiode Array (Pda) Adjustment (Fine Adjustment)
60 ele and 63 ele. Adjust the position of the 0 order light described in 6.3.8 Grating Adjustment so that the emission line is in such position. If the emission line is at 52 ele to 59 ele, move the 0 order light to the left. SPD-M20A Service Manual... -
Page 52: Measures When Fail Is Displayed During Wavelength Check Using The Mercury Lamp
If the mask M1-L is off to the front, it may cause wavelength gap. Make sure that it is positioned at the correct position. *Type dose not have a groove in the base. *Type there is a groove in the base SPD-M20A Service Manual... -
Page 53: Pda Utility Service Menu
2) “regedit” is inputted into a name and [OK] is clicked. 3) The right click of the “HKEY_LOCAL_MACHINE\SOFTWARE\Shimadzu\Labsolutions” is chosen and carried out. 4) [Rename] is chosen and “Labsolutions” is changed into “Labsolutions_a” etc.. 5) Please return after use to the original name. SPD-M20A Service Manual... -
Page 54: When Pda Utility Software Of Spd-M20A Attachment Is Installed
Chapter 6: Maintenance and Adjustments < When PDA Utility software of SPD-M20A attachment is installed > 1) [Start], [Programs], [PDA Utility], [PDA Utility] are chosen and started. NOTE It is the same as CLASS-VP < Select connect instrument >... -
Page 55: The Service Menu Starting Method
When SPD- M10Avp is used, please be sure to choose the system which suited the software used. It is safer to choose, although it was not required in the case of SPD-M20A. < The service menu starting method> NOTE ... -
Page 56: Optical Check
< Optical Check > 1) The menu for PDA Utility service menu. 2) An “Optical Check” button is pushed. An “Optical Check” window is displayed. 3) The contents of the menu for service “Function” are as follows. SPD-M20A Service Manual... -
Page 57: Absorbance Linearity Check
Stray parameters is initialized. < Leak Sensor Check / Calibration > 1) The menu for PDA Utility service menu. 2) The “Leak sensor check / Calibration” button is pushed. The “Leak sensor check / Calibration” window is displayed. SPD-M20A Service Manual... -
Page 58: Instrument Information
1) The menu for PDA Utility service menu. 2) The “Instrument Information” button is pushed. The “Instrument Information” window is displayed. Serial number and manufact date can be inputted on this screen. ROM Version, ExposureTime, and W Lamp Voltage are automatically changed after upgrade. SPD-M20A Service Manual... -
Page 59: Operation Check
In the "leak" state, and read the "Sensor Output" of the sensor..............B 7) Calculate the "Threshold" using the following expression, and set this threshold........................(R = 0.7 (B A) A SPD-M20A Service Manual... -
Page 60: Exposure Time Setting
Measurement Value Error Standard Value < 1 253.7 nm < 1 404.7 nm < 1 435.8 nm < 1 546.1 nm < 1 253.7 nm < 1 404.7 nm < 1 435.8 nm < 1 546.1 nm SPD-M20A Service Manual... -
Page 61: Light Source Spectrum / Saturation Level Check
Standard filter 228-40251 JCRM230A (with JQA Certificate) < Absorbance Accuracy Linearity Calibration Procedure > 1) Open the PDA Utility "Absorbance Accuracy Check / Correction". 2) Select [Settings]-->[Check Conditions Settings], and perform the settings shown in the table below. SPD-M20A Service Manual... -
Page 62: Absorbance Accuracy Check Procedure
Only D2 lamp turned ON setting Cell temperature 40 [C] Sampling rate 640 [msec] Time constant 640 [msec] Absorbance measurement wavelength 6 [nm] bandwidth 3) Run "Absorbance accuracy check". 4) Proceed through <Content> -> <Required parts> -> <Preparations>. SPD-M20A Service Manual... - Page 63 Measurement value with standard filter 0.51 AU@245 nm ..B Error = (0.51/ 0.50 1) 100 = 2 [%] < 3% Standard Standard Measurement Accuracy Criteria Slit Width [nm] Wavelength Absorbance Judgment Value [ABS] [nm] [ABS] < 3 < 3 SPD-M20A Service Manual...
-
Page 64: Absorbance Linearity Calibration (Stray Light Correction) And Check
0.5 AU and 2.0 AU solutions should be specialized for that purpose. Balance For weighing the caffeine. Disposable syringes (2 mL) Adaptors for disposable Male nuts (PEEK), couplings, etc. syringes < Absorbance Linearity Calibration (Stray Light Correction) Procedure > SPD-M20A Service Manual... - Page 65 Only D2 lamp Lamp: turned ON Cell Temperature: 40C 4) Select [Function] and perform [Stray Light Correction]. 5) Proceed through <Content> --> <Background Compensation>. 6) Use a syringe to inject 1 mL of methanol into the cell. SPD-M20A Service Manual...
- Page 66 9) After confirming that the baseline is stable, press [Next]. 10) The spectra after the respective 1.2 nm and 8 nm slit width corrections are displayed. If there is no problem, press [Next] and set the correction value in the instrument. SPD-M20A Service Manual...
-
Page 67: Linearity Check Procedure
14) If the error does not satisfy the criterion, repeat the linearity correction procedure. ・ If the error (E) is +4% or more, narrow the light measurement wavelength bandwidth setting to 10 to 14 nm, and repeat the linearity correction procedure. SPD-M20A Service Manual... -
Page 68: Refractive Index Effect Measurement
20 L loop (about 50 L minimum to fill the loop), and measure the peak widening on a recorder. Perform the measurement twice, and confirm there is no difference in results. Time constant 640 ms Slit width 1.2 nm Wavelength 250 nm SPD-M20A Service Manual... - Page 69 When performing injection, be careful not to allow bubbles to enter. W is less than 10 seconds (with INERT cell, less than 15 Criteria seconds) b/a 2 W: Peak width b/a: Peak degree of warp SPD-M20A Service Manual...
-
Page 70: Version Upgrade
Chapter 6: Maintenance and Adjustments 6.10 Version Upgrade There are 2 ways to upgrade the SPD-M20A, one via a LAN and the other via RS-232C connection. If the SPD-M20A is connected to a network, the upgrade can be performed via the LAN, and if this method presents problems or if there is no network, the upgrade can be performed via RS-232C connection. -
Page 71: Upgrade By Way Of Rs-232C (1)
Chapter 6: Maintenance and Adjustments NOTE For the SPD-M20A, the version upgrade file name is in the format "m20aXXX.rom" (where XXX indicates the version number). 7) During the version upgrade process, the status indicator on the front of the instrument continues blinking. -
Page 72: Upgrade By Way Of Rs-232C (2)
6) The instrument's LED enters the state described in step 2) of "6.10.2 Upgrade by Way of RS-232C (1)". Exit the terminal software, and complete the version upgrade by performing the steps from 3) to the end of the procedure in "6.10.2 Upgrade by Way of RS-232C (1)". SPD-M20A Service Manual... -
Page 73: Chapter 7: Fault Diagnosis And Corrective
0x8922 Error occurred during An error occurred during the Perform system check again. If same system check system check. Lamp failure, error occurs again, contact Shimadzu etc., occurred. Representative. 0x4001, Detector buffer memory LAN or PC breakdown Restart the instrument and the PC. -
Page 74: Error Message When Using Web Browser
Measurement start time is Restart the instrument and the PC. abnormal, or there is a bug. 2100H Internal error An error occurred during the Perform system check again. If same system check. Lamp failure, error occurs again, contact Shimadzu SPD-M20A Service Manual... - Page 75 W lamp or circuit board is damaged, etc. power supply printed circuit board. C014H W lamp error By failure of Power board, Power board is exchanged. the voltage of W lamp is excessive. SPD-M20A Service Manual...
-
Page 76: Electrical Circuit Damage And Check Points
・ If there is a ping response even if the SPD-M20A is turned OFF, the IP address may be duplicated. ・ If there is a ping response from a PC on the same network as SPD-M20A, but no response from a PC on the different network, check the SPD-M20A subnet mask and default gateway settings. - Page 77 Chapter 7: Fault Diagnosis and Corrective Action ・ If they are not on the same network, communication is possible only via a router, etc. Change the IP address setting of the PC or the SPD-M20A. SPD-M20A Service Manual...
-
Page 78: Chapter 8: System Configuration And Parts List
Chapter 8: System Configuration and Parts List 8.1. Consumable Parts List Interchangeab Part Name Remark ility with VP 228-34016 D2 lamp (deuterium Lamp) Common Ultraviolet light source 228-34410 W lamp (tungsten lamp) Common Visible light source Cell gasket 6 3 0.1 228-35097-03 Gasket for flow cell 228-14572... -
Page 79: Temperature Controlled Semi-Micro Flow Cell Parts List
< Temperature controlled semi-micro flow cell Parts List > Part Name Remark Temperature controlled semi-micro flow 228-45605-92/94/44 - 92:Old Cell cell 228-40239-91 Lens fixing screw ASSY Lens fixing screws for flow cell 228-14572 Lens Incident light side lens for flow cell 228-18058 Cell window Emission light side cell window for flow cell... -
Page 80: Semi-Micro Flow Cell Parts List
New inlet pipe Heat exchange section Material: SUS316L Internal diameter: 0.13 Length: 1,040 Inlet Cell diamete External r: 0.8 FEP sleeve External diameter: 1.6 Previous outlet pipe 外径 1.6 External Diameter:1.6 Material ETFE Internal diameter: 0.3 Length: 300 New outlet pipe Outlet Material: SUS316L Cell... -
Page 81: Inert Cell Parts List
<Inert cell Parts List> Part Name Remark Cell gasket,2.0 228-14571-84 Two piece entering Cell gasket,2.5 228-32998-02 Lens 228-14572 Lens fixing screw 228-40239-91 ASSY Inlet pipe ,PEEK 670-10324-01 1.6×0.25×1m. no connector outlet pipe ,PEEK 670-10324-01 1.6×0.25×30cm. no connector 228-33347 Ferrule 1.6F PEEK 228-31638 <... -
Page 82: High Sensitivity Uhplc Optional Flow Cell
< High Sensitivity UHPLC Optional Flow cell > Part Name Remark For Fast Cell ID 1.0 Gasket 228-35097-01 For Fast Cell ID 0.8 Gasket 228-35097-05 Lens 228-14572 Cell window 228-18058 Lens Fixing Screw 228-40239-91 ASSY Inlet tubing ASSY 228-45609-41 Mail nut and Ferrule are attached. Mail nut,0.8MN-M4 228-42605 Ferrule,0.8F... -
Page 83: Mechanical Parts List
0.2 mm 228-34189-93/43 Fraction collection cell (Variable length cell) path length: 0.1 mm 228-25293-93 Semi-micro cell 228-45618-49 Fast Cell for SPD-M20A, ID 1.0 228-45618-46 Fast Cell for SPD-M20A, ID 0.8 Custom-made item 228-39306-91 Analog cable (RCA jack cable) 228-42622-91... -
Page 84: Chapter 9: Parts Table
Chapter 9: Parts Table 9.1 SPD-M20A (P/N 228-45005) Top panel, Side Panel Rear Panel... - Page 85 Duct 228-30163-80 Certificate of compliance, SPDM20 228-33627 Certificate of compliance, entry directions 228-30164 Certificate of compliance, instructions (-01) Name plate, SPD-M20A 100V 228-42604 (-02) Name plate, SPD-M20A 120V (-03) Name plate, SPD-M20A 230V 228-90052 GLP test result certificate 072-60333-03 Clip, wire SD-15...
- Page 86 037-02820-55 Knob, knurled N-1 M3 x 14 white 228-53010-41 PCB,EEPROM 32K 020-37057 Screw, SUS truss head M4X15 020-37054 Screw, SUS truss head M4X8 020-37501 Screw, SUS binding head M3X6 020-37503 Screw, SUS binding head M3X10 021-60314-01 Tapping screw, SUS pan head M3X10 023-66130 Washer, SUS flat M3 228-39613-03...
-
Page 87: Optical Unit (Optical Unit P/N 228-42510)
9.2 Optical Unit (OPTICAL UNIT P/N 228-42510) Optical Unit (Top Panel, Front Panel) Parts Table Part Name 228-33300-02 Base 228-42587-91 Cover ASSY 228-33193 Side plate 228-33183-91 LM ASSY 228-33184-91 M1 ASSY 228-33140-91 Shutter ASSY 228-33189-92 W lamp ASSY, M20A... - Page 88 228-33184-92 M2 ASSY 228-42519-91 Slit ASSY, SH2 228-33187-92 GR ASSY, M20A 228-42520-91 PDA ASSY 228-42572 Lamp housing, D2 228-33195 Plate, D2 228-33823 Spacer, D2 228-34016 LAMP D2 228-33353 Guide, fin D2 205-82702-01 Window plate, W (12) -G 228-42521 Plate, cell chamber 228-14534 Positioning pin 228-42522-91...
-
Page 89: Control Unit (Control Unit P/N 228-42511)
9.3 Control Unit (CONTROL UNIT P/N 228-42511) Control Unit (Top panel, Side Panel, Rear Panel) - Page 90 Control Unit (Inside Top Panel) Parts Table Part Name 228-42511 CONTROL UNIT 228-42513 Chassis 228-25436 Rubber feet 228-42582 Name plate, rear 228-42562 018-17101-04 Shield, finger 97-538-02 228-42515 Duct 228-42527 Holder, bearing SW 037-38760-04 Bushing, D4250-9130 228-42565 Shaft, SW 026-66203 Snap ring, for shaft E3 228-42543 Holder, SW 075-00070-87...
-
Page 91: Temperature Controlled Cell Assy (P/N 228-42593)
228-41963-91 CABLE, FLAT 1 228-41828-91 CABLE, CPU-CELL 070-02832-91 Lock screw, JFS-4S-B1W 020-46147 Screw, SUS sems P2 M4X8 020-46534 Screw, SUS sems P3 M3X6 020-46543 Screw, SUS sems P3 M3X35 020-46546 Screw, SUS sems P3 M4X6 020-05124 Screw, SUS pan head M2.5X8 023-77025 Washer, SUS spring 2 M2.5 020-37511... - Page 92 228-40239-91 Lens fixing screw ASSY 228-18058 Cell window 228-40189-43 Heater ASSY 228-41049 Sheet, heat conducting 228-40503-01 GND plate, cell 060-49746-16 Bushing, B-24 for TR 228-40998-10 Coupling, 1.6-0.8C 228-40996 Male nut 0.8MN 228-40997-10 Ferrule, 0.8F 316L 020-46635 Screw, SUS sems P4 M3X8 020-12104 Screw, SUS flat head M3X6 020-46634...
-
Page 93: Chapter 10: Circuit Diagrams
Chapter 10: Circuit Diagrams 10.1 CABLE DIAGRAM, PDA(228-41839) -
Page 94: Diagram, Power Board
10.2 DIAGRAM, POWER BOARD... - Page 95 10.2.1 SCHEMATIC, PDA-POWER (1/ 4) 228-41801...
- Page 96 10.2.2 SCHEMATIC, PDA-POWER (2/ 4) 228-41801...
- Page 97 10.2.3 SCHEMATIC, PDA-POWER (3/ 4) 228-41801...
- Page 98 10.2.4 SCHEMATIC, PDA-POWER (4 / 4) 228-41801...
-
Page 99: Schematic,Pda-Det 228-41811
10.3 SCHEMATIC,PDA-DET 228-41811... -
Page 100: Schematic,Pda-Cpu 228-41821
10.4 SCHEMATIC,PDA-CPU 228-41821 10.4.1 SCHEMATIC,PDA-CPU 228-41821 1/8... - Page 101 10.4.2 SCHEMATIC,PDA-CPU 228-41821 2/8...
- Page 102 10.4.3 SCHEMATIC,PDA-CPU 228-41821 3/8...
- Page 103 10.4.4 SCHEMATIC,PDA-CPU 228-41821 4/8...
- Page 104 10.4.5 SCHEMATIC,PDA-CPU 228-41821 5/8...
- Page 105 10.4.6 SCHEMATIC,PDA-CPU 228-41821 6/8...
- Page 106 10.4.7 SCHEMATIC,PDA-CPU 228-41821 7/8...
- Page 107 10.4.8 SCHEMATIC,PDA-CPU 228-41821 8/8...
-
Page 108: Electric Circuit,Led-Xp 228-41831
10.5 Electric circuit,LED-XP 228-41831...
Need help?
Do you have a question about the SPD-M20A and is the answer not in the manual?
Questions and answers