
Subscribe to Our Youtube Channel
Related Manuals for Shimadzu GC-2010


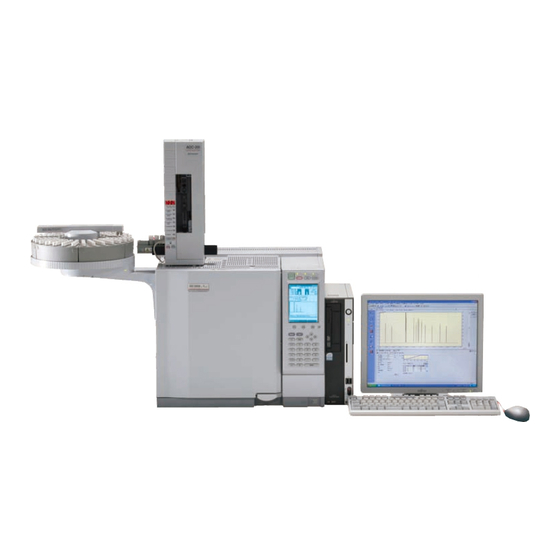
Summary of Contents for Shimadzu GC-2010
- Page 1 221-40455C FLAME PHOTOMETRIC DETECTOR FOR GC-2010 FPD-2010 USER’S MANUAL Read the instruction manual thoroughly before you use the product. Keep this instruction manual for future reference.
- Page 2 © Shimadzu Corporation 2000-2009. All rights are reserved, including those to reproduce this publication or parts there of in any form without permission in writing from Shimadzu Corporation. Information in this publication is subject to change without notice and does not represent a commitment on the part of the vendor.
- Page 3 Precautions for Safe Operation Precautions for Safe Operation The FPD-2010 is a detector for Shimadzu Gas Chromatograph GC-2010. Gas chromatograph is an analyzer to perform qualitative/quantitative analysis. For safe operation, observe the following precautions. If not observed, the safety may be compromised.
-
Page 5: Table Of Contents
Contents Precautions for Safe Operation I Outline Principle of the FPD (Flame Photometric Detector) ......1 Parts List Parts List . - Page 6 Contents Troubleshooting ............73 Error messages .
-
Page 7: Outline
1 Outline Principle of the FPD (Flame Photometric Detector) This detector is a hydrogen flame photometric detector. Flat convex lens High voltage supply Photomultiplier Optical filter Data processing unit Electrometer Carrier gas Fig. 1.1.1 Block Diagram Air is mixed with the hydrogen/carrier gas mixture at the nozzle producing a hydrogen flame. The sample gas, carried by the carrier gas, is burnt by the hydrogen flame at the nozzle, emitting light of a certain wave- length. - Page 8 1 Outline 1.1 Principle of the FPD (Flame Photometric Detector) FPD-2010...
-
Page 9: Parts List
2 Parts List Parts List This detector consists of the following contents. Confirm the contents. FPD Parts List FPD-2010 221-47734-38(230V) 221-47734-92(115V) Parts name Parts No. Qty. FPD unit 221-48416-91 FPD control unit 221-48456-91 APC flow controller for FPD 221-47742-91 Thermal insulation cup 221-44671-90 Instruction manual 221-40455... - Page 10 2 Parts List 2.1 Parts List FPD-2010...
-
Page 11: Basic Operation
GC-2010, refer to the instruction manual of the GC-2010. CAUTION It is necessary to set each parameter before pressing the [Start GC] key. Be sure to read the instruction manual of the GC-2010 before starting the analyzer. ■ FPD operation procedure <Key operations>... -
Page 12: Gas Used
3 Basic Operation Gas used To maintain the performance of the equipment, the gases used shoud meet the following purity standard: ■ Carrier gas (supply pressure: 300 to 980 kPa) Helium (optimal) Purity 99.999% or higher Nitrogen (applicable) Purity 99.999% or higher ■... -
Page 13: Comfirming The Filter
3 Basic Operation Comfirming the Filter The filter used for the FPD differs according to the component of the analysis. Mount filter for S (option: P/N 221-46310-01) to detect sulfur components, for P (option: P/N 221-46310-02) to detect phosphorous components, and for Sn (option: P/N 221-46310-03) to detect tin components. Make sure that the filter mounted is the correct one by using the procedure below: WARNING High temperature... - Page 14 3 Basic Operation 3.3 Comfirming the Filter Remove the fixing screw shown in figure 3.3.1 and remove the FPD upper cover. FPD upper cover Remove this screw Fig. 3.3.1 FPD-2010...
- Page 15 3 Basic Operation 3.3 Comfirming the Filter Pull out and remove the photomultiplier to the side while holding it with both hands. In order to prevent light from entering into the removed photomultiplier, cover the opening of the photomultiplier with aluminum foil and the like. Photomultiplier Fig.
- Page 16 3 Basic Operation 3.3 Comfirming the Filter When filter check is complete, mount the photomultiplier. If difference of height exists at the connecting portion of the lens and the photomultiplier, stray light may result. When mounting the photomultiplier, adjust the height using screws at two locations on the shielding plate at the lower portion of that photomultiplier so that no inclination will be made.
- Page 17 3 Basic Operation 3.3 Comfirming the Filter Please install the FPD upper cover according to an opposite procedure after the end of work. At this time, please install the FPD upper cover for the arrow to press photomultiplier against the main body pushing in the direction.
-
Page 18: Shield Ring Height Check
3 Basic Operation Shield Ring Height Check The shield ring of FPD is mounted at the nozzle end in order to cut unnecessary noise components. Basically, the noise components will be cut by setting the shield ring at the upper position. This, at the time, decreases the signals of the target components. - Page 19 3 Basic Operation 3.4 Shield Ring Height Check Remove the fixing screw shown in figure 3.4.1 and remove the FPD upper cover. FPD upper cover Remove this screw Fig. 3.4.1 FPD-2010...
- Page 20 3 Basic Operation 3.4 Shield Ring Height Check Pull out and remove the photomultiplier to the side while holding it with both hands. In order to prevent light from entering into the removed photomultiplier, cover the opening of the photomultiplier with aluminum foil and the like.
- Page 21 3 Basic Operation 3.4 Shield Ring Height Check Remove the two screws on the sheet metal that are fixing the body and remove the sheet metal. Head fixing screws Head Body fixing sheet metal Fig. 3.4.3 After removing the quartz cylinder using a pair of tweezers, pull up the body upward and remove it. Quartz cylinder Body Fig.
- Page 22 3 Basic Operation 3.4 Shield Ring Height Check Rotate the shield ring mounted at the end of the nozzle. Refer to the following values and set the ring to the appropriate height using a provided adjuster. • SPL (Split/Split-less sample injection port) : Shield ring height = approx. 2.0 mm •...
- Page 23 3 Basic Operation 3.4 Shield Ring Height Check Mount the quartz cylinder, the body, the head, and the photomultiplier by following the dismounting procedure in reversed order. If difference of height exists at the connecting portion of the lens and the photomultiplier, stray light may result.
-
Page 24: Checking Glass Insert And Injection Port Septum
3 Basic Operation Checking Glass Insert and Injection Port Septum This section describes how to check the glass insert. For the detailed procedure, refer to "12. Injection port" in the GC-2010 Instruction Manual. Confirm that the glass insert suits the purpose. WARNING High temperature You might suffer burns. -
Page 25: Mounting The Column
3 Basic Operation Mounting the Column This section describes mounting of the column. For the detailed procedure, refer to “4. Installating the Column” in the GC-2010 Instruction Manual. WARNING High temperature You might suffer burns. Be sure to confirm that each part has cooled down before starting the operations. -
Page 26: Setting The Detector Temperature
This fan keeps operating as far as the power is supplied to the GC-2010 main unit. Consequently, in order not to make the service life of the filer shorter, do not turn OFF the power of the GC- 2010 main unit when the column oven and detector temperature is high. - Page 27 3 Basic Operation 3.7 Setting the Detector Temperature To set the temperature of the FPD detector, select the detector screen using the [DET] key and set the detector temperature. Set the detector temperature around 30 °C higher than the column oven temperature in order to prevent the detector from getting soiled.
-
Page 28: Setting The Temperature Of The Column Oven And The Injection Port
Injection Port Set the column oven temperature and the sample injection port temperature. For the detailed procedure, refer to “11. Setting the Oven Temperature Program” and “12. Injection Port” in the GC-2010 Instruction Manual. For the sample injection port, select the Sample Injection Port screen using the [INJ] key and set the temperature. - Page 29 3.8 Setting the Temperature of the Column Oven and the Injection Port As for the column oven, select the Column Oven screen using the [COL] key and set the temperature. As for the detailed procedure, refer to “11. Setting the Oven Temperature Program” in the GC-2010 Instruction Manual.
-
Page 30: Setting The Flow Rate
3 Basic Operation Setting the Flow Rate Press the [FLOW] key and set the carrier gas flow rate in the screen that appears. For the detailed procedure, refer to “12. Injection Port” in the GC-2010 Instruction Manual.. Fig. 3.9.1 FPD-2010... -
Page 31: System Start-Up
System Start-up 3.10 Press the [SYSTEM] key and press the [Start GC] in the PF menu in the screen that appears. For the detailed procedure, refer to “7. Starting and Stopping GC” in the GC-2010 Instruction Manual. Fig. 3.10.1 FPD-2010... -
Page 32: Setting Flow Rate Of Detector Gases (Hydrogen/Air)
3 Basic Operation 3.11 Setting Flow Rate of Detector Gases 3.11 (Hydrogen/Air) Set the flow rate of hydrogen and air respectively with the following procedure. Supply hydrogen and air. Press the [DET] key and display the setting screen of the detector. Select the [Det Gas] in the PF menu. - Page 33 3 Basic Operation 3.11 Setting Flow Rate of Detector Gases (Hydrogen/Air) Fig. 3.11.1 FPD-2010...
-
Page 34: Igniting The Fpd
3 Basic Operation 3.12 Igniting the 3.12 WARNING Caution for handling the hydrogen gas Explosion may possibly result if the oven is filled with hydrogen gas. Turn OFF the APC flow controller not in use and tightly close the column connection port. - Page 35 3 Basic Operation 3.12 Igniting the FPD Setting detector to On In the FPD detector screen, when the detector control is set to [Off], place the cursor on [Off] and change the detector control to [On] using the right/left keys of the cursor. Igniting the FPD (1) Before igniting the FPD detector, confirm that the detector gas is supplied.
-
Page 36: Setting The Ranges And The Attenuation
3 Basic Operation 3.13 Setting the Ranges and the Attenuation 3.13 Analog output When analog output is connected to a data processing unit, analog signals are provided in two types: Wide and Linear. When connecting to the wide range enable data processing unit (analog input of the C-R7A, C- R7Aplus, and C-R8A), set the analog signal type to [Wide]. -
Page 37: Baseline Check
3 Basic Operation 3.14 Baseline Check 3.14 Baseline check (1) Set the FPD range to 10 (note) and attenuation of Chromatopac to 3(2 ) and confirm that the baseline stabilizes horizontally. (Note) When the analog signal type is “Wide”, set the signal attenuation to “×2 ”. -
Page 38: Example Of The Chromatogram
3 Basic Operation 3.15 Example of the Chromatogram 3.15 ■ When analyzing sulfur (S) components: <Analysis conditions> Sample : Dodecanethiol Concentration 10 ng/µl (Solvent: Hexane) Injection volume: 1µl : DB1-M30-025 (I.D. 0.25 mm, Length 30 mm, Non-polar, film thickness 0.25 µm) Column Column oven temp. - Page 39 3 Basic Operation 3.15 Example of the Chromatogram ■ When analyzing phosphorus (P) components: <Analysis conditions> Sample : Tributyl Phosphate Concentration 10 ng/µl (Solvent Hexane) Injection volume: 1µl Column: DB1-M30-025 (I.D. 0.25 mm, Length 30 mm, Non-polar, film thickness 0.25 µm) Column oven temp.
-
Page 40: Method For Stopping
After confirming that the hydrogen flame has gone off, set the FPD detector to [Off]. After that, lower the temperature of [COL], [INJ], and [DET]. For the details of stopping procedure, refer to "7.4 Setting the Stop Procedure" in the GC-2010 Instruction Maual. -
Page 41: Key Operations
Setting of the output signal at the lower half on the screen will be displayed when the detector is included in line configuration. (Refer to “8.3 Setting Line Configuration” in the GC-2010 Main Unit Instruction Manual.) - Page 42 4 Key Operations 4.1 Key operation of FPD Flame Setting range: On/Off, Default: Off (When auto ignite is set to [On], the flame will be On.) When the flame is ignited, it is On. When it is not ignited, it is Off.) Filter time constant Setting range: 4 ms/5 ms/10 ms/20 ms/50 ms/100 ms/200 ms/500 ms/1s/2s Default: 200 ms...
- Page 43 4 Key Operations 4.1 Key operation of FPD Analog signal type Setting range: Linear/Wide, Default: Linear Set the range when making analog connection with the Chromatopac. The C-R8A and the GC make digital connection using the RS-232 cable, the value set here does not influence the signals.
- Page 44 4 Key Operations 4.1 Key operation of FPD 4.1.1.4 Checking the installation state setting (This section is described for confirmation. Setting is normally made at installation.) Pressing the [FUNC] key and selecting “7. Service/Maintenance” in the screen that appears displays the sub-screen shown in the figures. 1.
- Page 45 This is the temperature control port of the detector to which flow controller set in the slot is connected. Set DET 1 when the DET1 is connected to the FPD detector and DET2 when connected to DET2. For the details, refer to “16.7 Service and Maintenance” in GC-2010 Instruction Manual. FPD-2010...
- Page 46 When changing the line configuration, move the cursor to the FPD line using the cursor keys (up/down), select the line, and determine the selection by pressing the [ENTER] key. For the details, refer to “Chapter 8 Setting the Analitical Parameters and File Management” in the GC-2010 Instruction Manual. FPD-2010...
- Page 47 4 Key Operations 4.1 Key operation of FPD 4.1.2 Selecting the detector The key operation and the screen display when selecting the detector are as follows: Pressing the [DET] key displays the setting screen of the detector. When more than one detector is loaded, the setting screen of the currently selected detector will be displayed.
- Page 48 4 Key Operations 4.1 Key operation of FPD 4.1.3 Setting the Detector Gas Press the [DET] key to display the setting screen of the FPD. Pressing the [Det Gas] of the PF menu displays the detector gas setting screen. Set the flow rate of hydrogen and air respectively.
- Page 49 4 Key Operations 4.1 Key operation of FPD Fig. 4.1.7 [PF key] Return: Returns to the setting screen of the detector. Program: Moves to the flow rate program screen of the detector gas. On/Off: Selects On/Off of flow control of the detector gas. NOTE In the case of sulfuric (S) component analysis, if the AIR flow rate is too little (approx.
- Page 50 4 Key Operations 4.1 Key operation of FPD 4.1.4 Detector ON/OFF In the FPD screen, when the control of the FPD is set to [Off], place the cursor on the [Off] position and set the detector control to [On] using the right/left of the cursor key. Fig.
- Page 51 4 Key Operations 4.1 Key operation of FPD 4.1.5 Igniting and Extinguishing the Detector This section describes ignition and extinguishments operation of the detector. WARNING Make sure of no leak of gas from the gas line. WARNING Explosion may possibly result if the oven is filled with hydrogen gas. Turn [Off] the APC flow controller not in use and tightly close the column connection port.
- Page 52 4 Key Operations 4.1 Key operation of FPD 3. Detector ON When the control of the FPD detector is set to [Off] on the FPD detector screen, place the cursor on the [Off] position and set the detector control to [On] using right/left cursor keys. 4.
- Page 53 4 Key Operations 4.1 Key operation of FPD 4.1.6 Setting the Range Move the cursor using up/down of the cursor key and select the range using right/left of the cursor key and enter by the [ENTER] key. 10 is usually used. (When the type of analog signal is wide, use ×2 Fig.
- Page 54 Zero adjustment is performed on the Monitor screen. This section describes zero adjustment only. For the details of the monitor screen, refer to "9. Monitor" in the GC-2010 Instruction Manual. Pressing the [MONIT] key displays the main screen. When the displayed line configuration does not include the FPD, press [Chng.Line] of the PF menu and change the line.
- Page 55 4 Key Operations 4.1 Key operation of FPD Key operation No. 1: Automatic zero adjustment Pressing the [Zero Adj.] in the PF menu changes the display on the screen to 0µV and the baseline moves to the zero point of the GC. However, depending on the range of the detector and the attenuation of the Chromatopack, baseline cannot be accommodated within the screen of Chromatopac.
- Page 56 4 Key Operations 4.1 Key operation of FPD Key operation No. 2: Zero point adjustment Pressing [Up][Down] of the PF menu changes the baseline level upward/downward. Fig. 4.1.14 FPD-2010...
- Page 57 4 Key Operations 4.1 Key operation of FPD Key operation No. 3: Releasing zero adjustment Pressing the [Zero Free] of the PF menu returns the baseline to the level before zero adjustment is performed. Fig. 4.1.15 When the level does not move with key operation, it is exceeding upper or lower limit. In such a case, refer to “6.1 Troubleshooting”.
- Page 58 4 Key Operations 4.1 Key operation of FPD FPD-2010...
-
Page 59: Maintenance And Inspections
WARNING High temperature The high temperature portion of the FPD is exposed when the INJ/DET cover of the GC-2010 main unit is removed. Be sure to perform maintenance and inspection after the detector is cooled down sufficiently. CAUTION When removing the photomultiplier, be sure to turn OFF the power of the FPD. -
Page 60: Turning Off The Power
OFF. After confirming that the hydrogen flame goes OFF, set the FPD detector to [Off], and then lower the temperature of [COL], [INJ], and [DET]. For the details of the stopping procedure, refer to “7.4 Setting the Stop Procedure” of the GC-2010 Instruction Manual. -
Page 61: Cleaning And Replacing The Quartz Cylinder
Fig. 5.3.1 Quartz Cylinder Turn off the power of the system according to the procedure given in “5.2 Turning off the Power”. Remove the INJ/DET cover of the GC-2010 main unit after the FPD has been cooled sufficiently. INJ/DET Cover Fig. - Page 62 5 Maintenance and Inspections 5.3 Cleaning and Replacing the Quartz Cylinder Remove the fixing screw show in figure 5.3.3 and remove the FPD upper cover. FPD upper cover Remove this screw Fig. 5.3.3 FPD-2010...
- Page 63 5 Maintenance and Inspections 5.3 Cleaning and Replacing the Quartz Cylinder Remove two screws on the head and dismount the head. Remove these screws Fig. 5.3.4 Remove the quartz cylinder using a pair of tweezers. Confirm that the cylinder is free from contamination and damages.
-
Page 64: Maintenance And Replacement Of The Filter
Be sure to turn OFF the power of the Gas Chromatograph main unit before performing maintenance works. Turn OFF the power of the FPD according to “5.2 Turning OFF the power”. Remove the INJ/DET cover of the GC-2010 main unit after the FPD unit is sufficiently cooled. FPD-2010... - Page 65 5 Maintenance and Inspections 5.4 Maintenance and Replacement of the Filter INJ/DET Cover Fig. 5.4.2 CAUTION Remove the photomultiplier with the power of the system turned OFF. FPD-2010...
- Page 66 5 Maintenance and Inspections 5.4 Maintenance and Replacement of the Filter Remove the fixing screw shown in figure 5.4.3 and remove the FPD upper cover. FPD upper cover Remove this screw Fig. 5.4.3 FPD-2010...
- Page 67 5 Maintenance and Inspections 5.4 Maintenance and Replacement of the Filter Slowly pull out and remove the photomultiplier to the side while holding it with both hands. In order to prevent light entering into the removed photomultiplier, cover the opening of the photomultiplier with aluminum foil and the like.
- Page 68 5 Maintenance and Inspections 5.4 Maintenance and Replacement of the Filter After checking contamination of the filter, confirm that the O-ring is free from deterioration and/or damages. Deteriorated and/or damaged O-ring will result in stray light. If contamination of the filter cannot be removed by the above works or if the O-ring is deteriorated or damaged, replace the filter unit.
- Page 69 5 Maintenance and Inspections 5.4 Maintenance and Replacement of the Filter Please install the FPD upper cover according to an opposite procedure after the end of work. At this time, please install the FPD upper cover for the arrow to press photomultiplier against the main body pushing in the direction.
-
Page 70: Replacing Photomultiplier
Be sure to turn OFF the power of the Gas Chromatograph main unit before starting replacement. Turn OFF the power of the FPD according to “5.2 Turning OFF the power”. Remove the INJ/DET cover of the GC-2010 main unit after the FPD unit is sufficiently cooled. FPD-2010... - Page 71 5 Maintenance and Inspections 5.5 Replacing Photomultiplier INJ/DET Cover Fig. 5.5.2 CAUTION Remove the photomultiplier with the power of the FPD turned OFF. FPD-2010...
- Page 72 5 Maintenance and Inspections 5.5 Replacing Photomultiplier Remove the fixing screw shown in figure 5.5.3 and remove the FPD upper cover. FPD upper cover Remove this screw Fig. 5.5.3 FPD-2010...
- Page 73 5 Maintenance and Inspections 5.5 Replacing Photomultiplier Slowly pull out and remove the photomultiplier to the side while holding it with both hands. In order to prevent light entering into the removed photomultiplier, cover the opening of the photomultiplier with aluminum foil and the like. Photomultiplier Fig.
- Page 74 5 Maintenance and Inspections 5.5 Replacing Photomultiplier Remove the photomultiplier from the socket. Be careful not to contaminate and/or damage the light receiving portion, using soft gloves and the like. Fig. 5.5.6 After inserting a new photomultiplier into the socket, mount it by following the removal procedure in reversed order.
- Page 75 5 Maintenance and Inspections 5.5 Replacing Photomultiplier Please install the FPD upper cover according to an opposite procedure after the end of work. At this time, please install the FPD upper cover for the arrow to press photomultiplier against the main body pushing in the direction.
-
Page 76: Replacing The Battery
And backup battery is provided so that the fan keeps rotating until the filter is sufficiently cooled even when the power of the GC-2010 main unit is turned OFF at the state where the detector temperature is still high. This battery can rotate the fan only for several hours, so it is necessary to change the battery when they are degraded. - Page 77 5 Maintenance and Inspections 5.6 Replacing the Battery The backup battery is installed at the lower part of the liquid crystal panel of the GC-2010 main unit. Remove the cover below the liquid crystal panel. HELP ENTER POWER Fig. 5.6.2 ...
- Page 78 5 Maintenance and Inspections 5.6 Replacing the Battery FPD-2010...
-
Page 79: Troubleshooting
If a trouble cannot be cleared by the counter measure given here after, or if troubles other than outlined in this chapter occurs, contact Shimadzu office or agent which is nearest to you. flame is not ignited. The flame goes off. - Page 80 Temperature of each section is unstable. Confirm the temperature of each unit. If it does not sta- bilizes, contact your local Shimadzu techincal office. The flow rate is unstable. Confirm the pressure and flow rate of AFC. If it does not stabilize, contact your local Shimadzu techincal office.
- Page 81 6 Troubleshooting 6.1 Troubleshooting Cause Countermeasures There is a large quantity of impurities in the carrier and • Purge the air mixture inside the flow line com- pletely. detector gases. • Replace the Filter (Molecular Sieve Filter, Gas Fil- ter or Oxygen Trap). •...
-
Page 82: Error Messages
This error message appears when the cooling fan is not mounted or the cable is not connected correctly. If no anomaly is found with the connection, hardware failure may be occurring. You cannot use the FPD unless repaired. Turn OFF the power and contact your local Shimadzu techincal office. ■ DET#n FPD electric current error. -
Page 83: Maintenance Parts
7 Maintenance Parts Maintenance Parts List Part name Part No. Remarks Silicon rubber septum(20pcs) 201-35584 Injection port septum (for general use) High temperature septum(20pcs) 201-43898 Injection port septum (for heat resistance) Glass insert (for split) 221-41444-01 For split sample introduction method Glass insert (for splitless) 221-48335-01 For splitless sample introduction method... - Page 84 7 Maintenance Parts 7.1 Maintenance Parts List FPD-2010...
-
Page 85: Specifications
8 Specifications Specifications of the FPD-2010 Detection method : Flame photometric method using air-hydrogen flame Detector : Side-on type Photomultiplier Range : Five stages form 1 to 10 (at analog linear output) Attenuation : Five stages from 1 to 2 (at analog wide output) Dynamic range : S--- 10... - Page 86 8 Specifications 8.1 Specifications of the FPD-2010 FPD-2010...
-
Page 87: Appendix
9 Appendix Quenching What is quenching? When hydrocarbon enters into the FPD, the effect is to reduce the detection response of the FPD for certain components, especially sulfur. This phenomena is referred to as “Quenching”. Quenching does not occur for all components and varies according to the concentration and the kind of the hydrocarbon. - Page 88 9 Appendix 9.1 Quenching FPD-2010...
Need help?
Do you have a question about the GC-2010 and is the answer not in the manual?
Questions and answers